


Elessar2590’s Grande Armee Project


Recommendations: 72
About the Project
Welcome! Join me as I take a French Army from Grey Conscripts to a Fully painted Force worthy of The Guard itself! I'm currently working on a French force for the game "Napoleon at War". Come prepared for plenty of banter/tangents and feel free to comment and add your own thoughts as I go.
Related Company: Warlord Games
Related Genre: Historical
This Project is Completed
Some Ramblings about Uniforms and an Essential Tool
Not an Update but some of my thoughts on a few things plus a book recommendation that's essential for anyone wanting to wargame in the Napoleonic period.
Let me know if you guys want to see more of these or if you’d prefer me to just stick with a clean Hobby Project.
On Uniforms and their Colours
I spend a long time doing research before I put together an army but one thing I don’t stress about is uniform colours. Dark Blue is Dark Blue, Grey is Grey to me making everything look “uniform” is less historical than mixing it up.
Quick backstory, in the French Army under Napoleon you were given some kit. If you lost/damaged/wore out any of it the replacement costs came out of your pay, which wasn’t that great to begin with. If you wore out your greatcoat and that dead Russian has a perfectly good one then you can save some money and time. Soldiers break stuff and soldiers are remarkably good at “finding” stuff so I don’t stress out if the French Army didn’t technically issue a Khaki Coloured Great Coat.
A good example of this is German troops serving in North Africa during the Second World War. The uniforms faded quickly, new arrivals would dye their clothes to match the faded veterans and many men got their hands on Italian uniforms since they were better suited to the conditions. Australians in the Pacific dyeing their Khaki uniforms green using whatever they had on hand is another example.
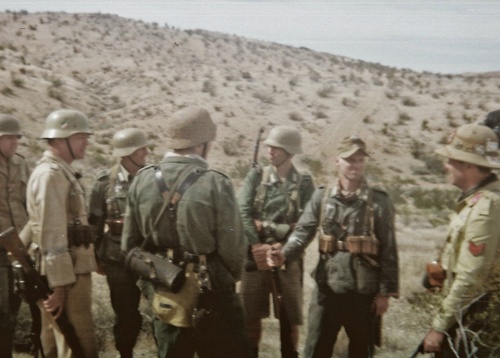 DAK in North Africa. Note the variety of uniform colours.
A Book Reccomendation
Anyone wargaming the napoleonic period absolutely needs to get a copy of “Napoleon’s Campaign’s in Miniature”. It is an incredible book full of facts and easy to find information.
With the Internet there’s a huge amount of information out there but unfortunately a lot of it gets buried beneath other stuff and sifting through it can be a real pain. With this book you just find the section and get what you need quickly and with a wargamer in mind.
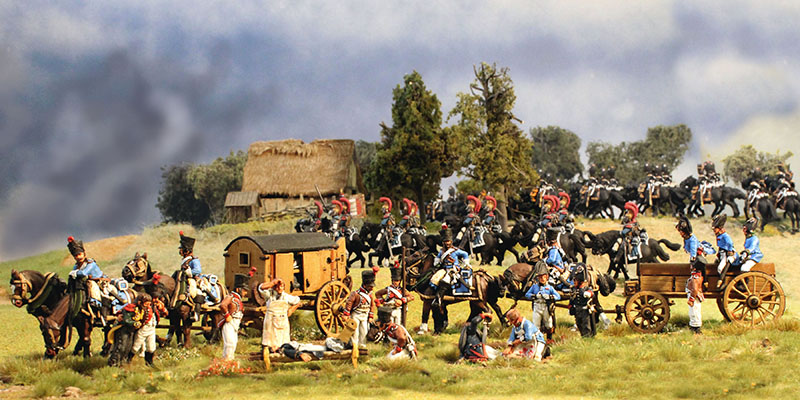
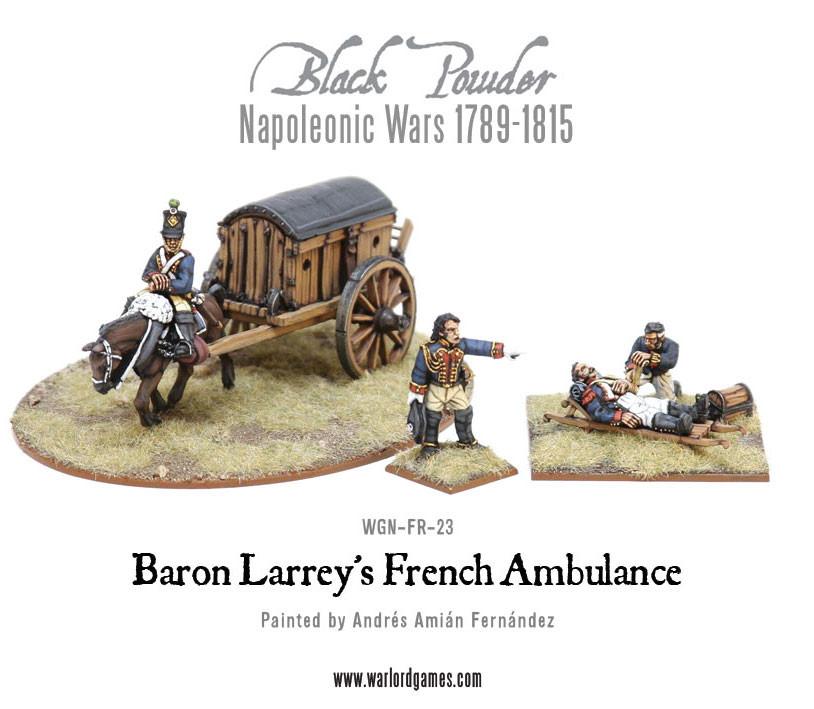
The sections on Military Medicine and Ambulances is particularly interesting. From the French Ambulance Corps to the Russians total lack of medical care you’ll find anything you need.
Baron Larrey is probably my favourite “Character” from the Napoleonic period, his inventions laid the groundwork for generations of medical care and compared to the other armies of the period the care he set up for wounded Frenchmen was excellent.
Wounded men were generally just left on the field and collected at the end of the battle, sometimes days after, and thrown in big, heavy, slow wagons then sent tens of miles away to a “Hospital”. Baron Larrey implemented Triage and on numerous occasions refused to treat officers in favour of wounded enlisted men, Larrey treated both friend and foe in fact he treated Prussian Field Marshall Blucher’s son which saved him from execution when the Prussians captured him, developed a method of amputation than made it easier to fit a wooden prosthetic, implemented the policy of immediate amputation since the nerves were numbed from shock and locating hospitals on the field or extremely close (within a mile) of it.
But perhaps Larrey’s most important invention was the “Flying Ambulance”. These were two horse wagons which contained two stretchers, medical equipment and bottles of alcohol (for medicinal purposes only I’m sure). So while a wounded British private might lay on the ground bleeding for hours a wounded Frenchmen was usually picked up within the hour and taken to a state of the art hospital.
From the Larrey Biography
“During the fighting at the Battle of Waterloo, the Duke of Wellington noticed a surgeon working on the wounded while under fire. Upon asking who it was and learning that it was Larrey, he directed his men to not fire in Larrey’s direction and took off his hat in a salute to Larrey. When asked who he was saluting, Wellington pointed at Larrey and explained, “I salute the courage and devotion of an age that is no longer ours.”
Baron Larrey was also the only person in Napoleon’s Will to be praised for his virtue rather than his performance.
From Napoleon’s Will.
” Idem, to Larrey, surgeon-in-chief, one hundred thousand francs.–He is the most virtuous man I have known.”
I hope you enjoyed my rambling tangent, next post will be more minis but let me know if you want some more of these types of posts scattered in the project.
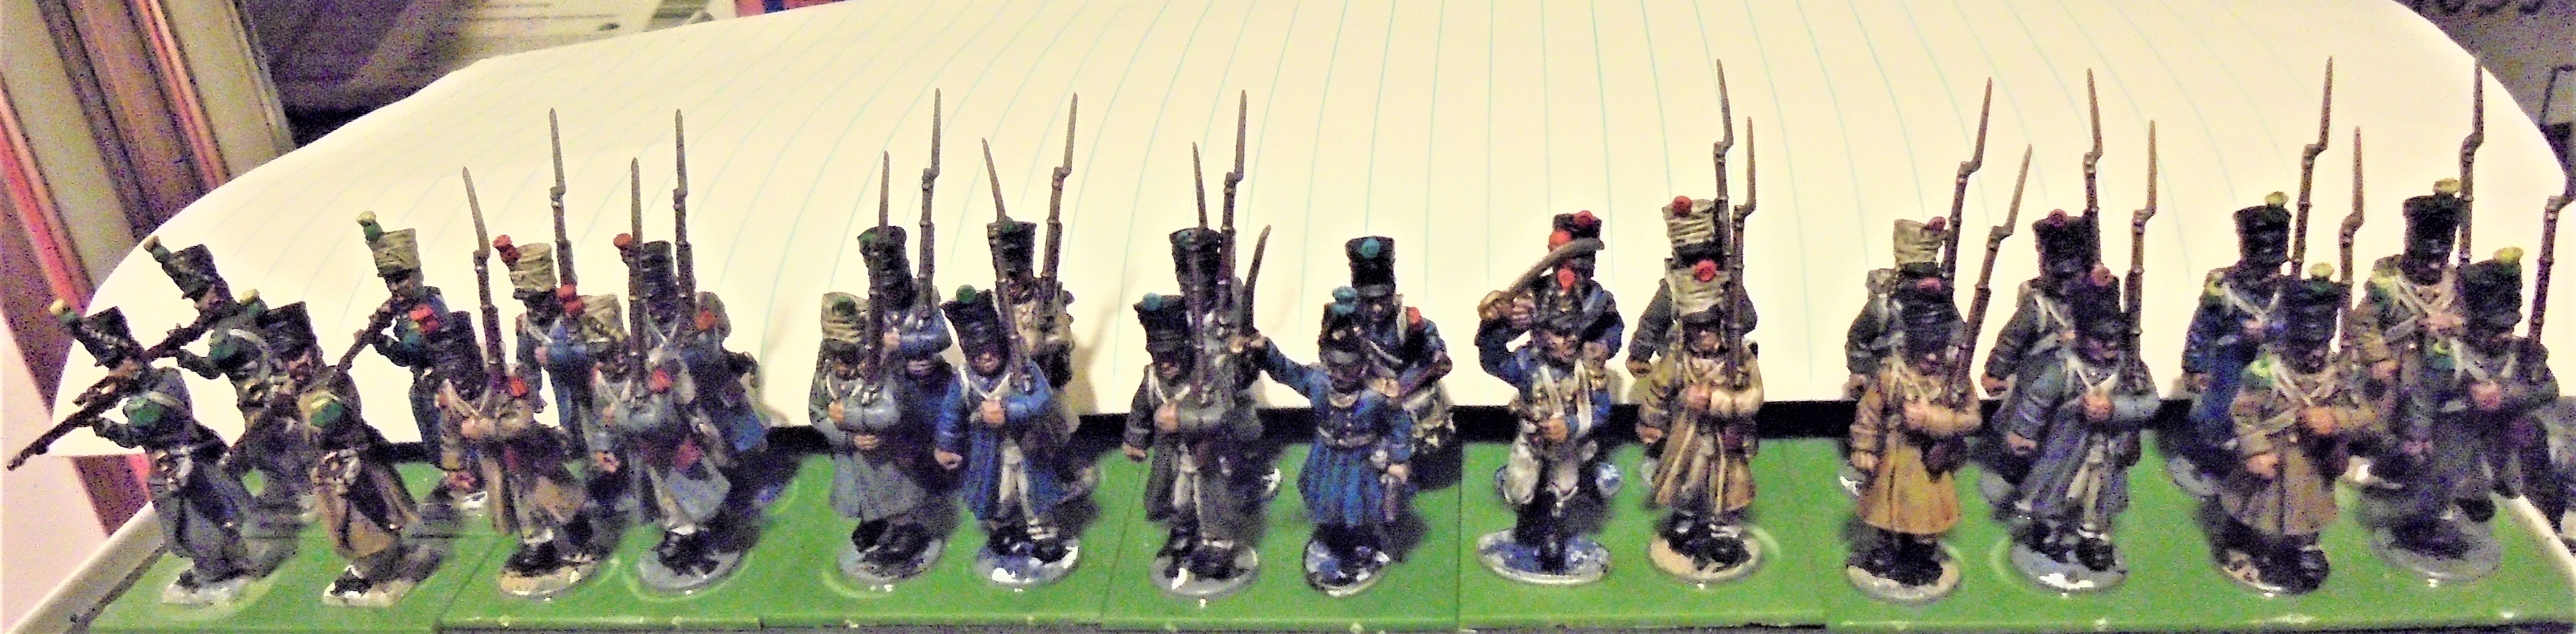
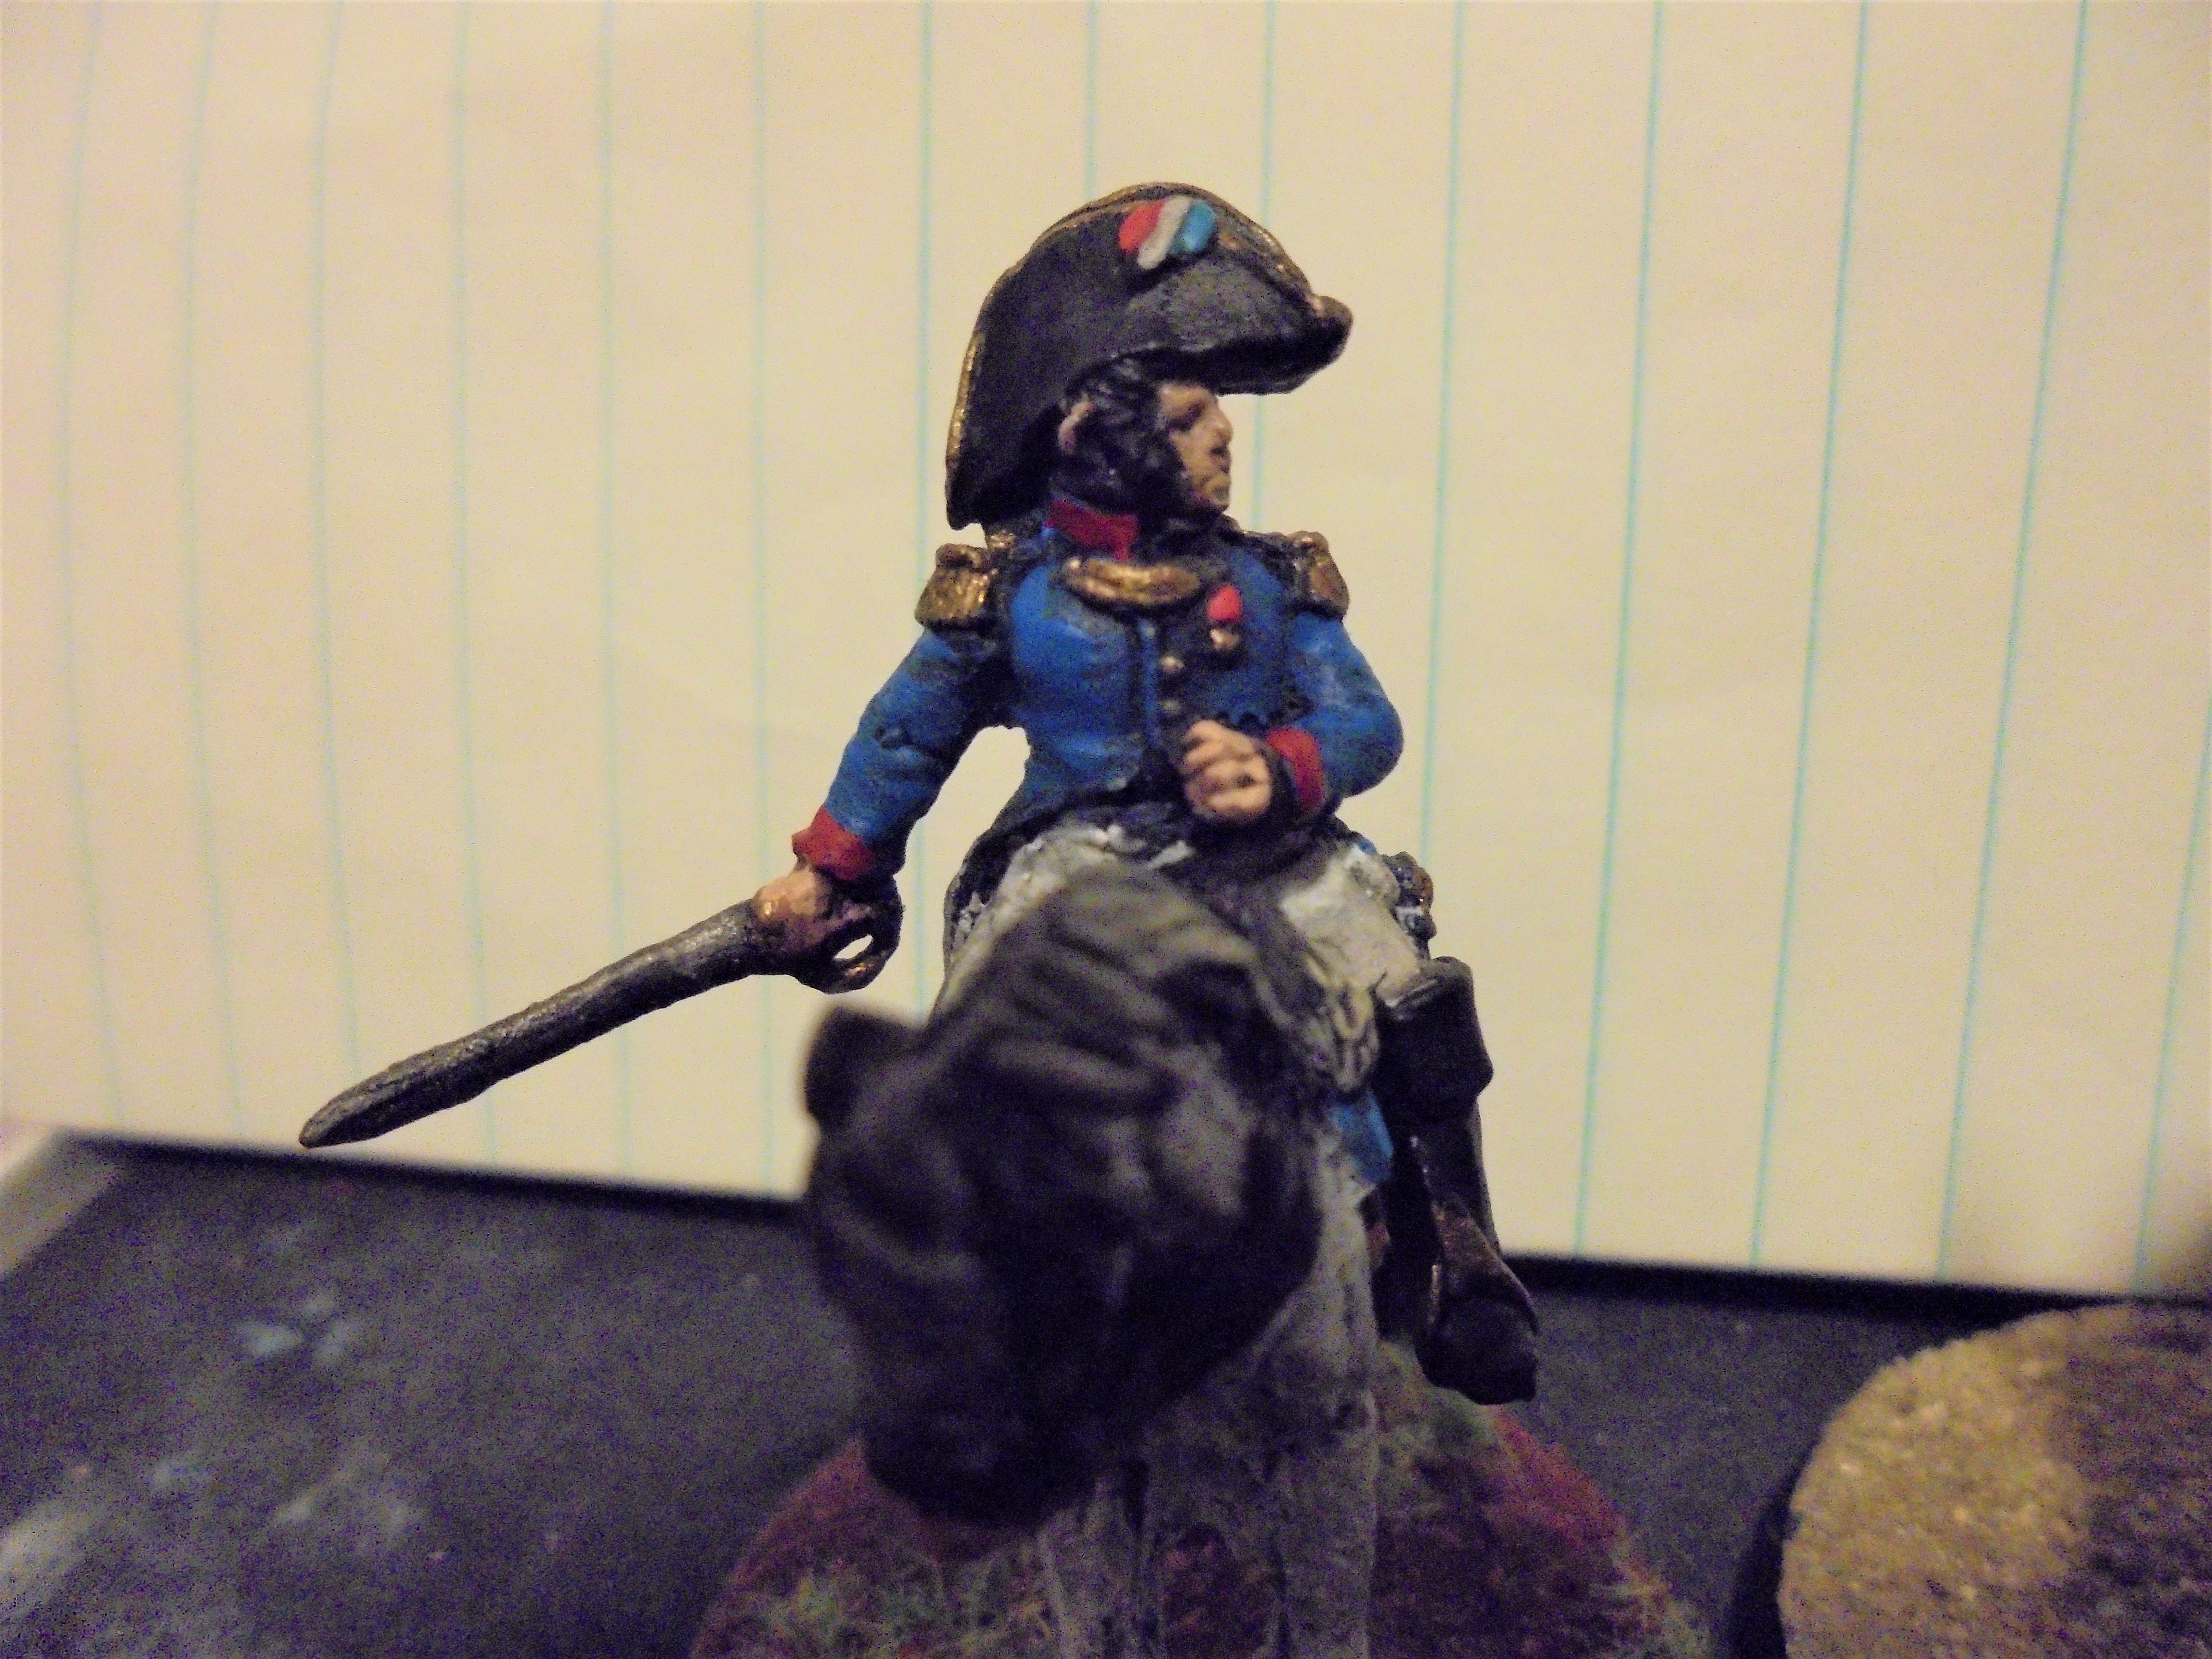
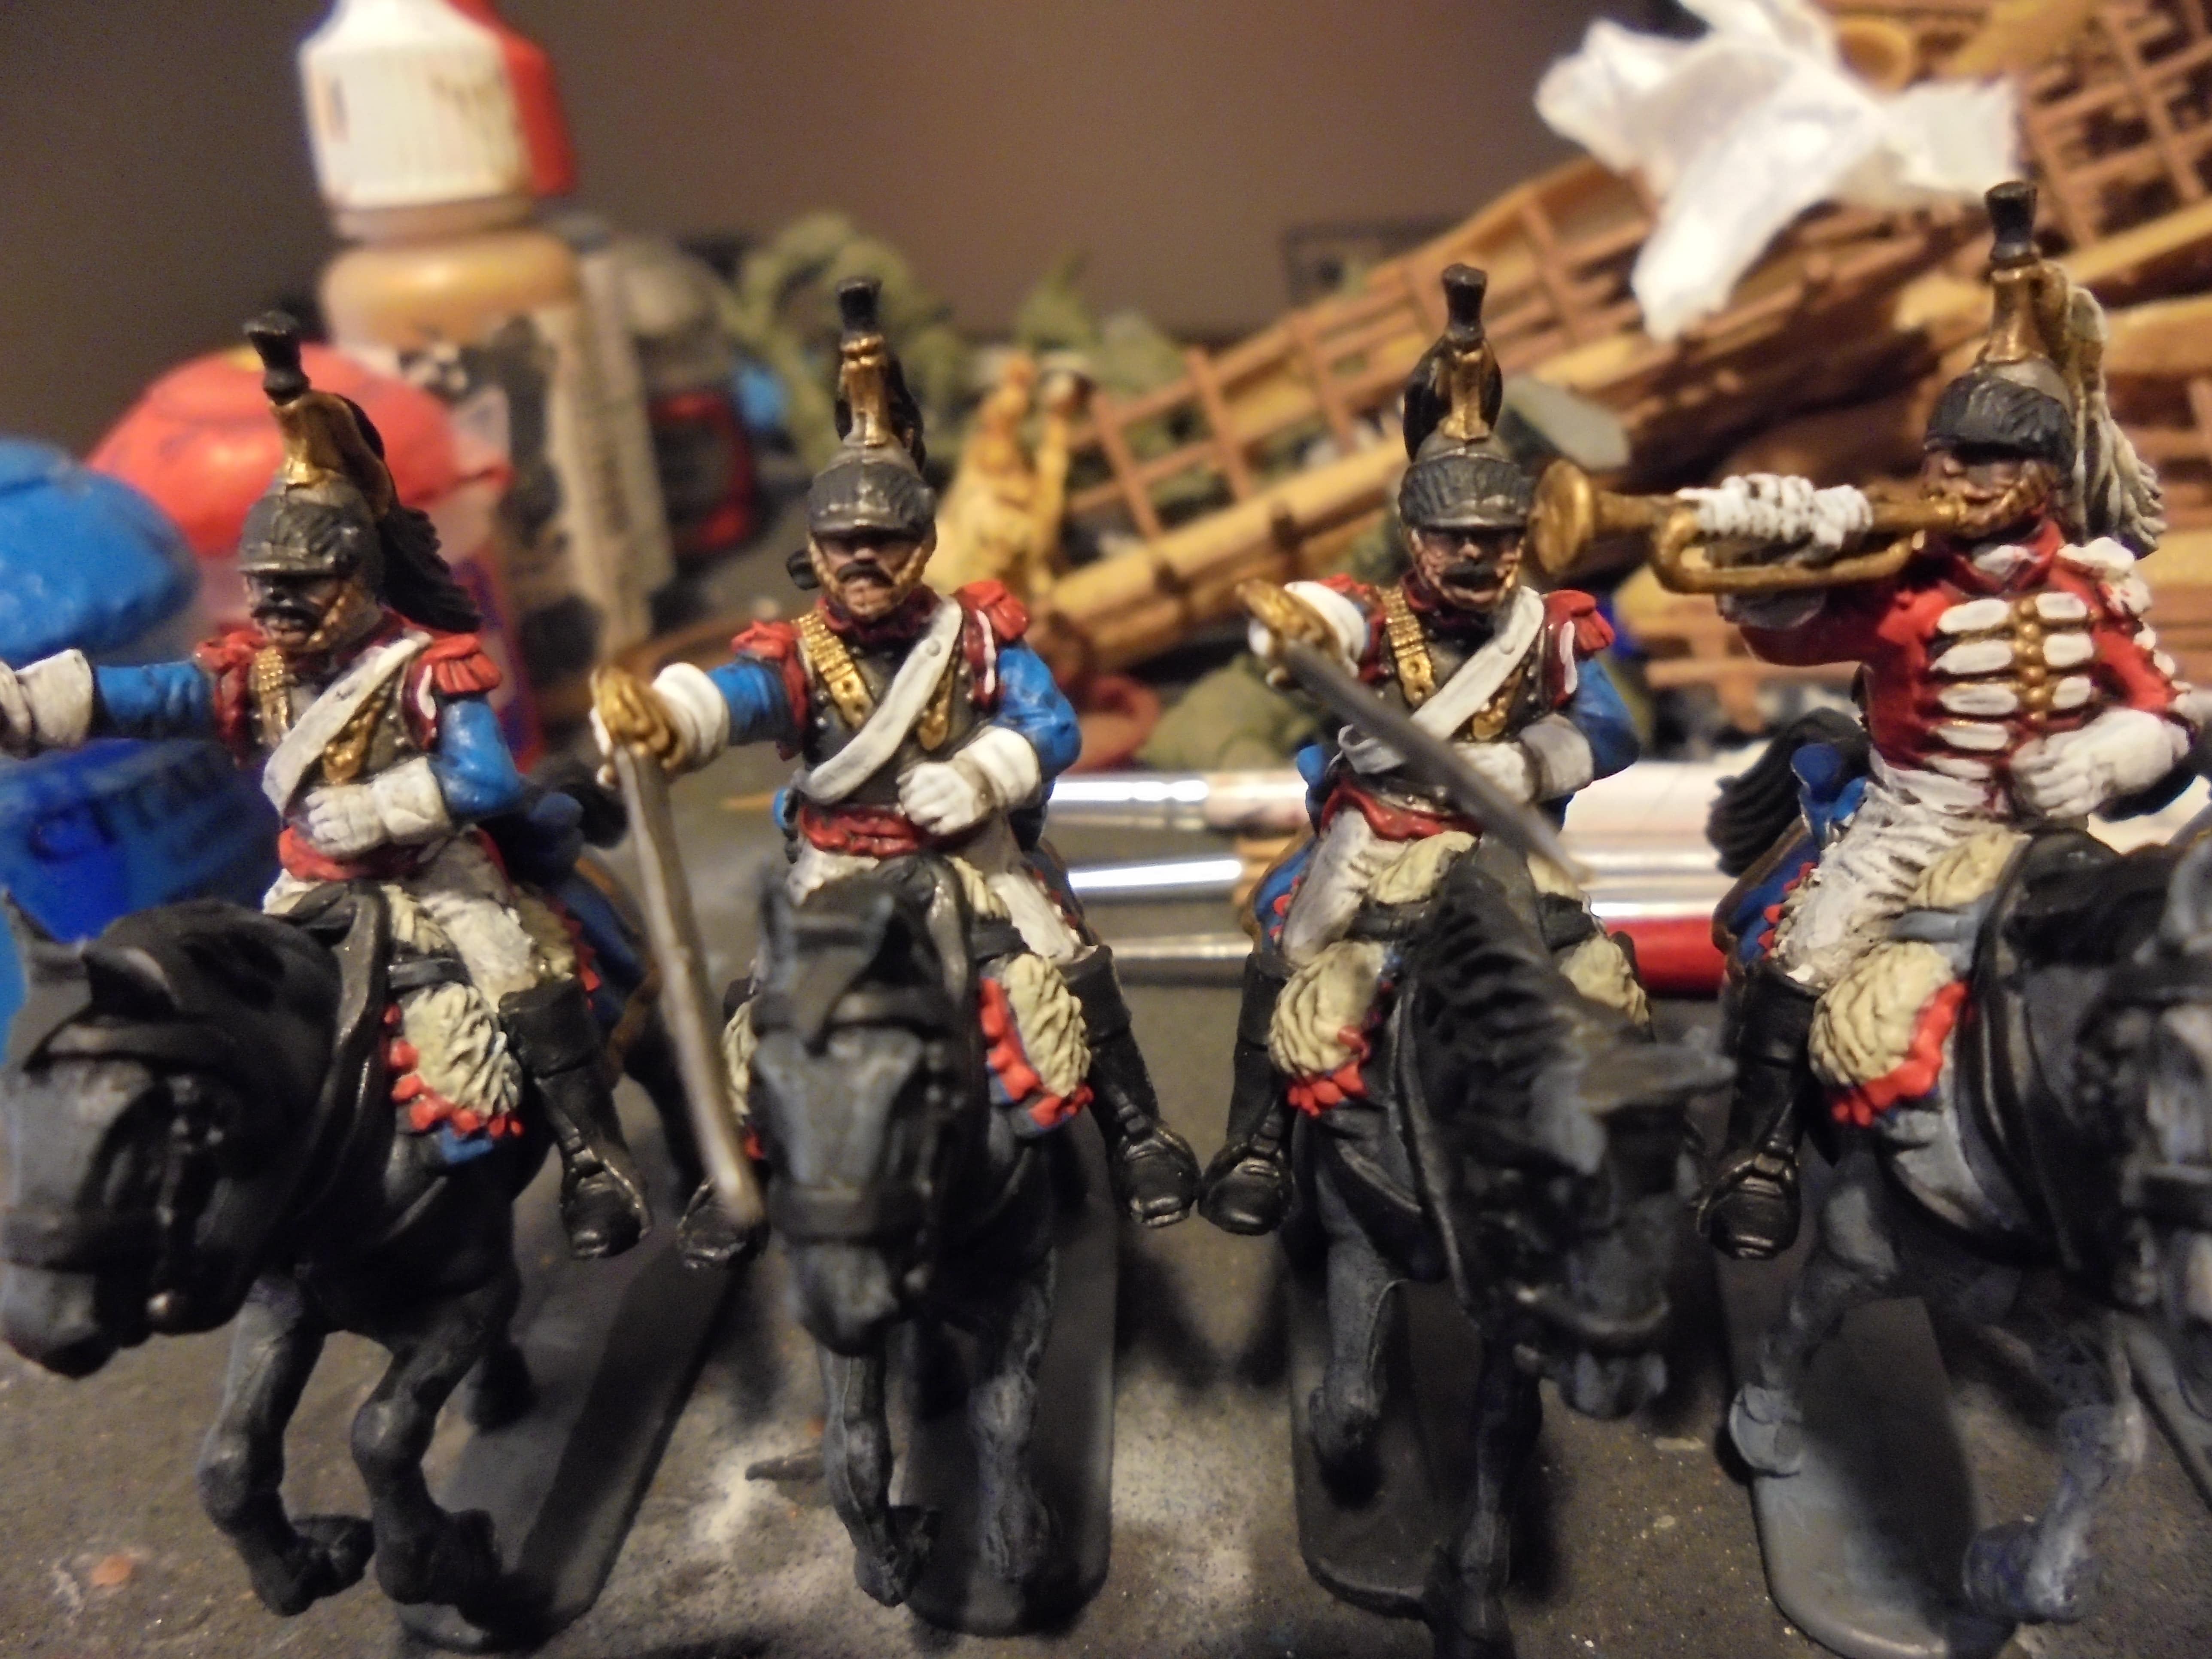
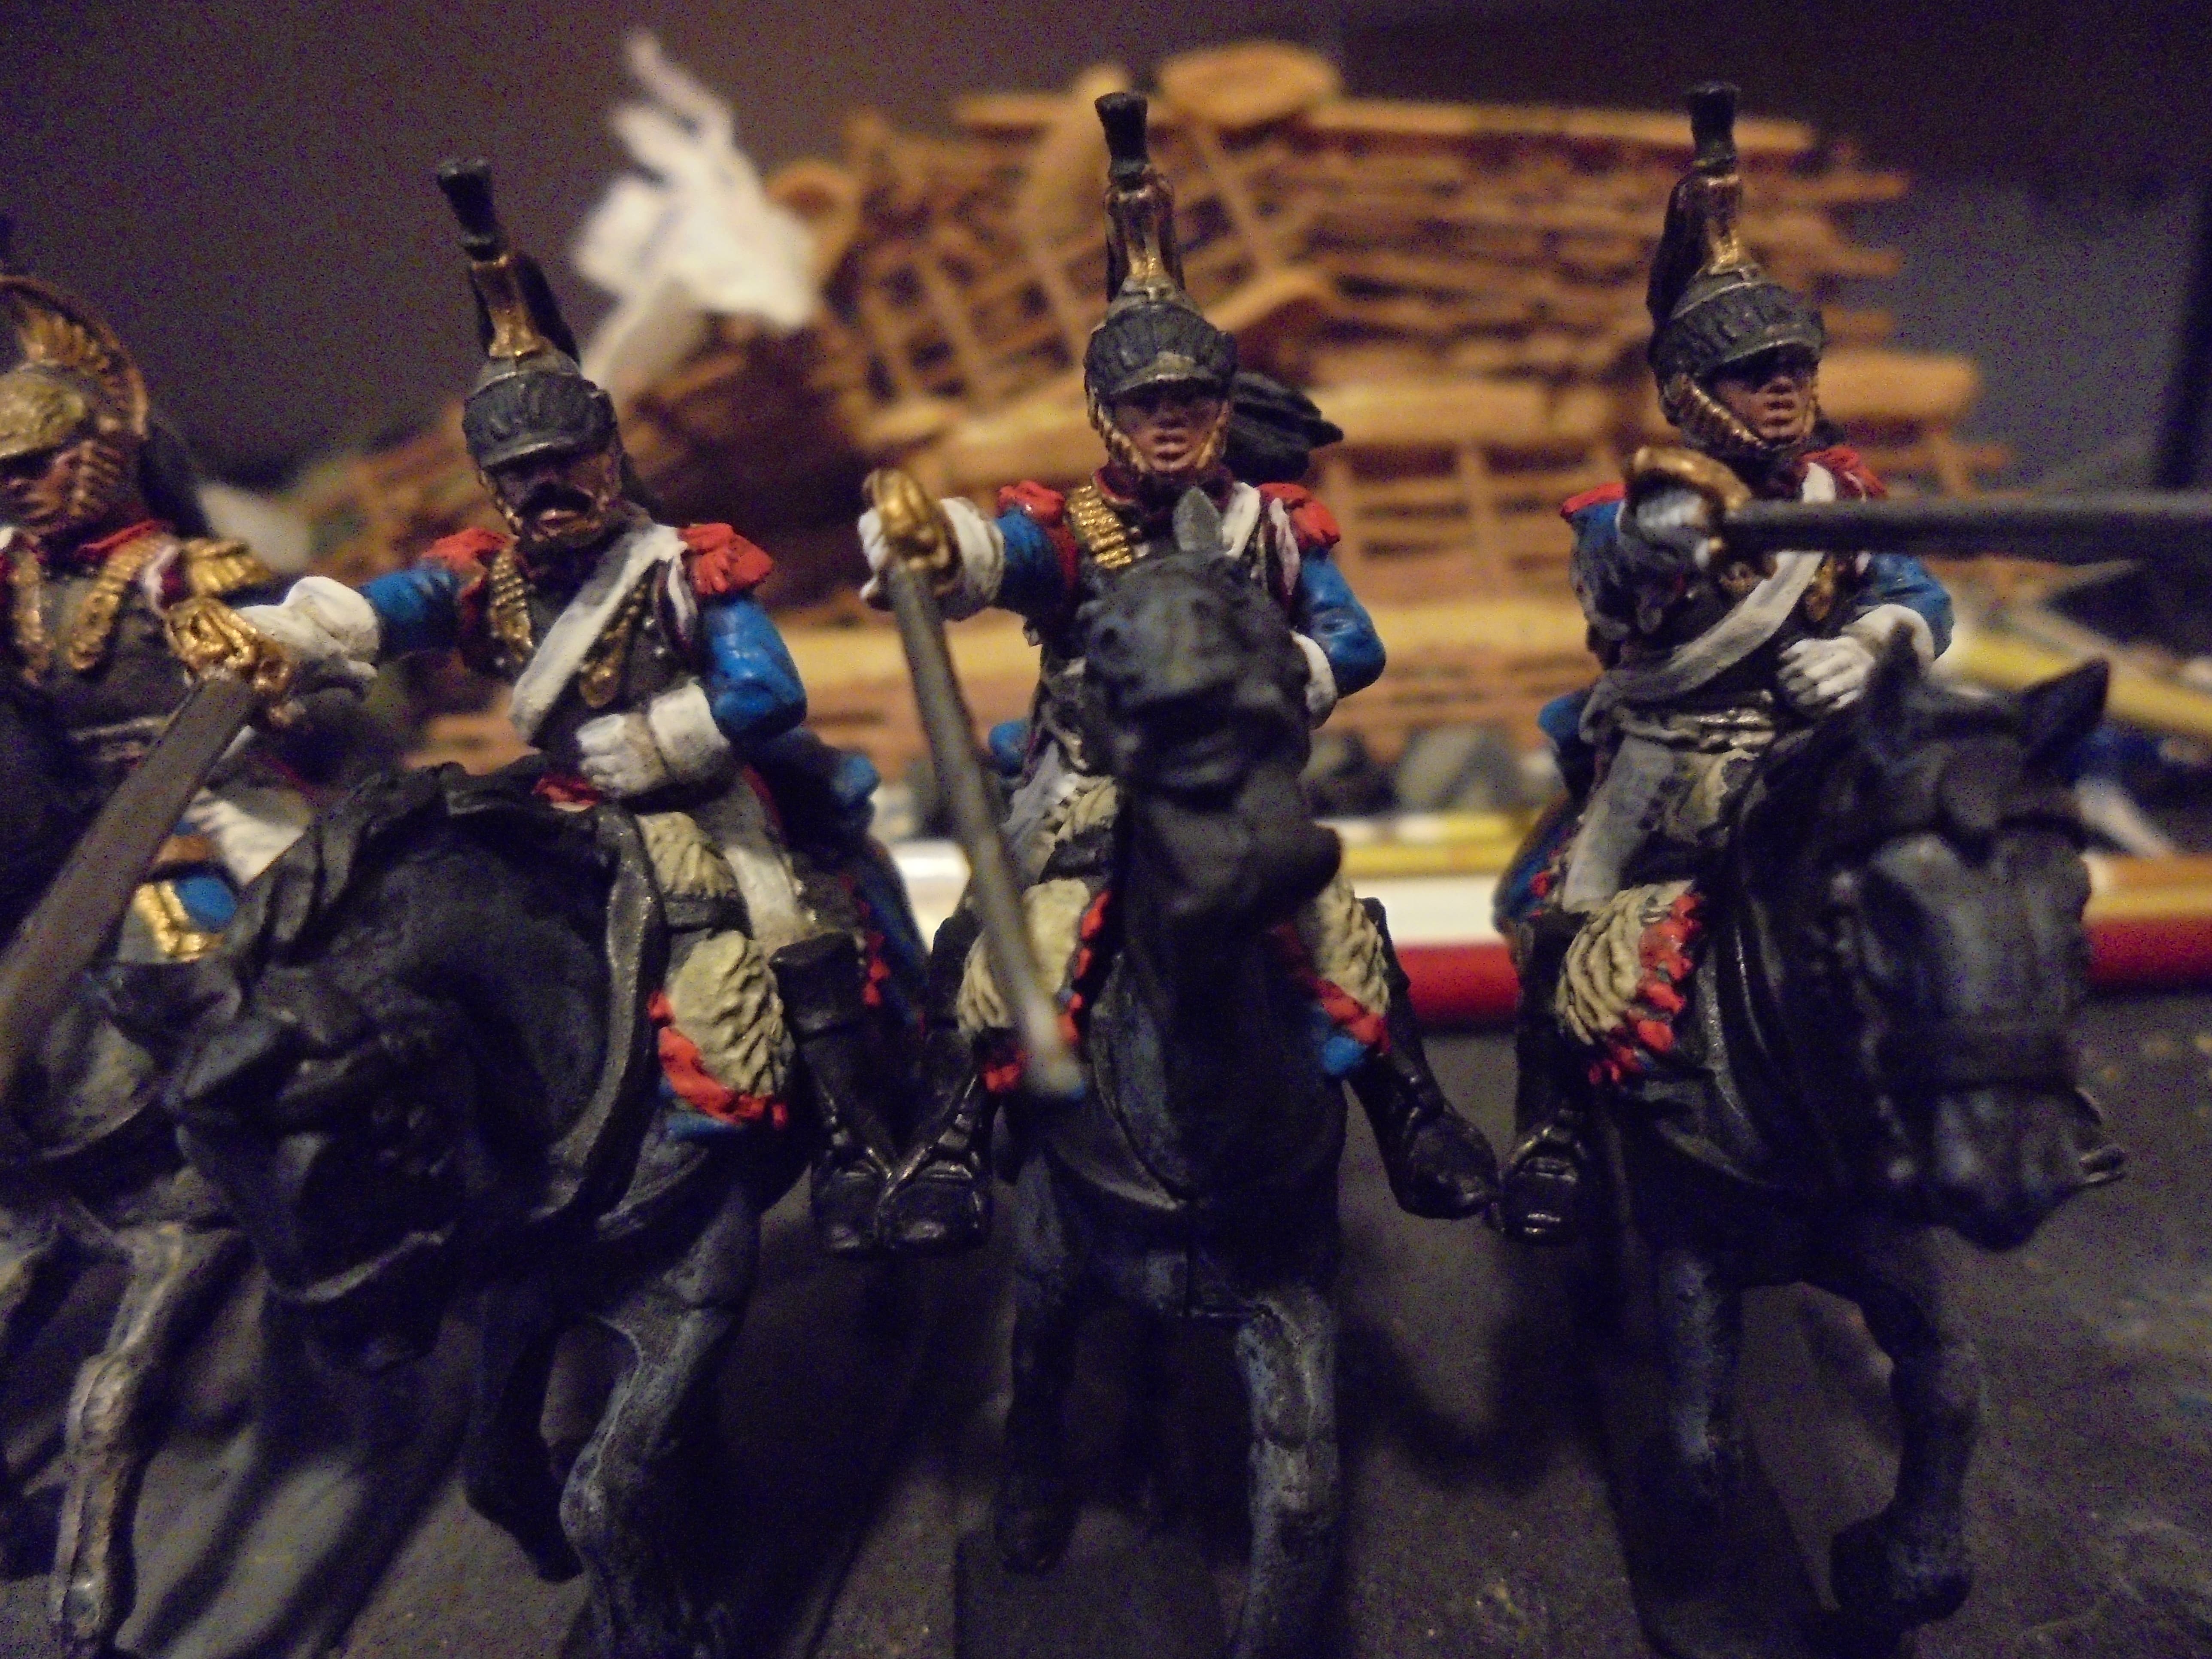
Basecoat Finished
The Project Advances to the next stage
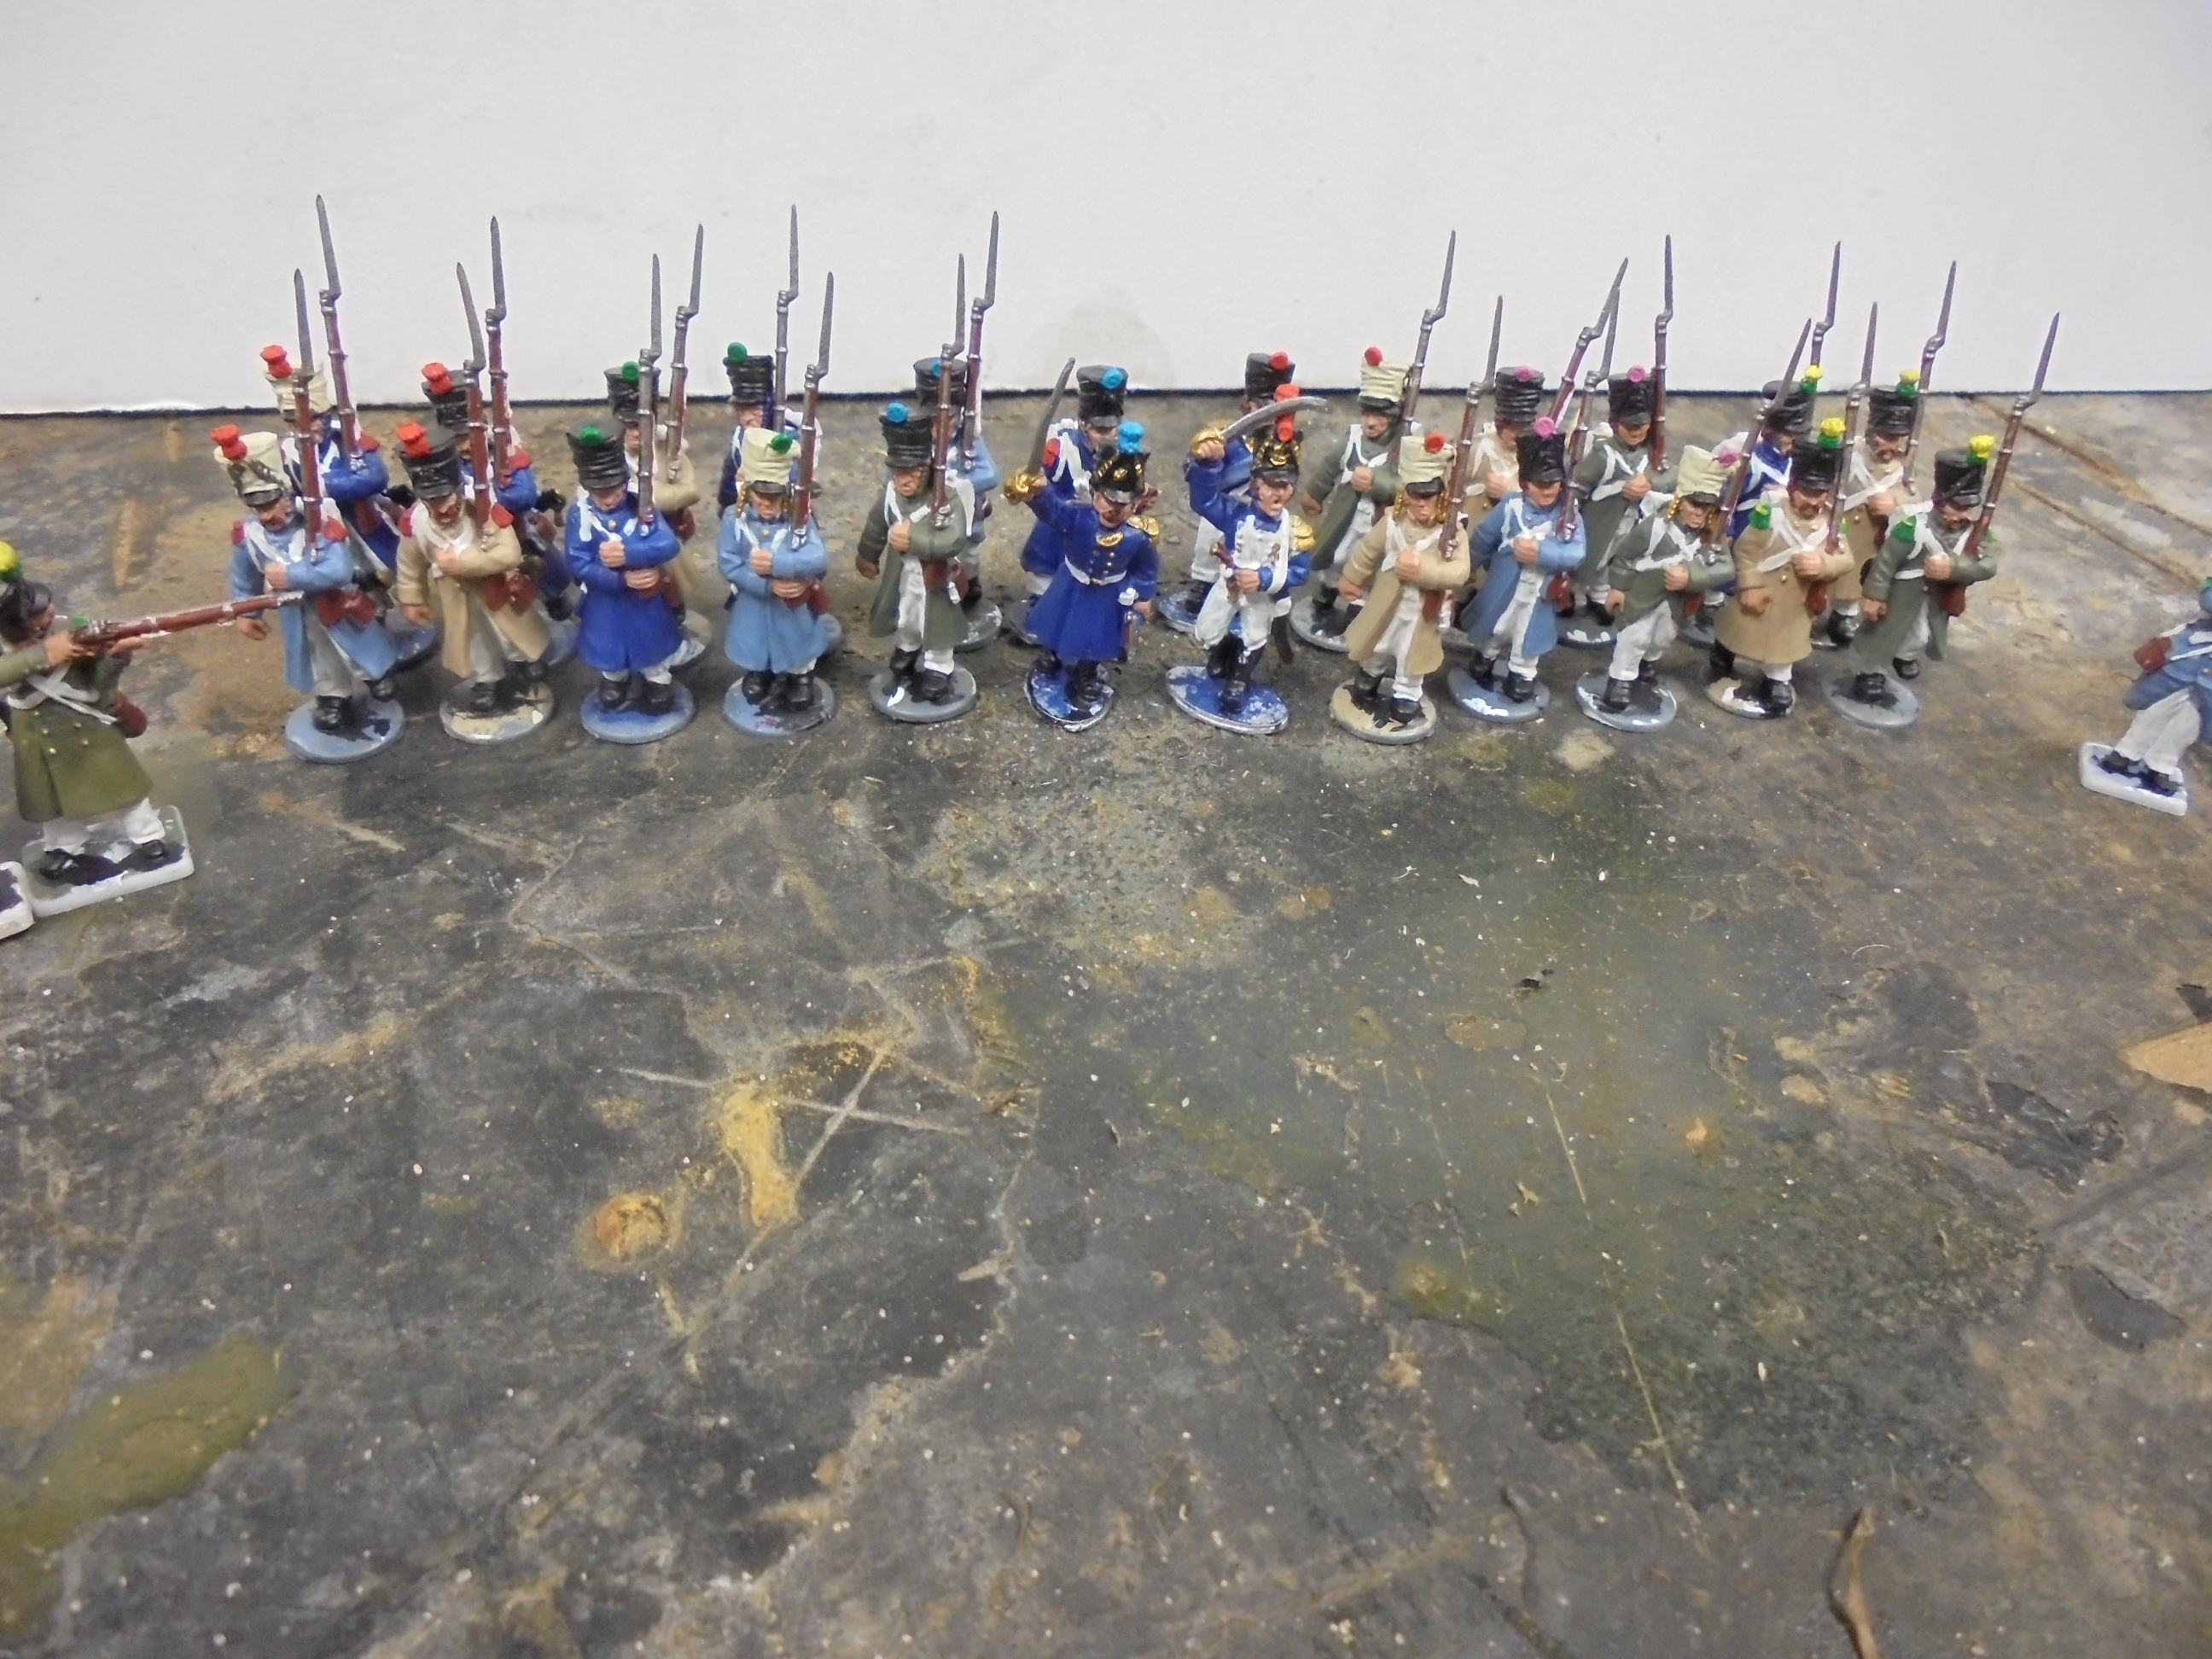
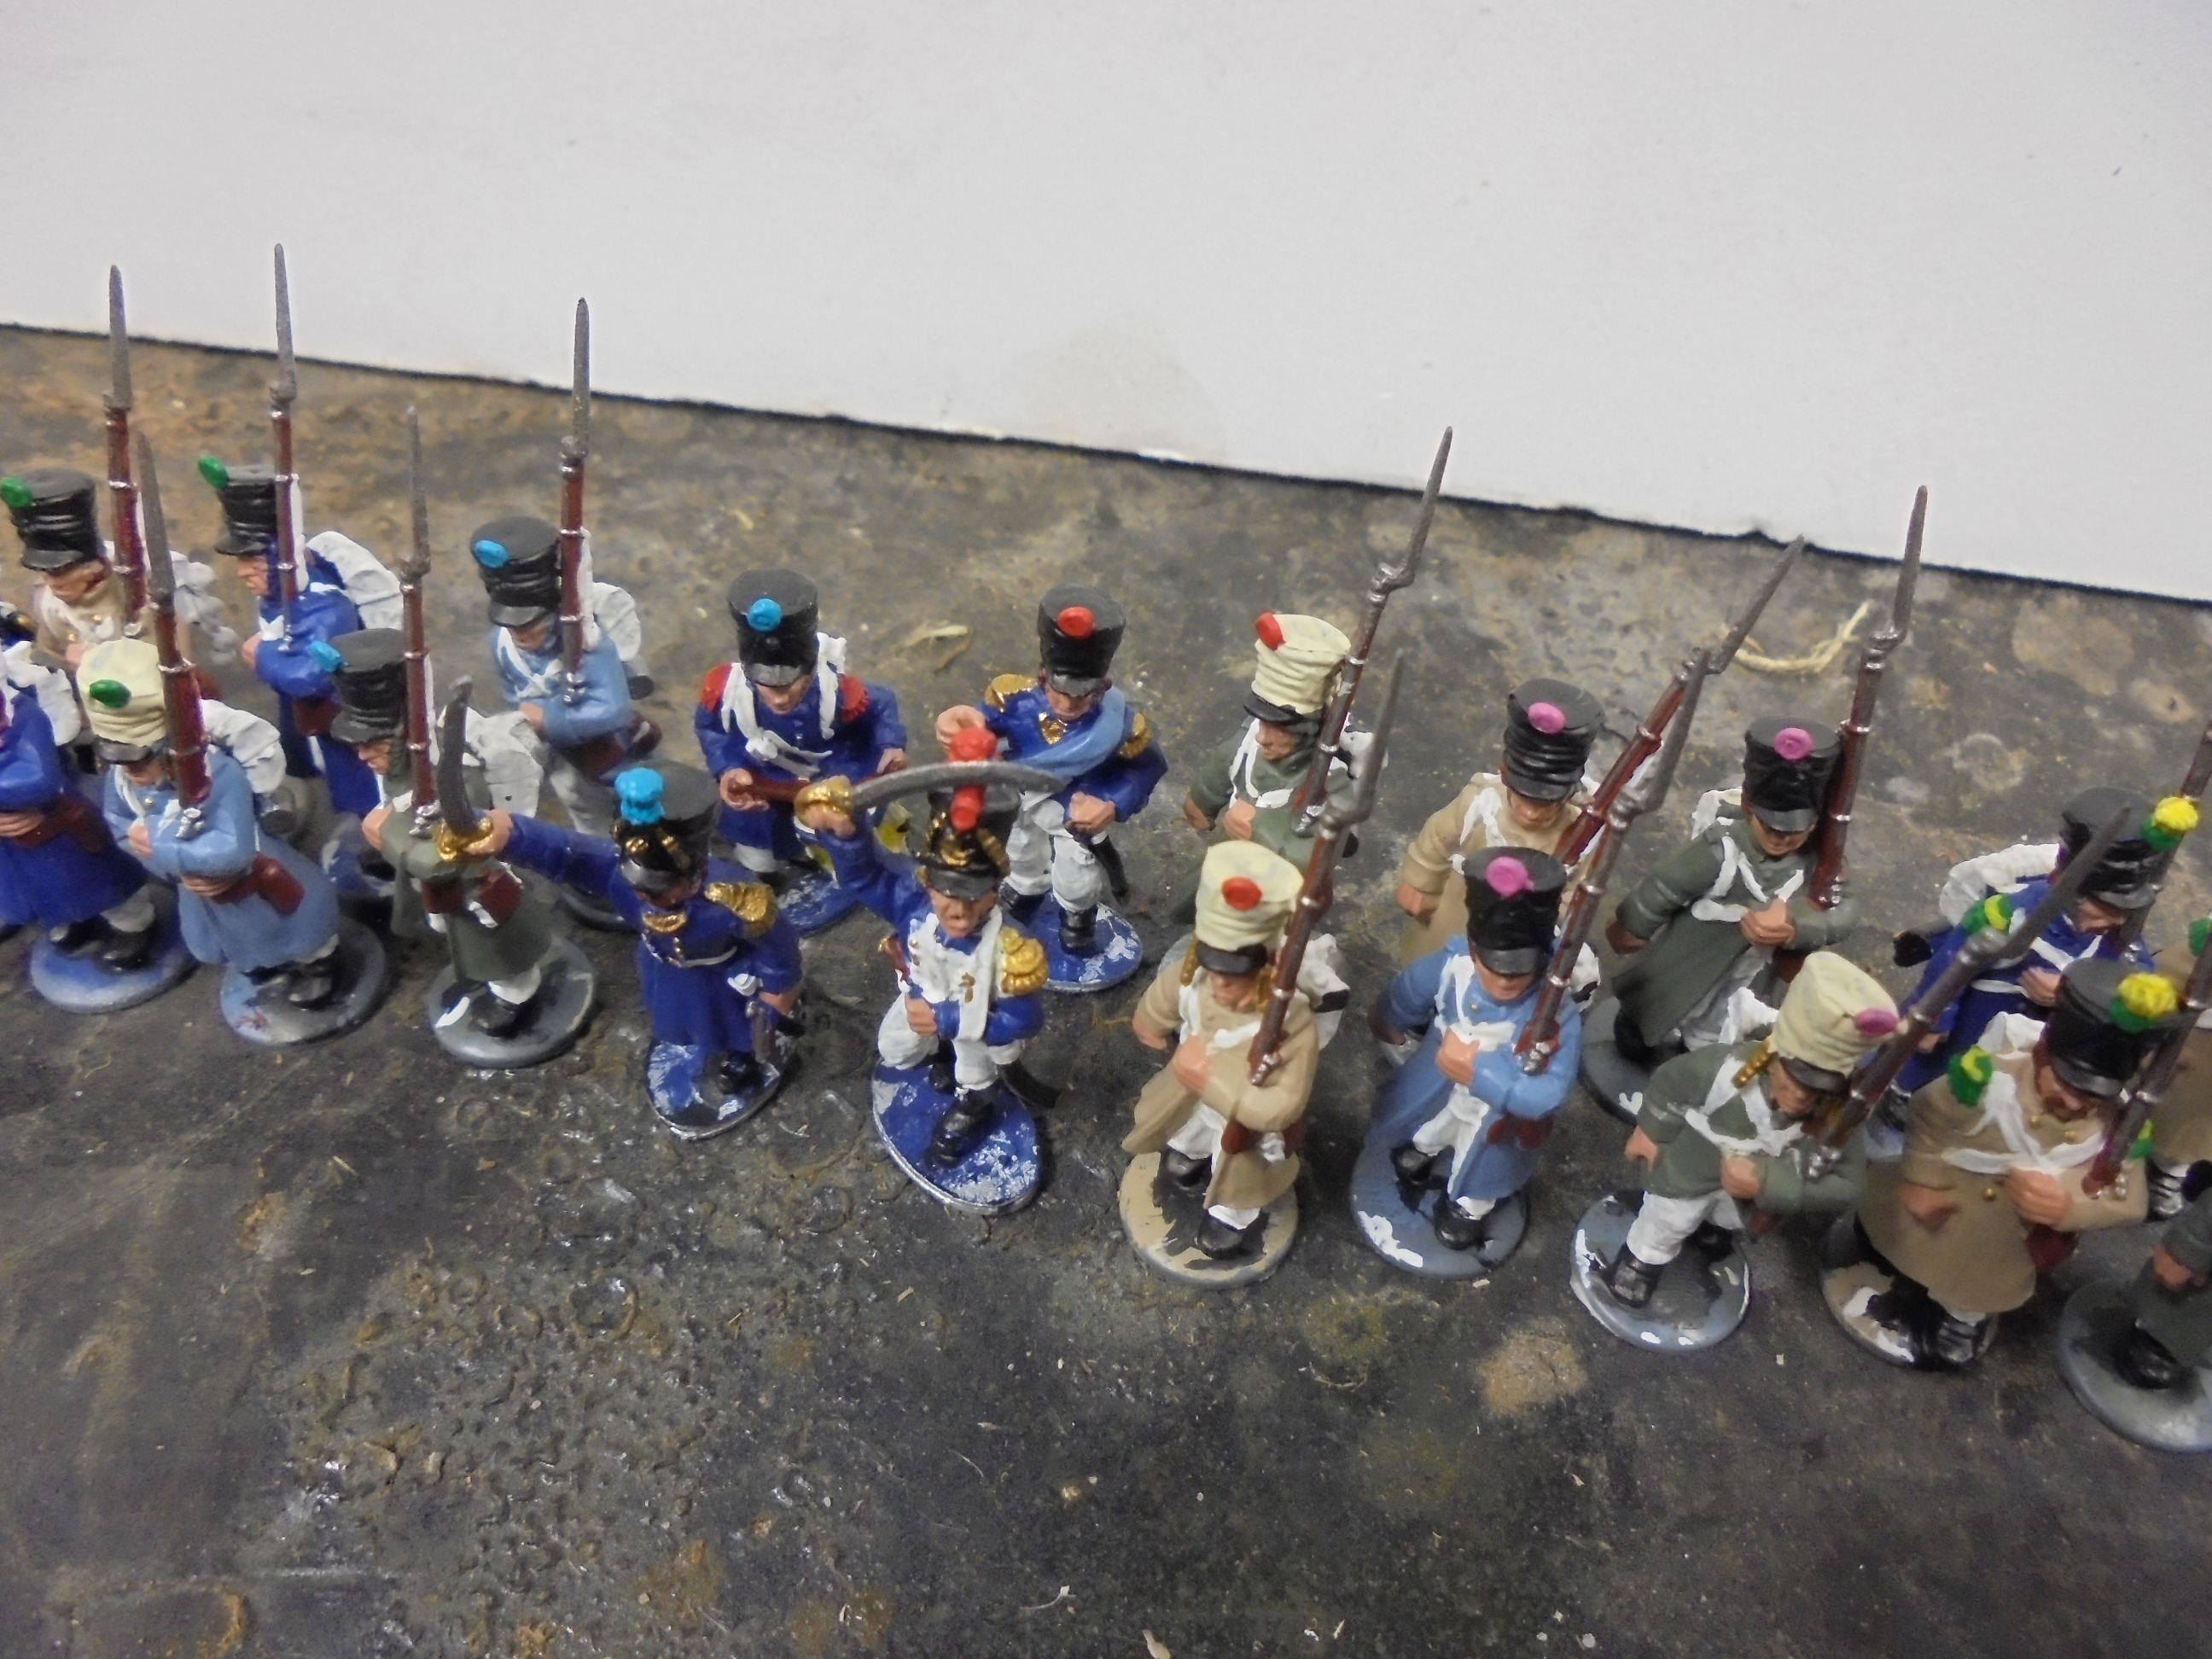
With my first Battalion ready for a wash I thought I’d post some pictures.
Leave me a comment if you have any basing tips. It’s one part of the Hobby I’ve never really been any good at/spent much time on (wait a minute could that be linked) so any tips would be very appreciated.
Next, a description of “Napoleon at War” as requested by @tonysilvey
Napoleon at War: The Basics
Appologies for the Delay but I have a lot of stuff ready to go I just have to remember to update the Project.
Not a Napoleonic song but a Prussian one from half a century earlier back before the Prussians got some style in their uniforms (enough with the silly pom poms). Very interesting line. "Goodbye Lusie, wipe your tears. It's not like every bullet hits. If every bullet hit it's target how would kings get their soldiers then" very logical advice for a mother/wife.
Napoleon at War has a lot of cool little rules but I’ll just describe one core rule that really stands out for me.
There are two states a unit can be in. Engaged or Unengaged. This is a very nice mechanic. Basically a unit is engaged if it’s within 12 Inches of an enemy Cavalry unit, in the firing arc of an unlimbered artillery unit or within 6 Inches of an enemy unit.
To me this answers the constant question of “What do I do with my Cavalry?” Sure you can keep them around menacingly ready to pounce on a fleeing enemy but you’re relying on your opponent to react to you and rather than a secret weapon the Cavalry just become yet another unit to be countered.
Not in Napoleon at War. In NaW you aren’t so much controlling your army as you are generally pushing them in the right direction. Sure, outside of contact all your officers relay your orders to the letter but once they see those lance tips shining in the sunlight and observe artillery creating fire lanes they tend to use their own initiative. Outside of being Engaged you can reform, move and control your units however you like so long as they don’t move further than their movement allowance. Once a unit is engaged they must test to perform an action or be severely limited in their movement options.
So rather than Cavalry just being a sledgehammer that you occasionally get to let off the leash they’re an area denial tool that not only force a player themselves to judge the risks but simulates the commanders on the ground making their own decisions. Artillery does the same thing only with firing arcs. Artillery has a firing arc directly area of itself (most artillery is 3 or 4 bases but the Russians get 6 that they can put together into 12 and 18 man batteries). So careful positioning of both Cavalry and Artillery is essential to your infantry having the edge over your opponent and winning you the battle.
To me this is the single biggest thing that separates NaW from other games of it’s style. It easily encourages the player to use combined arms rather than giving a simple +1 bonus or a reroll. Combining arms doesn’t necessarily benefit you but it does throw a monkey wrench in your opponents plans.
NaW has a lot of other cool rules like Intercepting Cavalry Charges, rolling to save bases based on hits received, skirmishers screening a unit and a “Flames of War” style scenario system with points values and balanced scenarios if you don’t feel like fighting a proper battle.
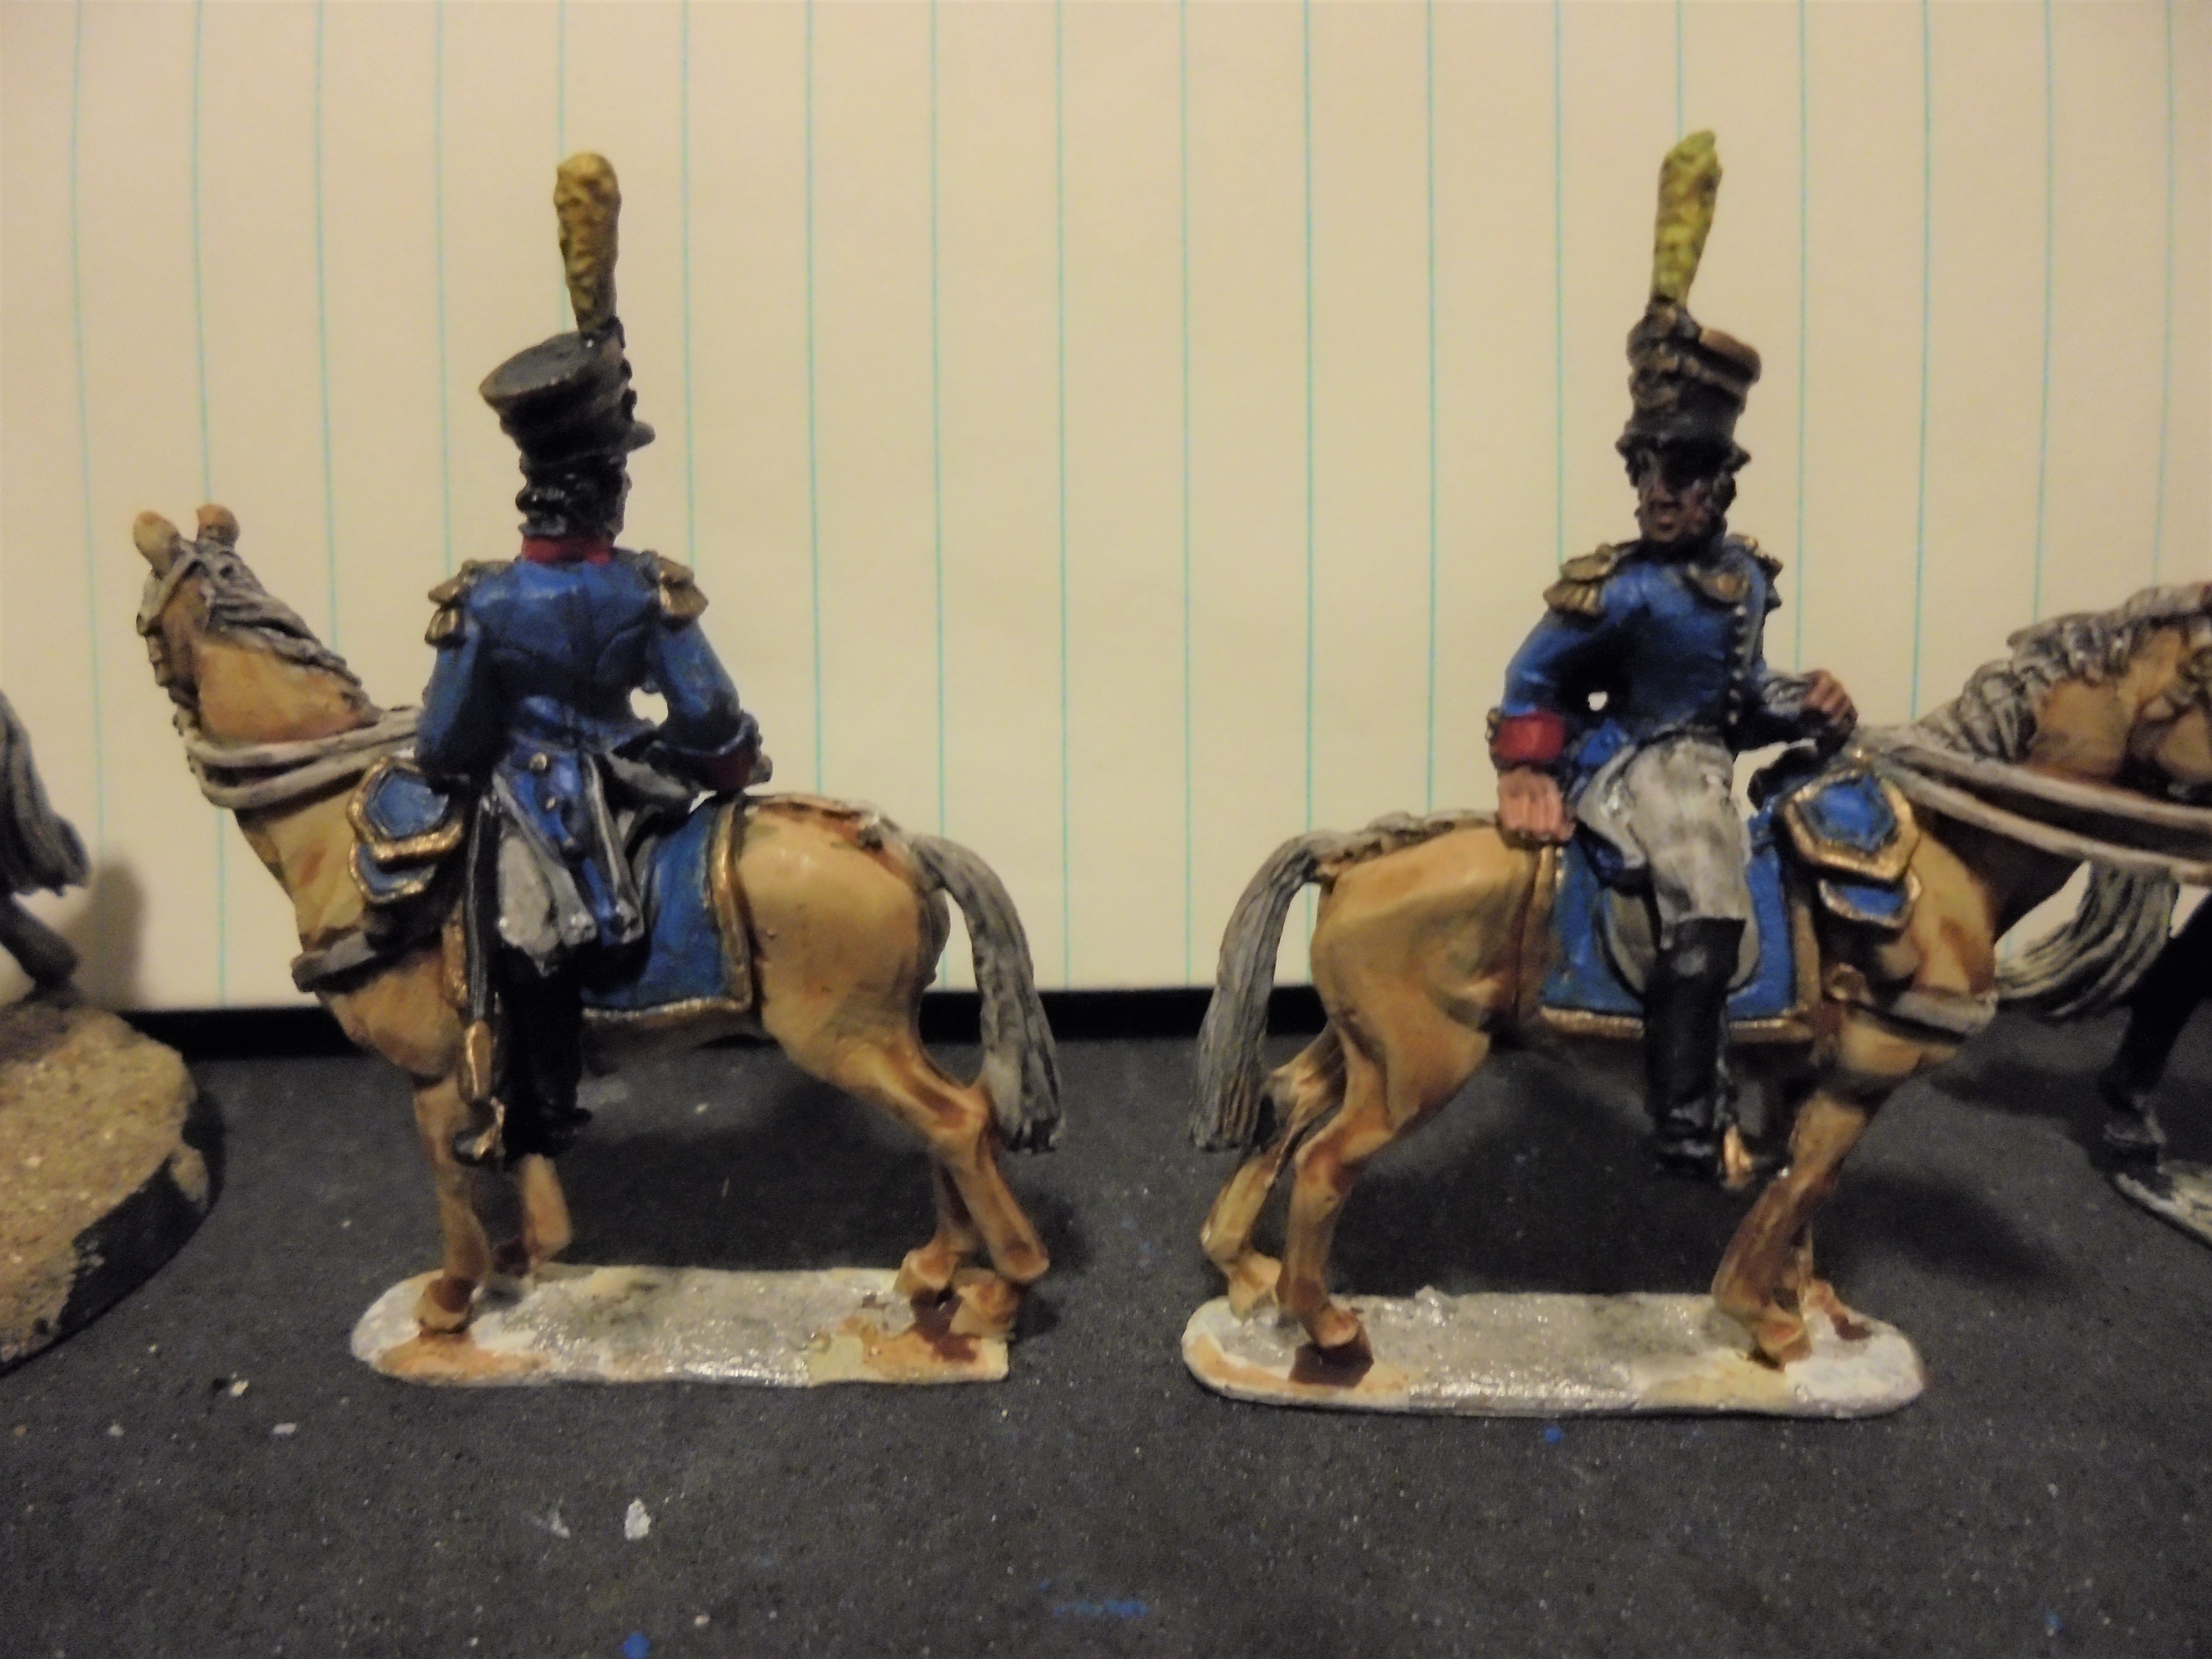
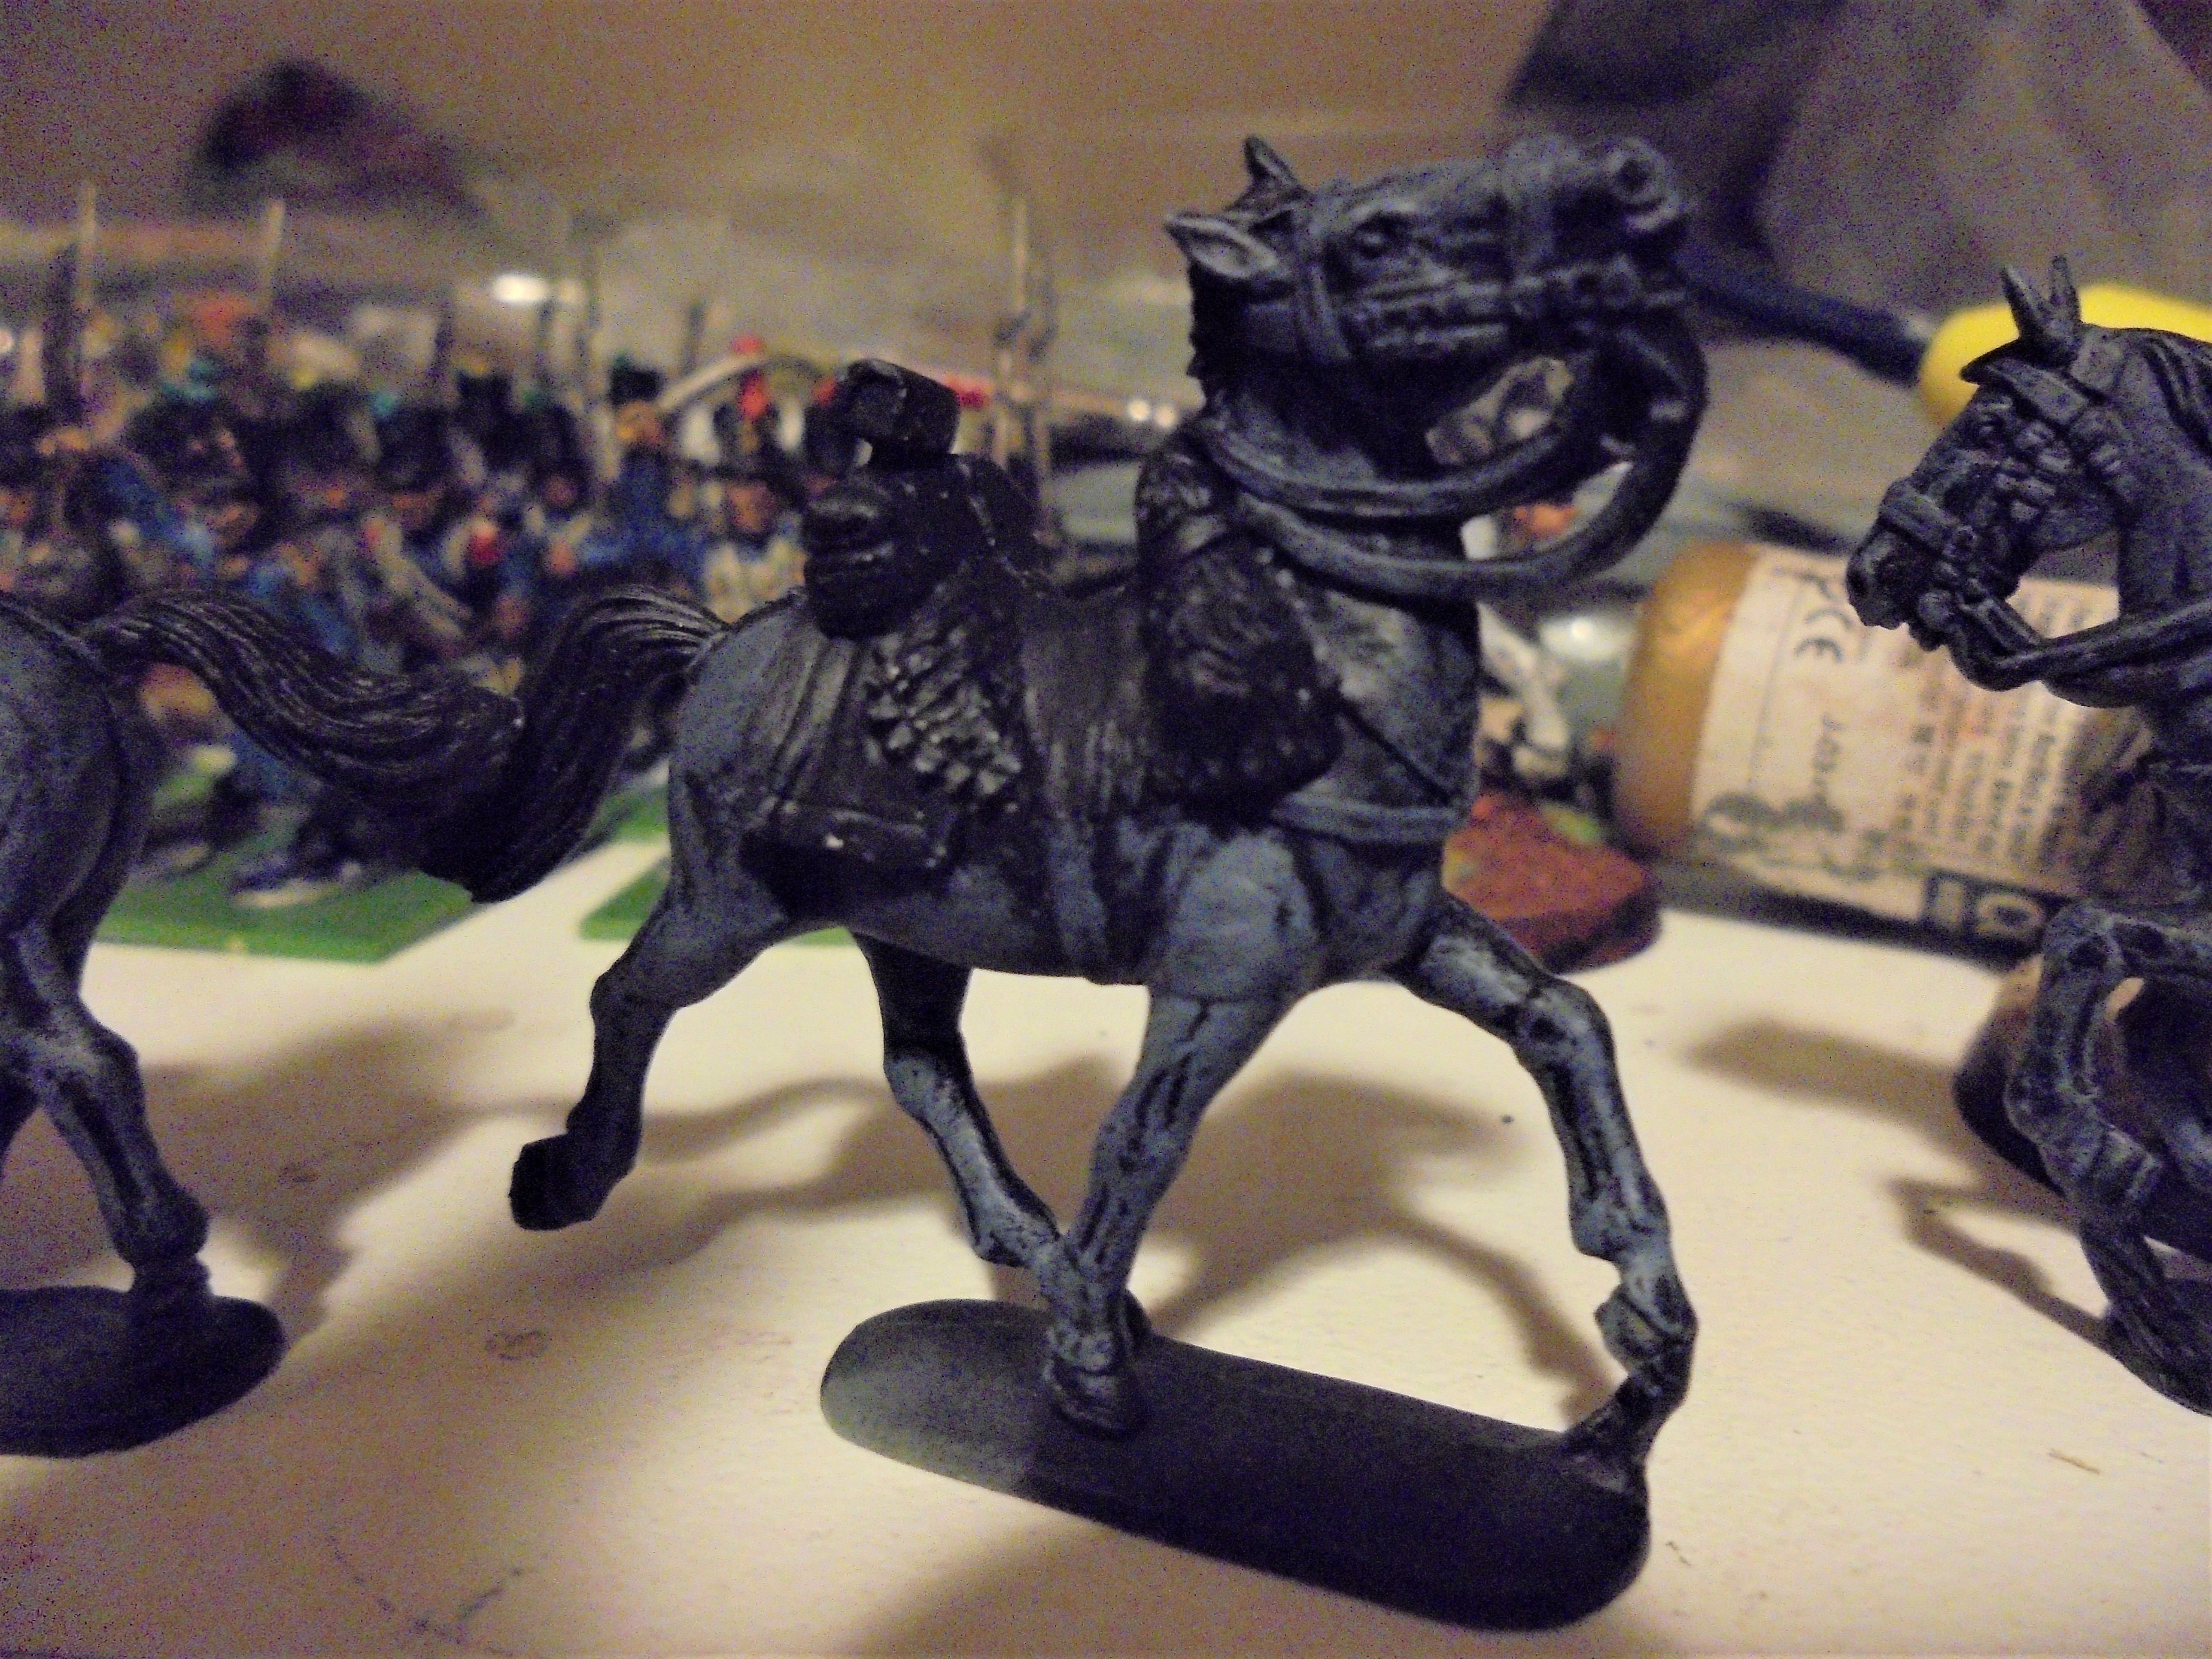
WiP of a lancer and his horse, Grey Horses for the Cuirassiers and a few Officers.
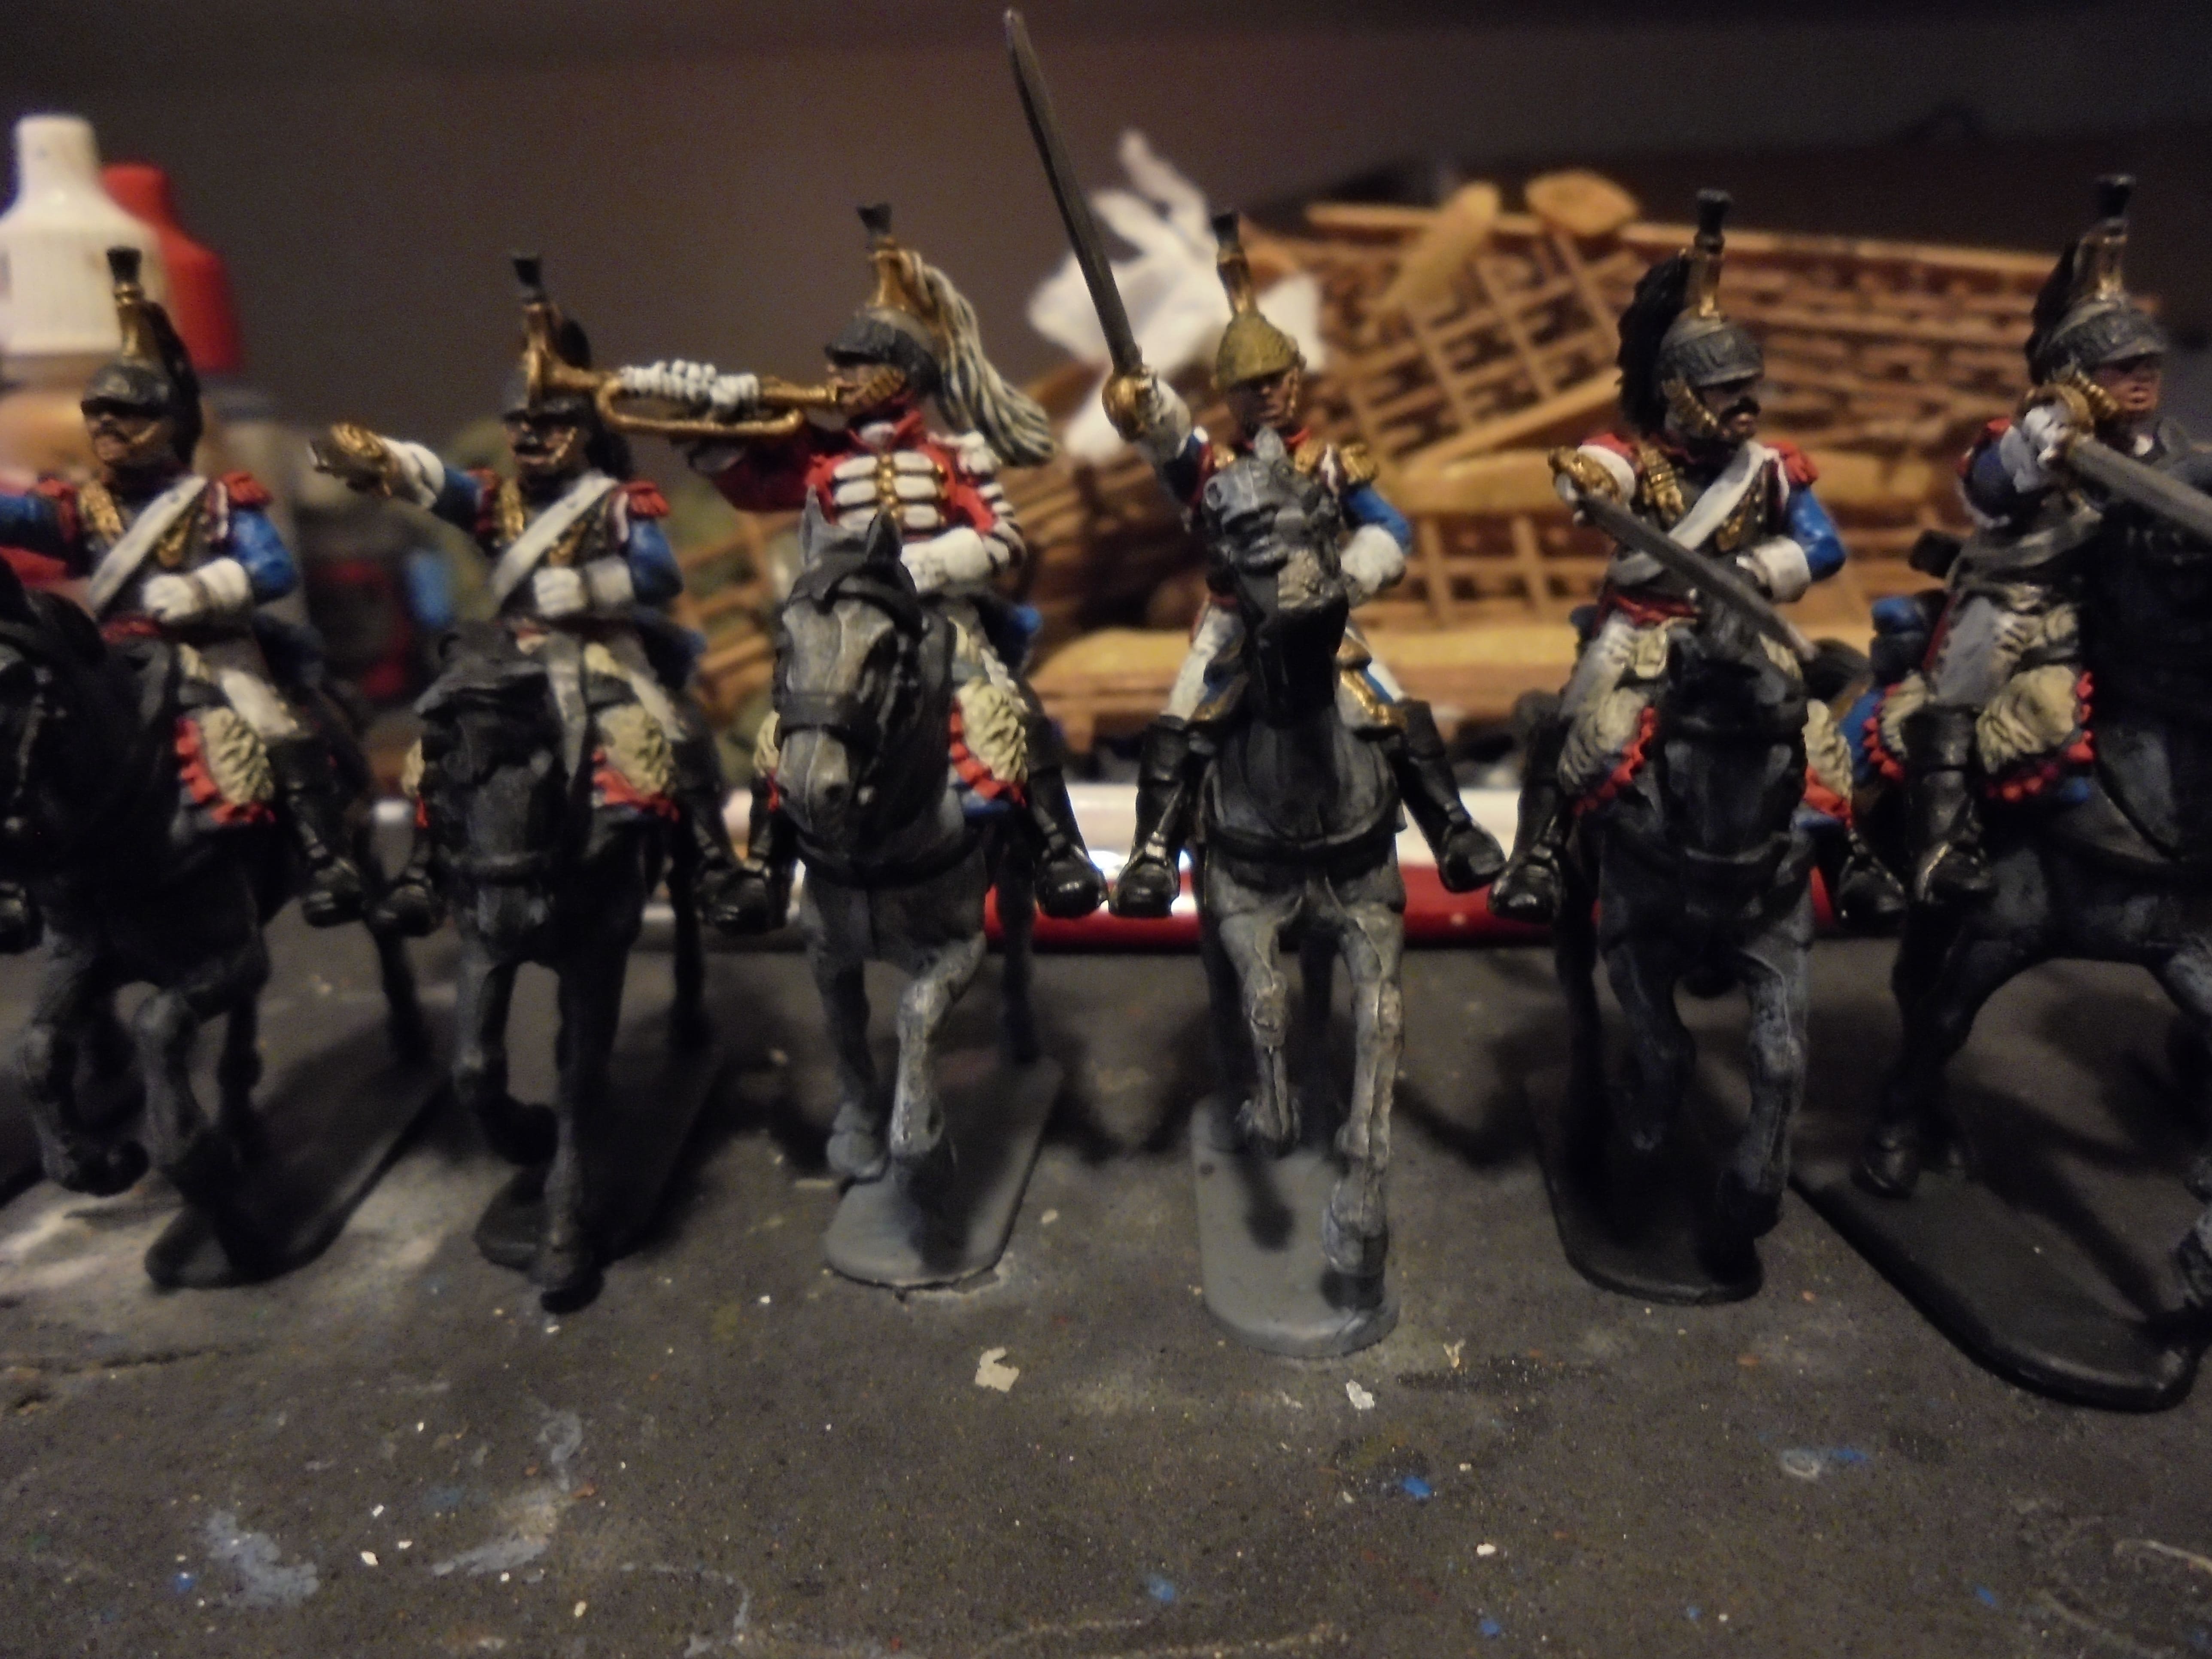
On Bases Ready to Base
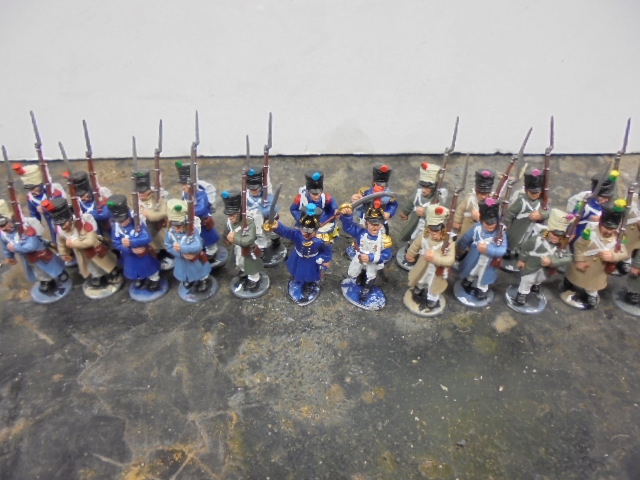
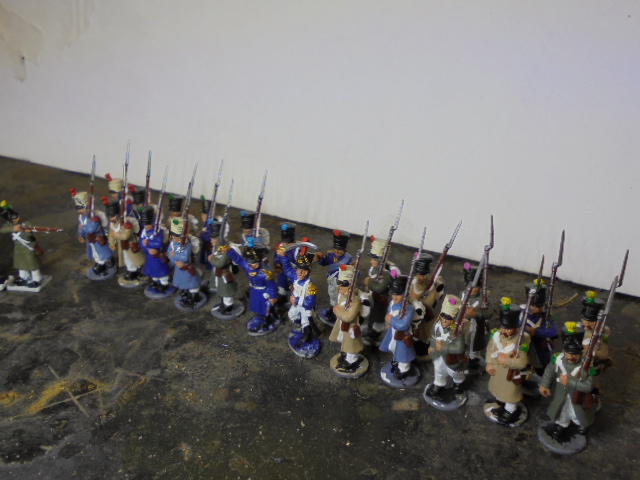
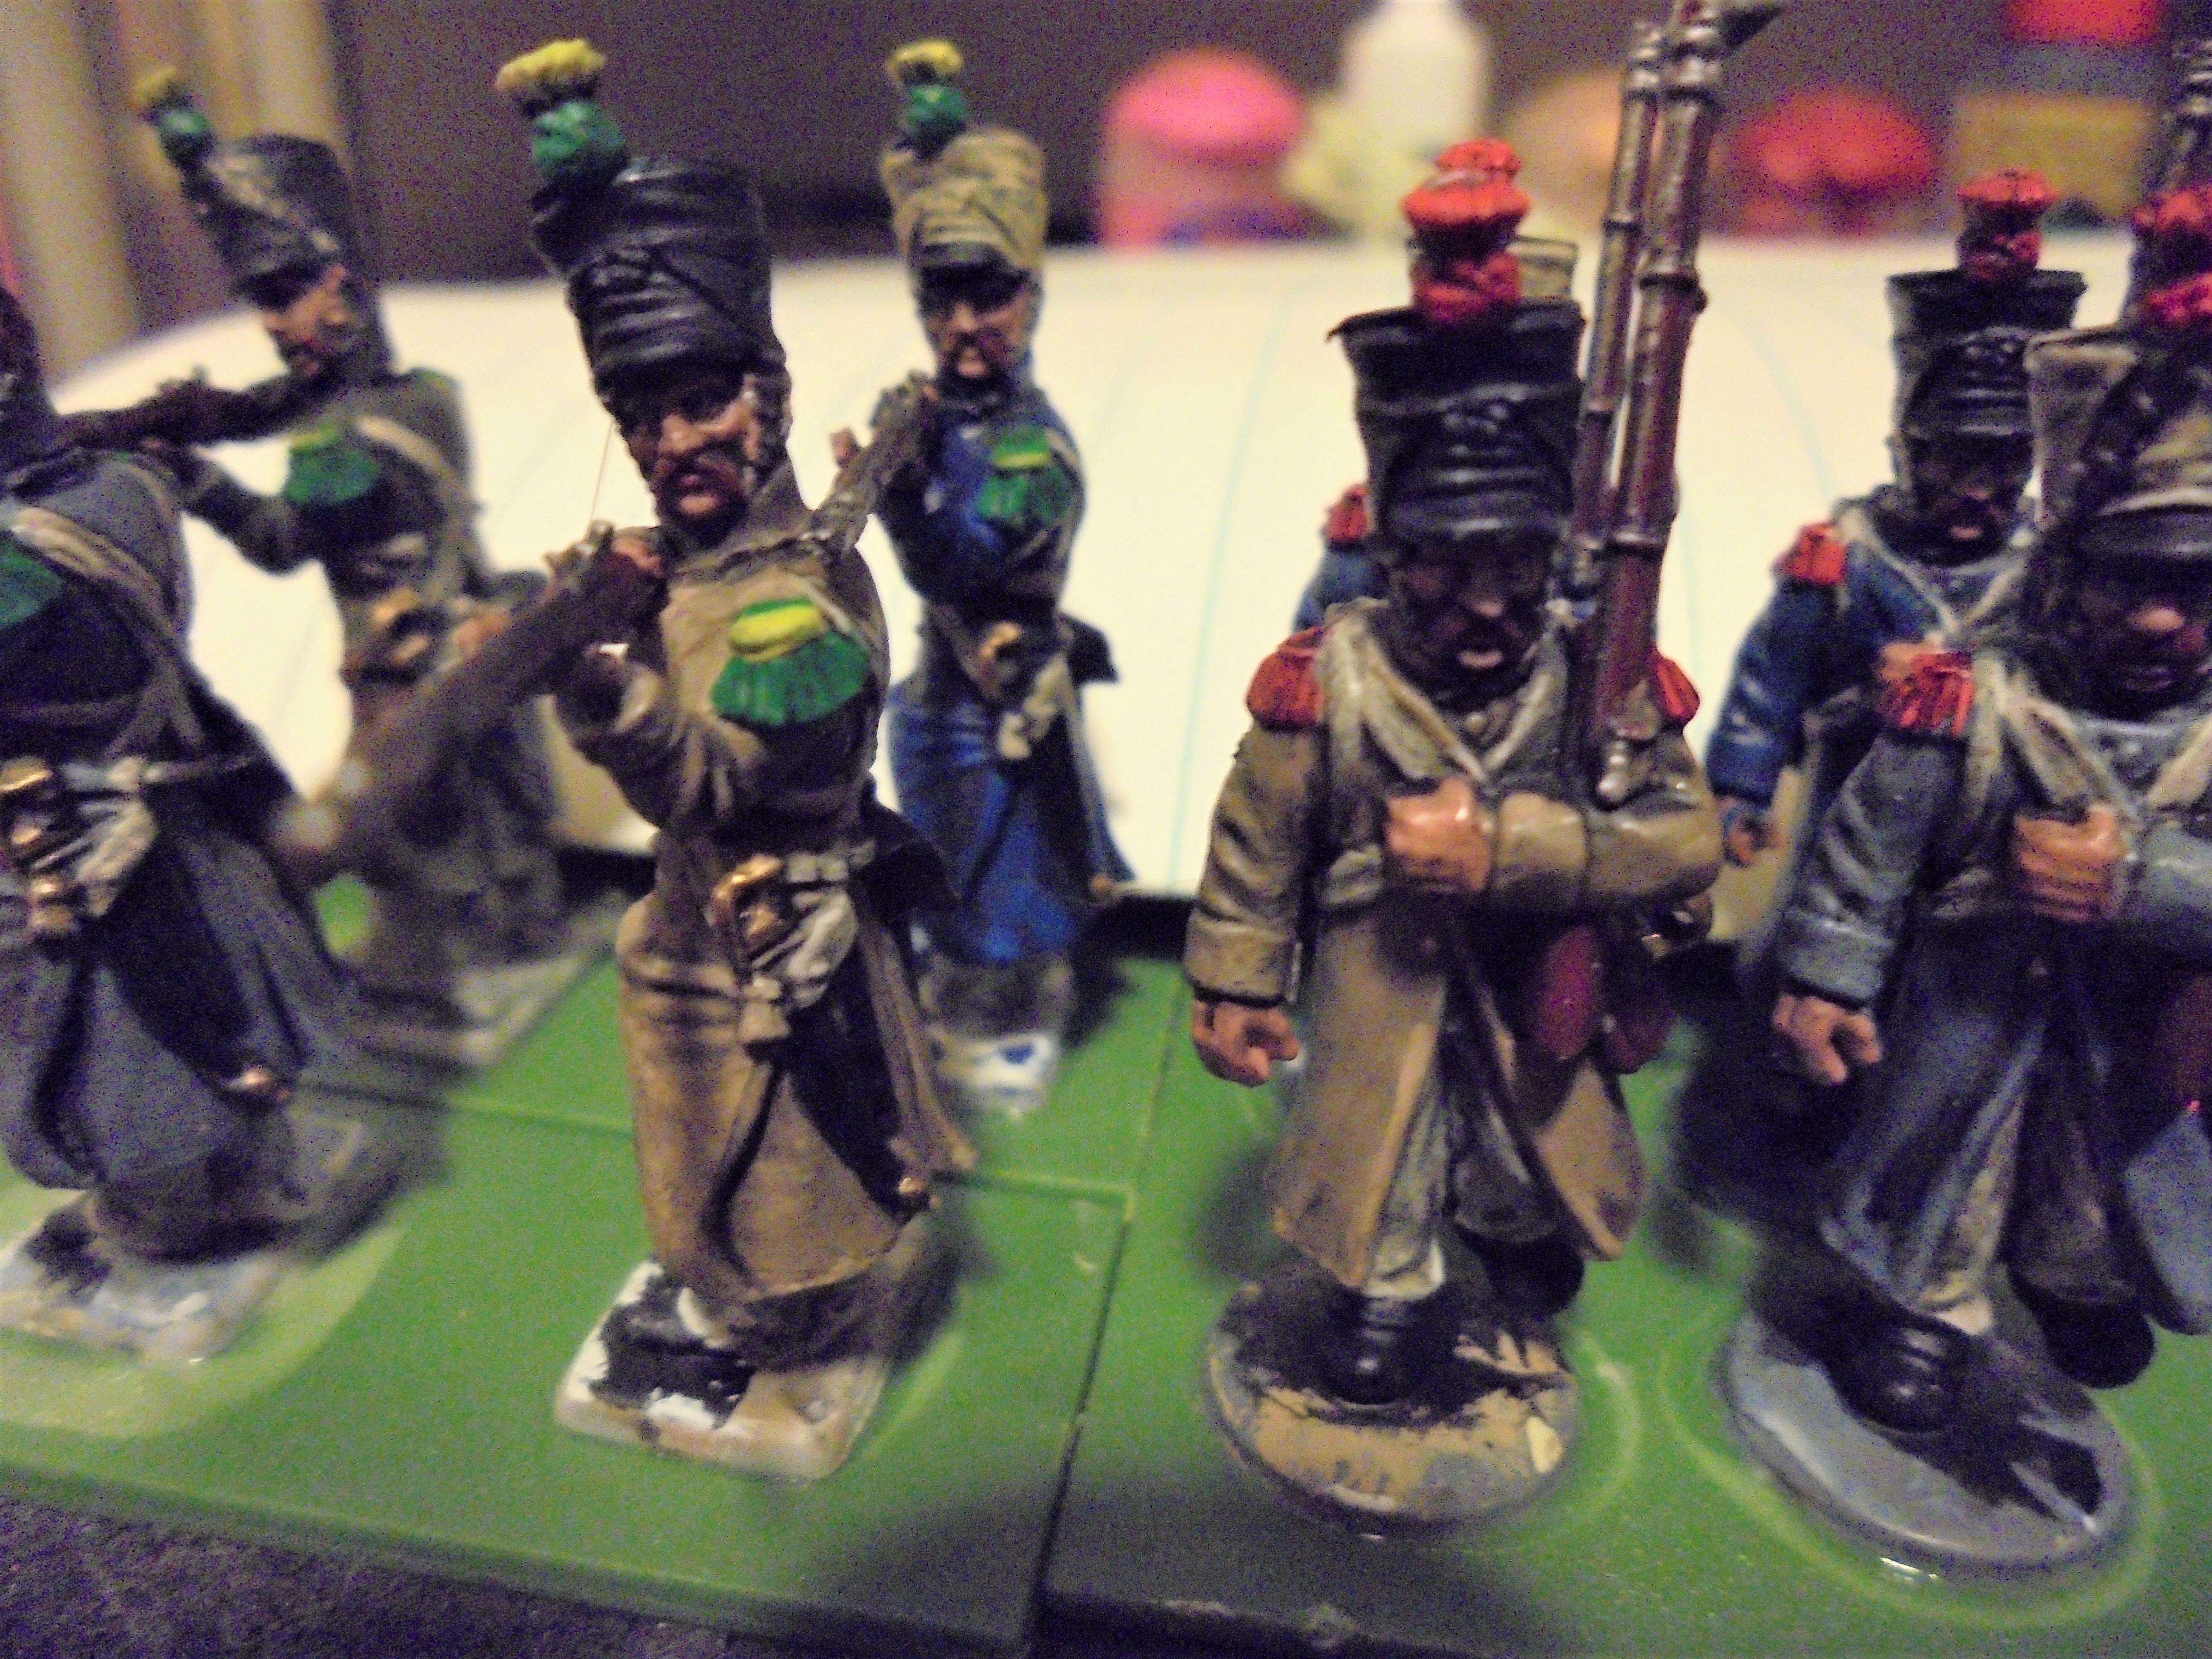
First Battalion Finished Second well on the way
Mixing it up a bit with Civil War. Band is mostly formed from former Sabaton members.
Just finished a very good biography on Admiral Collingwood and that I highly recommend for anyone who has an interest in Naval Warfare in the Napoleonic Period. “Admirl Collingwood: Nelson’s Hero” not sold on the title, Nelson and Collingwood were good friends but Nelson didn’t really see him as a hero and the book makes that very clear, they’re equals and Collingwood technically had Seniority (Collingwood was a Lieutenant about 2 years before Nelson but was also 10 Years older born, 10 years and 3 days apart) although Nelson outranked him.
Big 3 Take Aways
- Nelson did nothing innovative at Trafalgar. The tactic of attacking in columns and winning by either firepower or boarding was not new and had been done at least twice in the half decade before Trafalgar.
- Combat training is vital to a navy. The British routinely practiced Gunnery and Combat maneuvers whereas the French and Spanish (this is before Napoleon put his brother on the Spanish throne and betrayed his ally) spent most of their time bottled up in port and couldn’t practice. The British had about a 3-1 rate of fire advantage over their opponents which is huge. Admiral Collingwood was probably the best Gunnery Focused Officer in the entire Royal Navy at the time.
- You can’t give the Spanish Navy anything. The British give the Spanish Navy (who have now been betrayed by the French and are British Allies) a huge amount of Powder to refit their Navy. The Spanish then proceed to fire almost all of it in celebration of a Spanish Holiday. Collingwood was not impressed.
Hope you enjoyed the tangent.
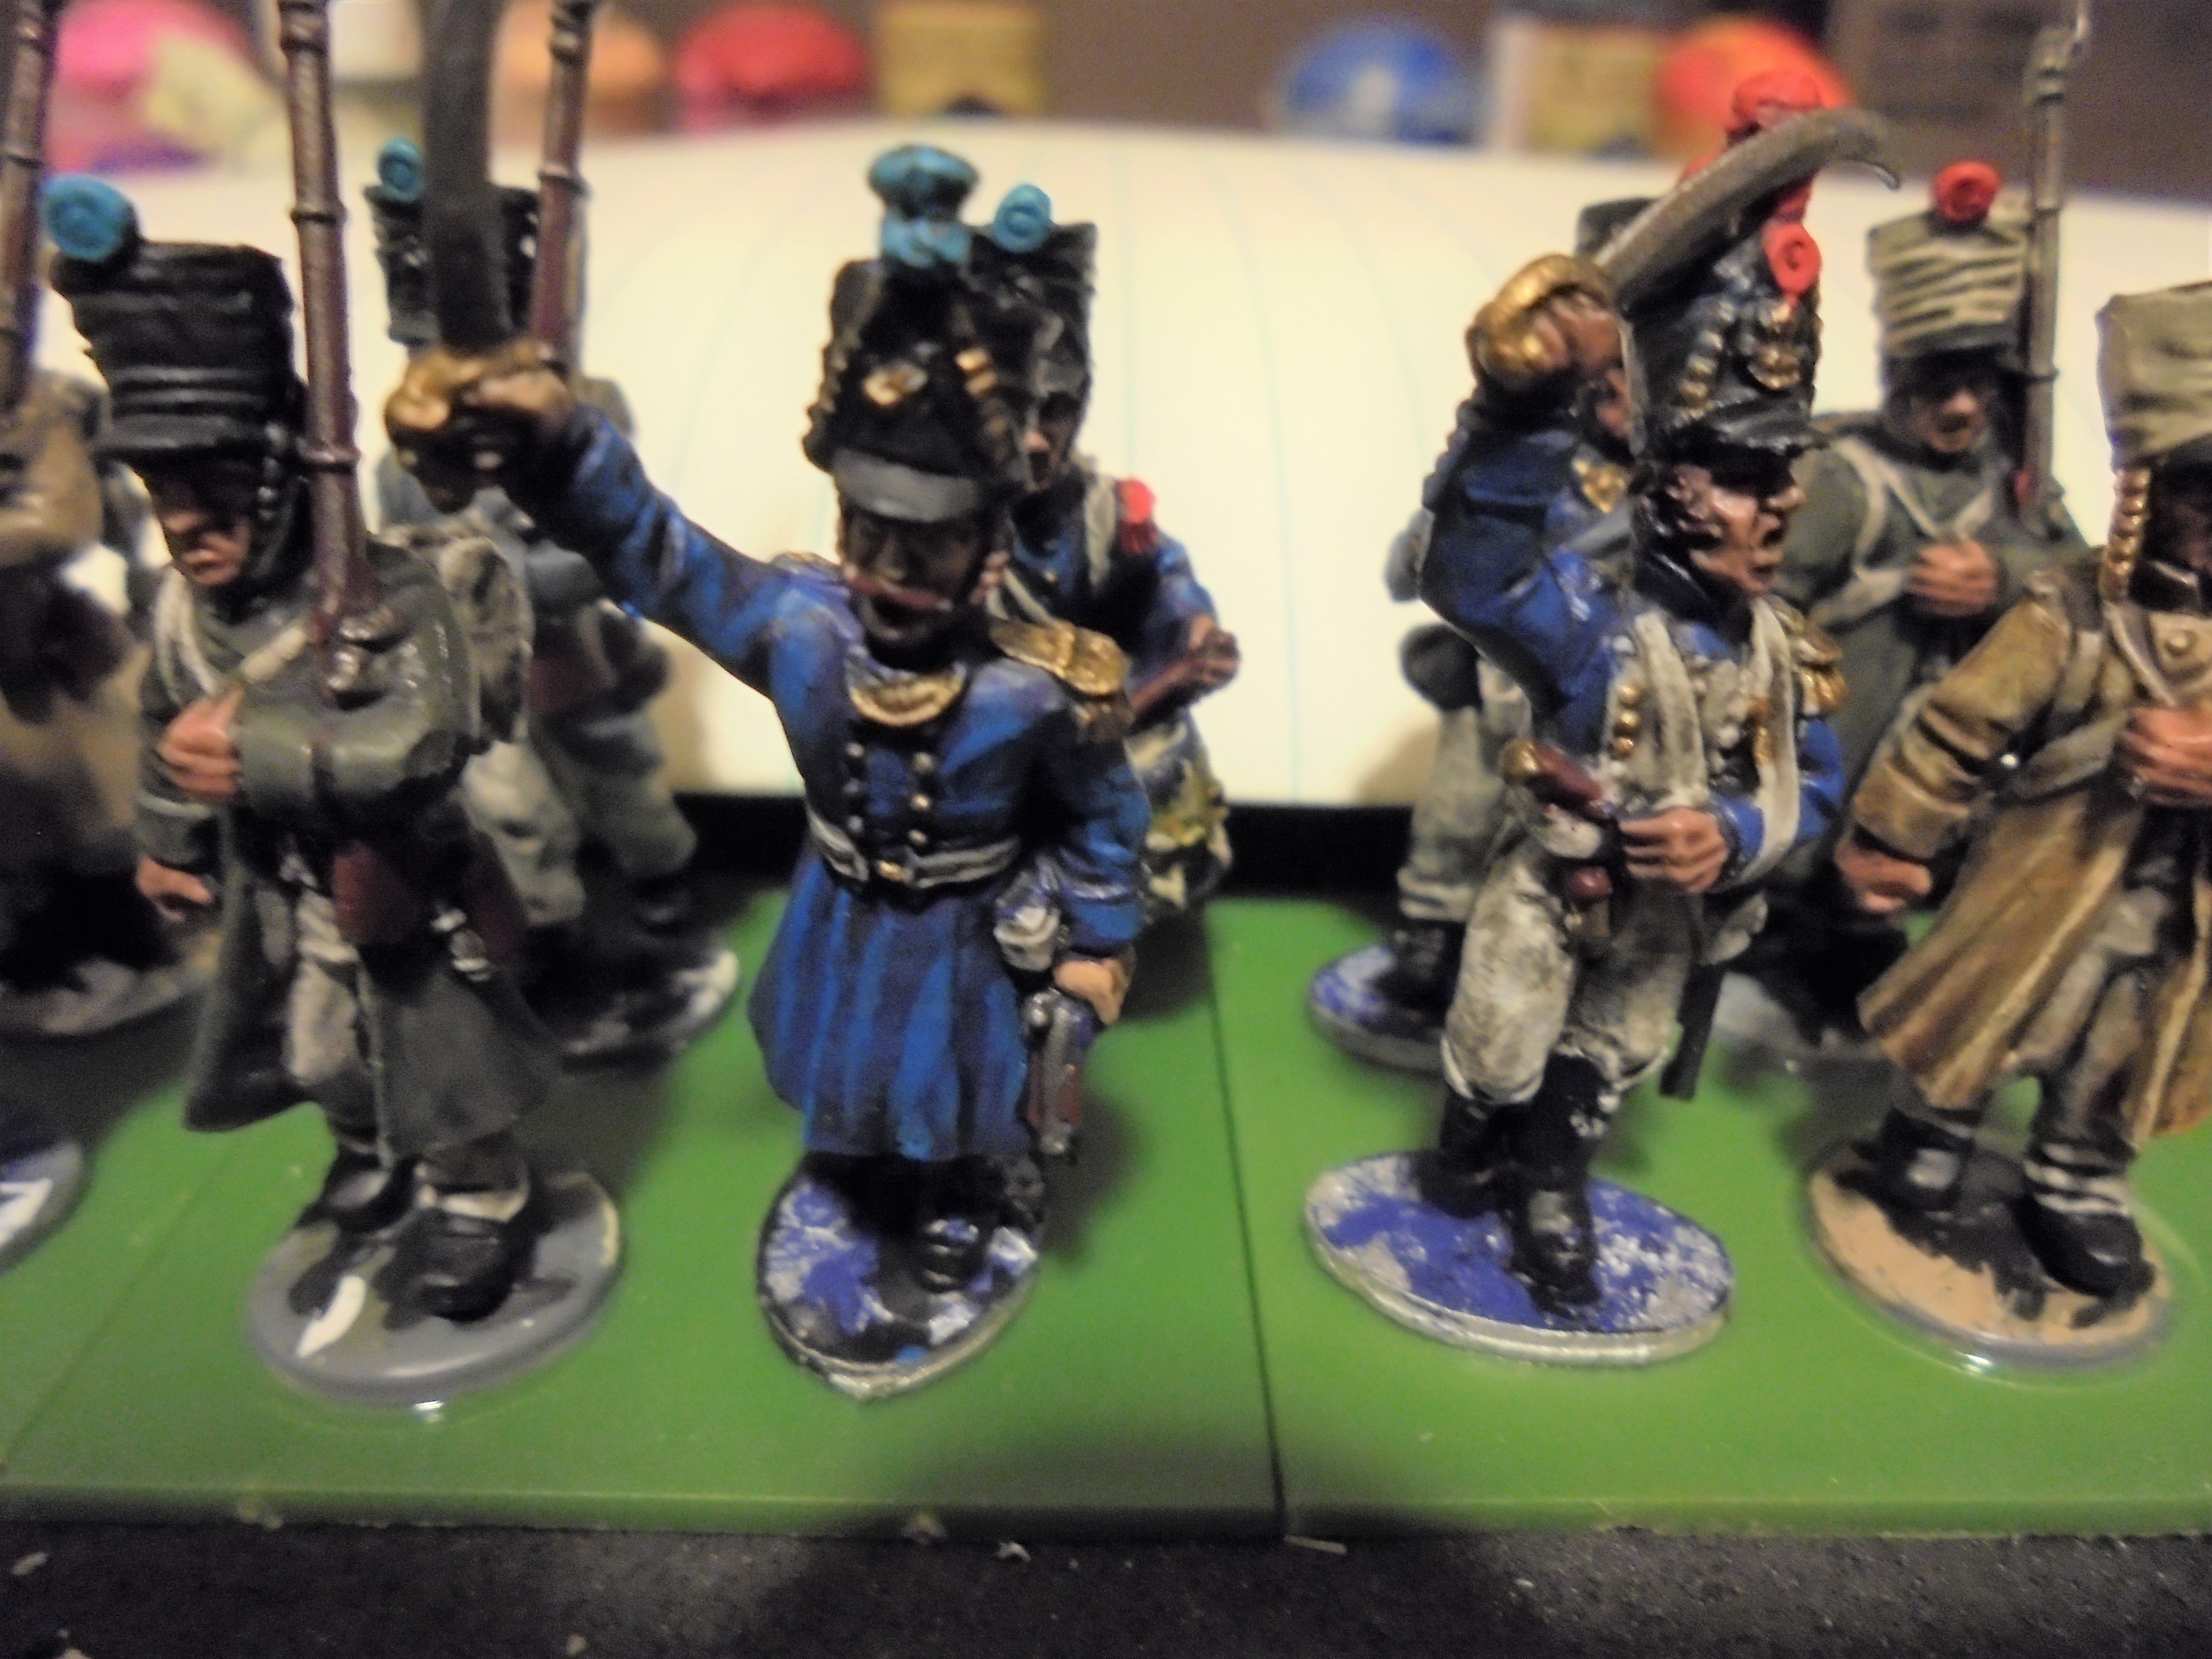
Here’s the First battalion ready to base up plus a few other small details like weathering and minor touch ups.
Thanks to everyone for the support for the project. I’m going to make sure I post updates far more often (every 2-3 days) mixing up some Wargaming Rule from Naw, Pics of the minis themselves and some banter/historical information.
Tangent: The Earl of Uxbridge, Professional Bridge Burner Extraordinaire
Obligatory Music
Bit of a different one today. Today I’m going to present a very interesting story of a man who most people have heard of but who’s very unique story isn’t quite so well known. The Earl of Uxbridge and why Wellington hated him.
First Uxbridge, he’s this guy (the one that isn’t Wellington) from Waterloo.
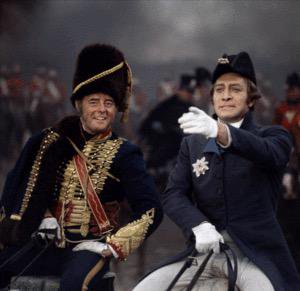 On the Left
Actually his name was Henry William Paget, Earl of Uxbridge but Uxbridge is how history remembers him.
Uxbridge was a swift rising British Officer in the Napoleonic Wars eventually commanding the British Cavalry in Spain under Sir John Moore. Moore was the British Commander in Spain before his death in 1809 after which he was replaced by Sir Arthur Wellesley, future Lord of Wellington. Uxbridge was actually quite a good Cavalry commander, being pretty successful in almost all his Cavalry exploits in Spain. British Cavalry was strange, Wellington once said
” I considered our cavalry so inferior to the French
from the want of order , that although I considered
one squadron a match for two French,
I didn’t like to see 4 British opposed to 4 French :
and as the numbers increased and order, of course,
became more necessary I was the more unwilling to
risk our men without having a superiority in numbers.”
British Cavalry was notorious for “over charging” beyond their initial target, as they did at Waterloo to disastrous results.
So a fine young Cavalry Commander with a pretty successful career, lots of friends and an Earl for a father nowhere to go but up right?
Well not so much, by 1809 Wellington wasn’t the only Wellesley in Spain. Wellington’s brother Richard was the Secretary of State for Foreign Affairs and his other brother was the British Envoy to Spain. Safe to say if you want to get ahead in the Peninsular War you get in good with the Wellesley’s.
What you don’t do is sleep with Henry’s wife, divorce your own wife then run off with the former Mrs. Wellesley. That would be a huge problem. No one would be that insane right, throw away over two decades of Military service including many years in active combat over a woman? Well Uxbridge did just that.
Now when you run off with the someone like Henry Wellesley’s wife it tends to have a ripple effect. Uxbridge of banned from operating under Lord Wellington, so the entire Spanish War, he spent the next 5 years sitting on the sidelines before the 100 Days Campaign of 1815. With great apprehension Uxbridge served under Wellington as Commander of the British Cavalry.
Wellington despised him and you could say that Wellington had the last laugh as at the end of the battle one of the last cannonballs fired from the French guns hit Uxbridge and took off his right leg prompting the very famous “By god sir I’ve lost my leg” “By god sir so you have”.
One last thing about Uxbridge.
Being a professional bridge burner and pisser-offer of important people Uxbridge dove head first into the Queen Caroline infidelity affair he made a very public statement when asked to shout “The Queen” then, being a troll, added “may all your wives be like her”.
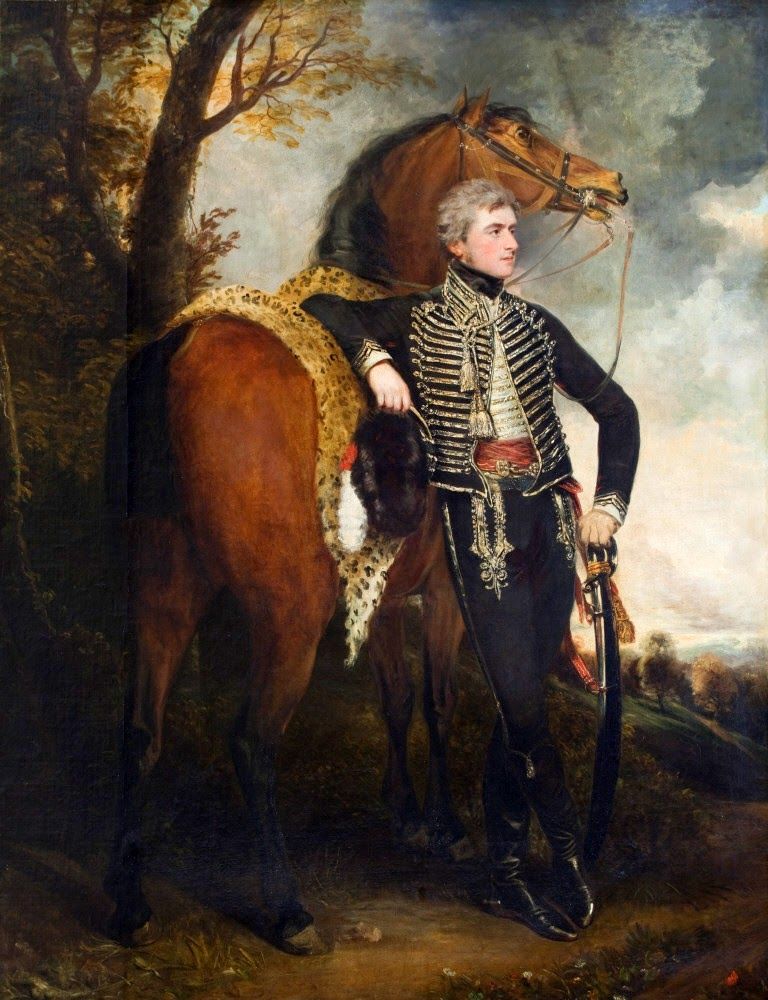
 Artists Recreation of Uxbridge's thoughts upon meeting Mrs. Wellesly
A Quick Update
Keep an eye on your paints kids
So with no Black to finish the Curassiers or Second Infantry Battalion I turned to the Artillery.
Here’s the basecoat done. These are both 6 Pounders which shows you just how much of a difference there is between Perry Miniatures and Warlord Games despite them both being essentially interchangeable.
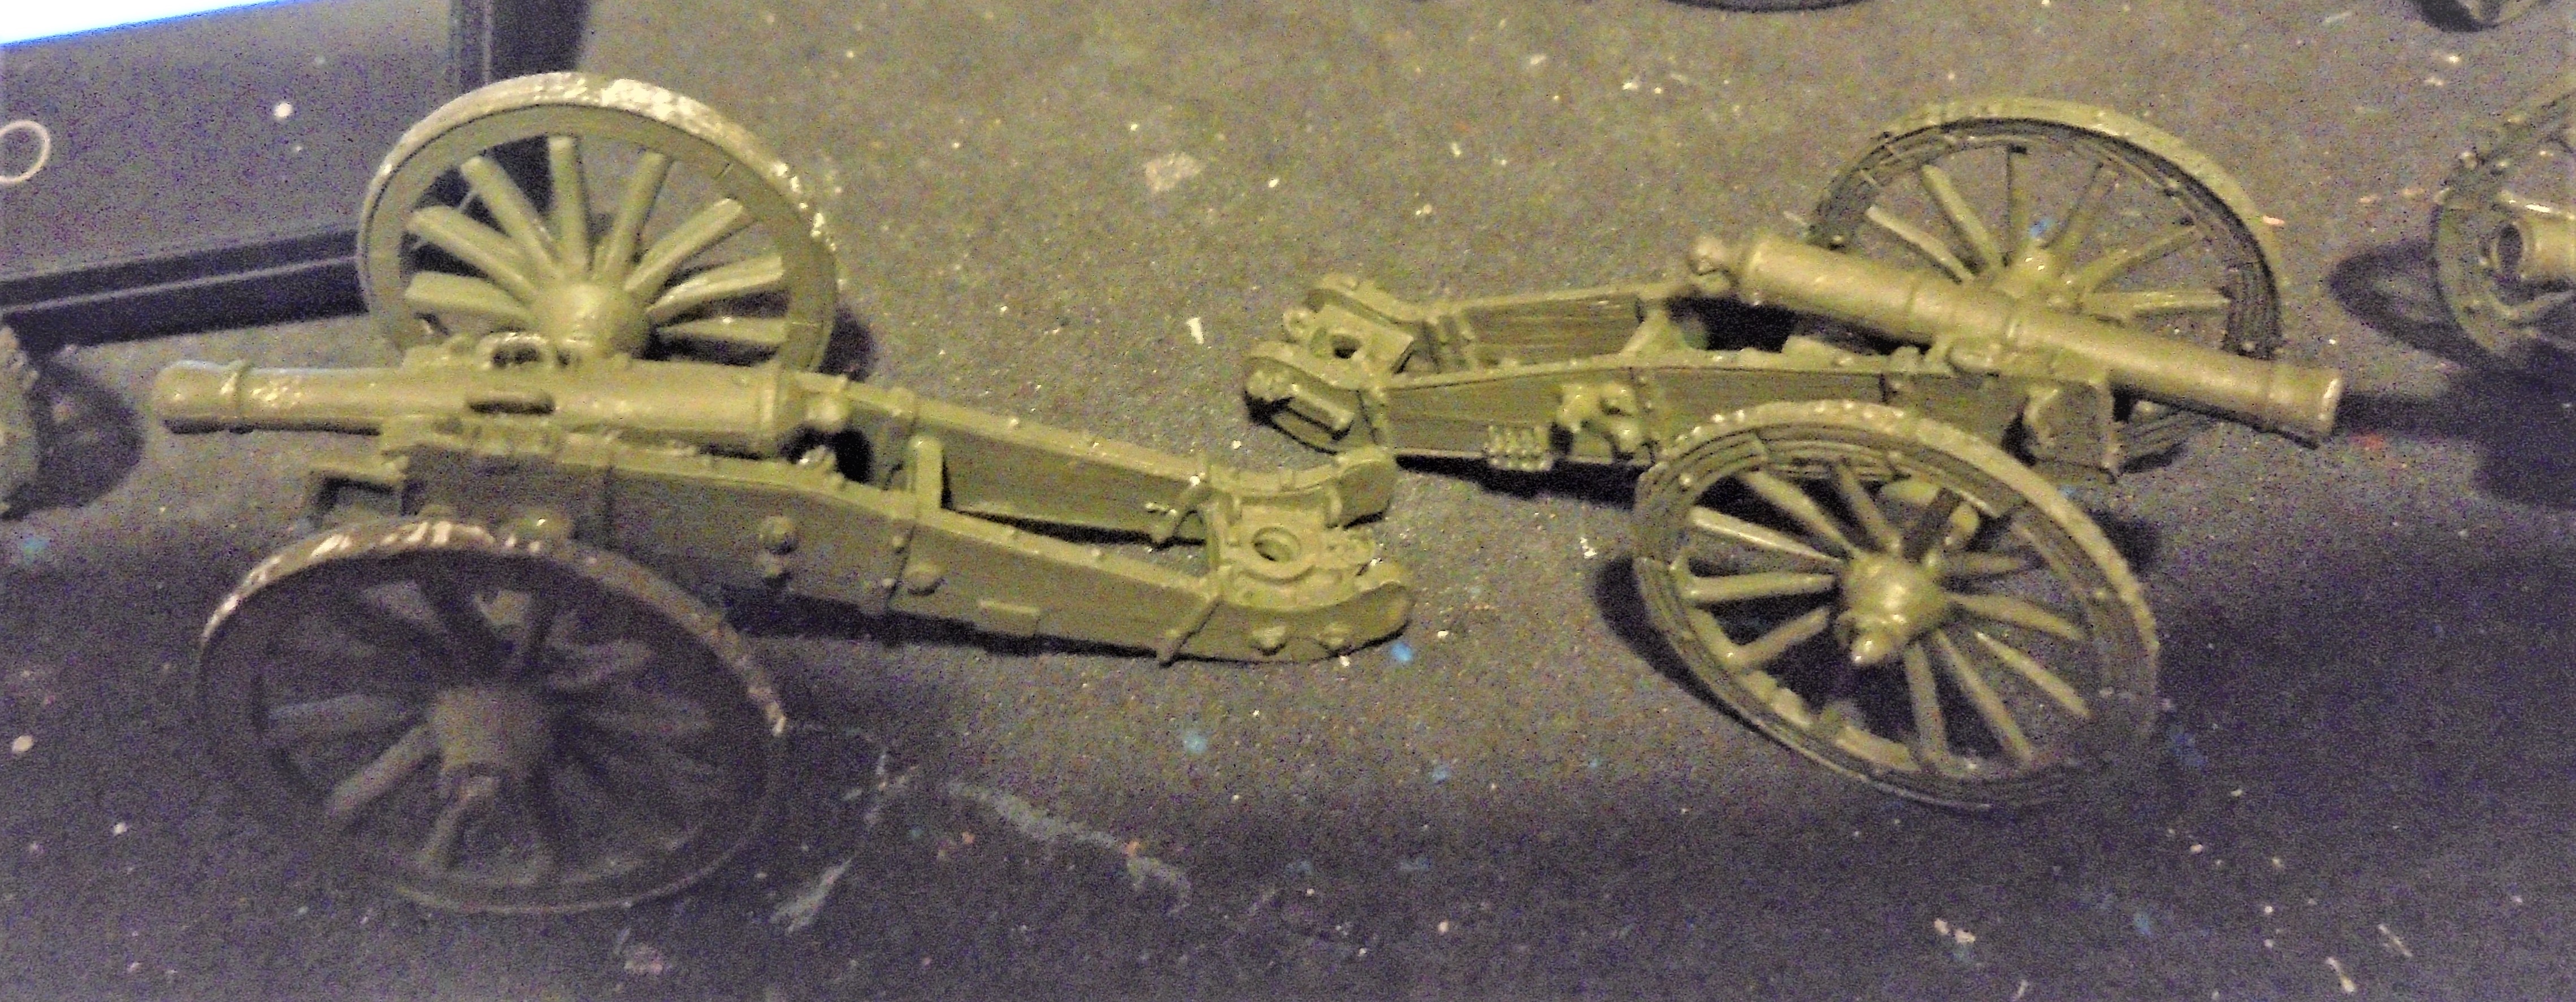 Warlord Left - Perry Right
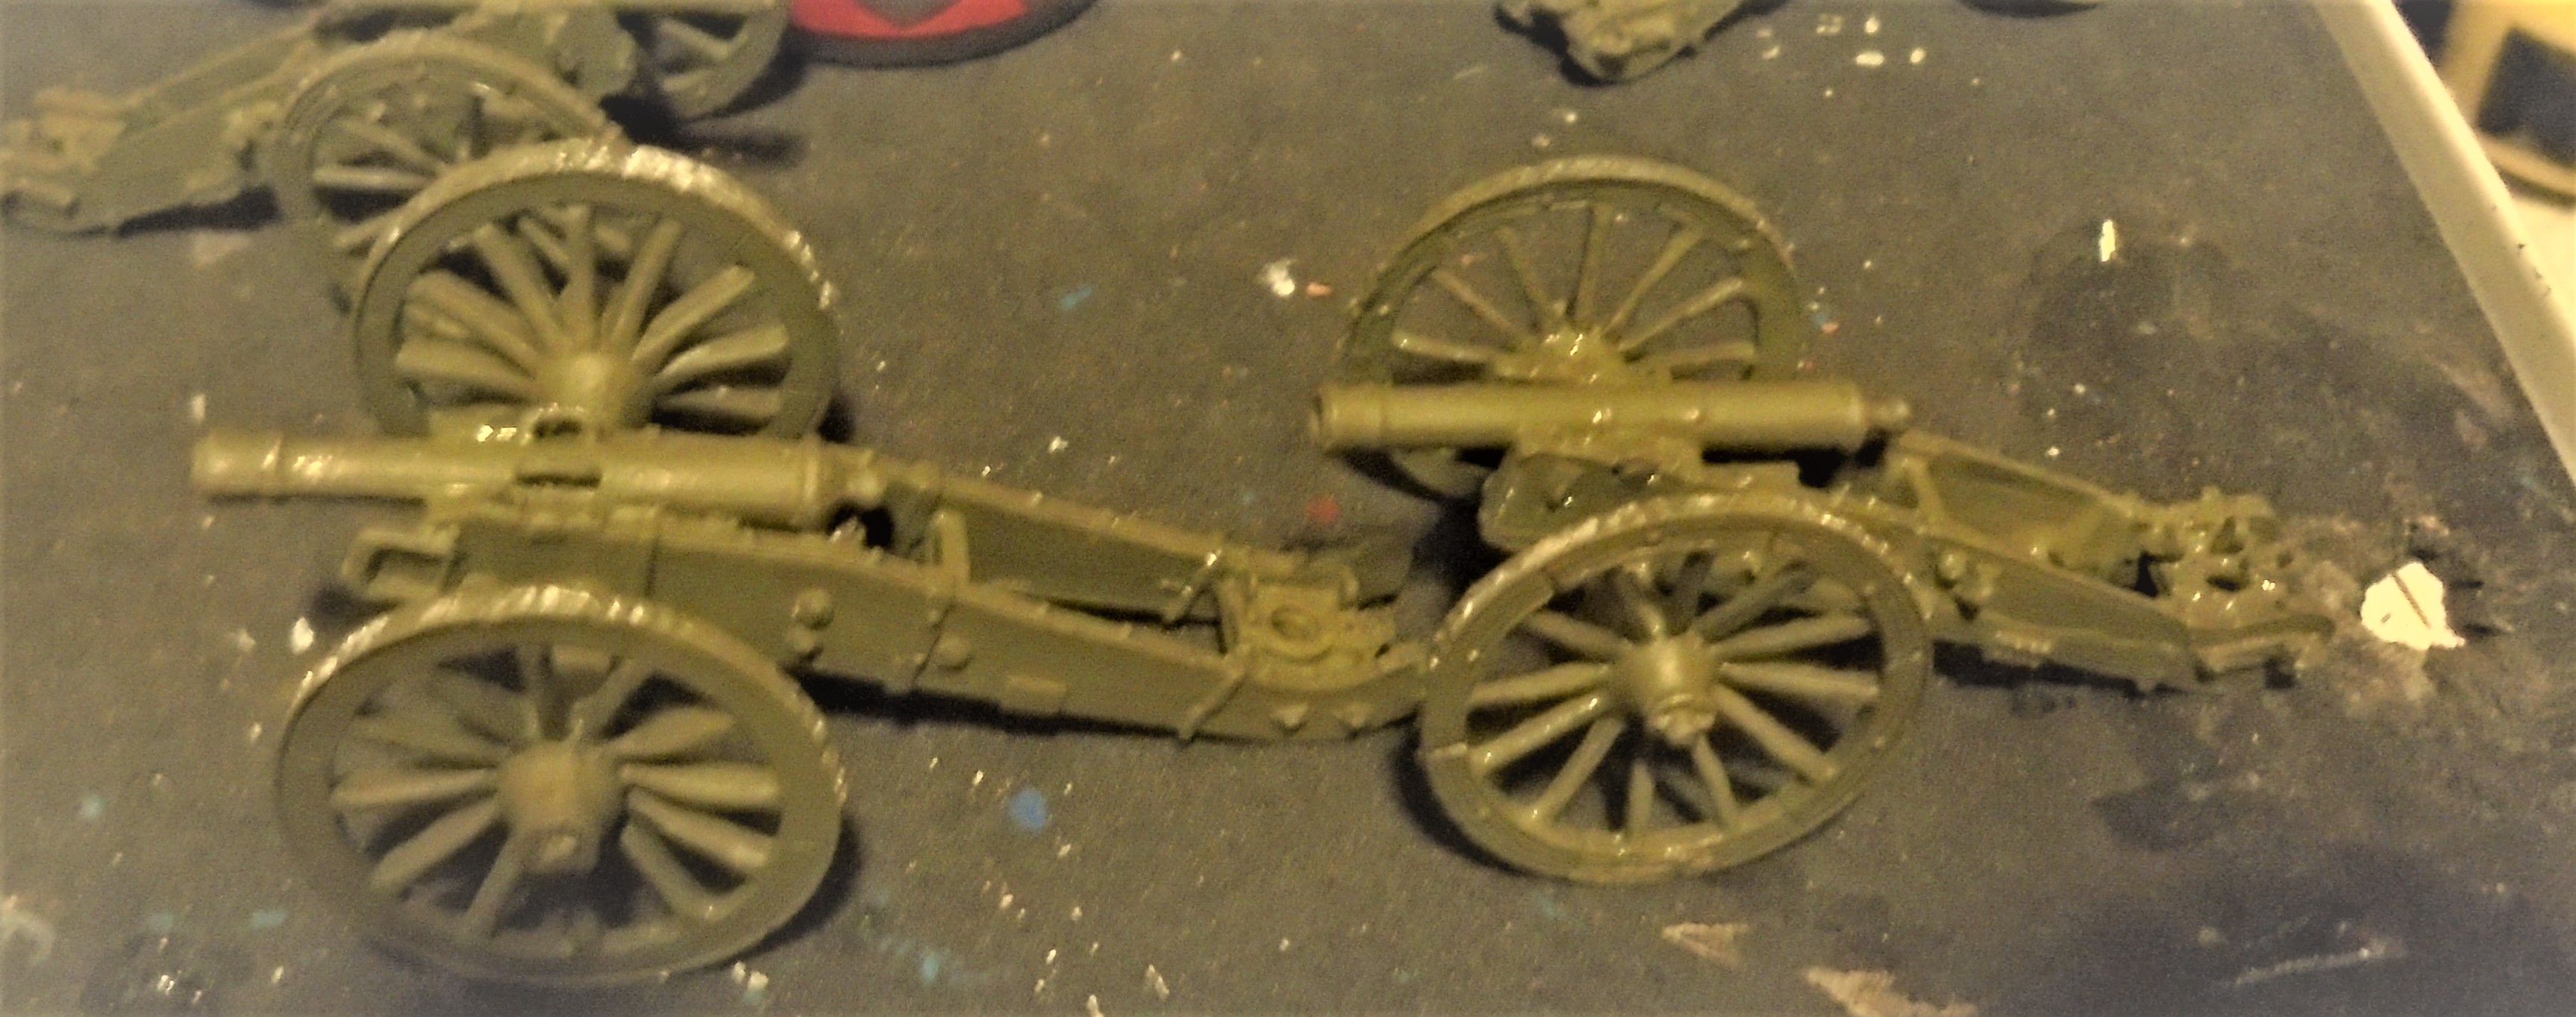 The smaller cannons were a gift from a friend (as were the Cuirassiers/Carabiners) from an old Prussian Project of his.
No big loss though in fact it makes it slightly easier for me. The Bigger Guns will be the famous 12 Pounders while the smaller guns will be the fr more common 6 Pounders.
There’s a myth out there regarding 12 Pounders during the American Civil War which were commonly known as “Napoleon’s”. Contrary to popular belief this wasn’t because of Napoleon. Well it was but not that Napoleon, aka Napoleon the First.
They were named after Napoleon’s Nephew who was also an Emperor of France and confusingly named Napoleon the Third. When he abdicated after the Battle of Waterloo Napoleon (The First) made his infant Child the Emperor of France and named him “Napoleon the Second”. So out of respect when his Nephew took power he took the name “the Third”.
The French really couldn’t make their mind up about the whole Republic or Monarchy thing.
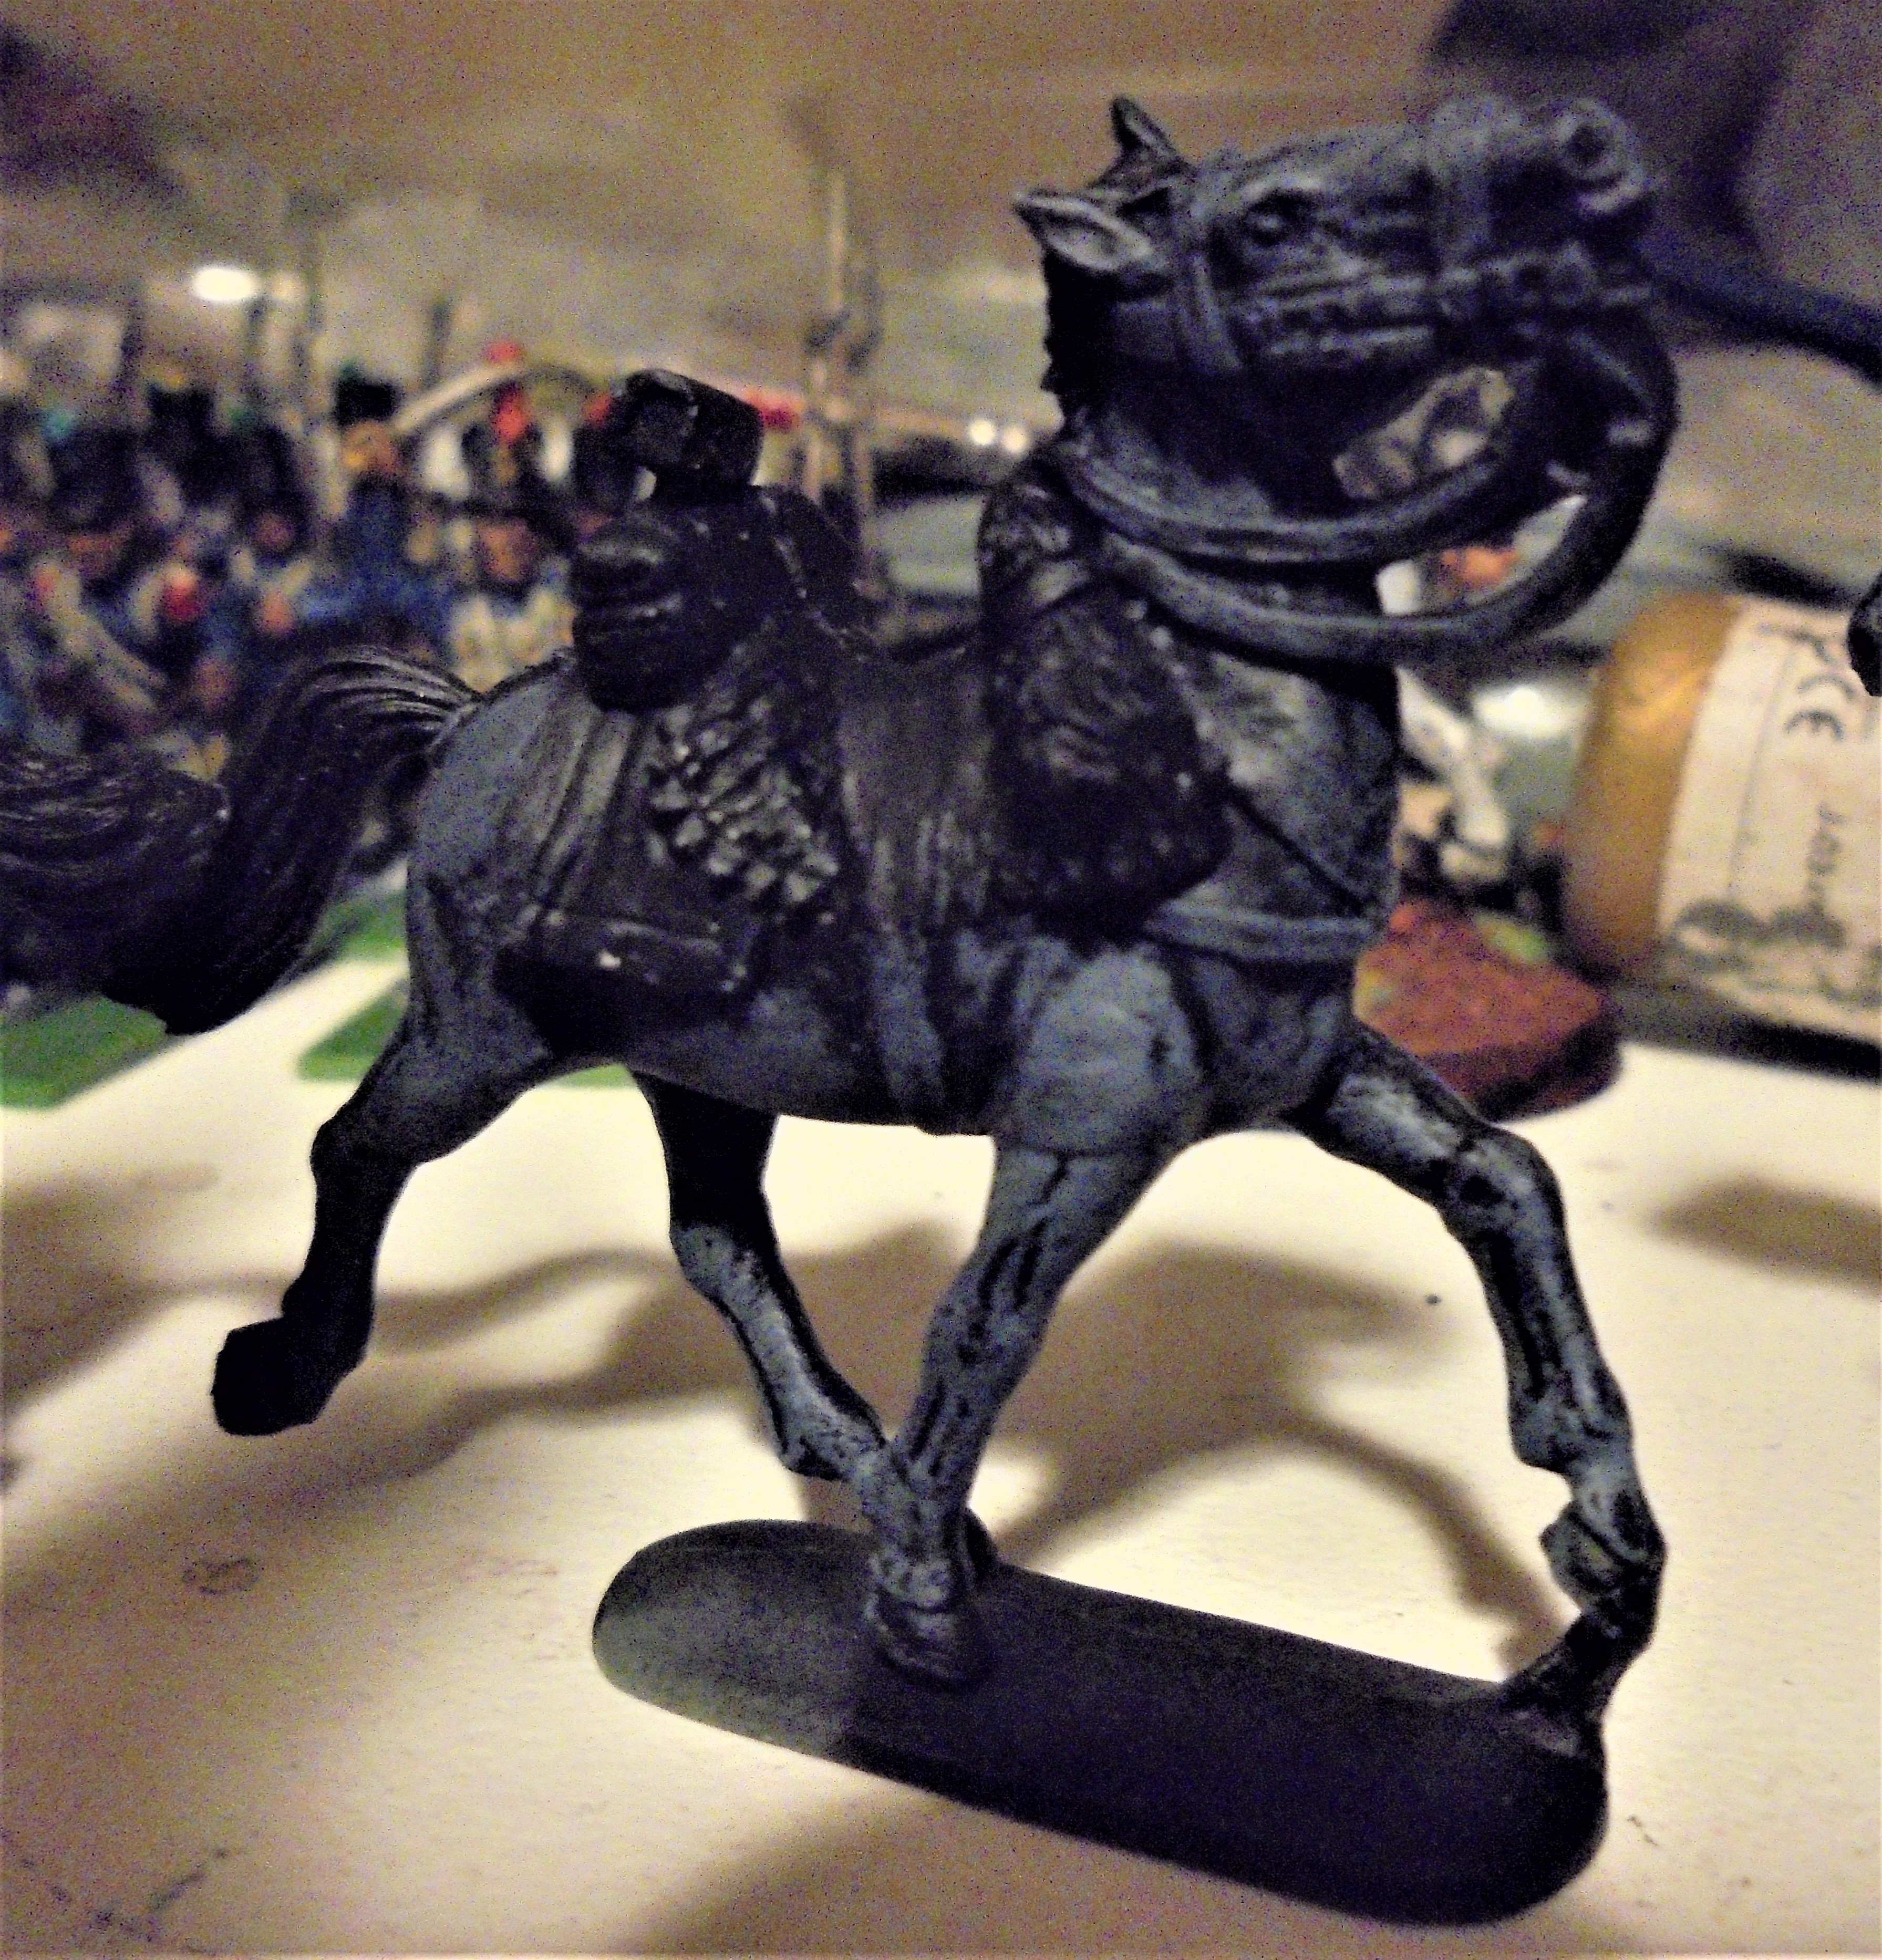 Here's the Culprit. Just need to paint the Straps and Hair
Feel the Very Ground Shake!!!
I’ve finally finished half of the Cuirassiers.
Now I just need to base them although I think I might leave that step for last so I can do it all at once and get a consistent standard across the whole force.
Cuirassier’s are pretty much the kings of Heavy Cavalry in most Napoleonic war games. In Sharpe Practice they can take almost anything head on and still come out in one piece, in Black Powder their charge packs a massive punch while in Napoleon at War they force the enemy to re-rell off successful saves.
That being said if you want to take Cuirassiers in a Points Match game of Napoleon of War then they’ll cost 500 Points (Regular game is 2000) for only two Squadrons so use them wisely.
That’s all for now, back to the Infantry for a while I think.
Let me know in the comments below if there’s anything in particular you’d like to see from this project in the future.
The next post will be some more mechanics of “Napoleon at War” plus hopefully some painted Artillery.
Make Ready! Present! Fire!
A Brief Explanation of Shooting in "Napoleon at War"
Time for another breakdown of “Napoleon at War” this time we’ll look at shooting, casualties and how this enhances the overall feel of the game.
Shooting is very standard. If you’re an infantryman with a gun your range is 6 Inches. That’s it. Rifles, Light Infantry and Russian Conscripts doesn’t matter they all fire 6 inches.
Also, if you’re within 6 inches you must fire or at least you must declare you’re firing even if you don’t actually want to fire. Basically, if you’re within 6 inches of an enemy you must declare you’re firing at that unit even if you then choose to not roll any dice, this is more important later when we get to counter firing.
Hitting is also straight forward, everything hits on a four. From Conscripts to Guard they all hit on fours. Elite units get extra dice to represent their superiour drill while poorly trained units must reroll successful hits but still the target is four.
Being hit is again very simple and works on the four-plus mechanic. Four hits automatically remove a base while one to three hits mean you must take a save. You can’t play “Musical Wounds” and turn six hits into six save attempts, six hits are a dead base and a save roll.
Saving is easy and there’s a simple trick to easily know your save roll, number of hits plus one. (For those mathematically inclined the formula for that is (S=n+1 where S is the save roll and n is the number of hits, wow all those years of Uni and High School are starting to pay off ?)one hit is saved on a two, two hits are saved on a three and three hits are saved on a four and four hits are a kill.
But how do actually know how many dice to roll? It’s all well and good hitting and killing but it’s the dice that we’re all here for. Well this again is easy, no matter what type of infantry you are you fire 2d6 for each base if you didn’t move and d6 per base if you did move.
So your dastardly Russians advance into firing range of my noble (and mustachioed) Frenchmen, your Russian Peasants will fire a pathetic d6 dice per base whereas my glorious soldiers shall be getting a mighty 2d6 per base. The game encourages you to wait and gather your forces rather than just rush headlong into combat.
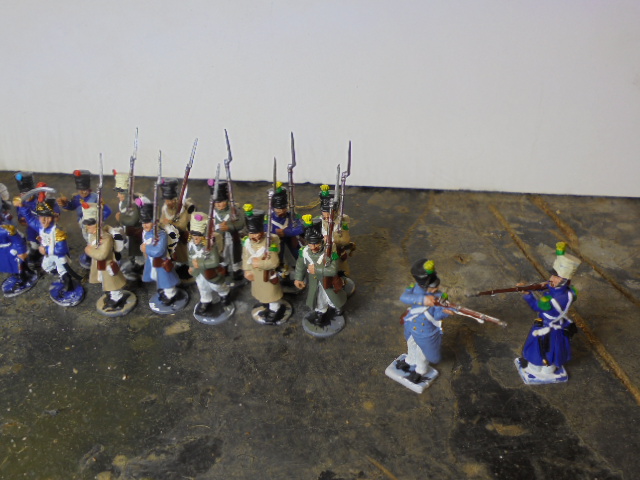
The eagle eyed amongst you may have noticed that while painting my French Battalion I also had two stands of two miniatures. Those are the units skirmish stands. Almost all units have two skirmish stands and these represent the thin screen of skirmishers sent out in front of the unit to harass the enemy and engage the enemies’ skirmishers.
Each Skirmish stand reduces the enemies dice by one. If you have two skirmish stands then your opponent rolls one or two d6 per base as normal but removes one dice for each skirmish base. Skirmish bases can also be destroyed if the enemy rolls three of the same result when rolling to hit. So if the enemy rolls three ones that’s a skirmish base destroyed, there are no saves, and the same if the enemy rolls three fives, that’s a dead skirmish base and a four-plus save on a normal base. Skirmish bases do not soak up dice so three fives still cause casualties on the “parent” unit and kill a base.
A unit can never have more skirmish bases than “parent” bases. So, a unit with one “parent” base and two skirmisher bases must remove one of the skirmishers.
Last thing about skirmishers, if you’re firing into the enemies’ flank rather than take away dice (since the enemy can’t fire back) they add d6 per base to your firing pool. They also have a chance of panicking when charged by cavalry, but I’ll save that for the melee section
If a unit is fired upon (remember you must fire even if you decline to actually fire/roll the dice) then the target unit gets to return fire. Other units which have the enemy in their firing arc may also return fire in the form of Supporting Fire which adds a single d6 to the return fire representing a few men taking, unordered, pot shots or the unit returning fire being urged on by their allies’ presence.
Returning fire is exactly the same as normal firing except that the target must be the unit that fired at them. A unit may return fire and add supporting fire any number of times in a single turn.
Artillery are a little different to normal units. They still hit on a four-plus but can fire either canister or solid shot. Canister has a range of six inches so if your cannons are firing canister the enemies’ firing back.
Artillery fires just like infantry so each base rolls 2d6 (3d6 for canister) halving the dice if the unit moved. However, each hit on the target unit then gets rerolled and on the result of a six the next unit behind them received a hit continuing until all potential targets are hit or anything but a six is rolled. This represents the shot ricocheting past the original target or just plain panicking units in their arc of fire, casualties aren’t all necessarily dead they could also be troops who fled or troops who remain in formation but who are essentially useless to their commander.
Speaking of Commanders, where would a Napoleonic Wargame be without the prospect that our brave (and pretty essential) Officers could take one for the team?
If an officer is attached to a unit which took fire, whether hits were caused or not, rolls 2d6 and on an eleven-plus the officer is wounded/killed. Officers within six inches of the enemy must also roll to see if they are hit.
If the unit a Commander is attached to is killed he is assumed to be either killed, wounded, trying to rally the unit or as the Vietnam guys would say “fragged”.
Now we’ve all seen Sharpe (if you haven’t stop RIGHT HERE and go watch it or even better watch it and read the books or audiobooks) so we all know that a Rifleman can be a death sentence for an enemy officer.
If an officer has to roll a casualty check and the unit which caused the roll, either by being within six inches or being a unit that fired on his “parent” unit, is killed on a ten-plus rather than an eleven-plus.
This isn’t just a Rifleman rule, it can also apply to Prussian Jagers or French Tirailleurs. If the unit had a reputation for Marksmanship they normally have this rule.
Lastly the easiest one, Cavalry. Cavalry don’t play nice, see normally the enemy kindly stands there, neat and tidy and takes it like a man. Cavalry have this weird habit of running away or at least running out of firing arcs.
Cavalry can take a test, the score depends on the type of cavalry, and if they pass they can make a free move out of the units firing zone. They can do this as many times as necessary in a turn so long as they keep passing their tests.
The score a cavalry unit needs to beat in order to make this maneuver depends on its historical performance. Polish Lancers are better at it than British Hussars.
So that’s pretty much it for shooting. More painted minis coming soon (I’ve recently acquired the Lannister half of “A Song of Ice and Fire” so that’s very distracting).