


40k Space Wolves & Daemons Boot Sale Bargain – Help Lawnor identify and fix please (Spring Cleaning)


Recommendations: 372
About the Project
I was helping my karate club run a stand at a school fete that had a boot sale of 6 cars. While handing out leaflets at the boot sale I saw a box and some drawers with some GW in. I asked how much and they said £10. I assumed per tank, but then thay said, "for the lot, not just the box. You can tell we don't want to take it home again". I don't play 40K and don't know too much about it, but how could I say no? I don't know what all of this is, and I don't know what parts are mising. Please help me return this to fighting shape.
Related Game: Warhammer 40,000
Related Company: Games Workshop
Related Genre: Science Fiction
Related Contest: Spring Clean Hobby Challenge (Old)
This Project is Completed
I was helping my karate club run a stallat a school fete that had a boot sale of 6 cars attatched to it. While handing out leaflets at the boot sale I saw a box with some GW in it, and a couple of drawers too. I asked how much it was and they said £10. I assumed per tank but then they said it was for everything, not just the box. I don’t play 40k but how can I say no to that when I’ve already seen a few tanks and 2 winged deamons and a spiderbot.
I’ve spent the last half an hour or so photographing the bigger items and I’m about to list them here. Could you please help me work out whats what, and work out whats missing from them. I’d love close up images of missing parts. I have a large bits box. I might have the parts, if I can identify them.
Does GW have some way I can order missing parts?
Some of these models are thick with dust. Is it OK to just run them under the tap and take a toothbrush to them, or does that just make the durst run in to the hard to reach places, making things worse?
Any thoughts on stripping the paint from the tanks? They’re too big to fit in a jam jar of Dettol. Or will I be fine just priming over the top?
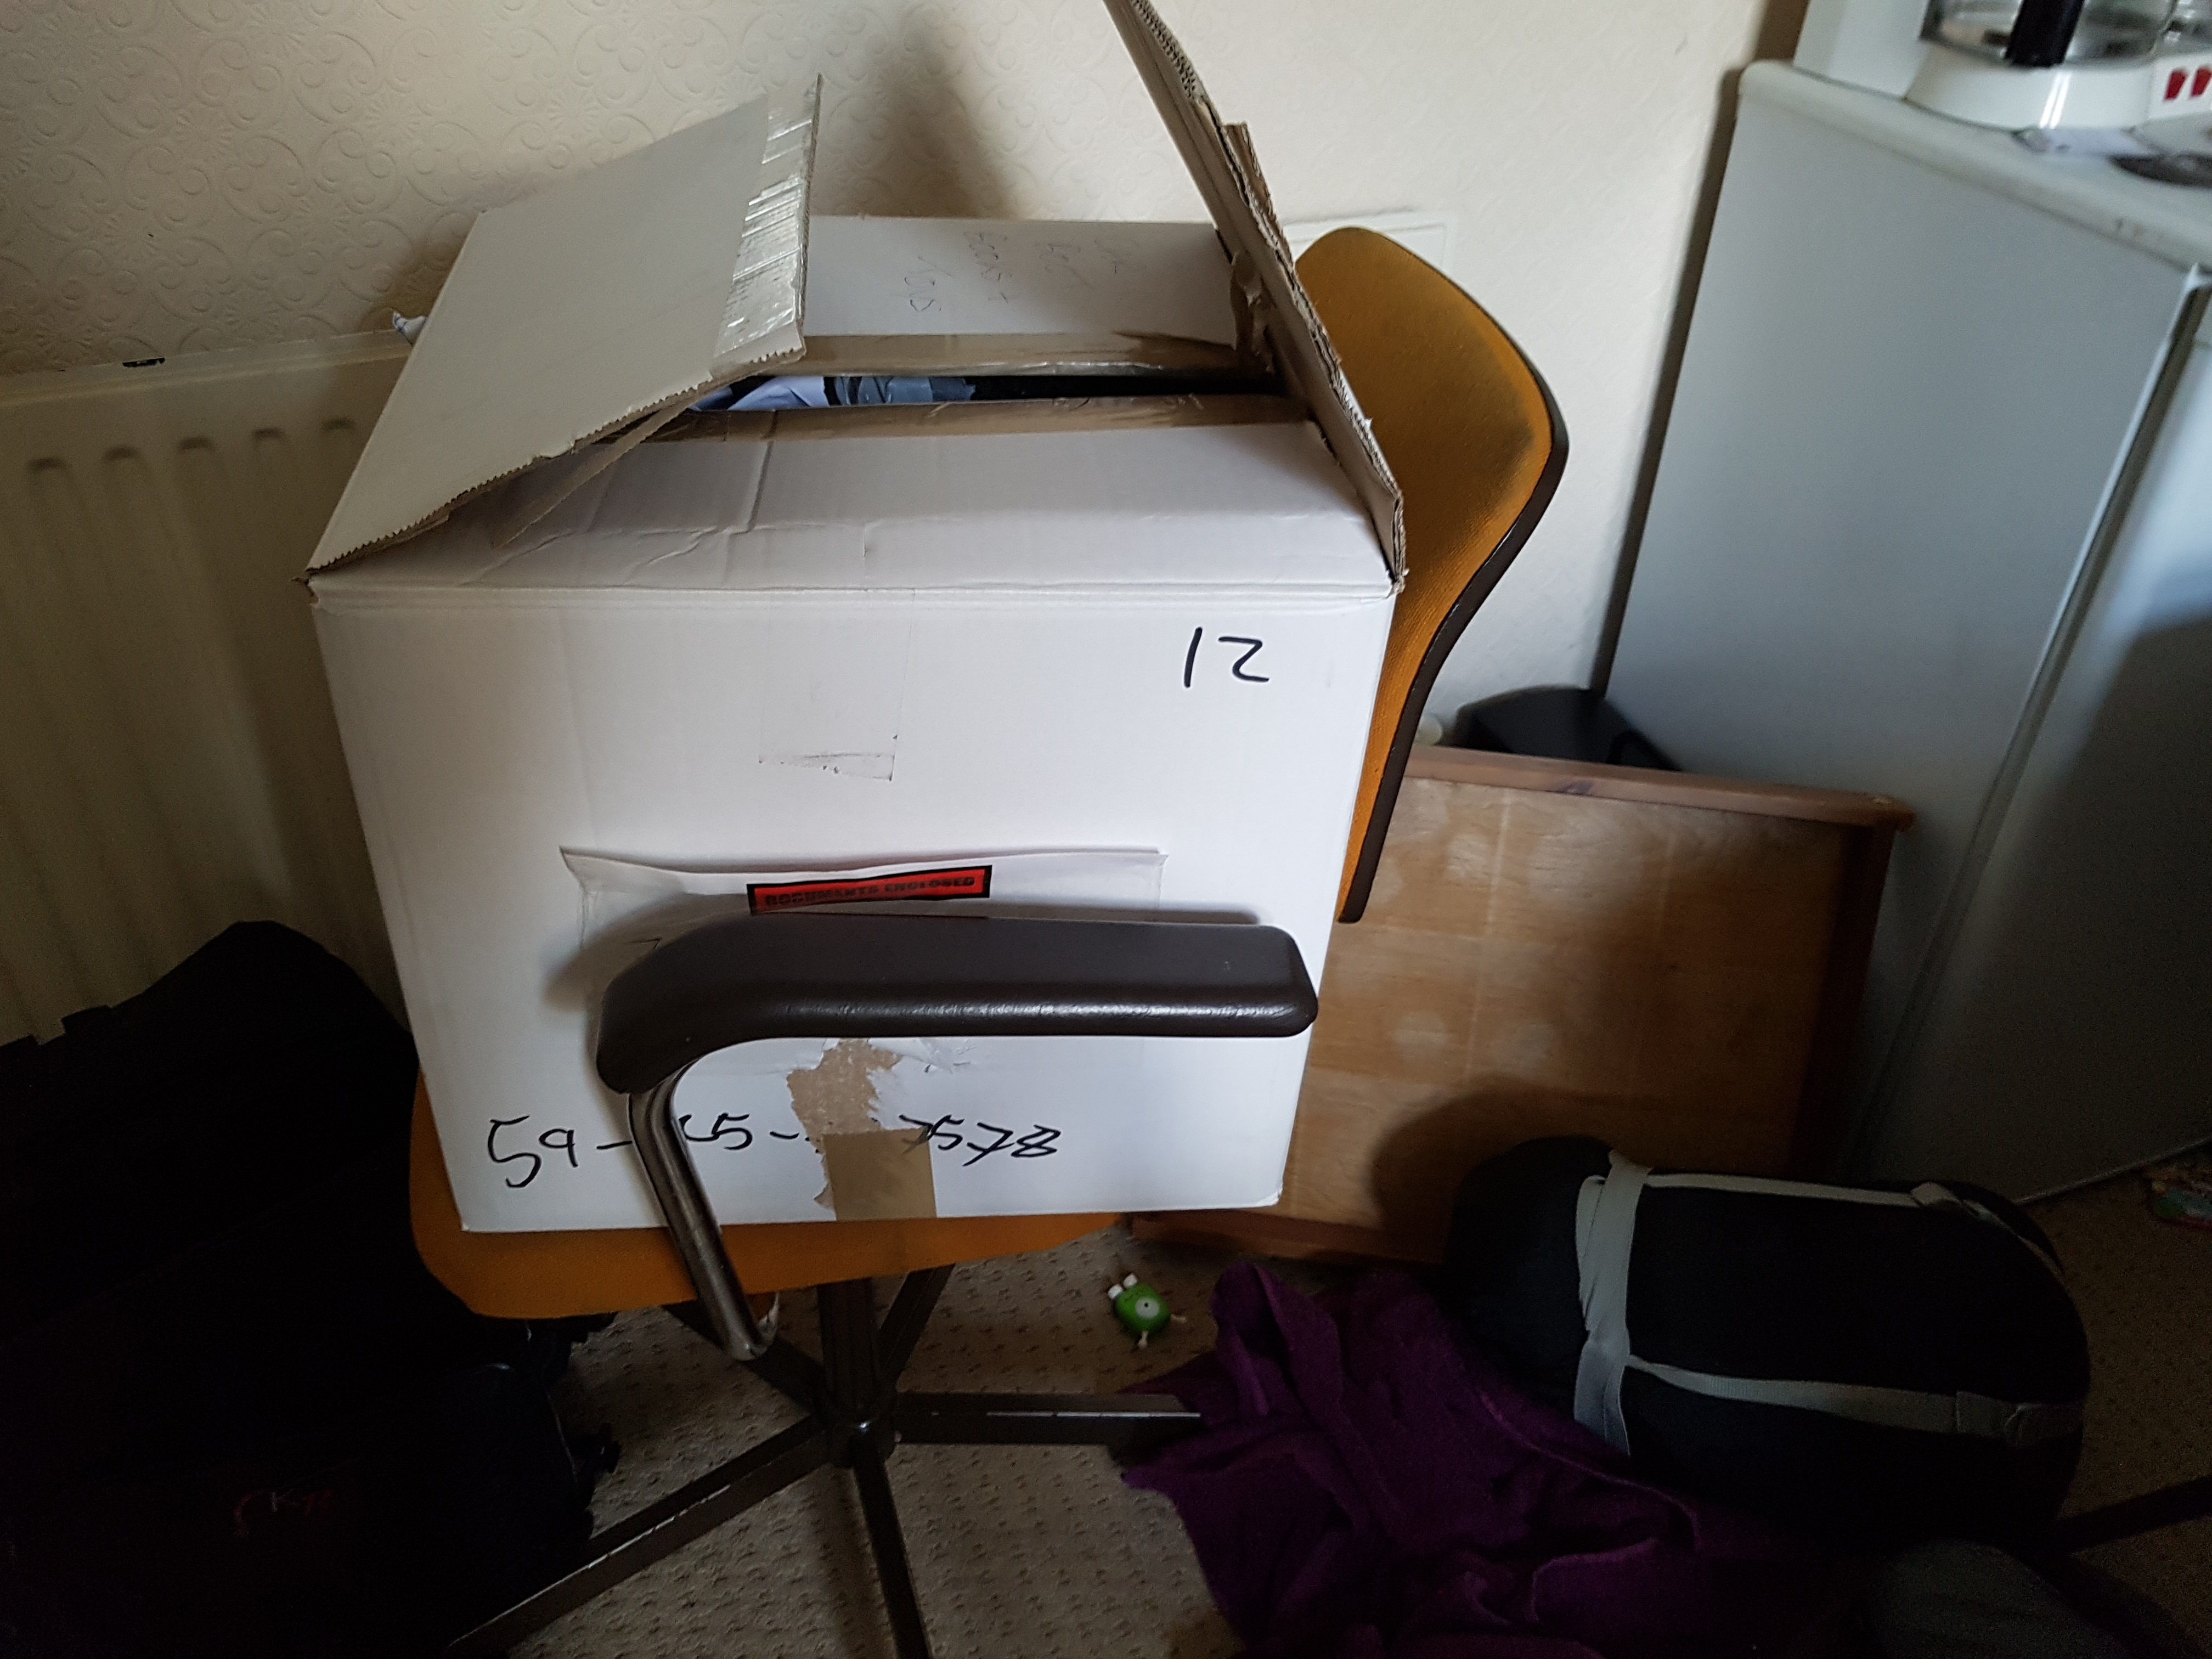 The Box. I managed to get it all in there, but the lid isn't going to close all the way without something breaking!
Soul Grinder
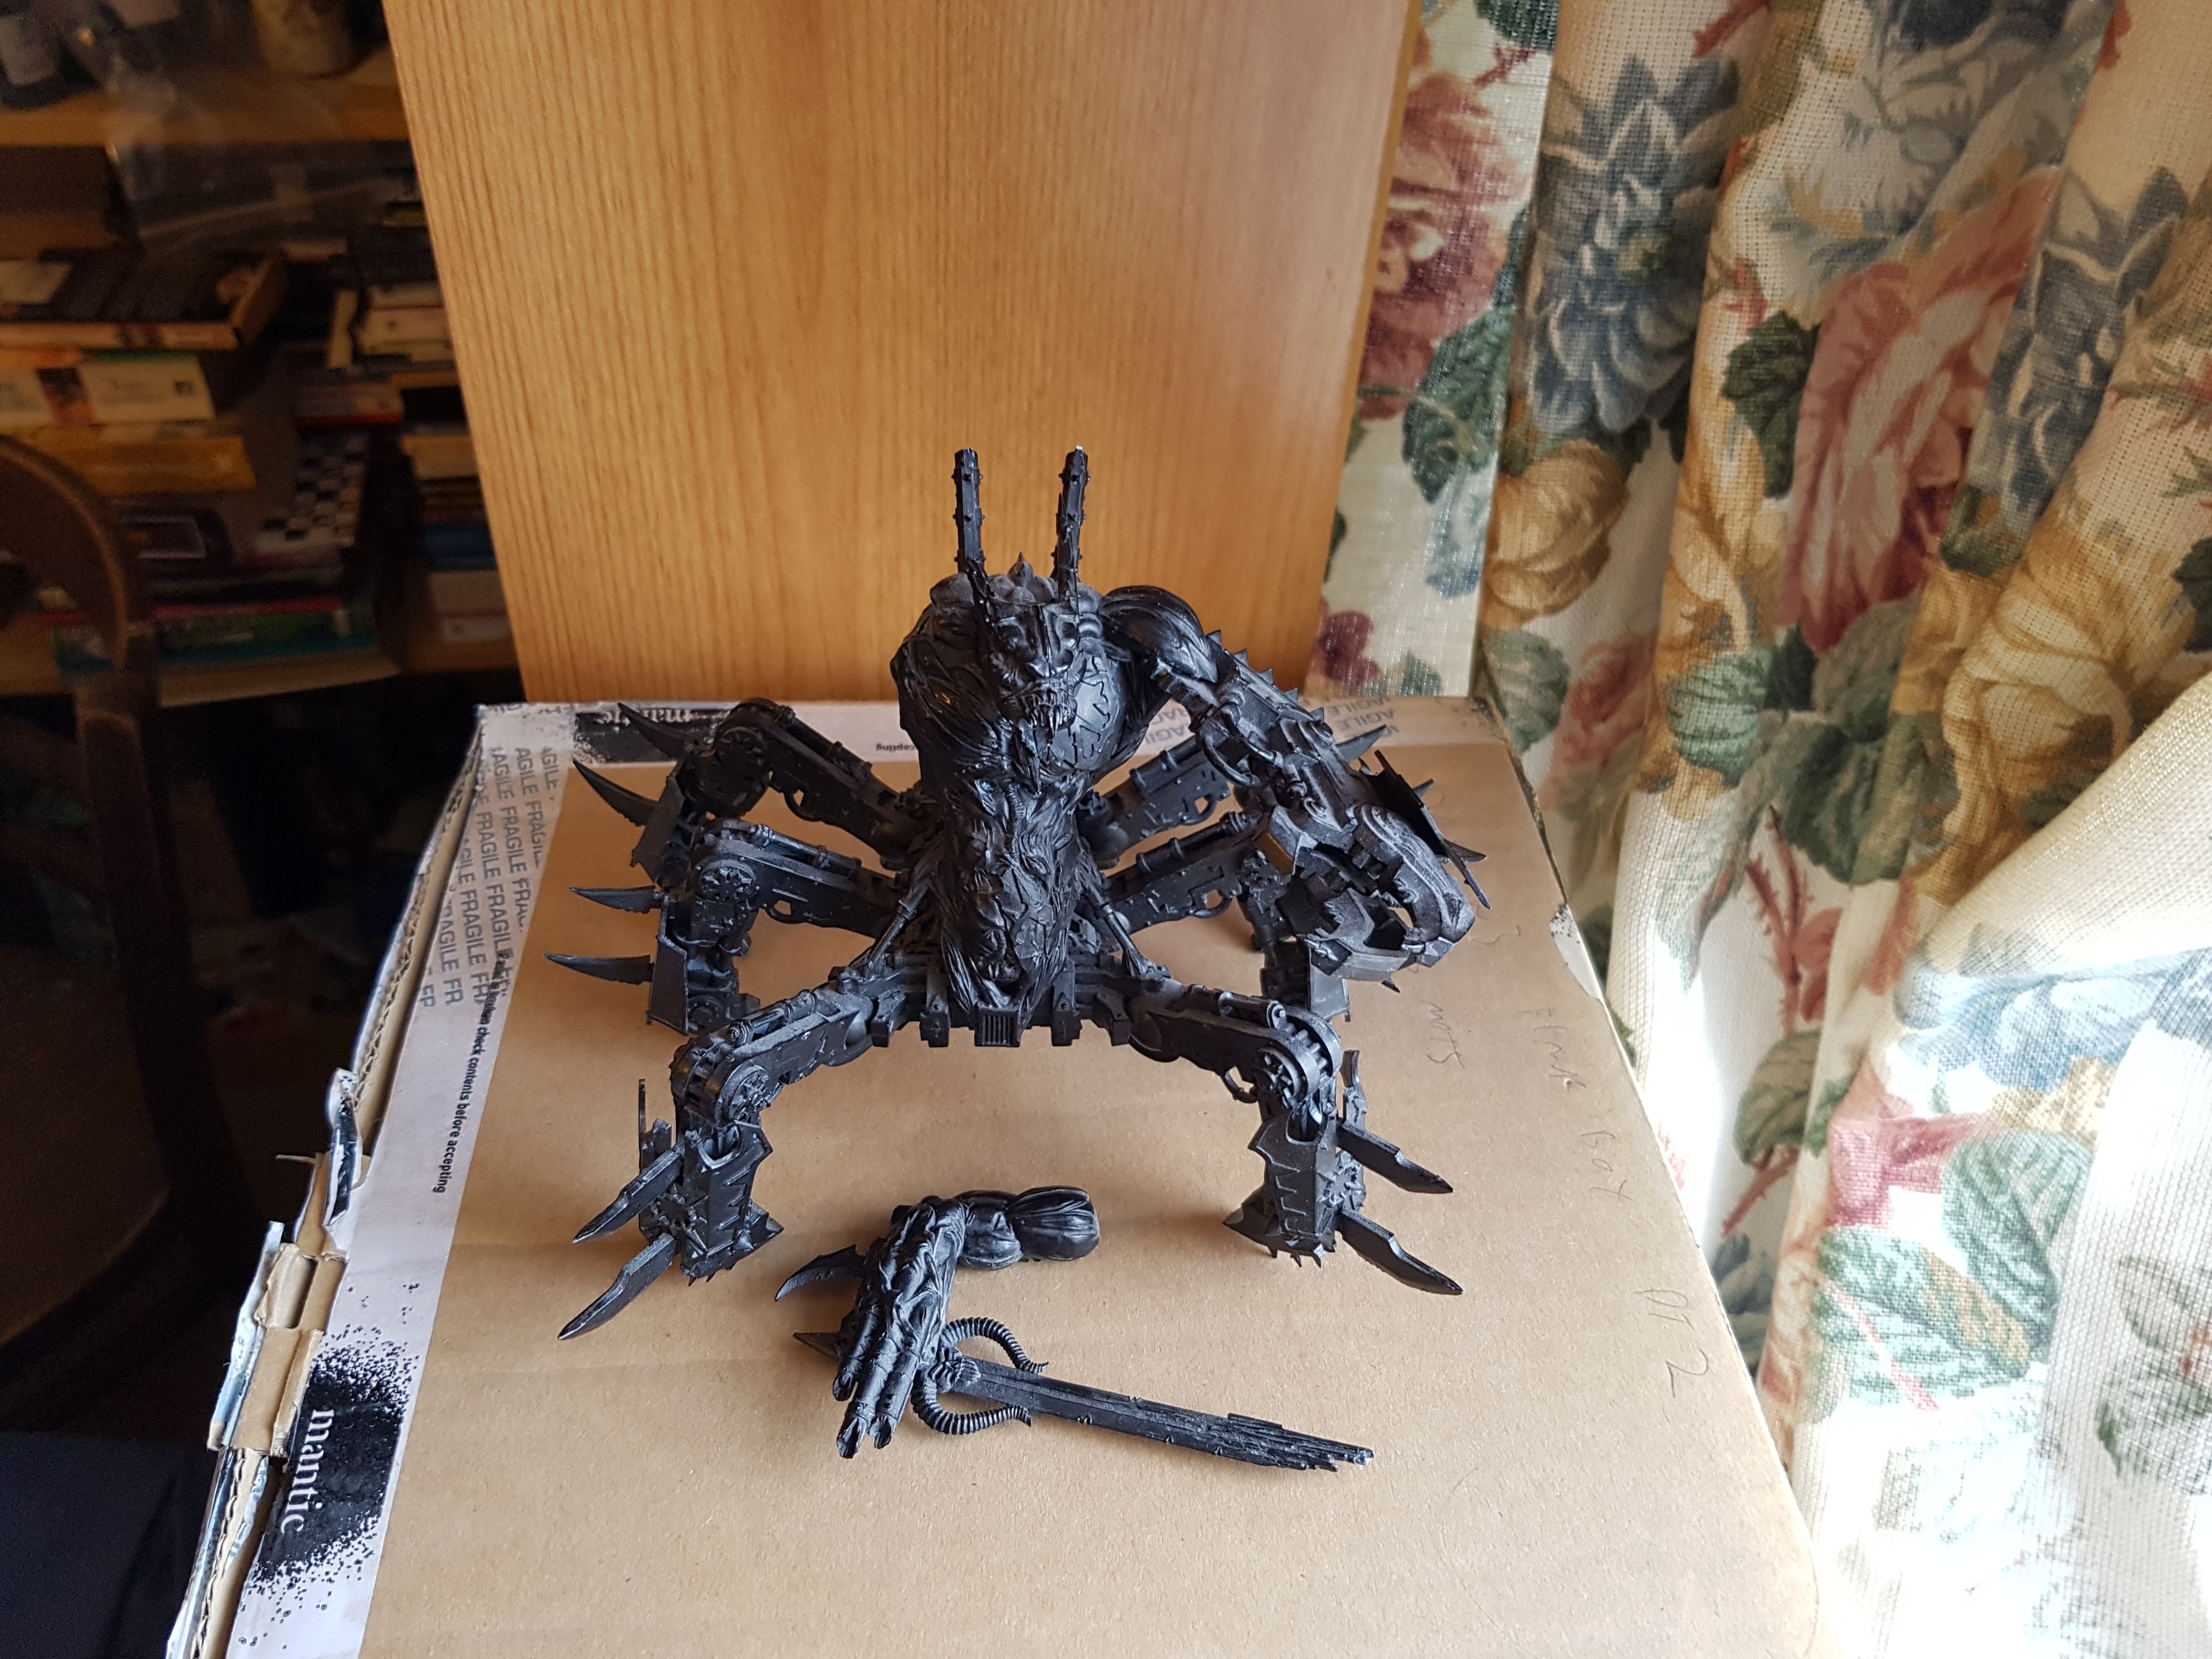
https://www.games-workshop.com/en-GB/Soul-Grinder
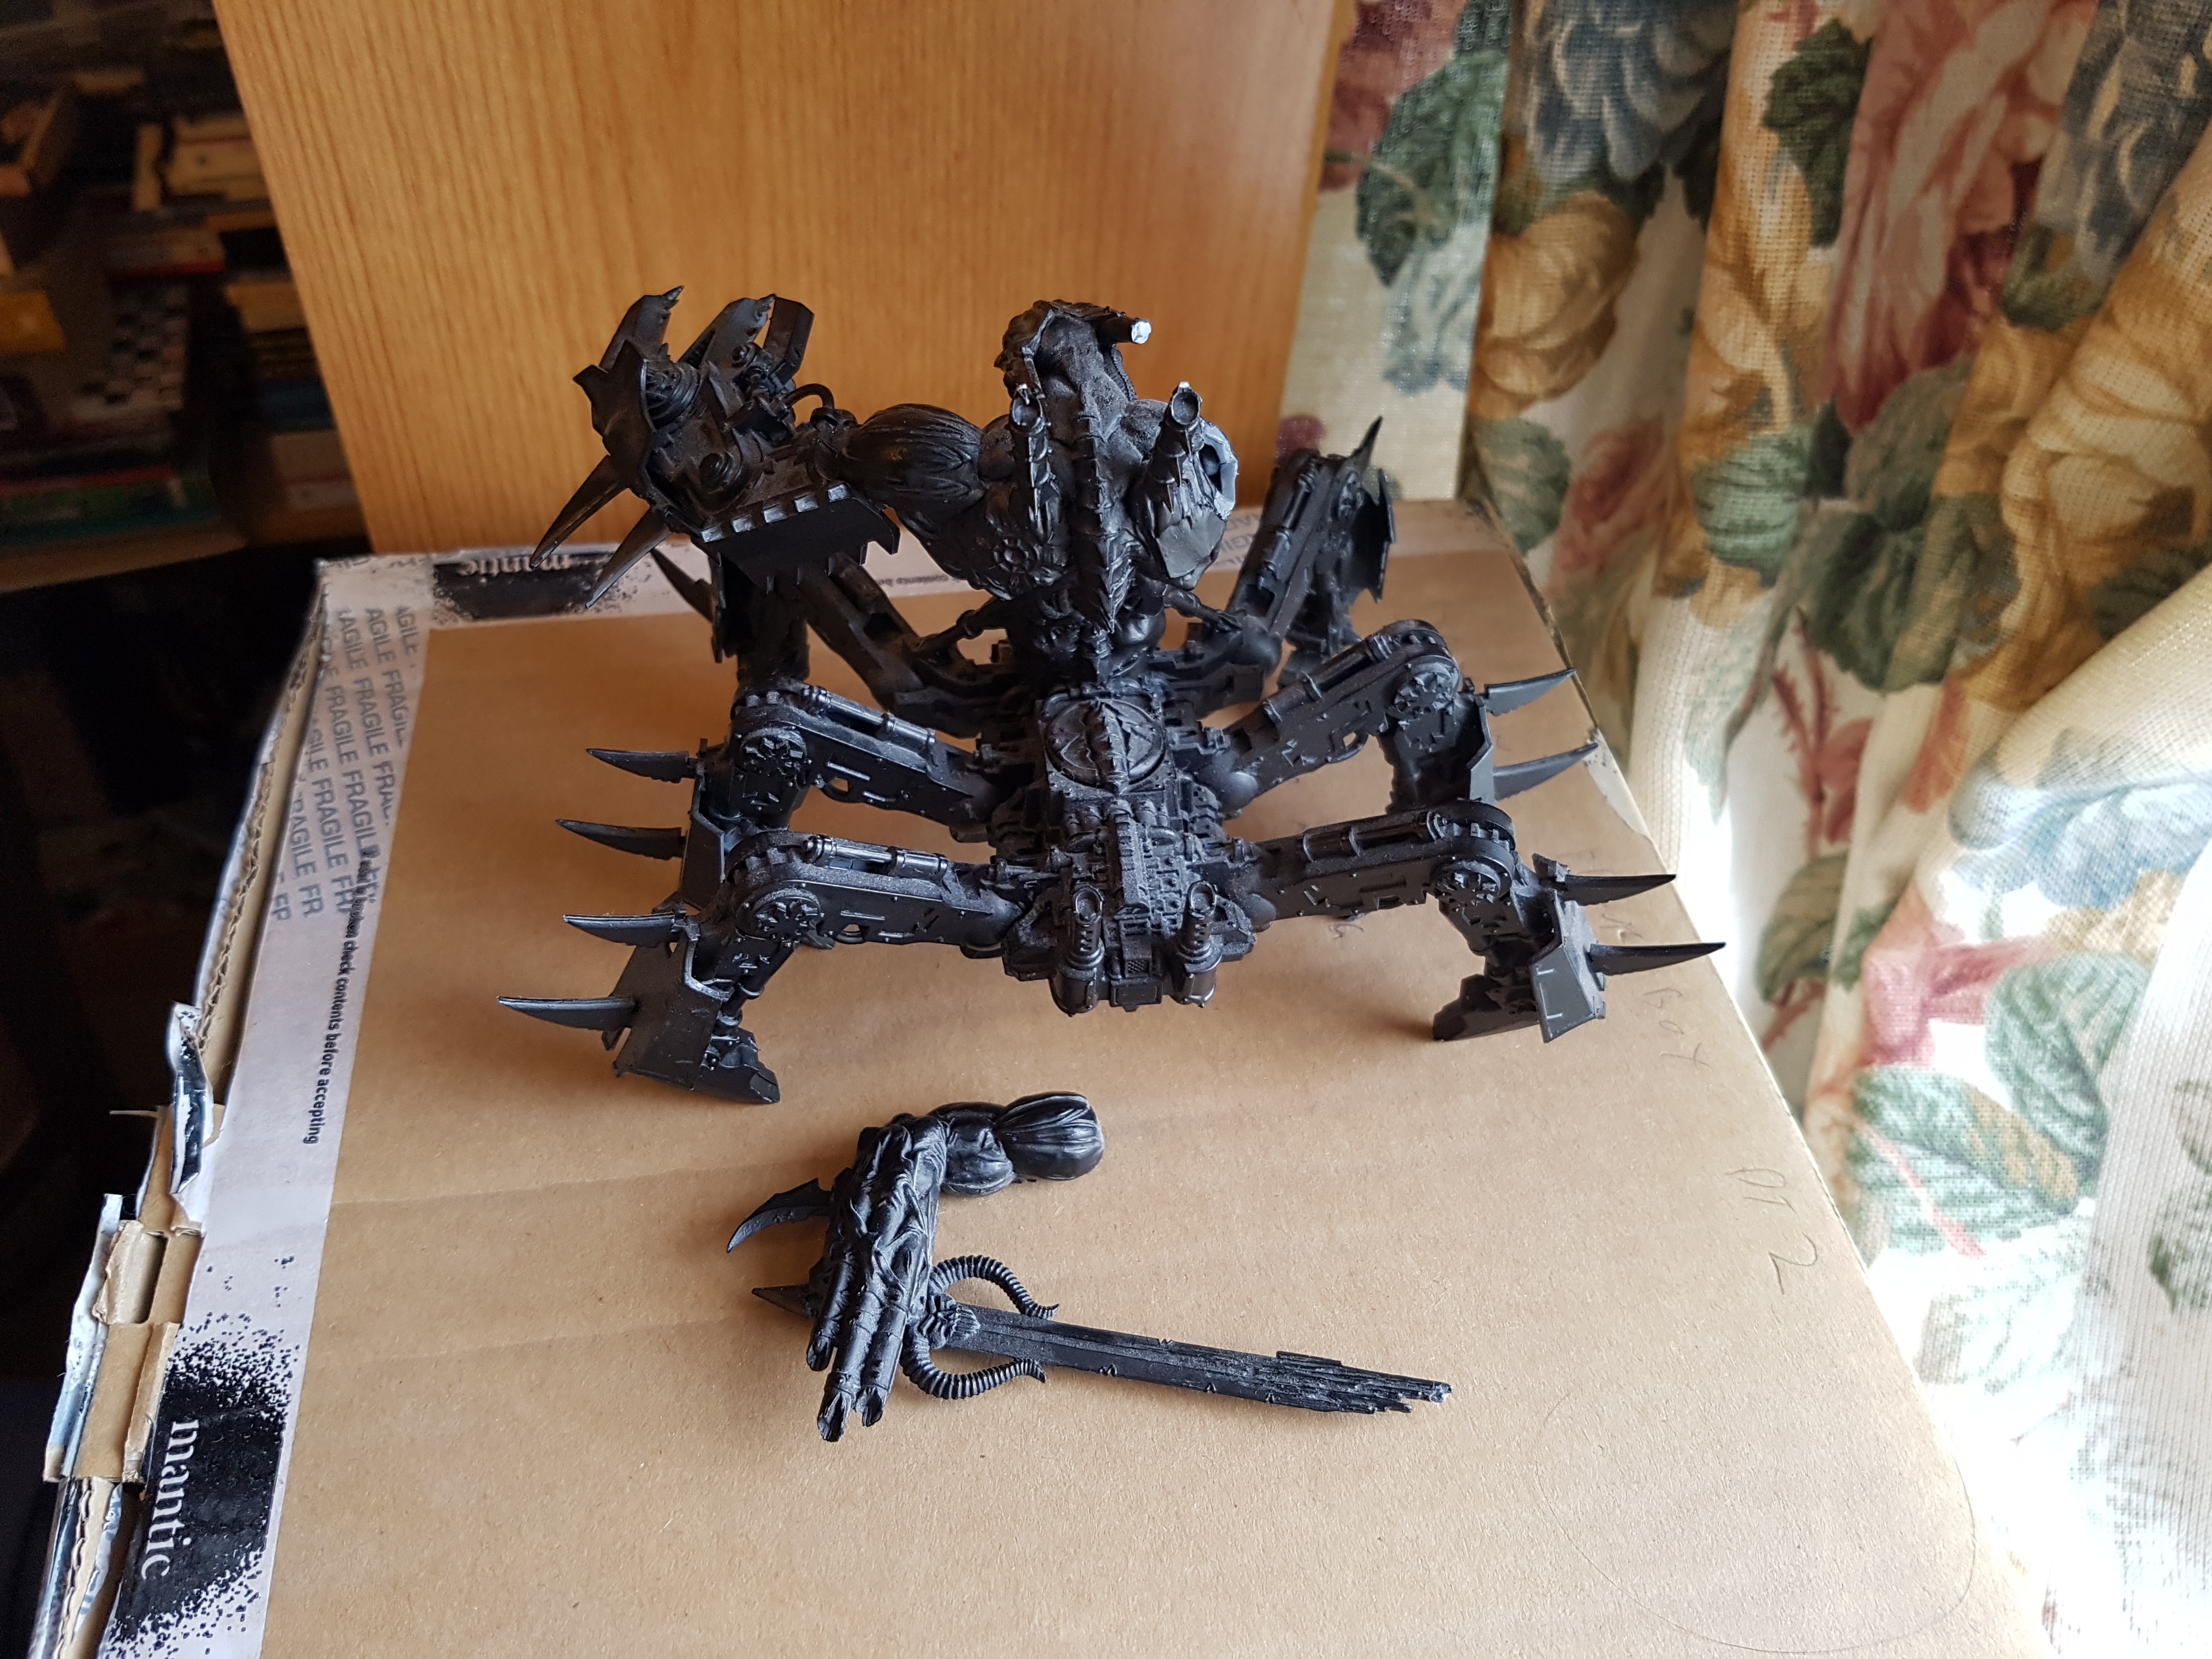
A Soul Grinder Chaos Daemon. Possibly with a Khorne affiliation? I don’t know if it matters or if its down to the paint scheme? When i first saw him his arm was missing, but I found it once I got home. One of his antenna has snapped of but I may yet find it. if I dont, I imagine a damaged daemon is normal anyway. hes not damaged, he’s custom modded. Right?
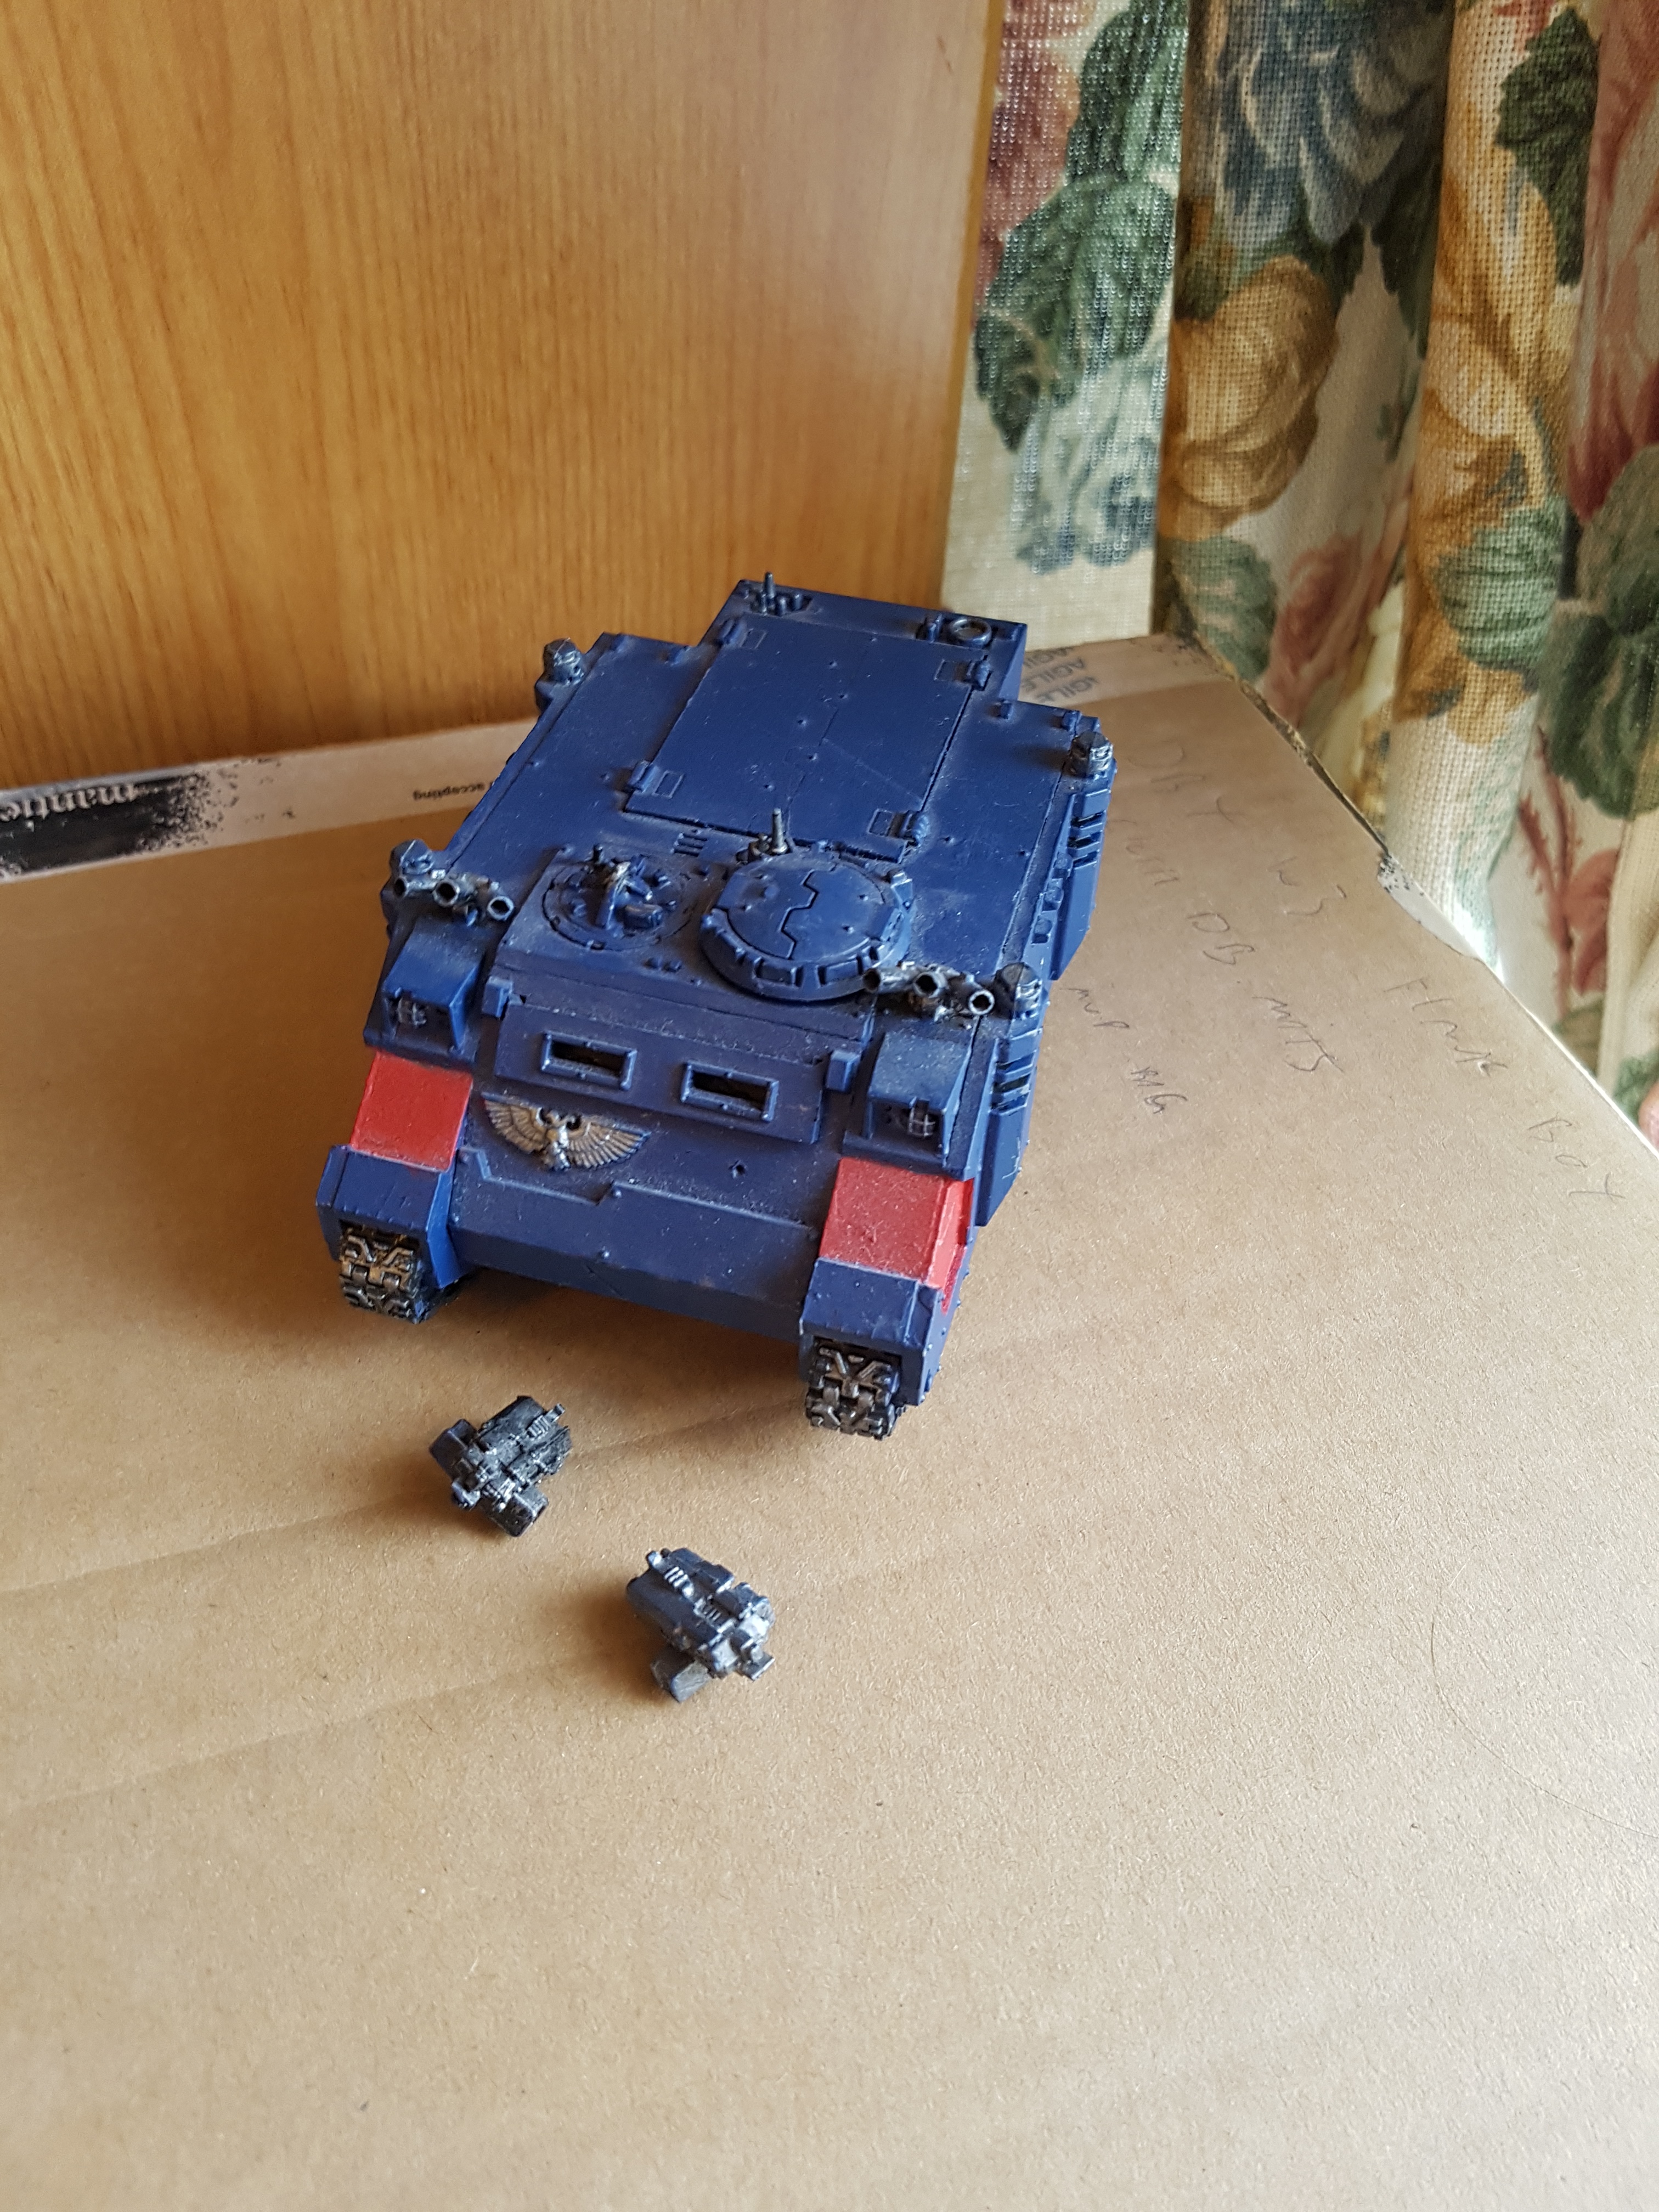
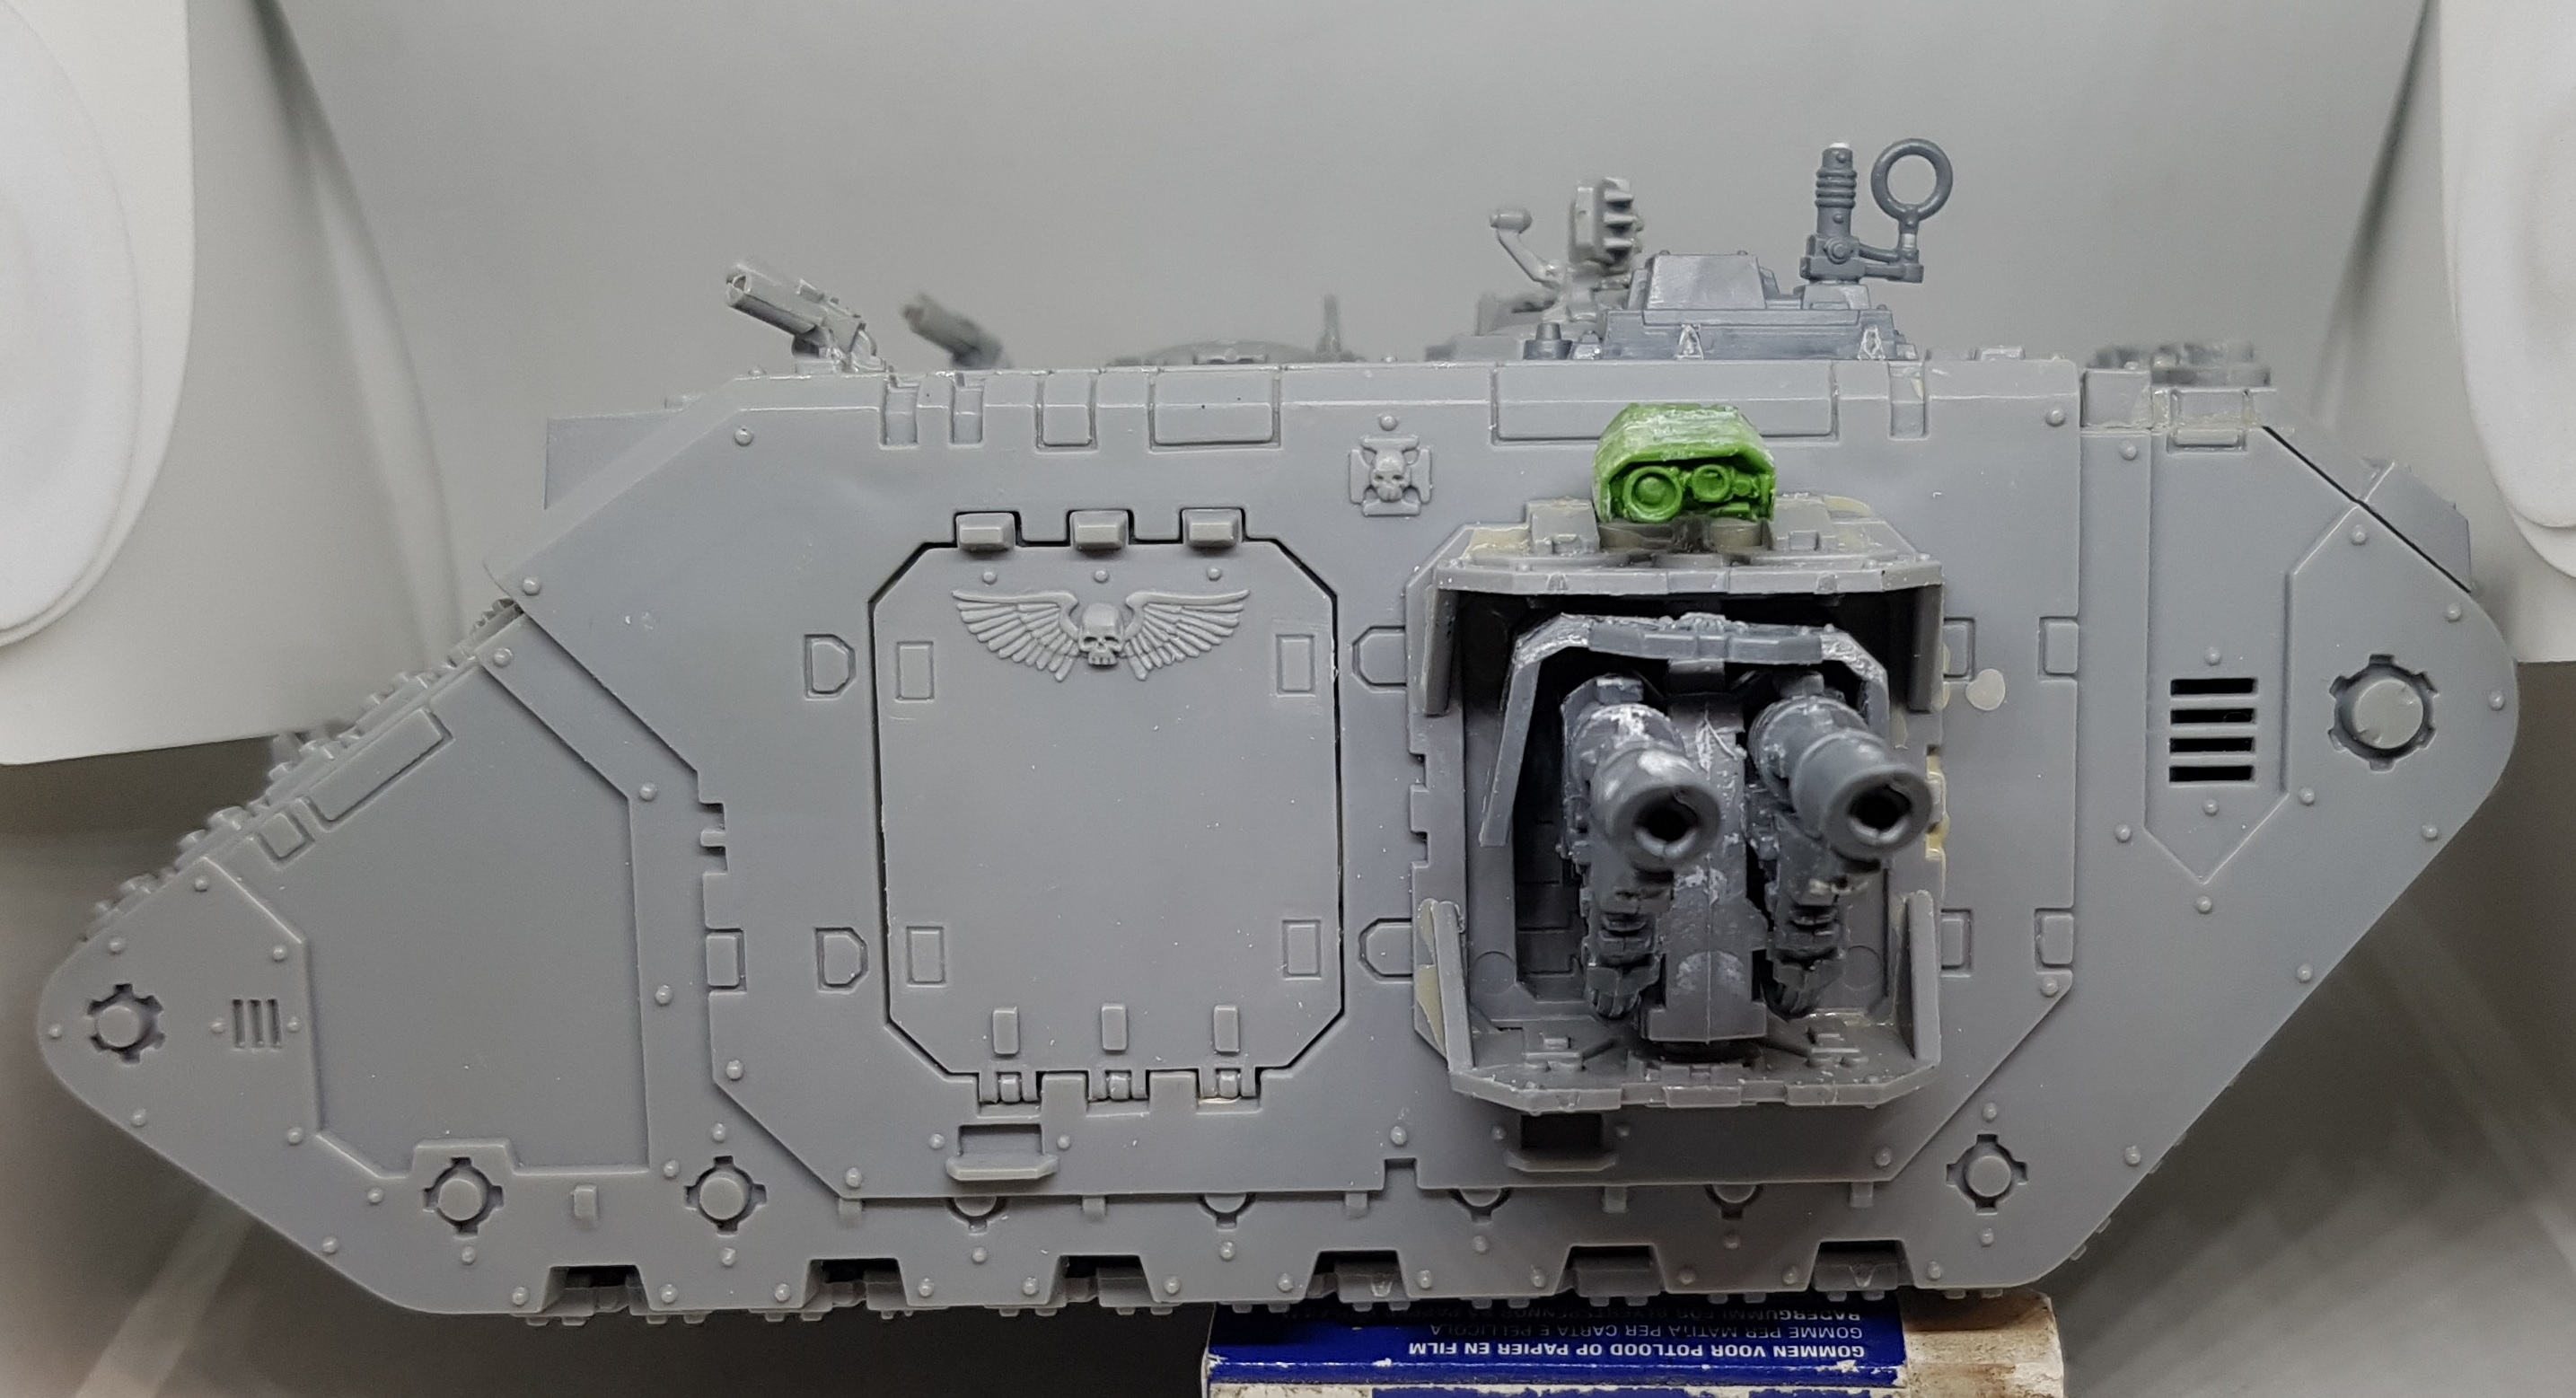
Vindicator??
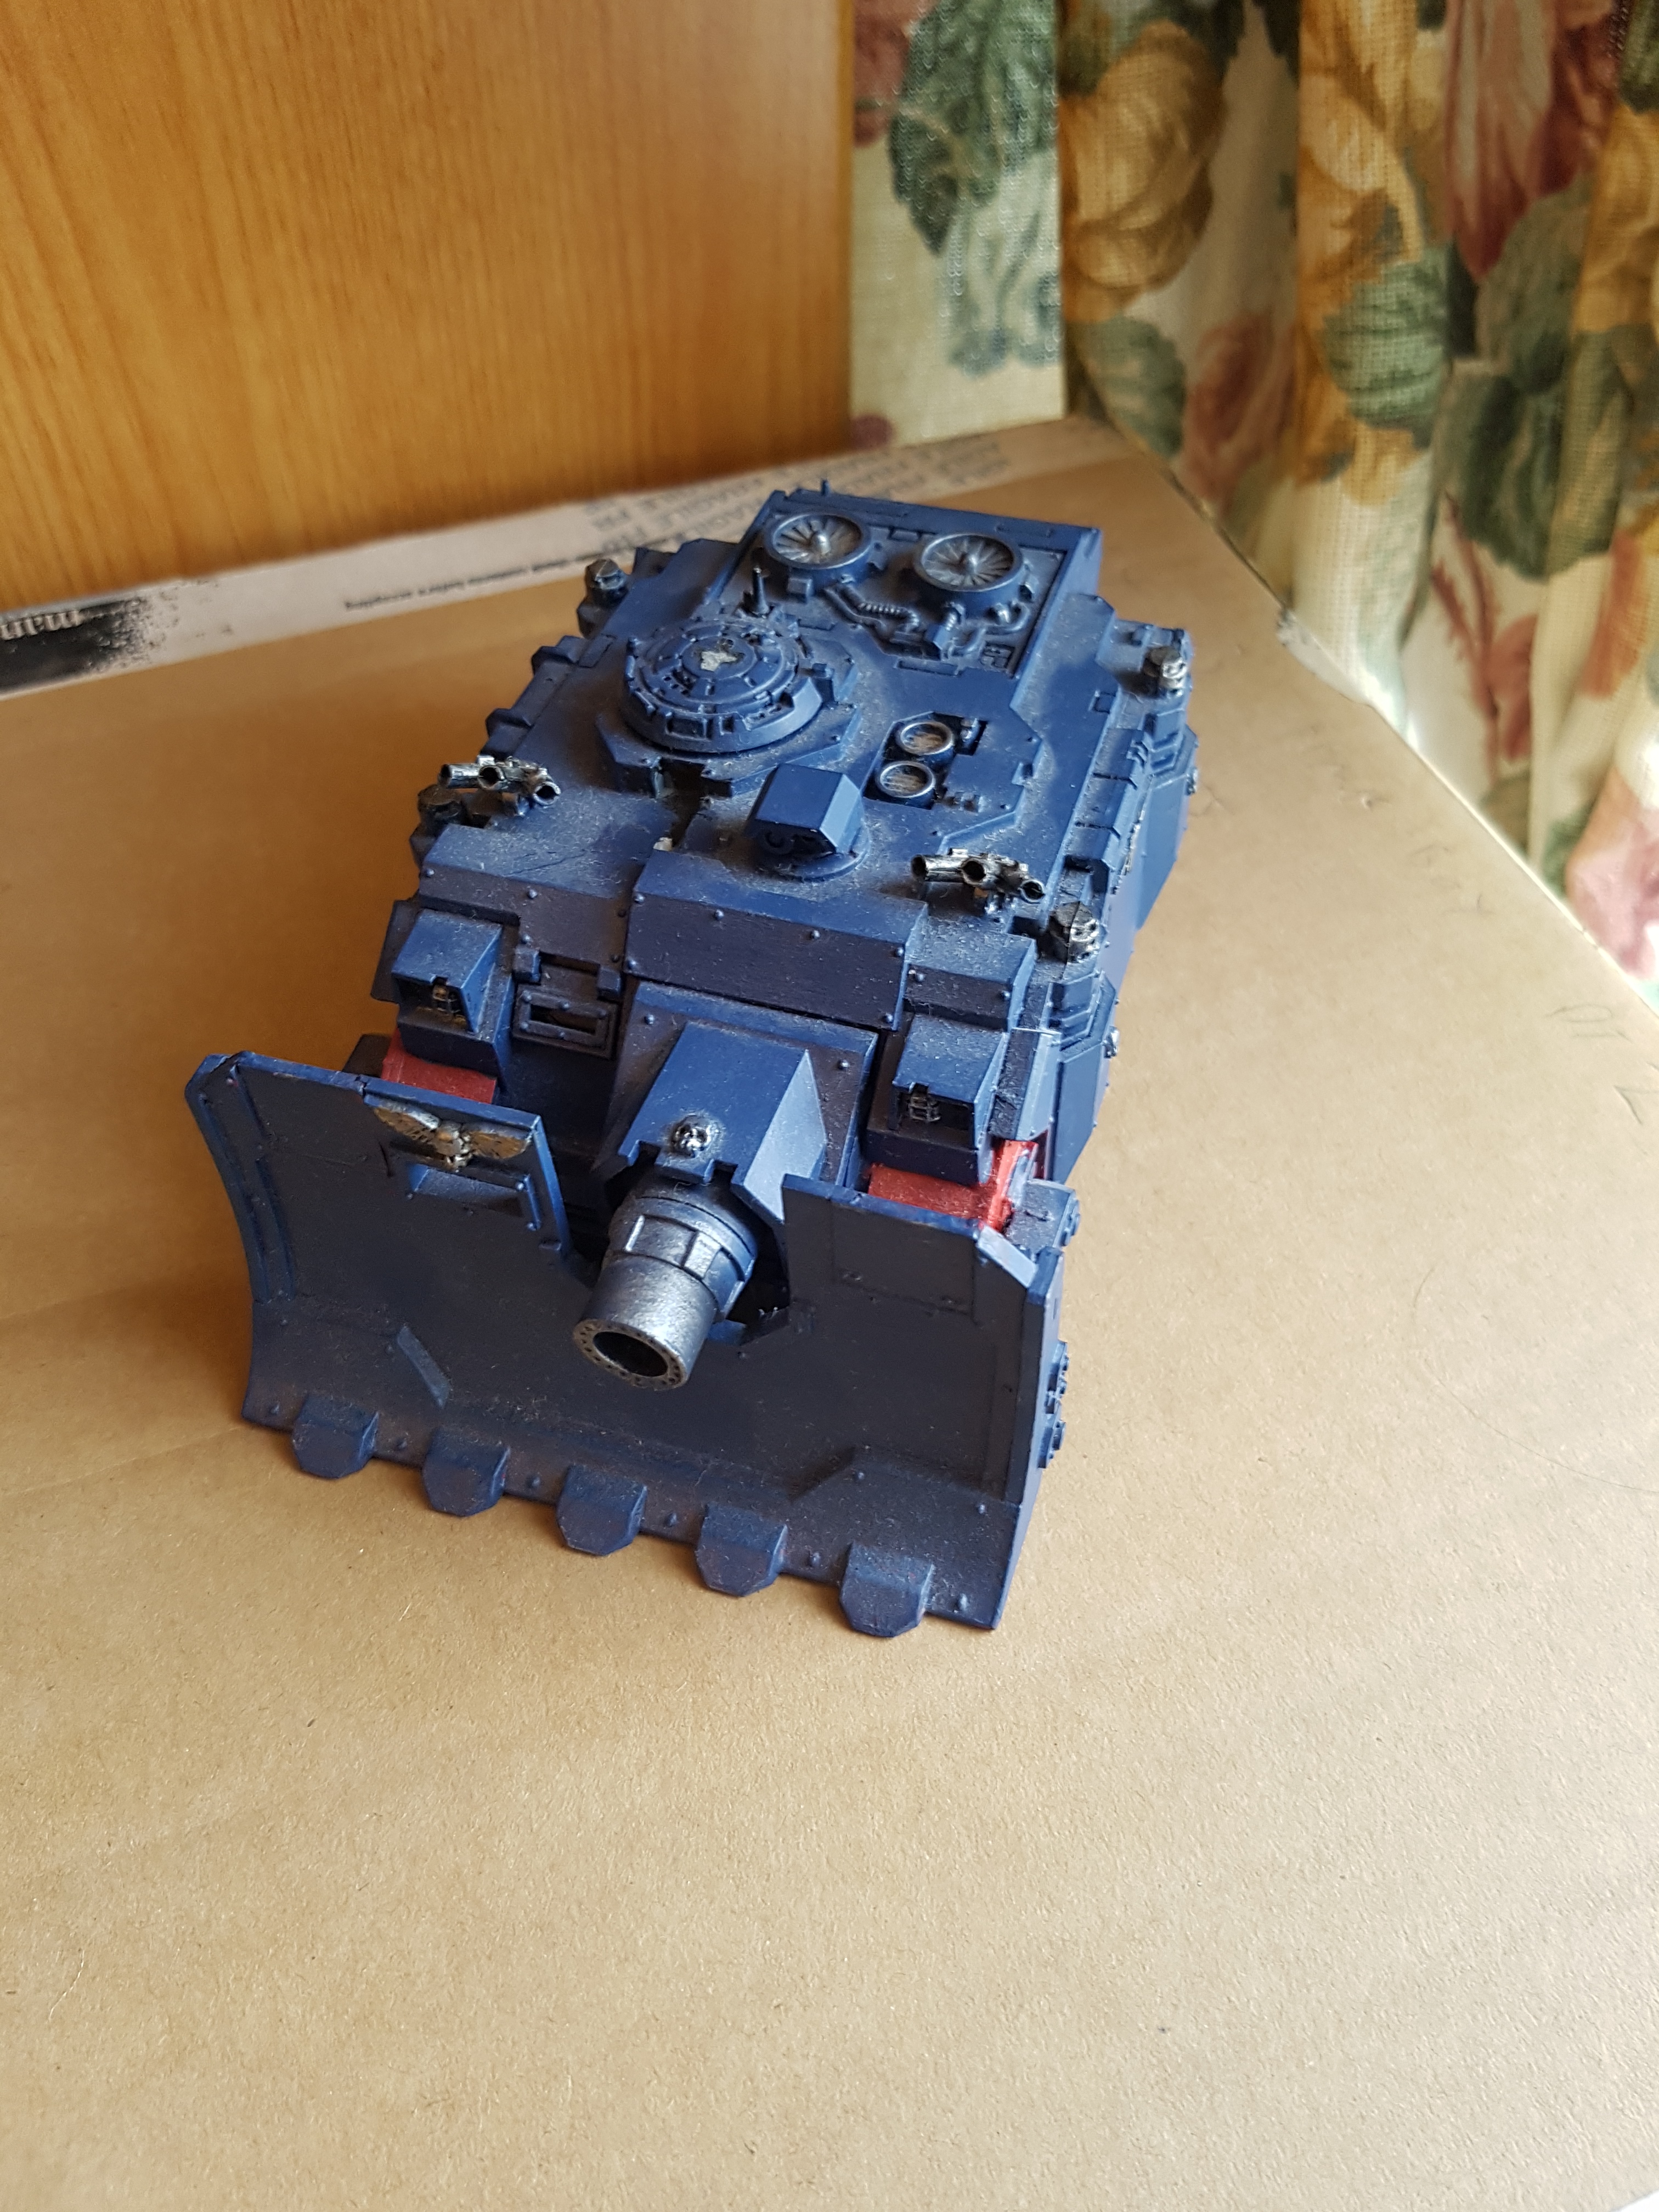

Looks like a Vindicator, but the thing on top has snapped off. The bit at the back is missing too, but theres no sign anything was glued there so perhaps its not a Vindicator? Anyone got any better pics of the missing parts to help see if I have them in the bits box?
https://www.games-workshop.com/en-GB/Space-Marine-Vindicator
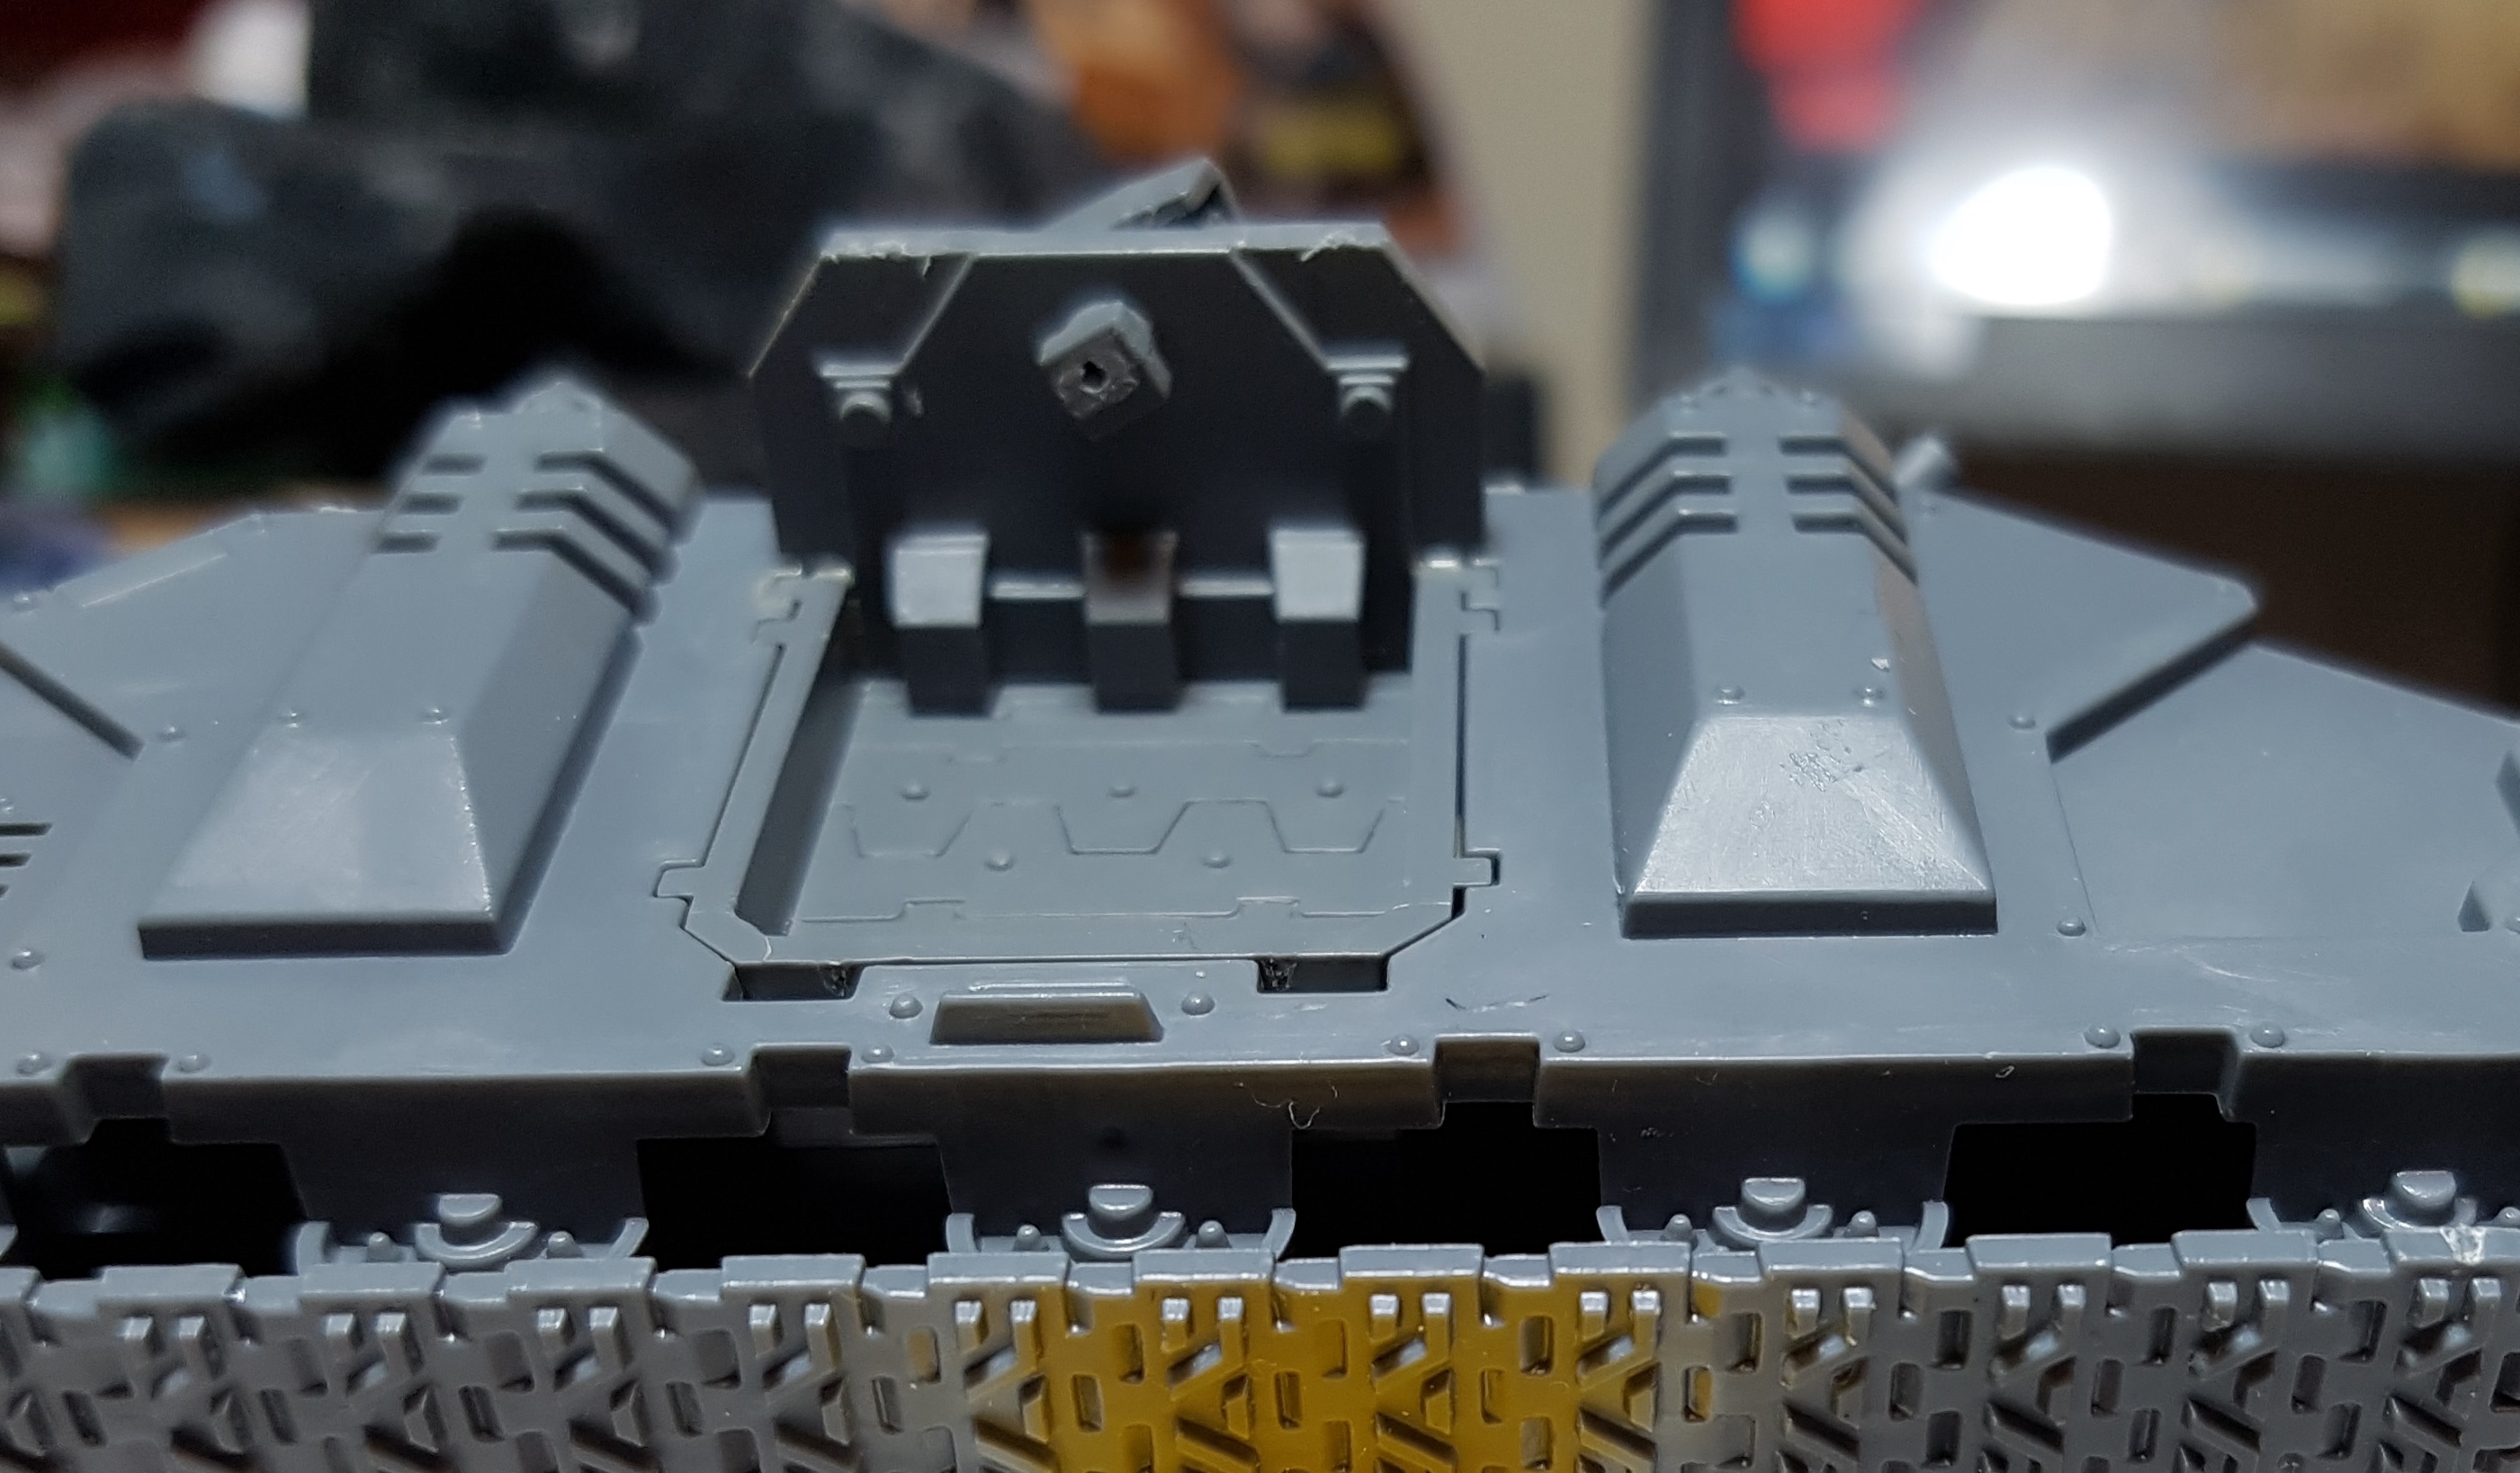
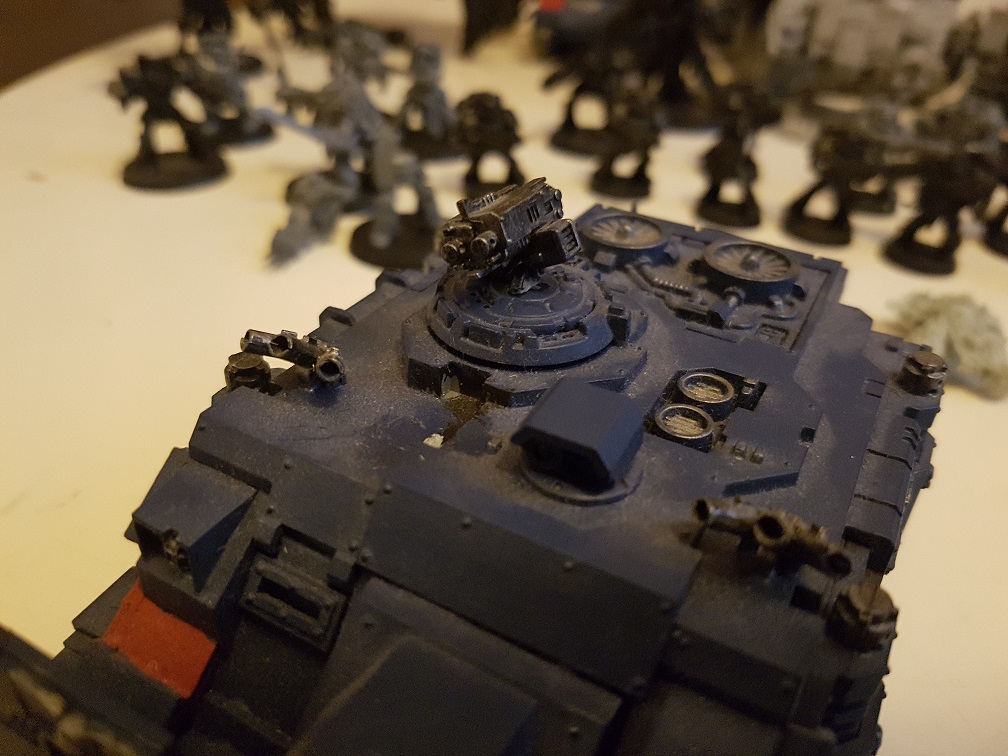 Having looked through the full gallery on the web store for this tank, it apperas the bits on top are optional extras, and this gun turret is just as valid. Thres 2 painted up, and 2 tanks with then snapped off of so the previous owner must have been using this part. I'm calling this tank comp;lete, unless anyone sees anything else?
Predator Tank
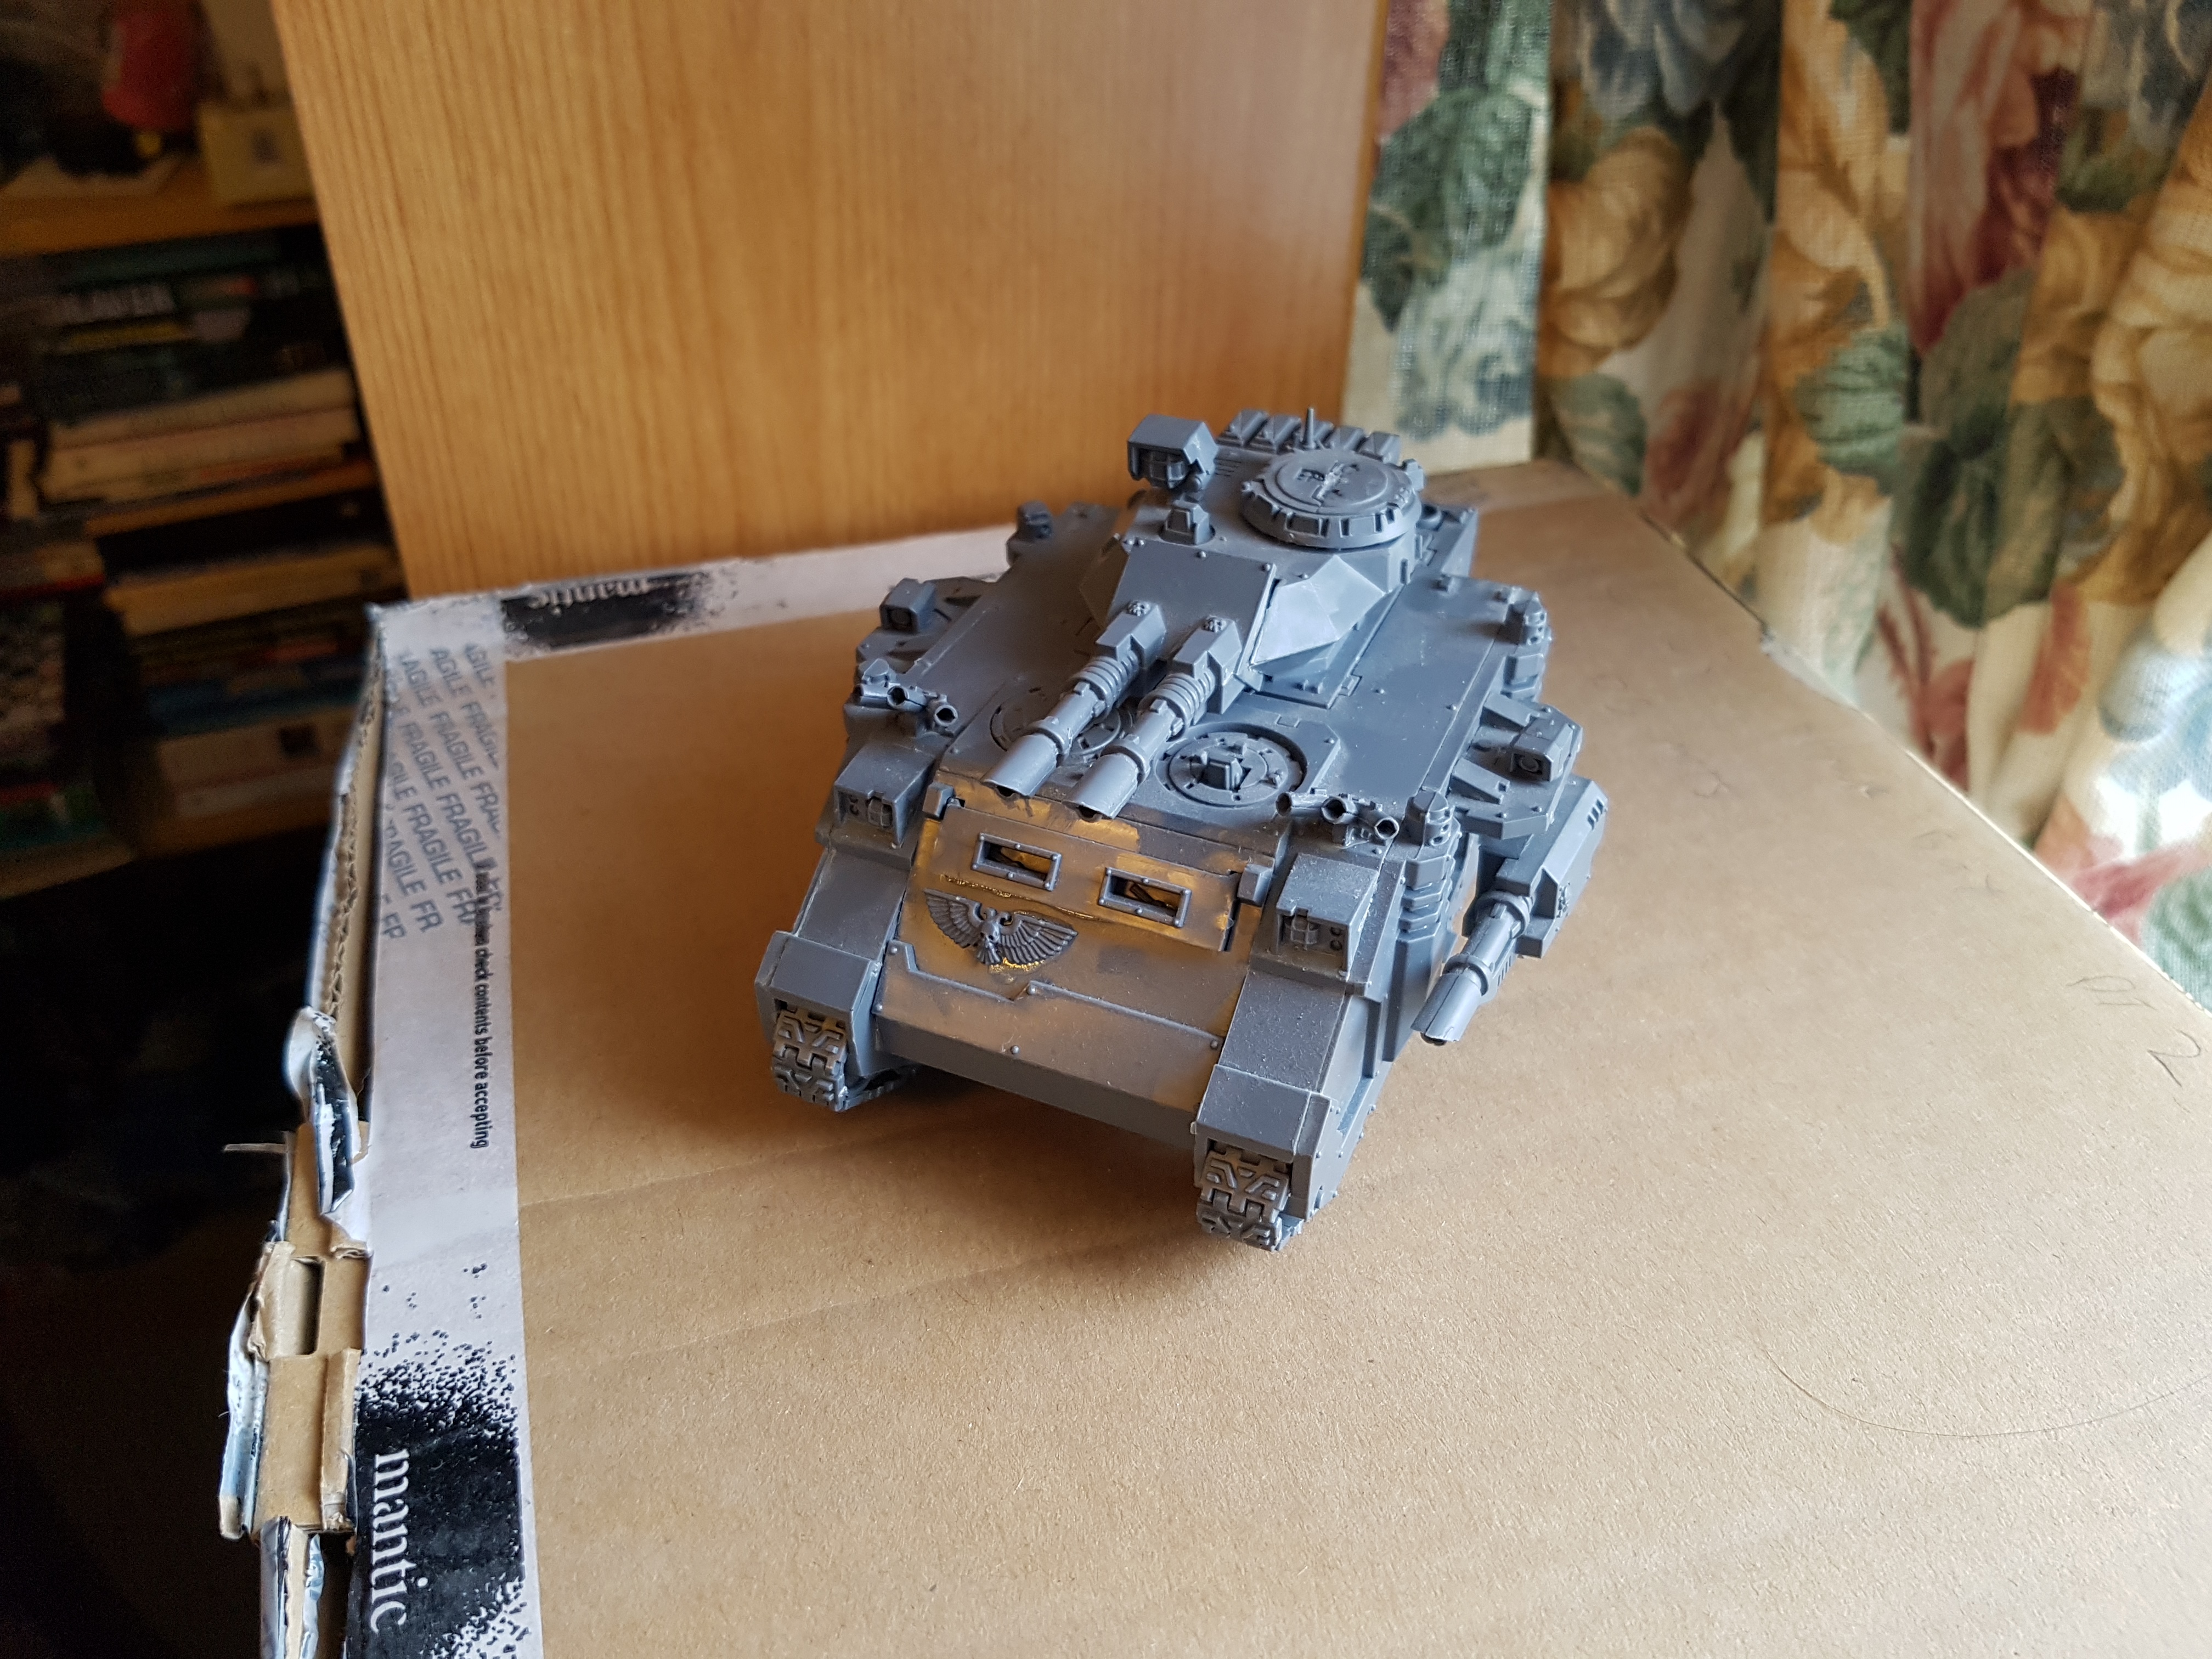
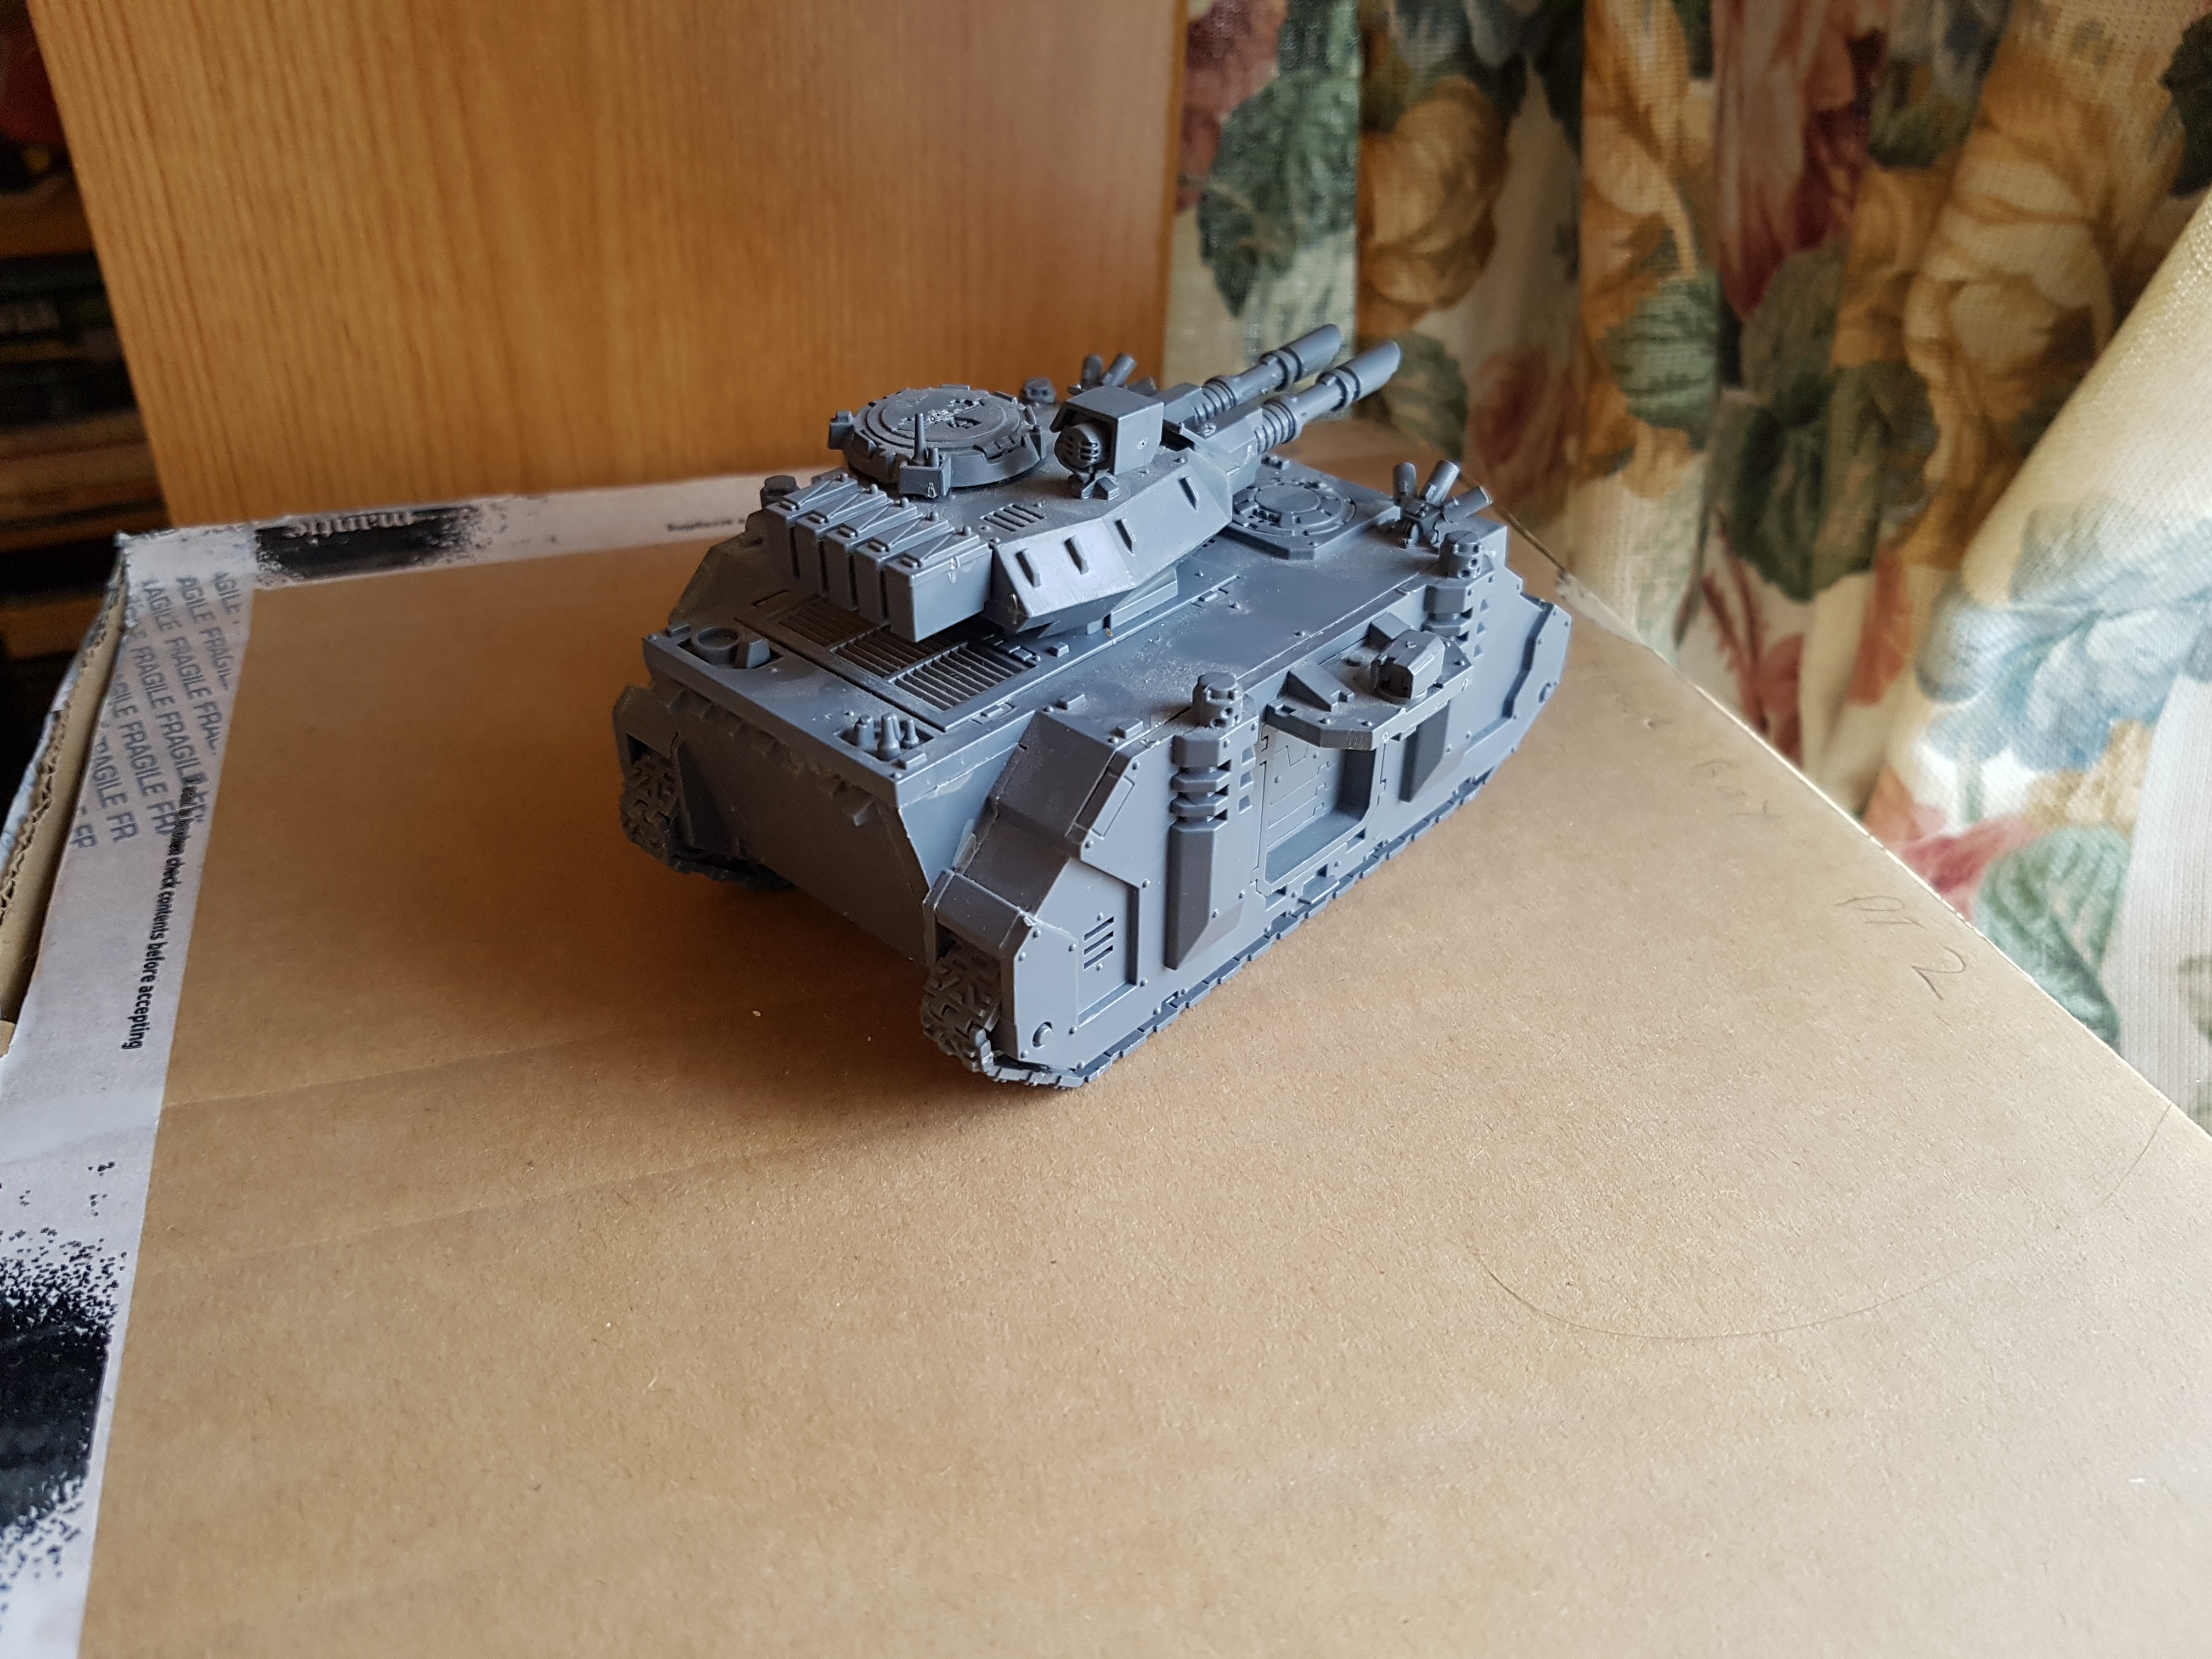
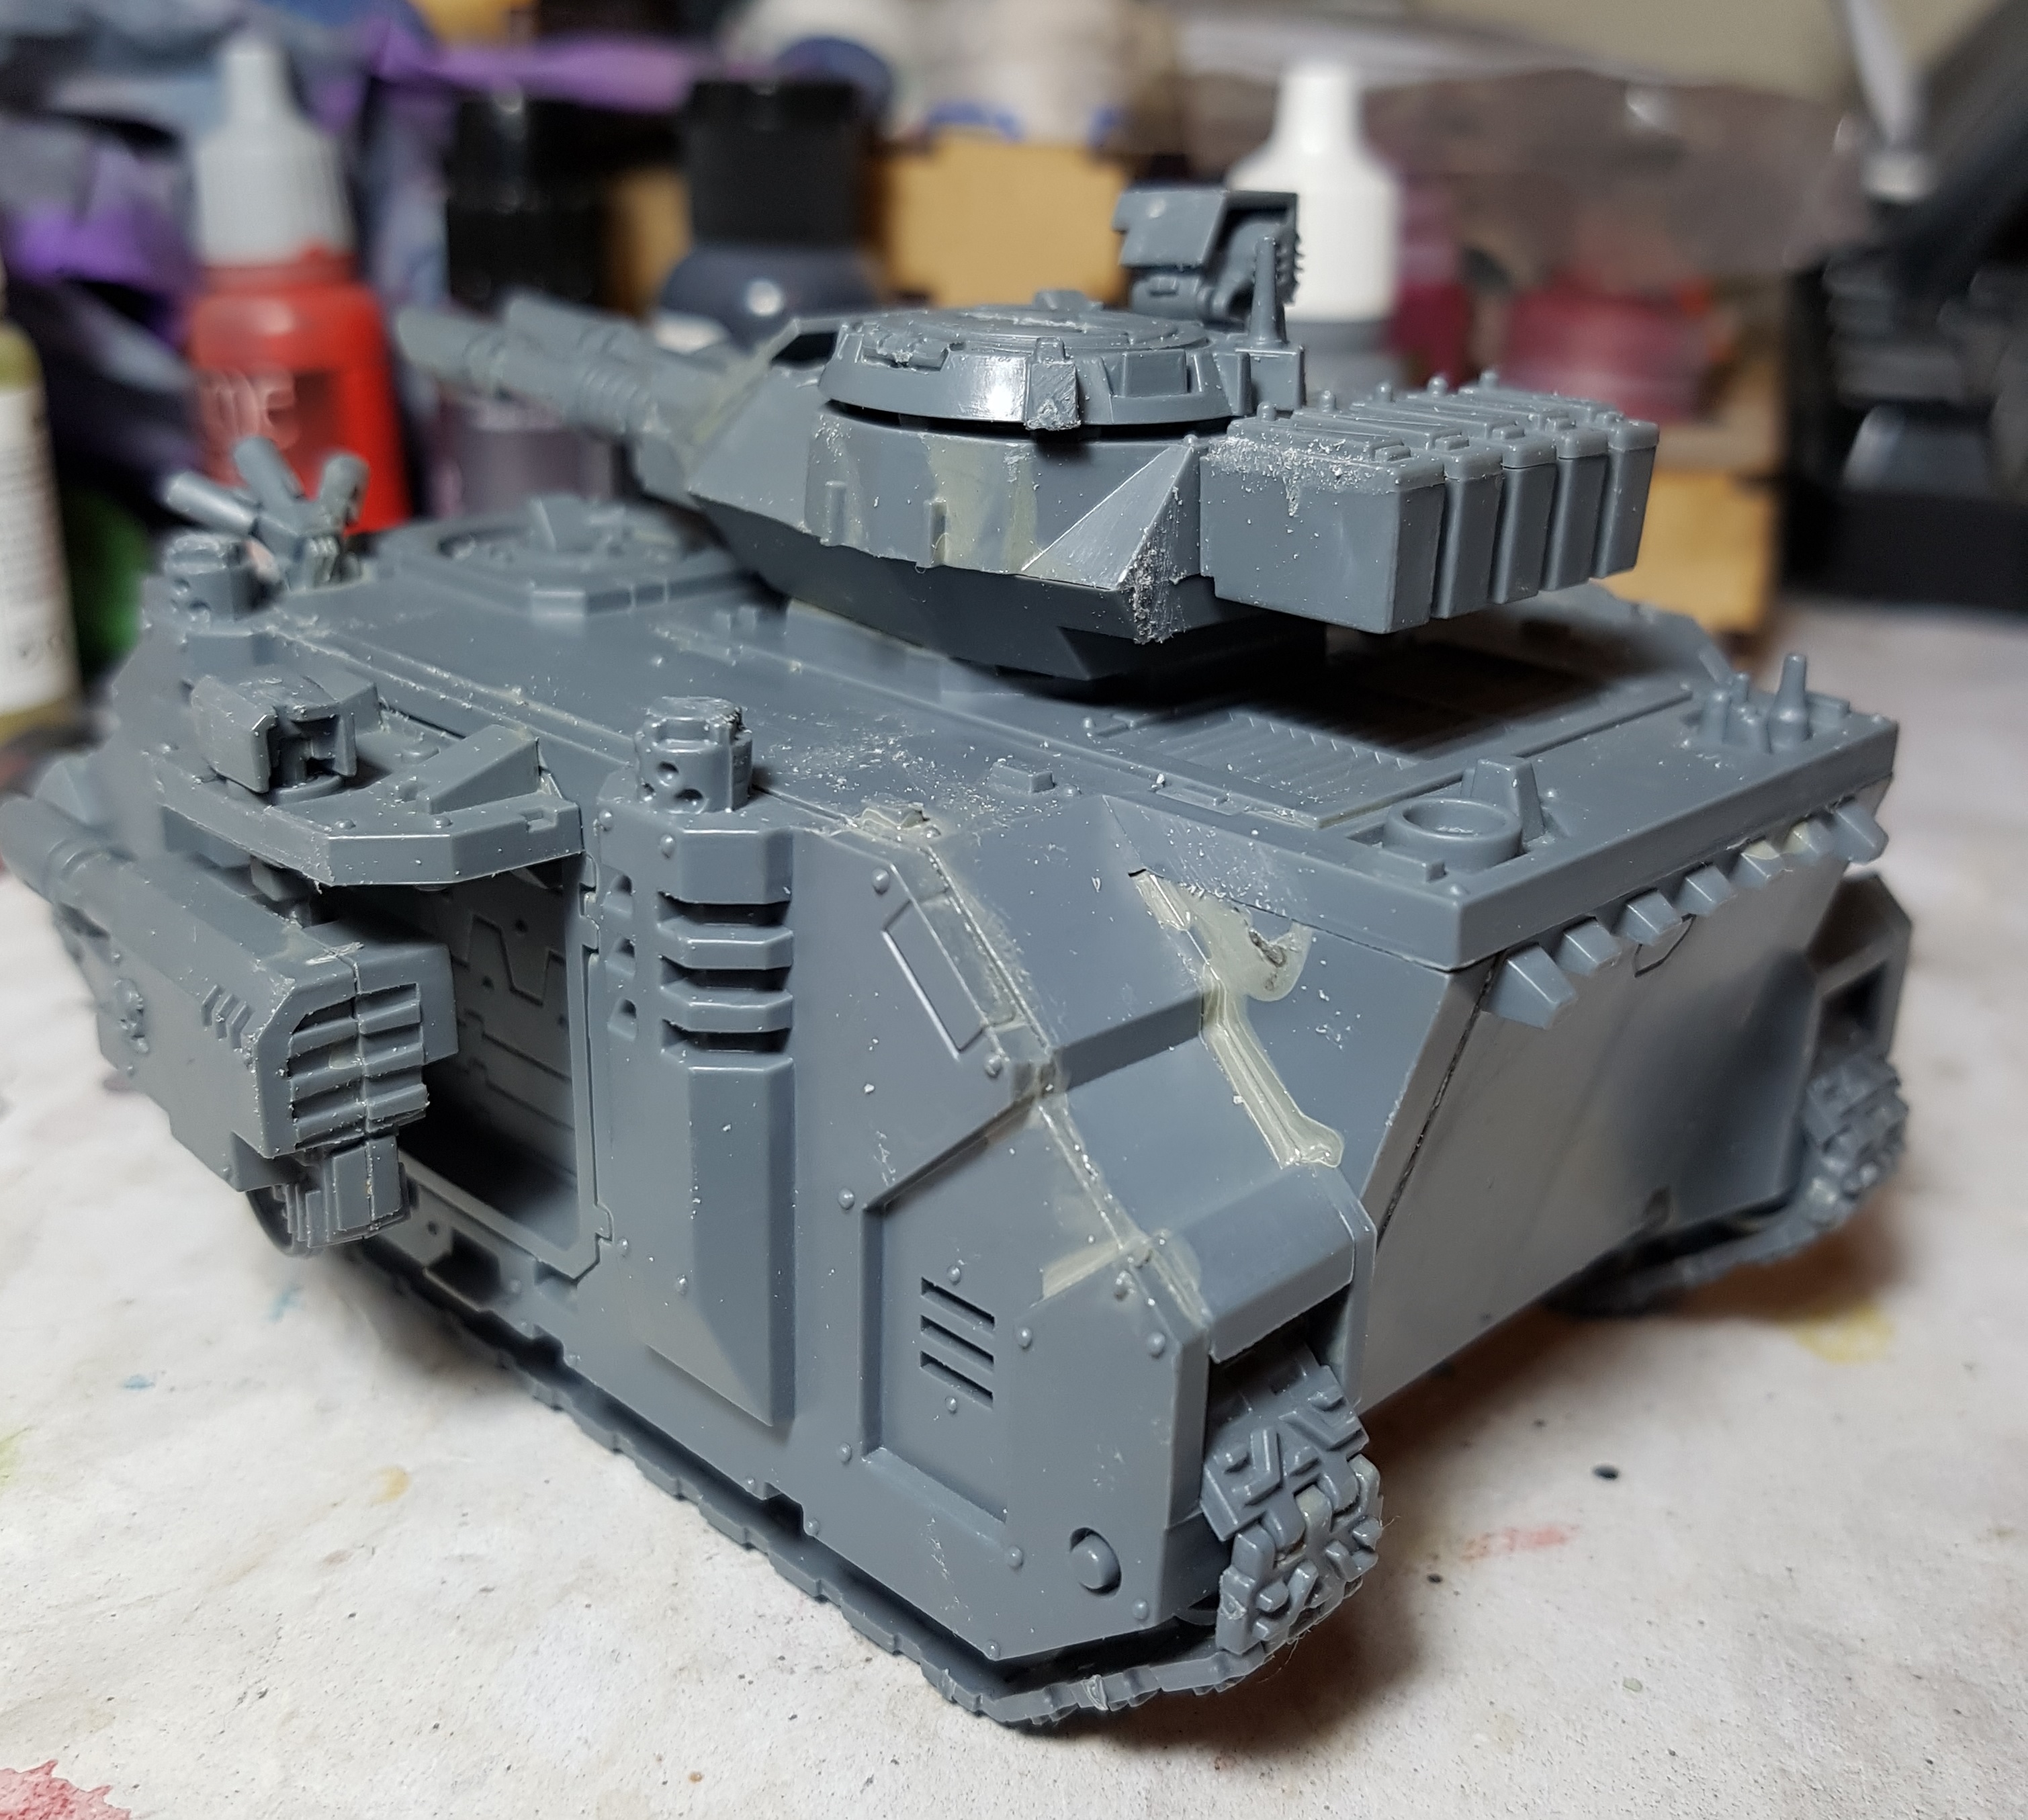
This would be a Predator tank? That bit on top, is that from the Vindicator, or is this not a Predator?
Land Raider?
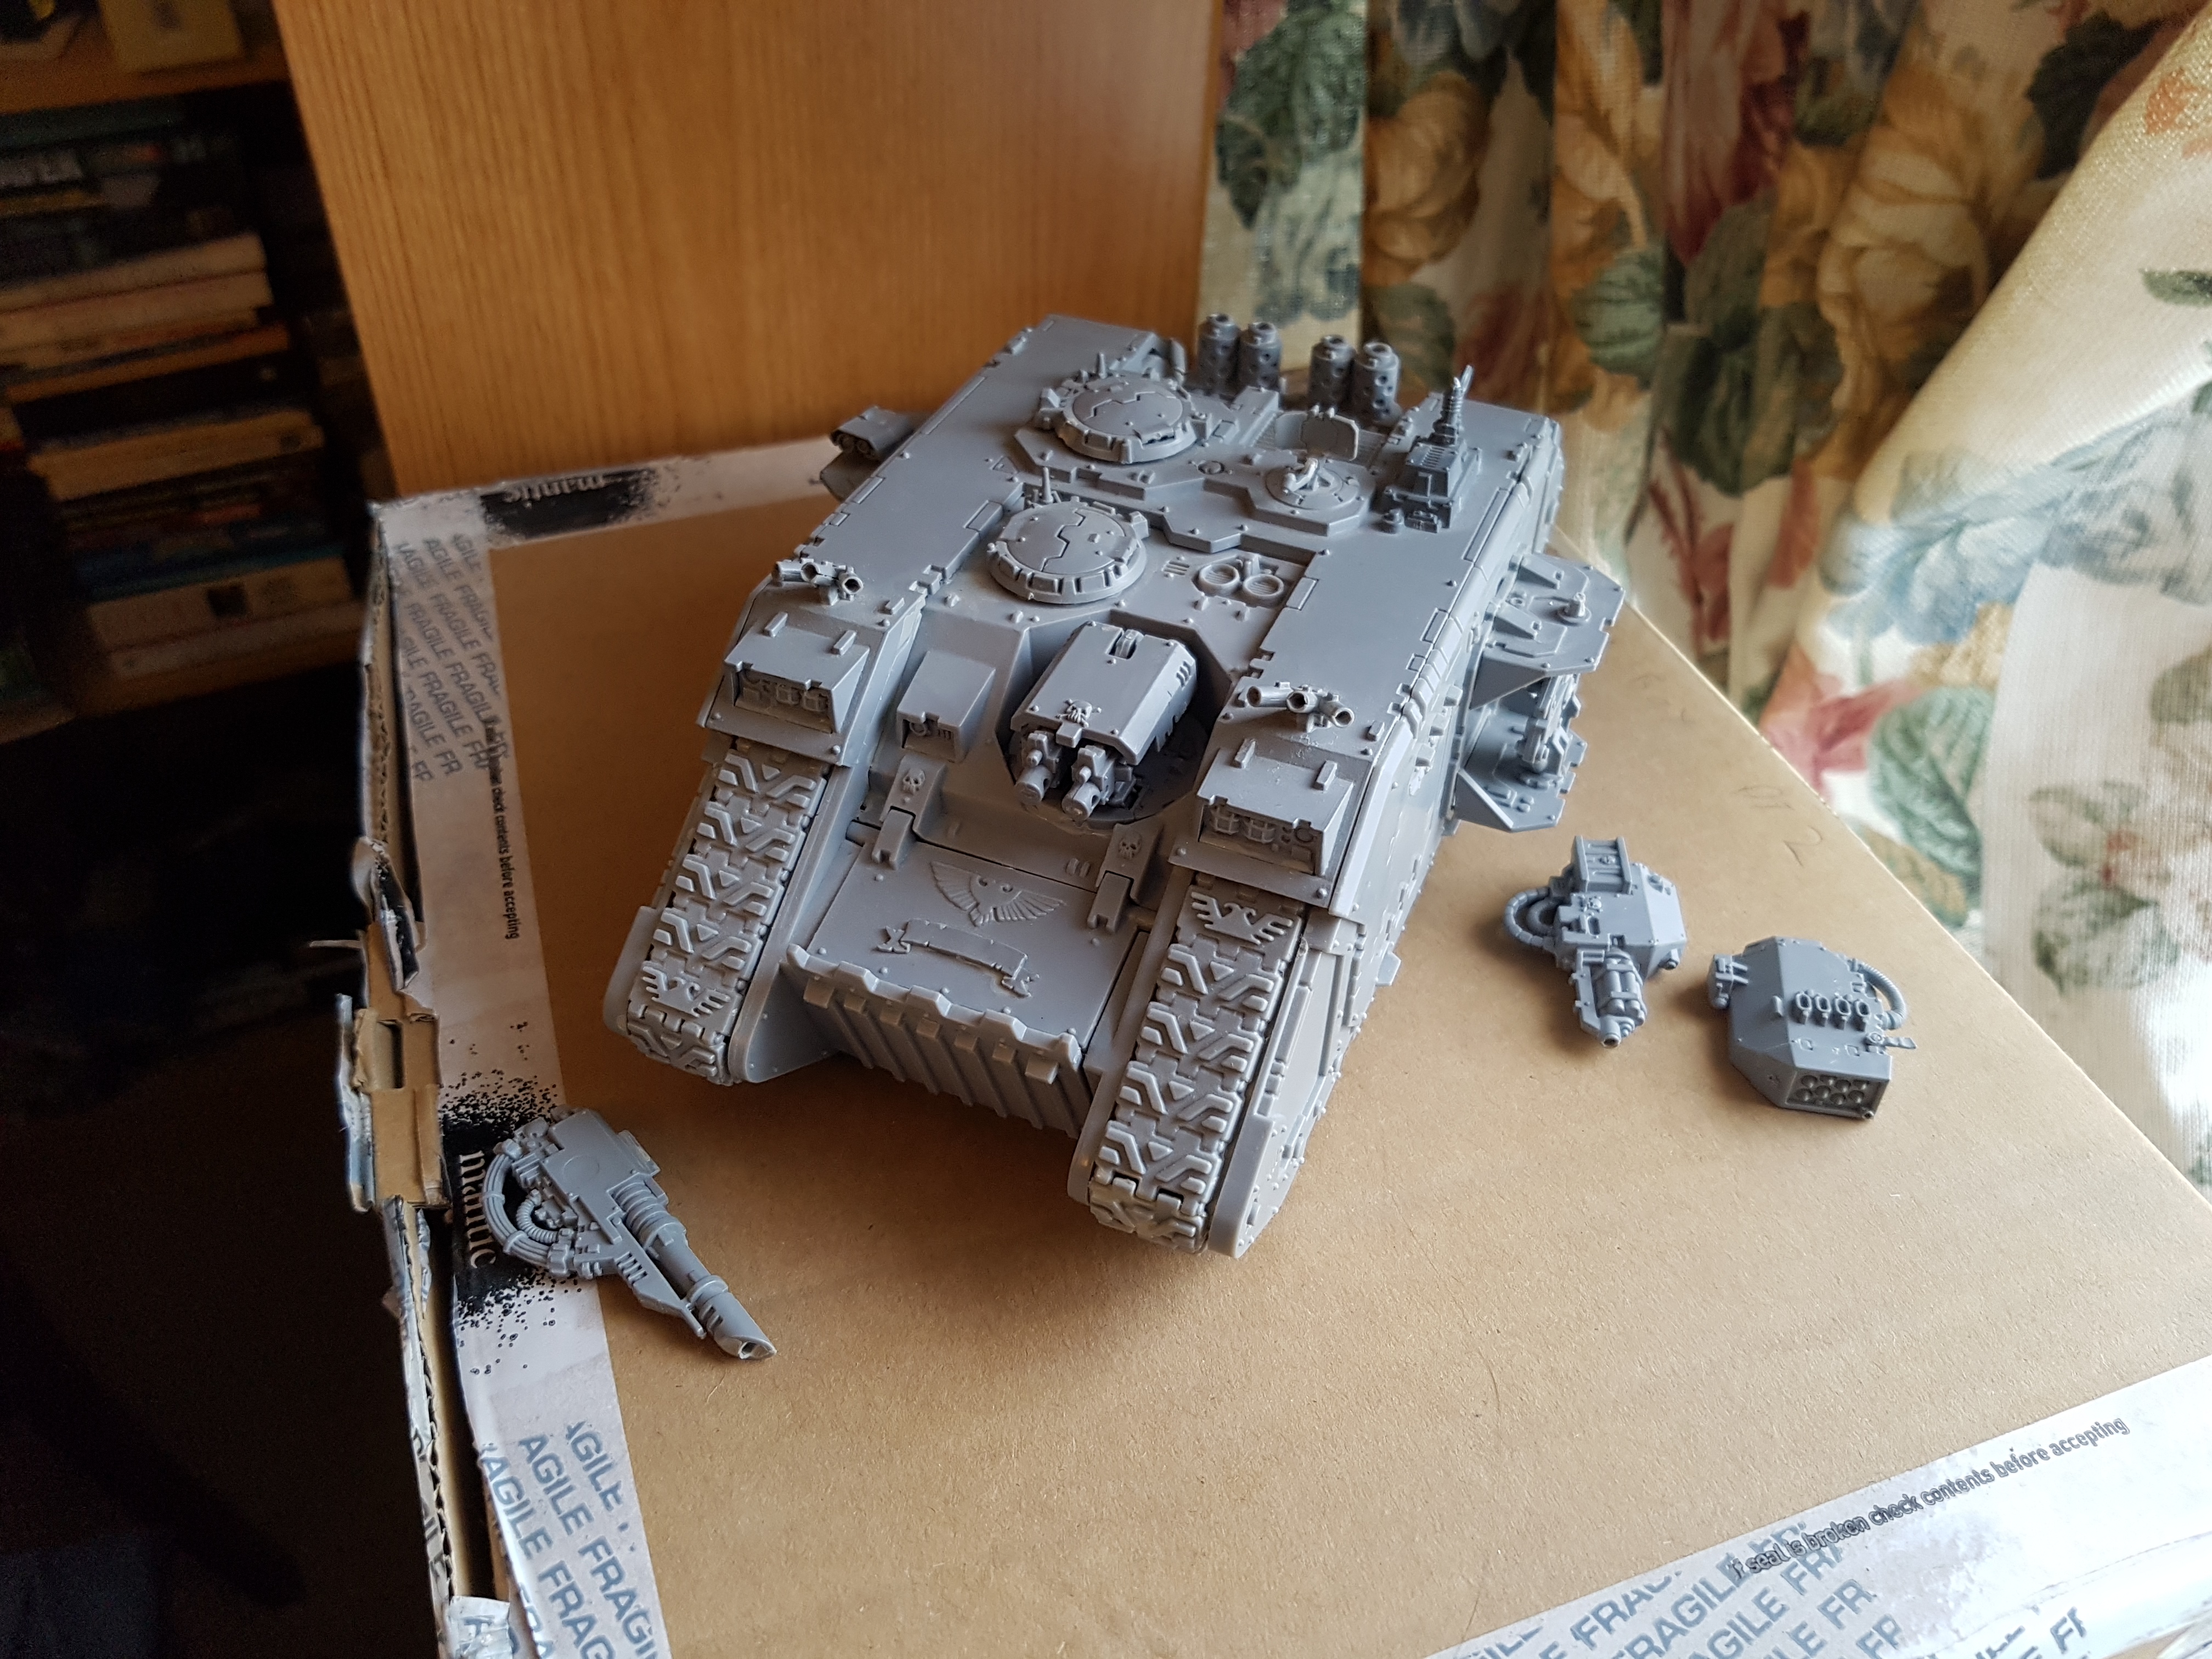

A Land Raider? Seems like the turrets are missing bits. Perhaps those loose weapons? Perhaps just end pieces/caps?
https://www.games-workshop.com/en-GB/Space-Marine-Land-Raider
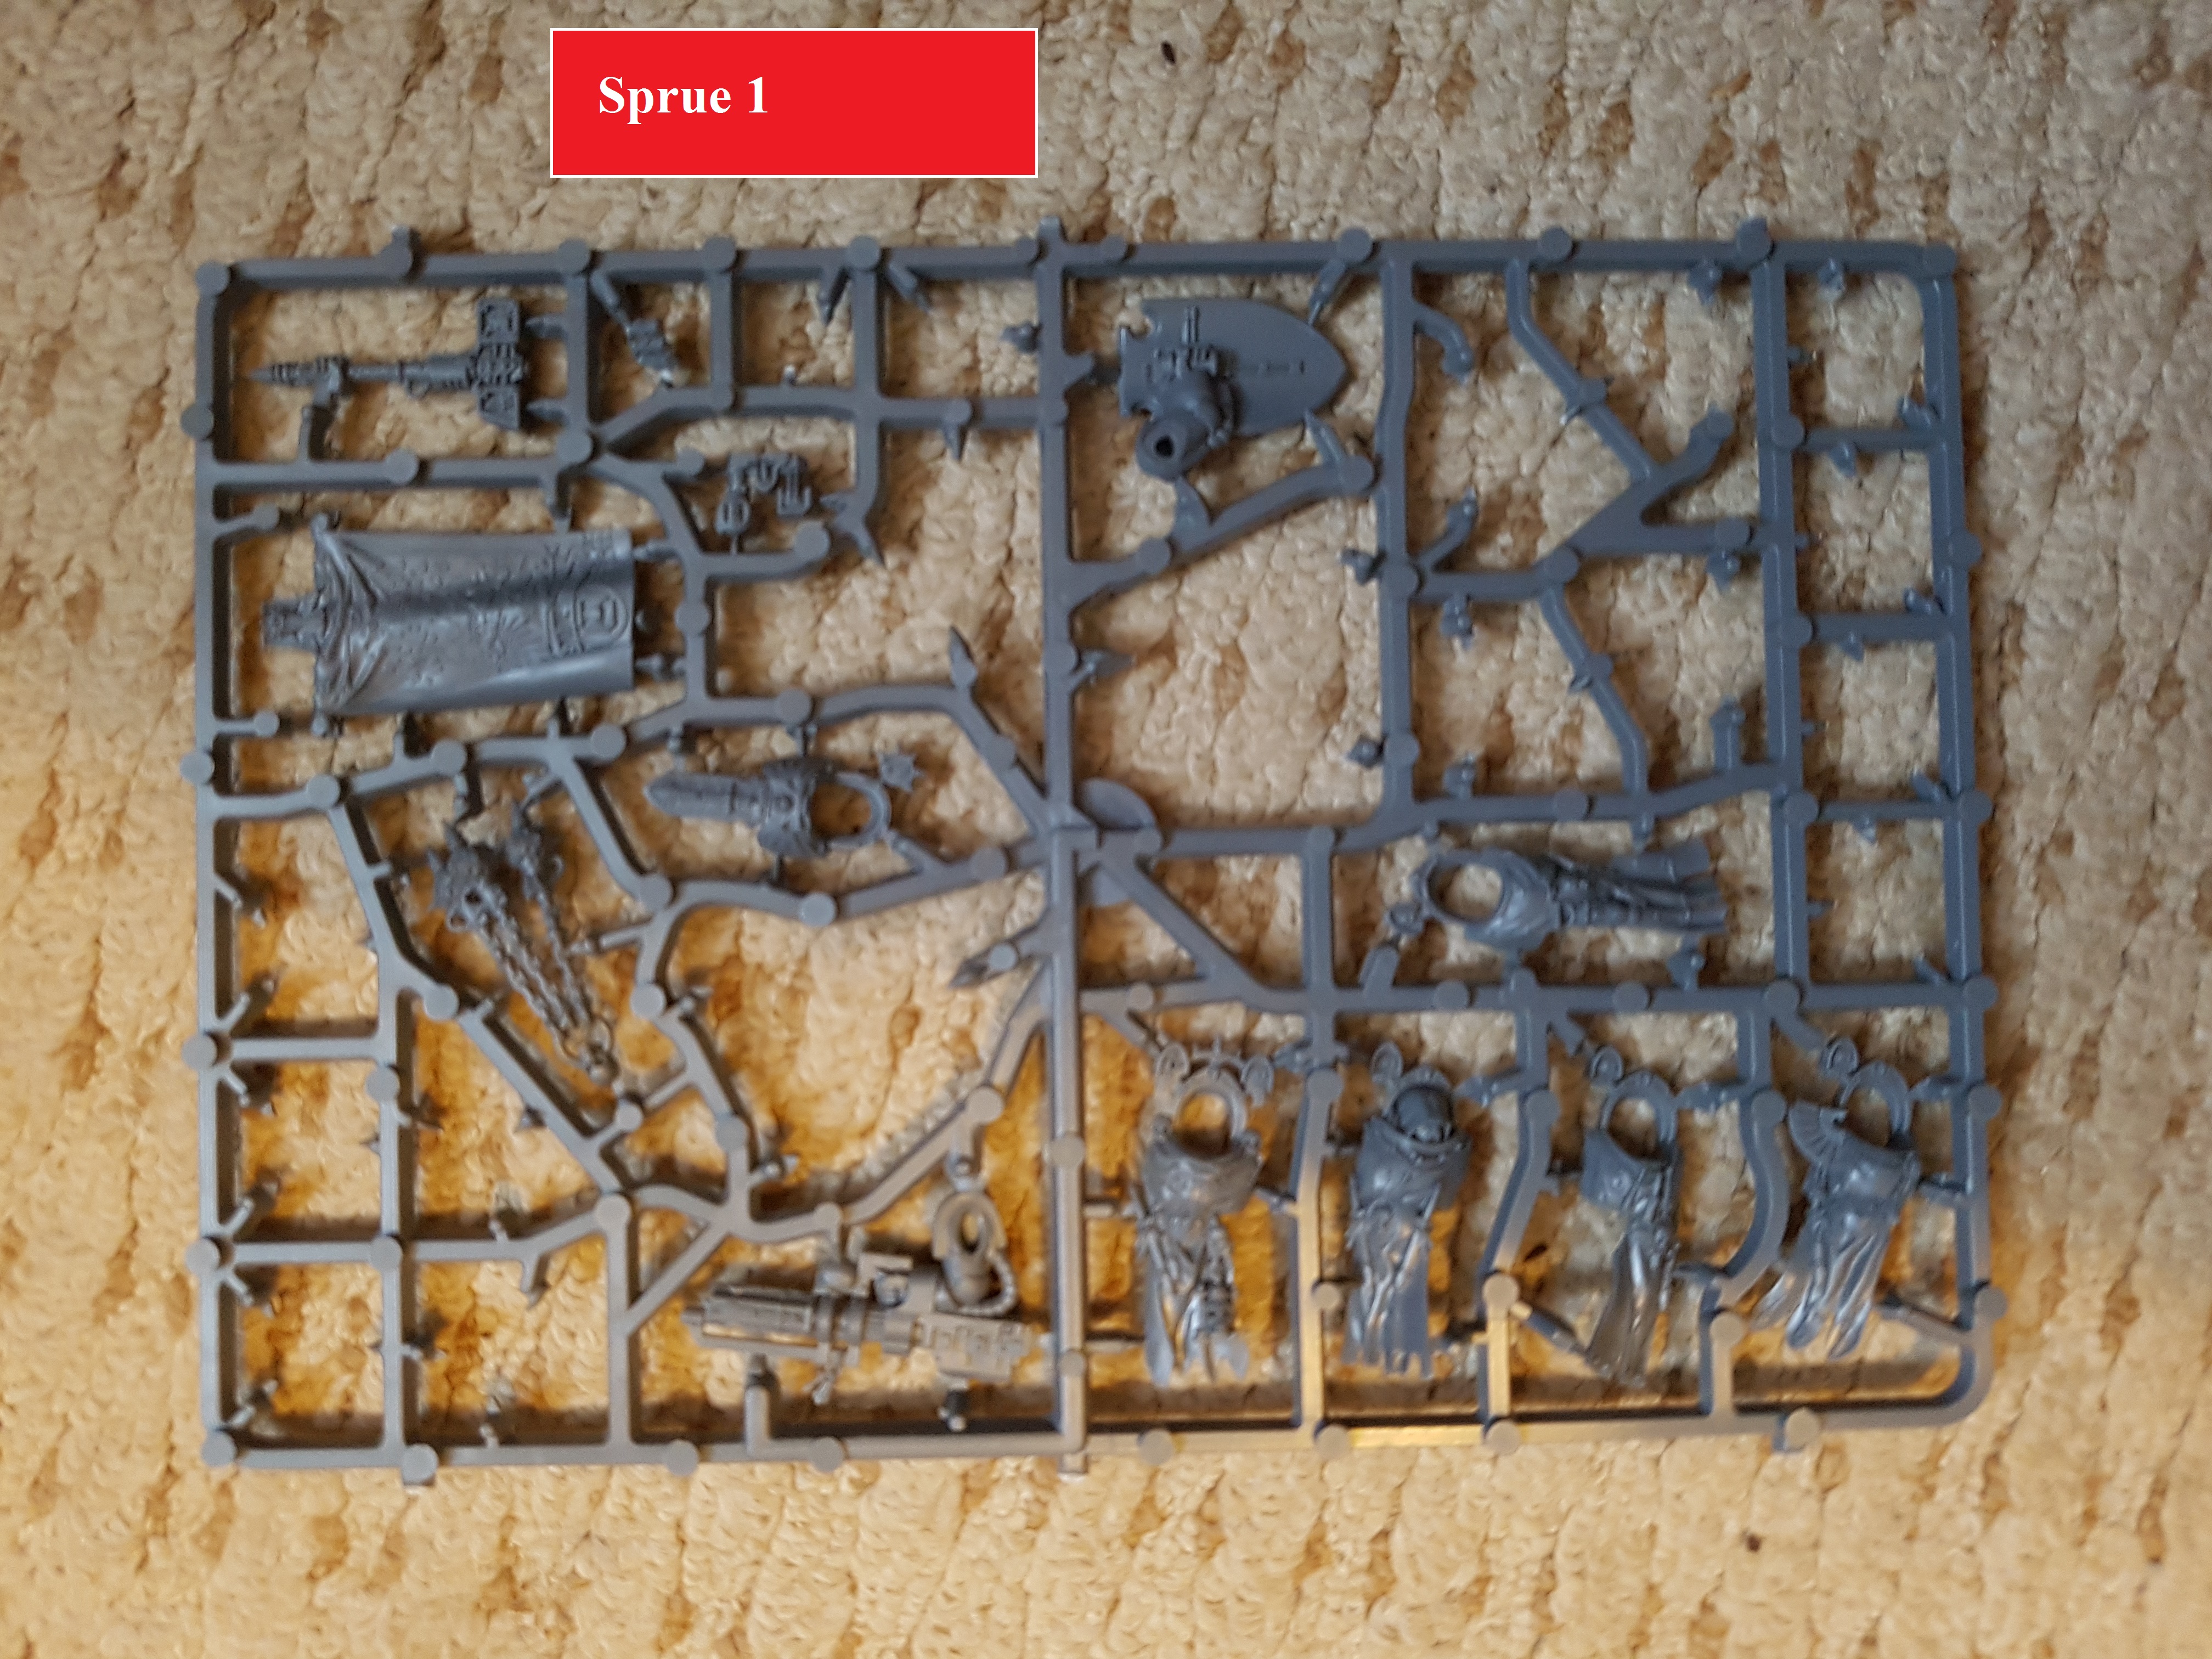
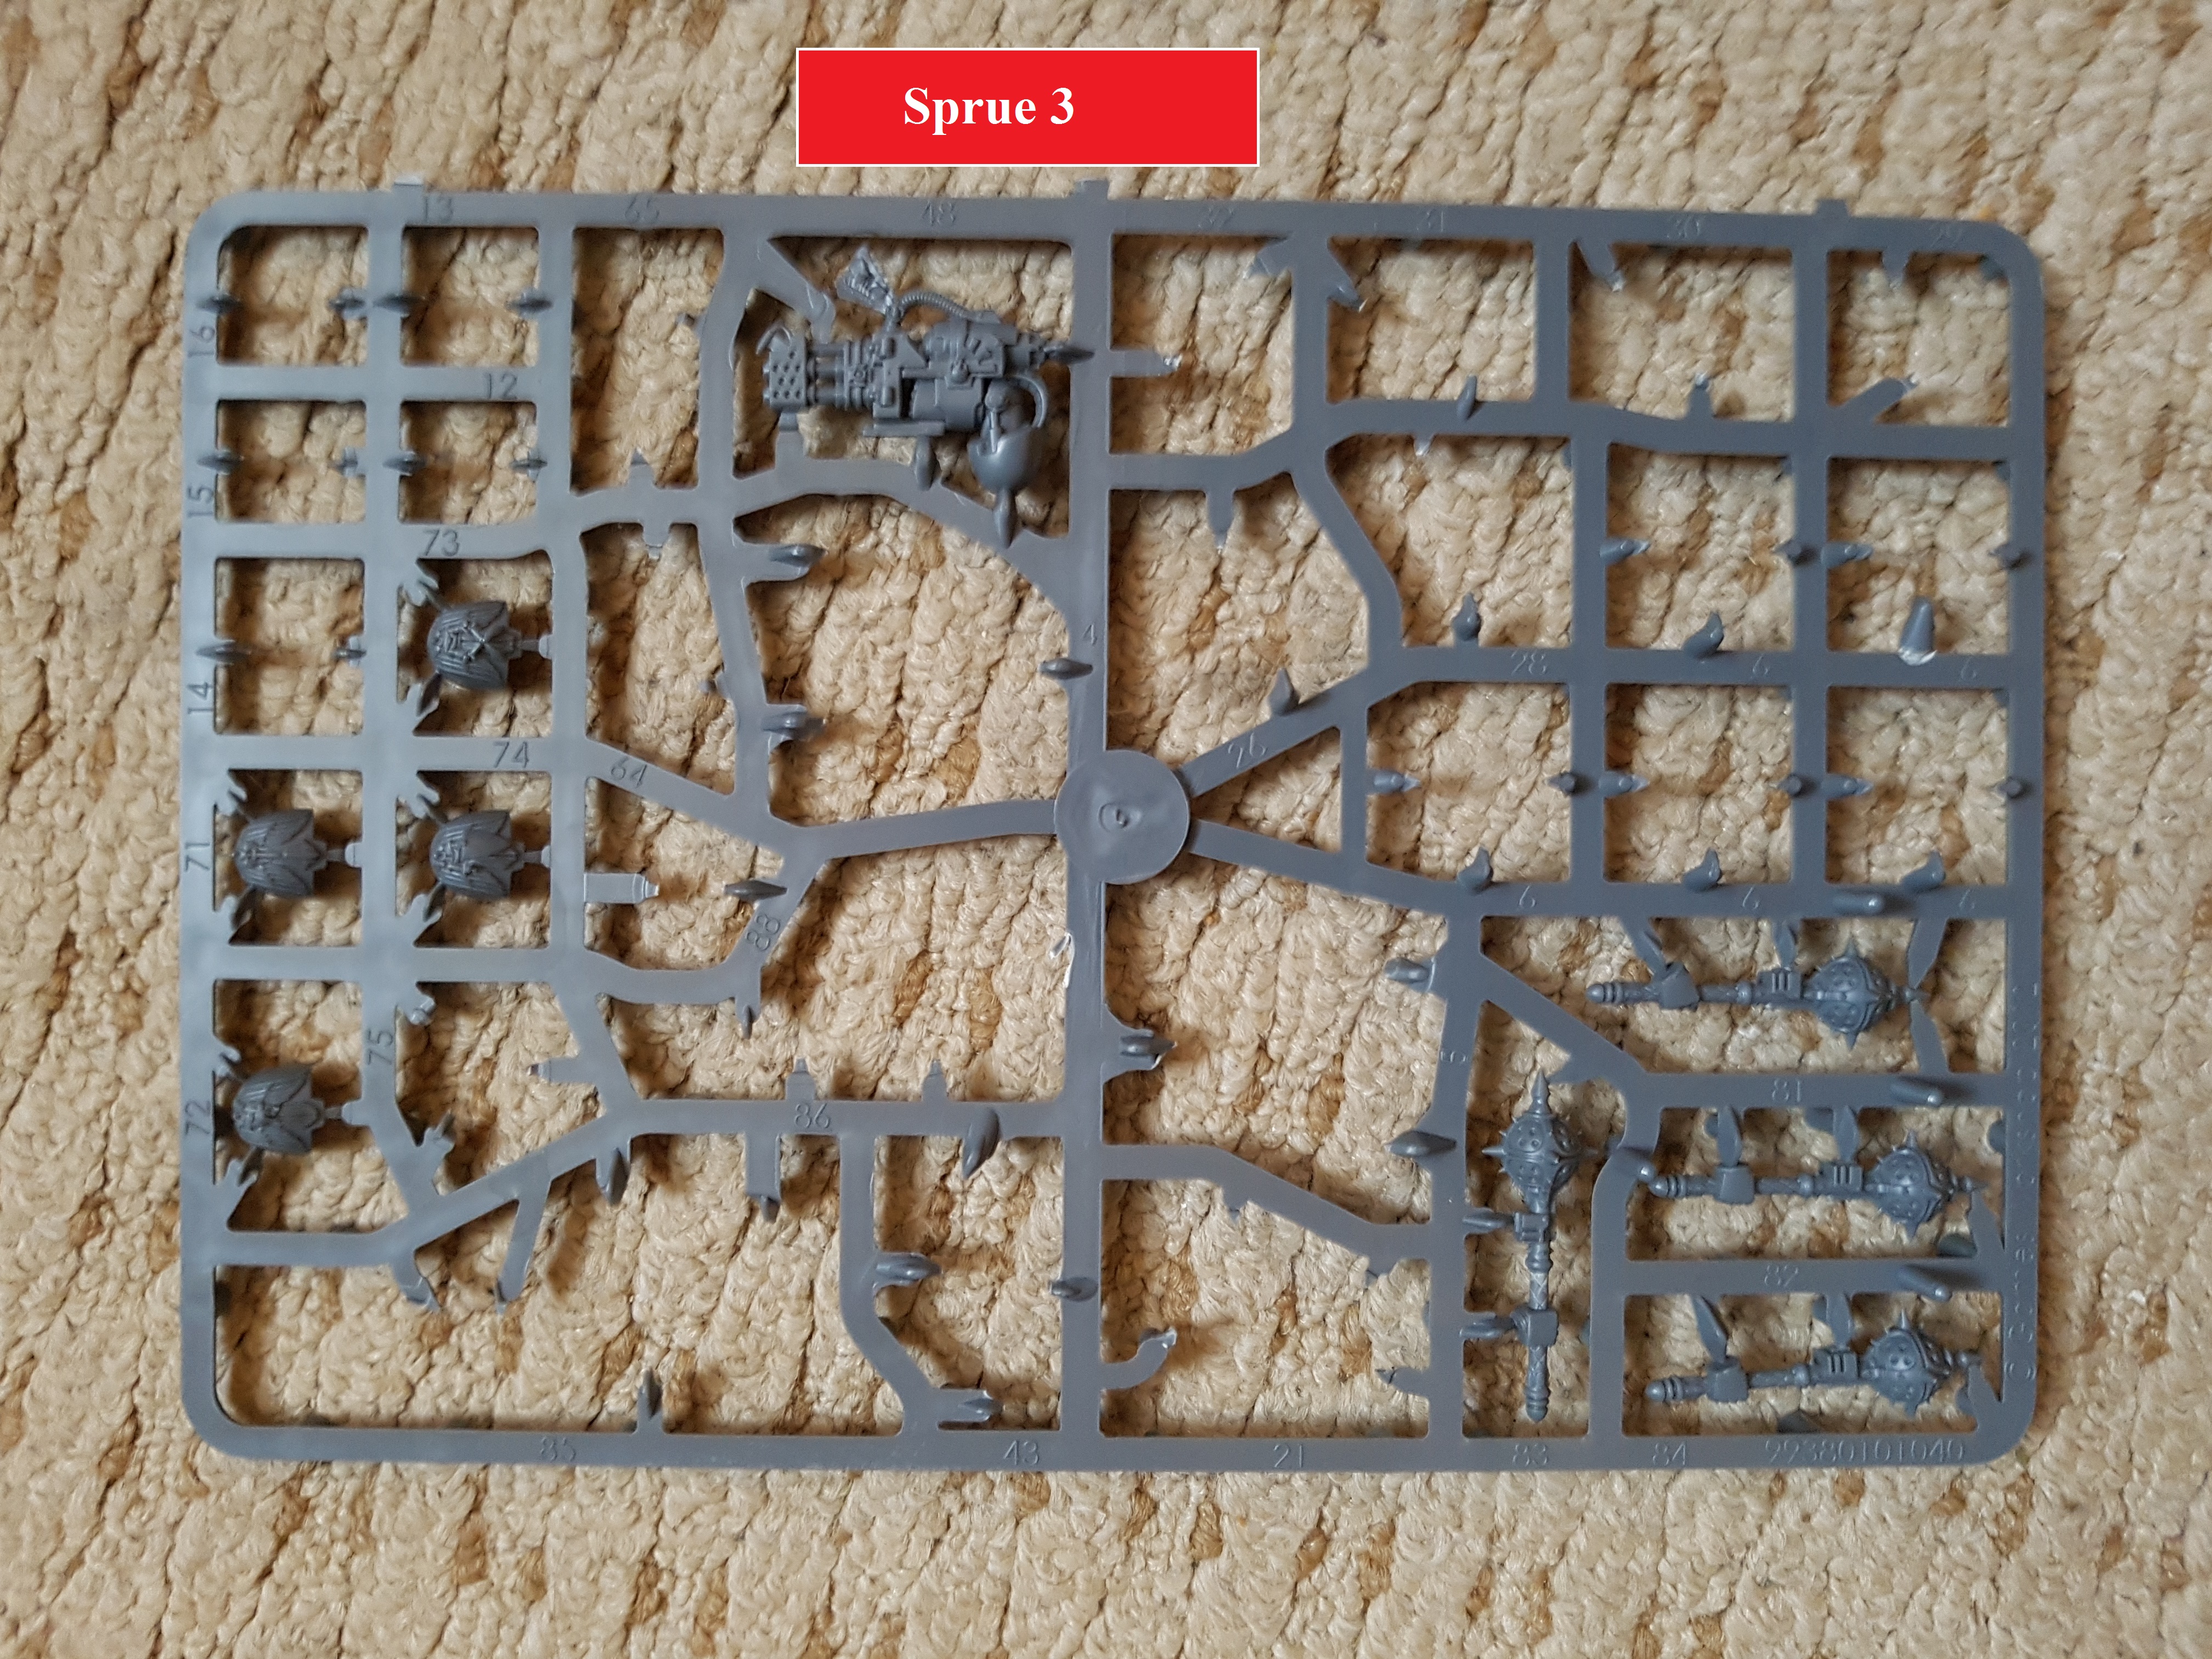
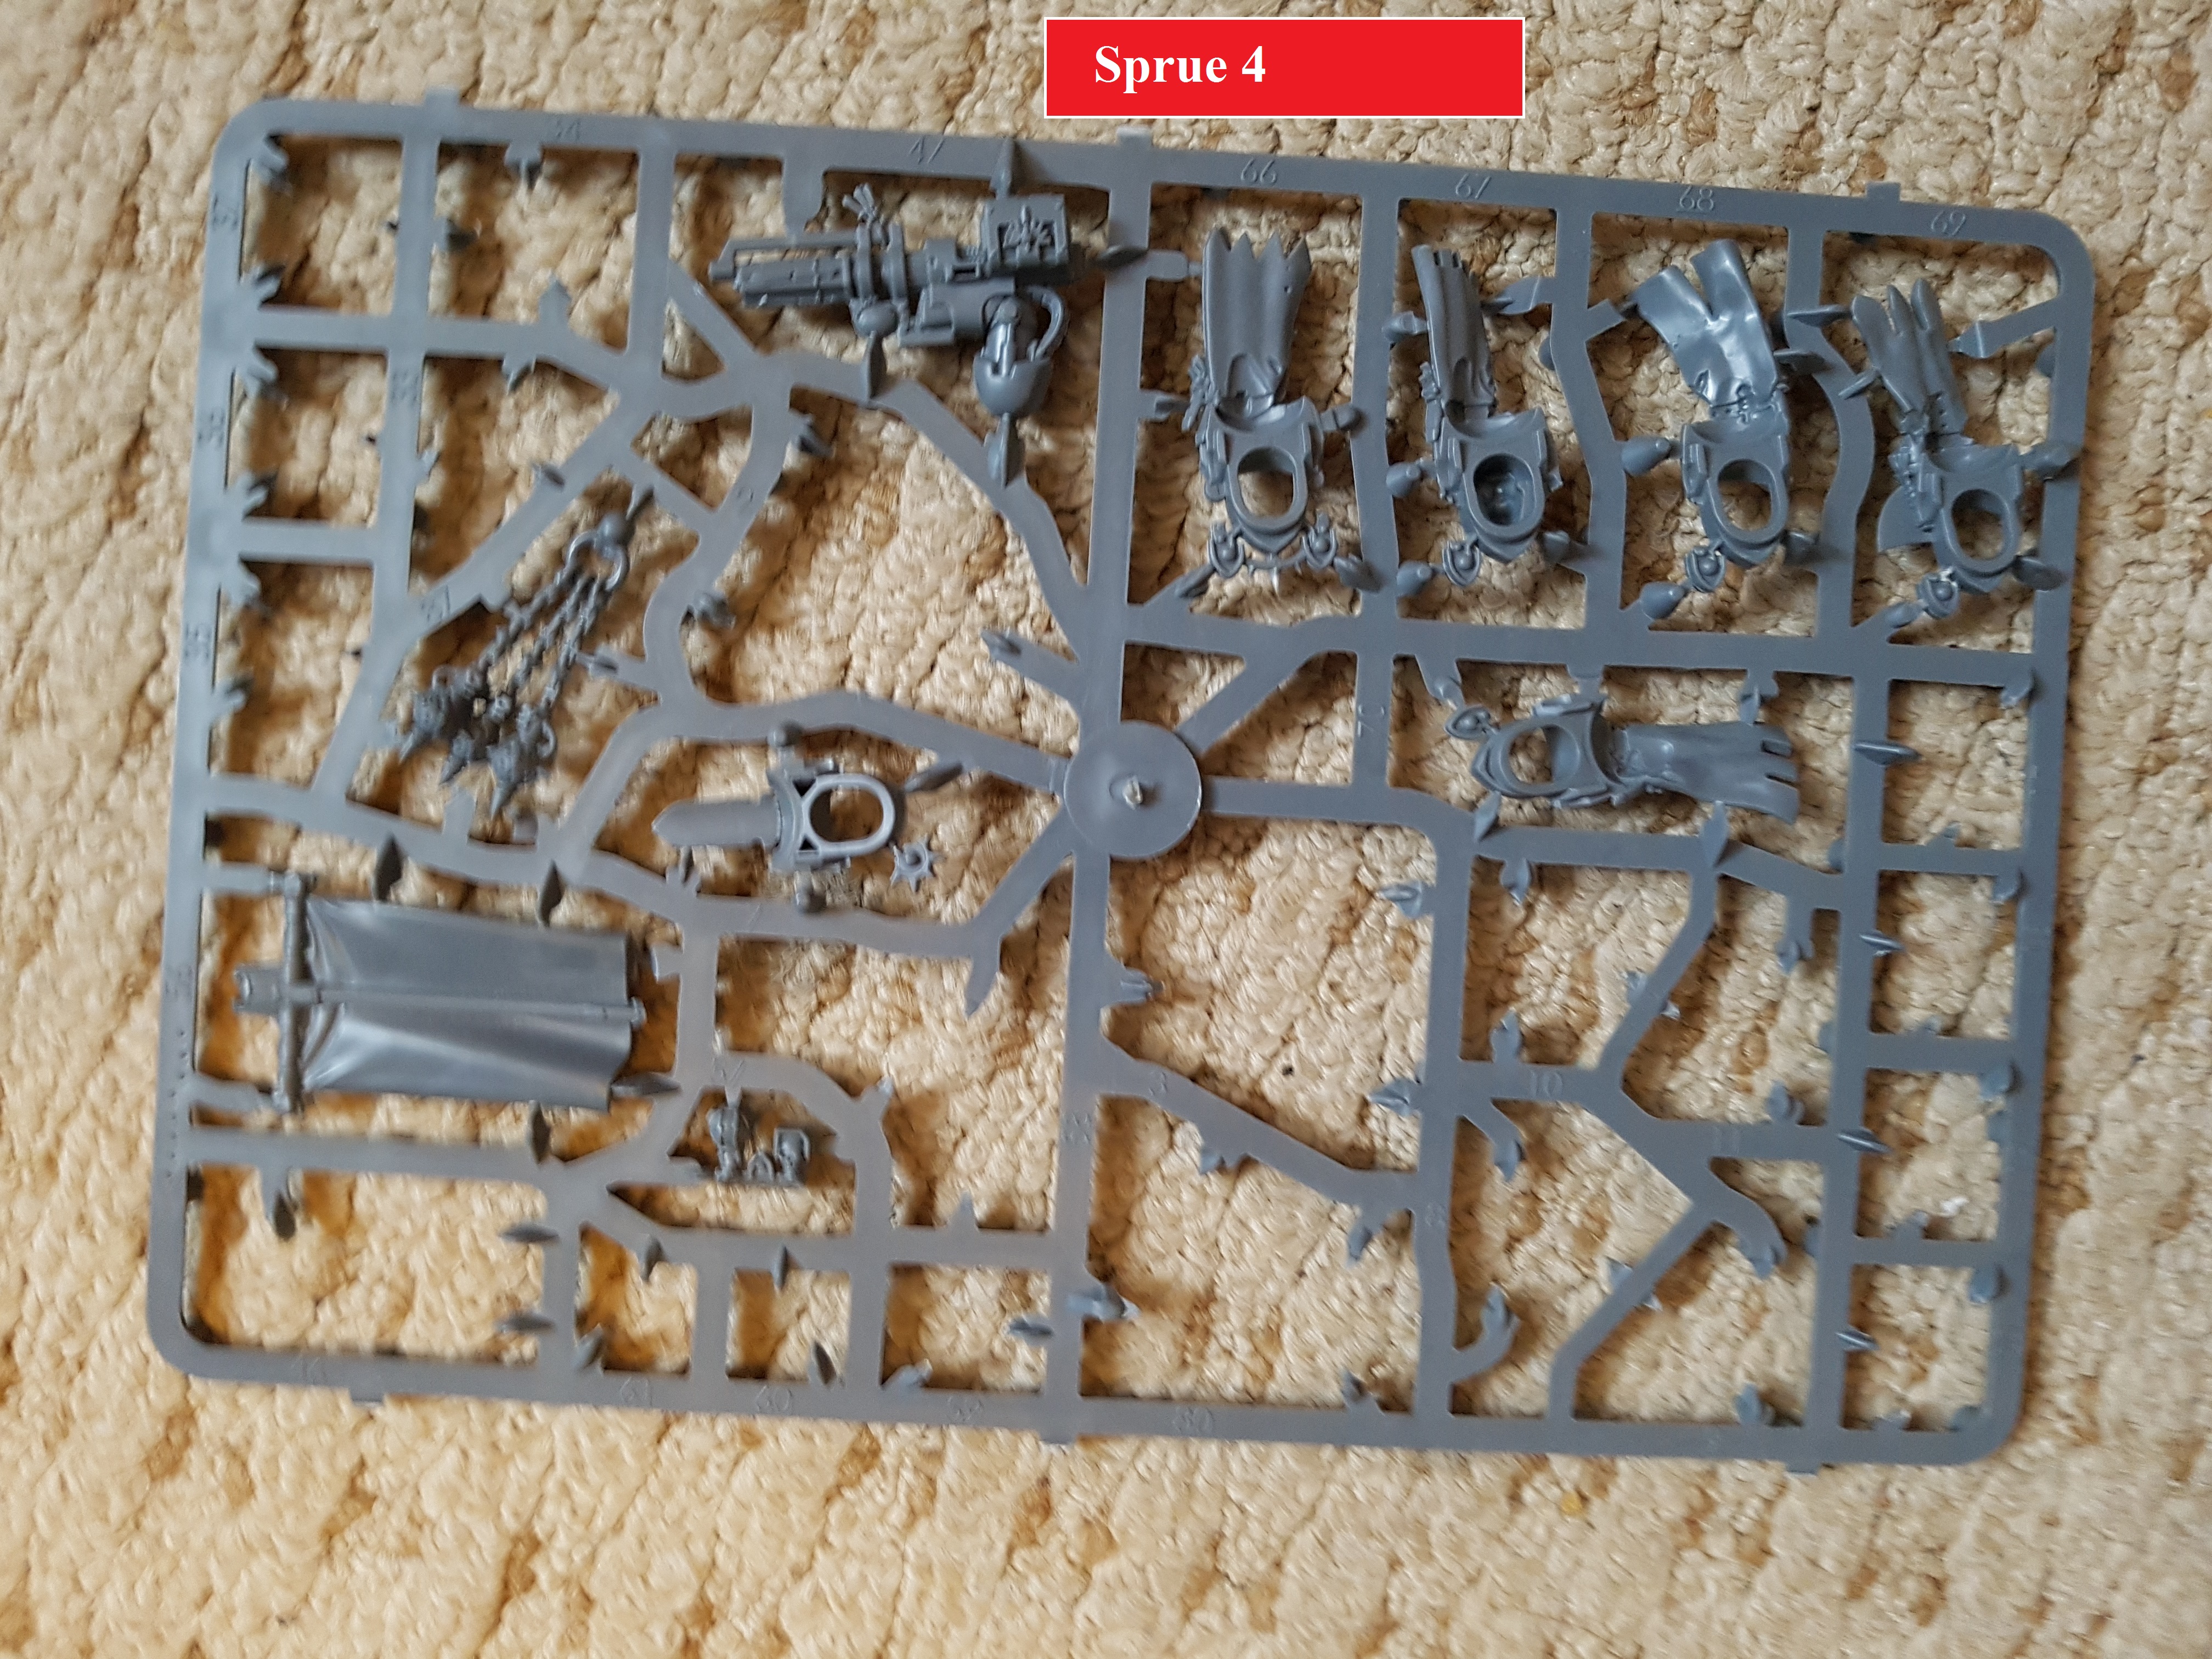
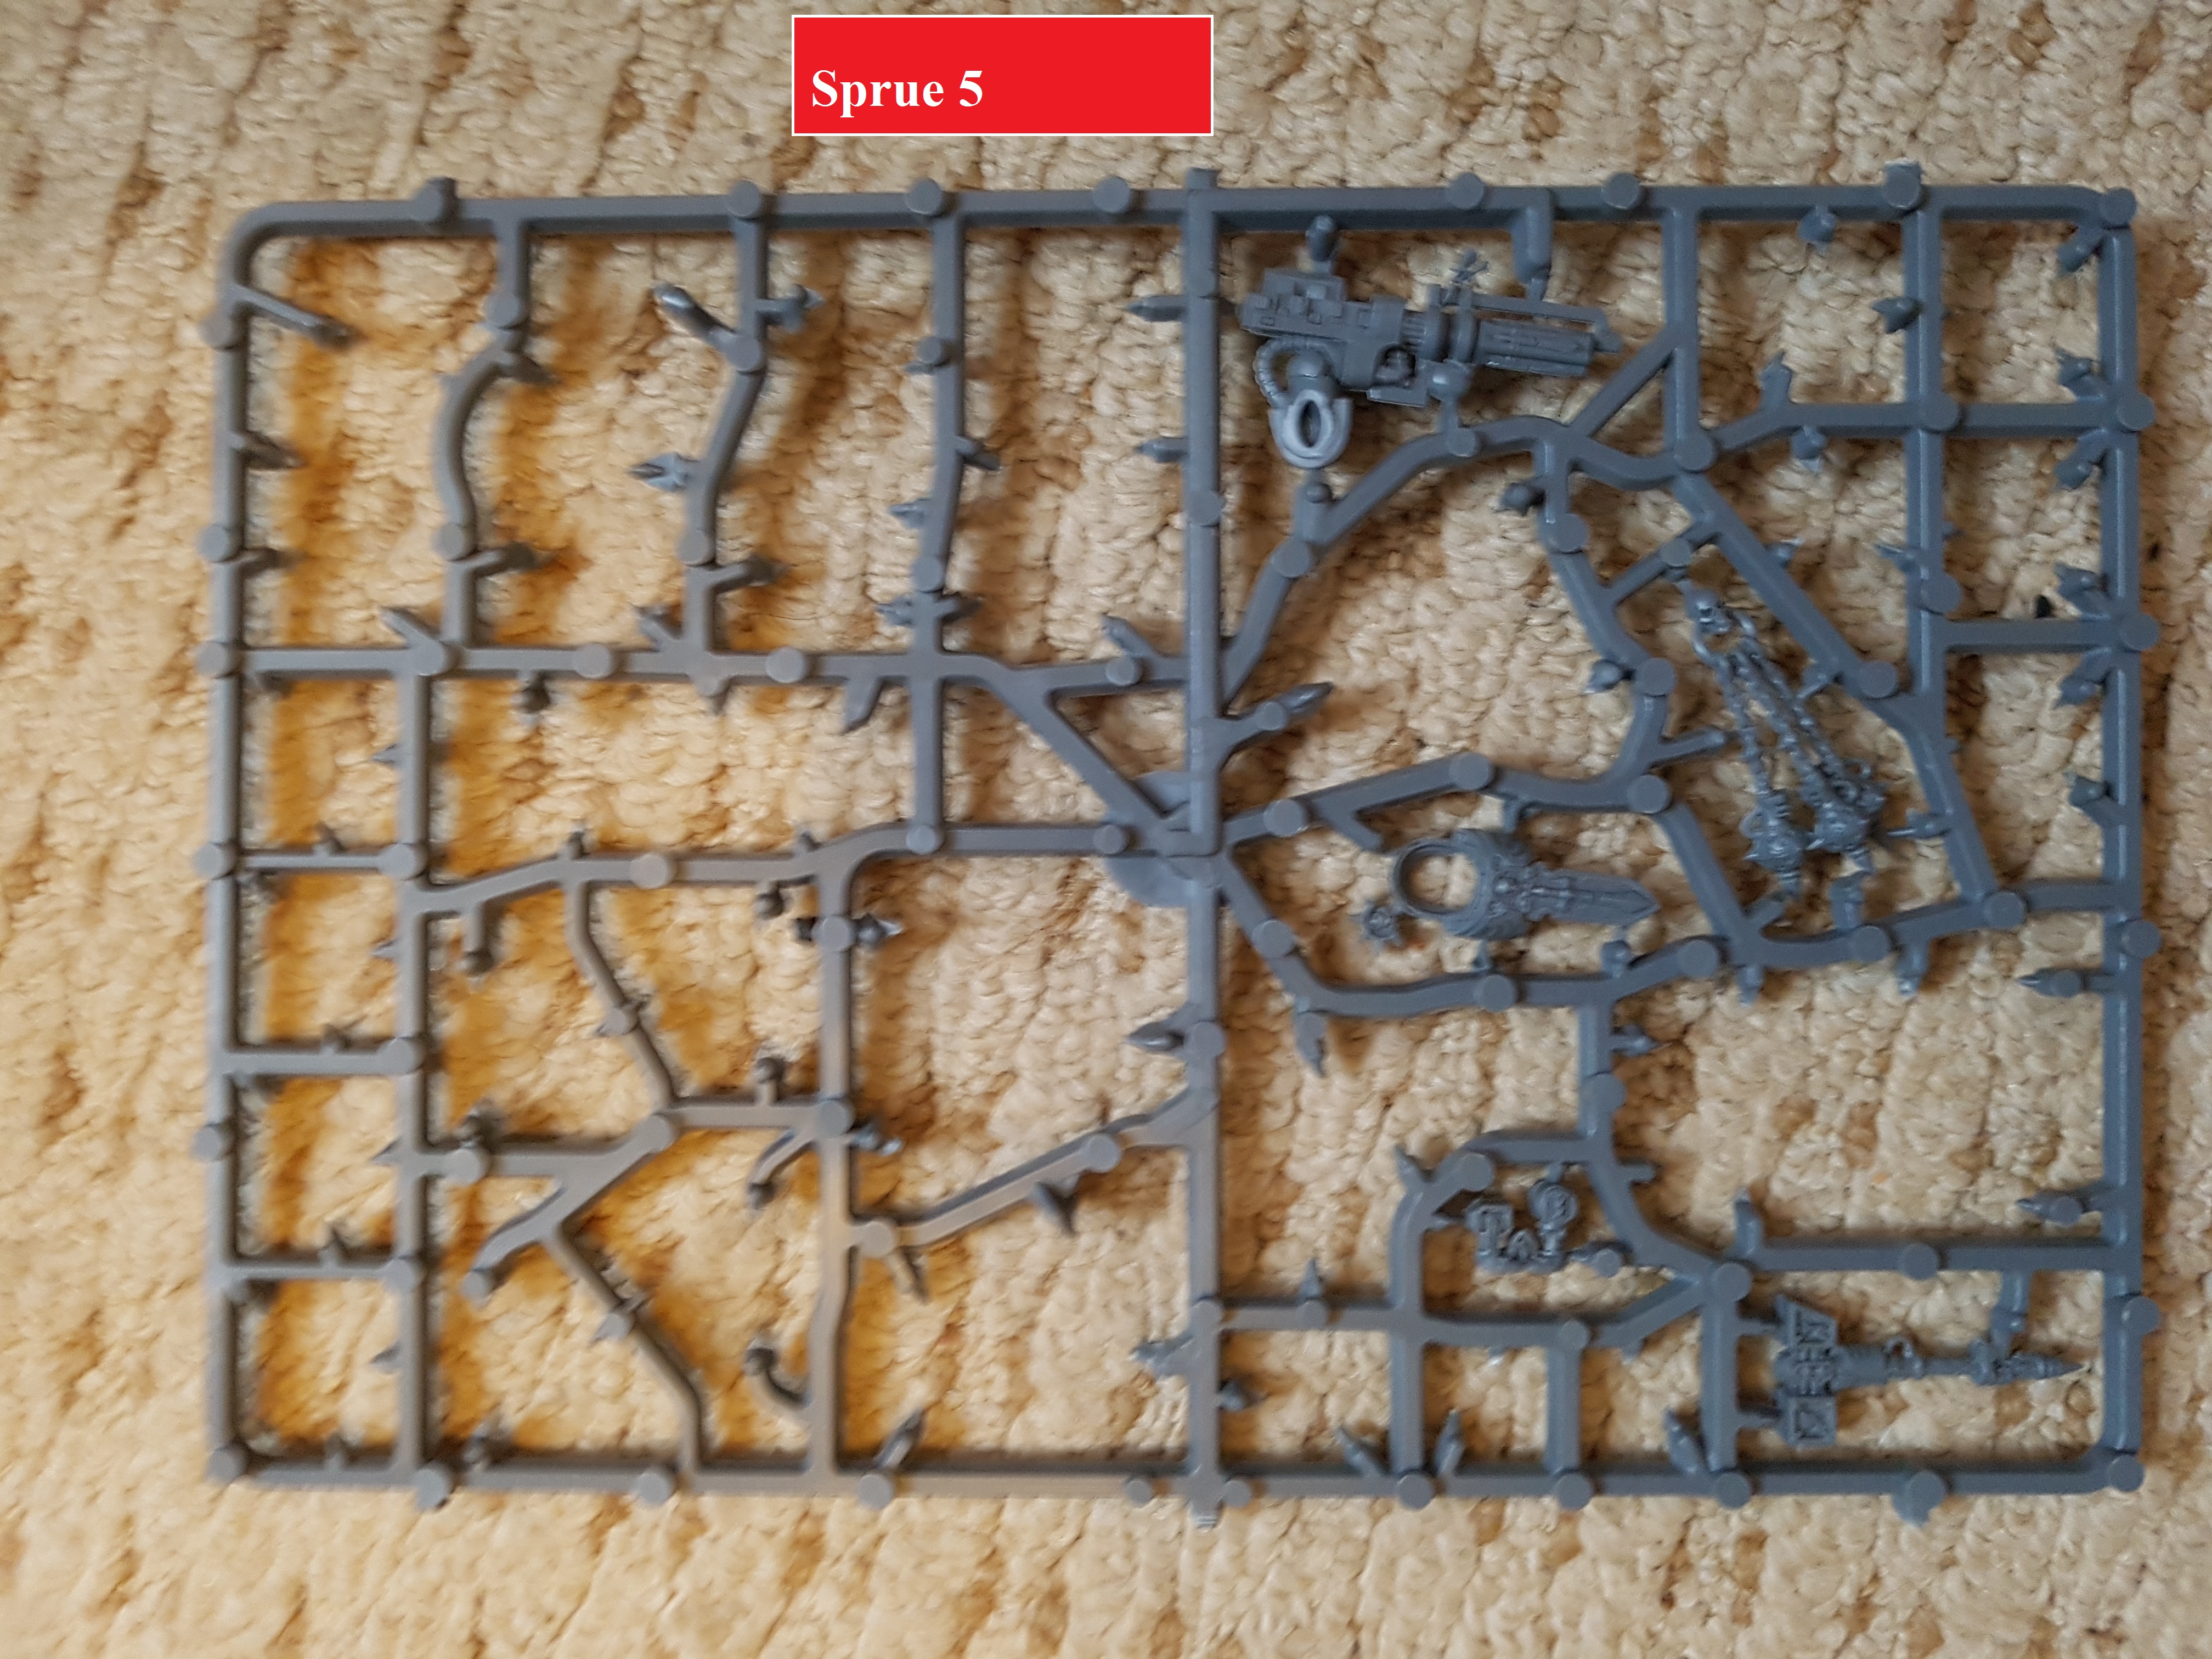
Update: 25/09/18
I’ve added a pic of a sprue to the gallery which highlights the parts I believe I am missing. I’m not seeing them on eBay. If anyone has them I’ll reimburse you. I can buy the other set of guns on eBay, and it would be quite simple to mod them to fit but the guy wants £12 just for the bottom half of that pic, which doesn’t seem proportional to the cost of the whole tank.
EDIT (5 minutes later): Looking again, the guns do appear to be side agnostic after all.
Anyone know the cheapest way/place to get a whole new unassembled Land Raider? Might be better to build a second up with different weapon options and use the lascannons for this one.
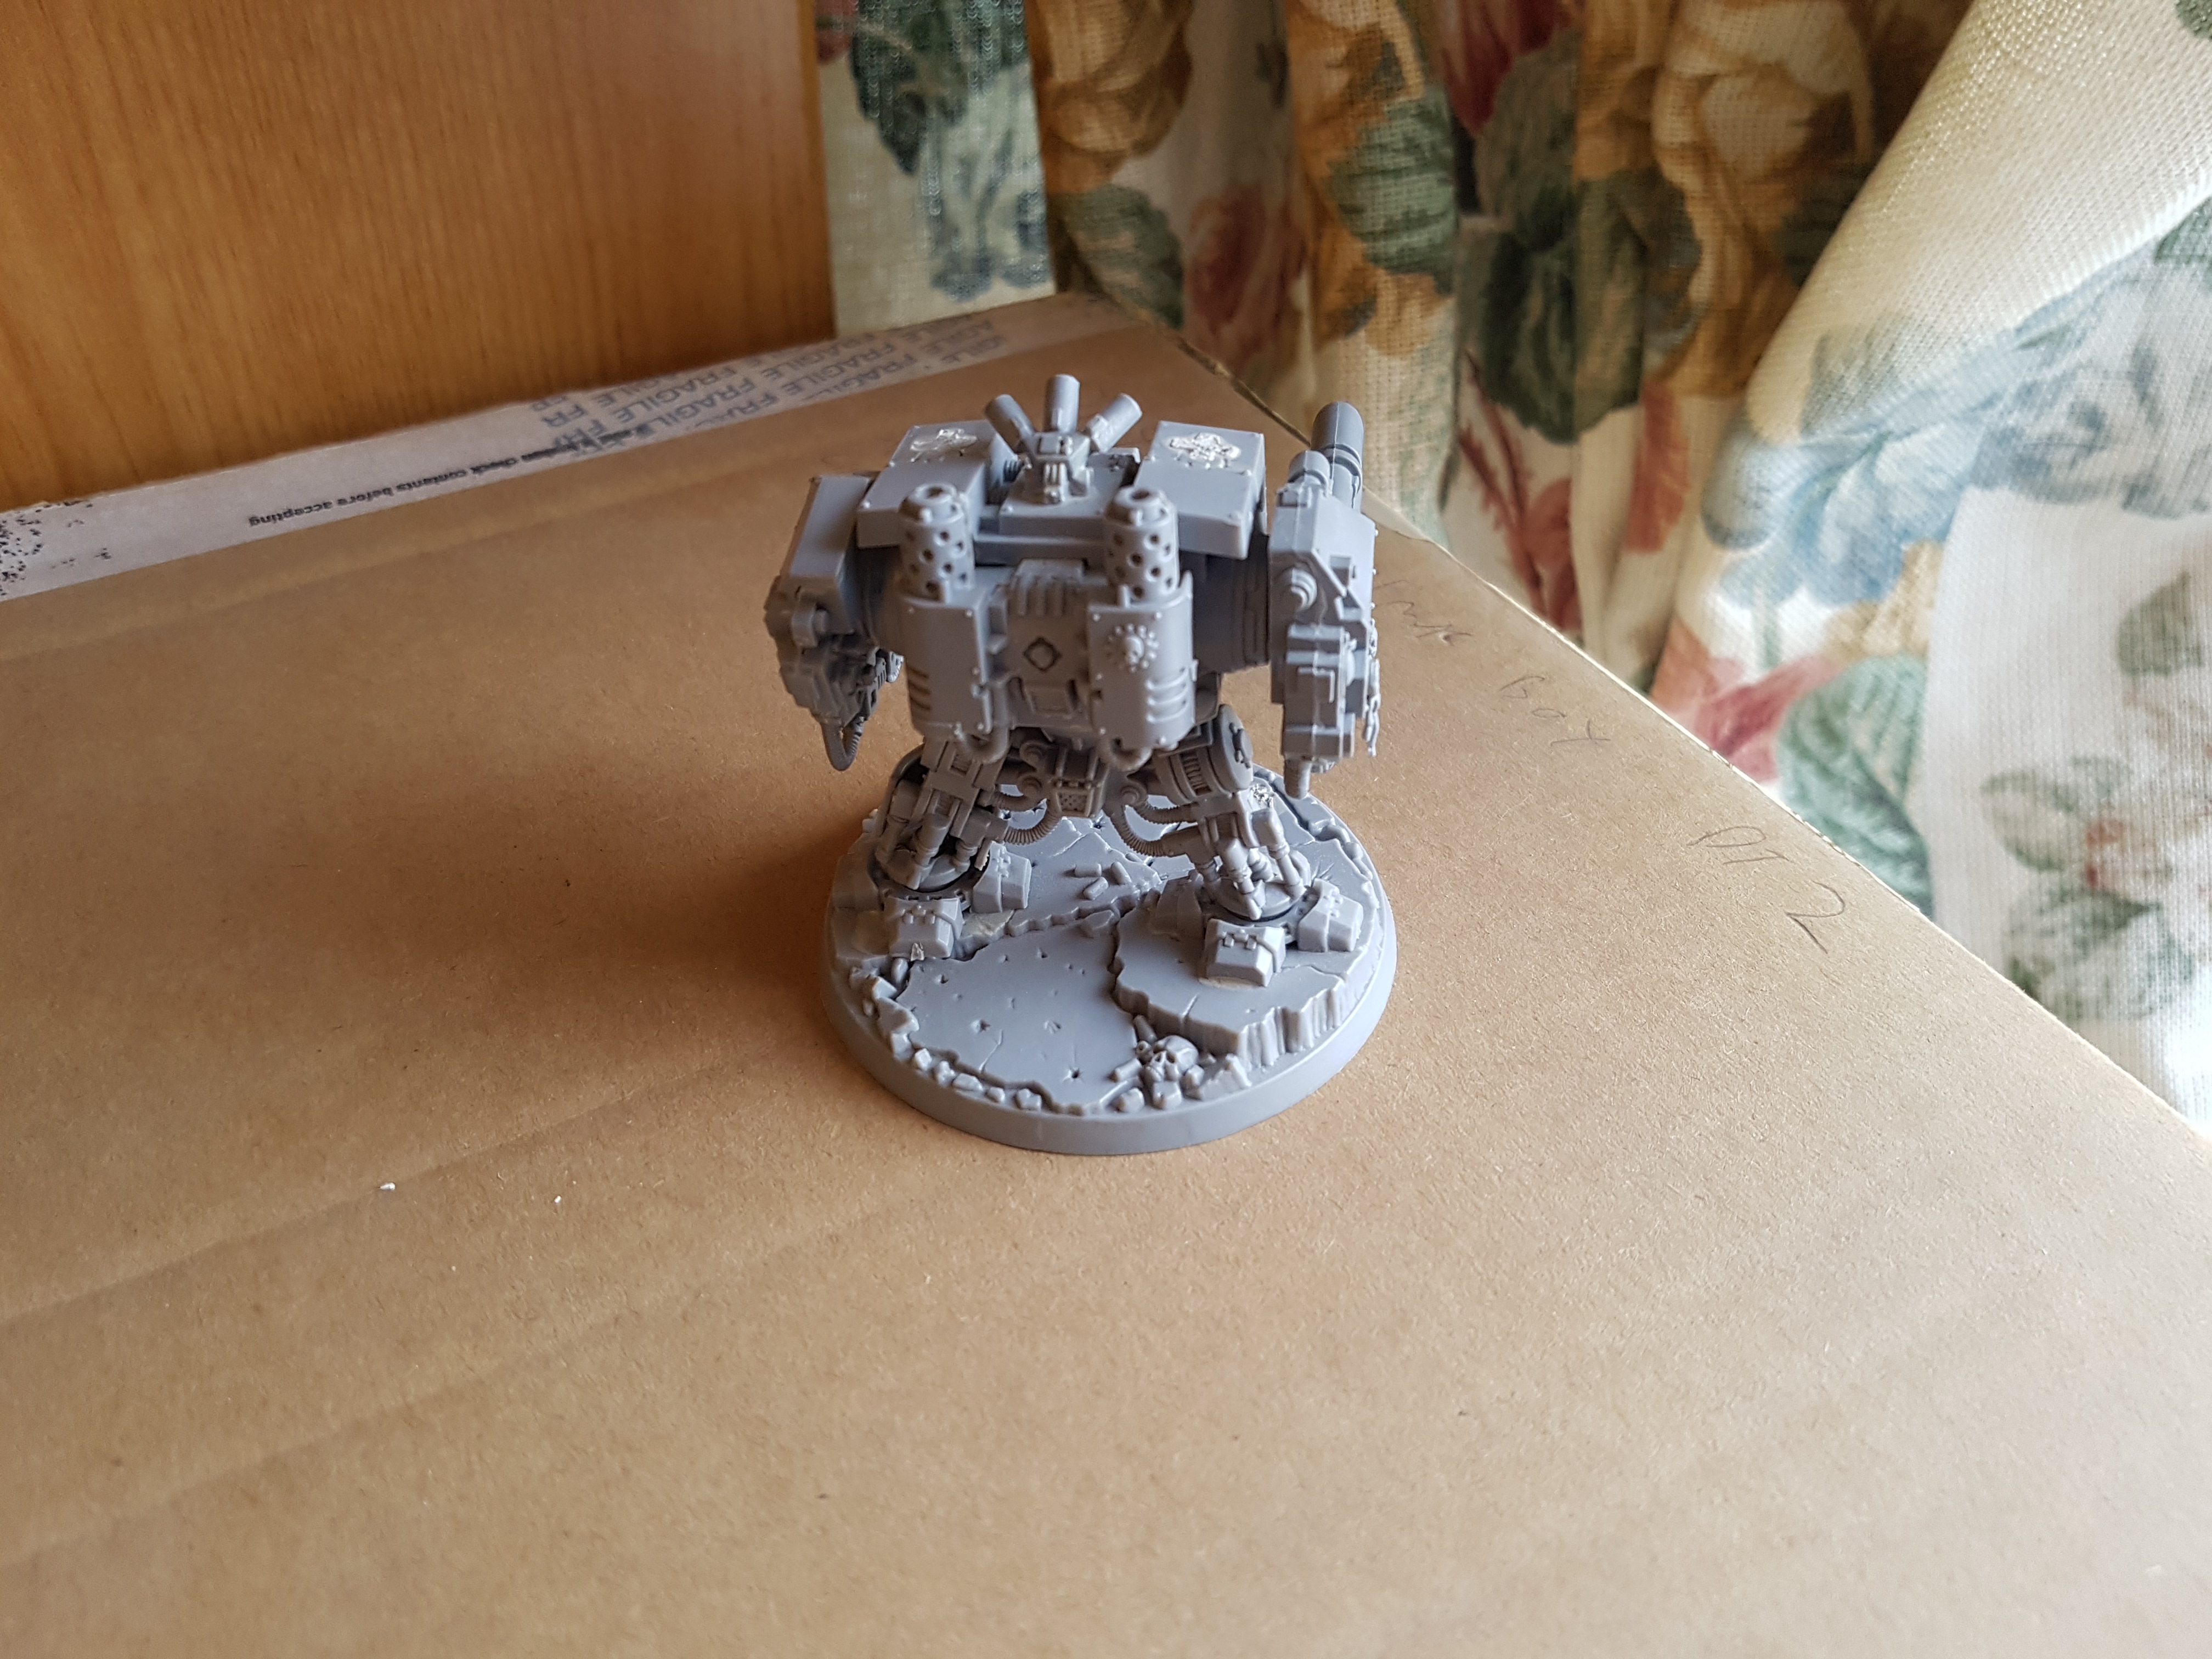
Venerable Dreadnought with Church Windows design and a halo
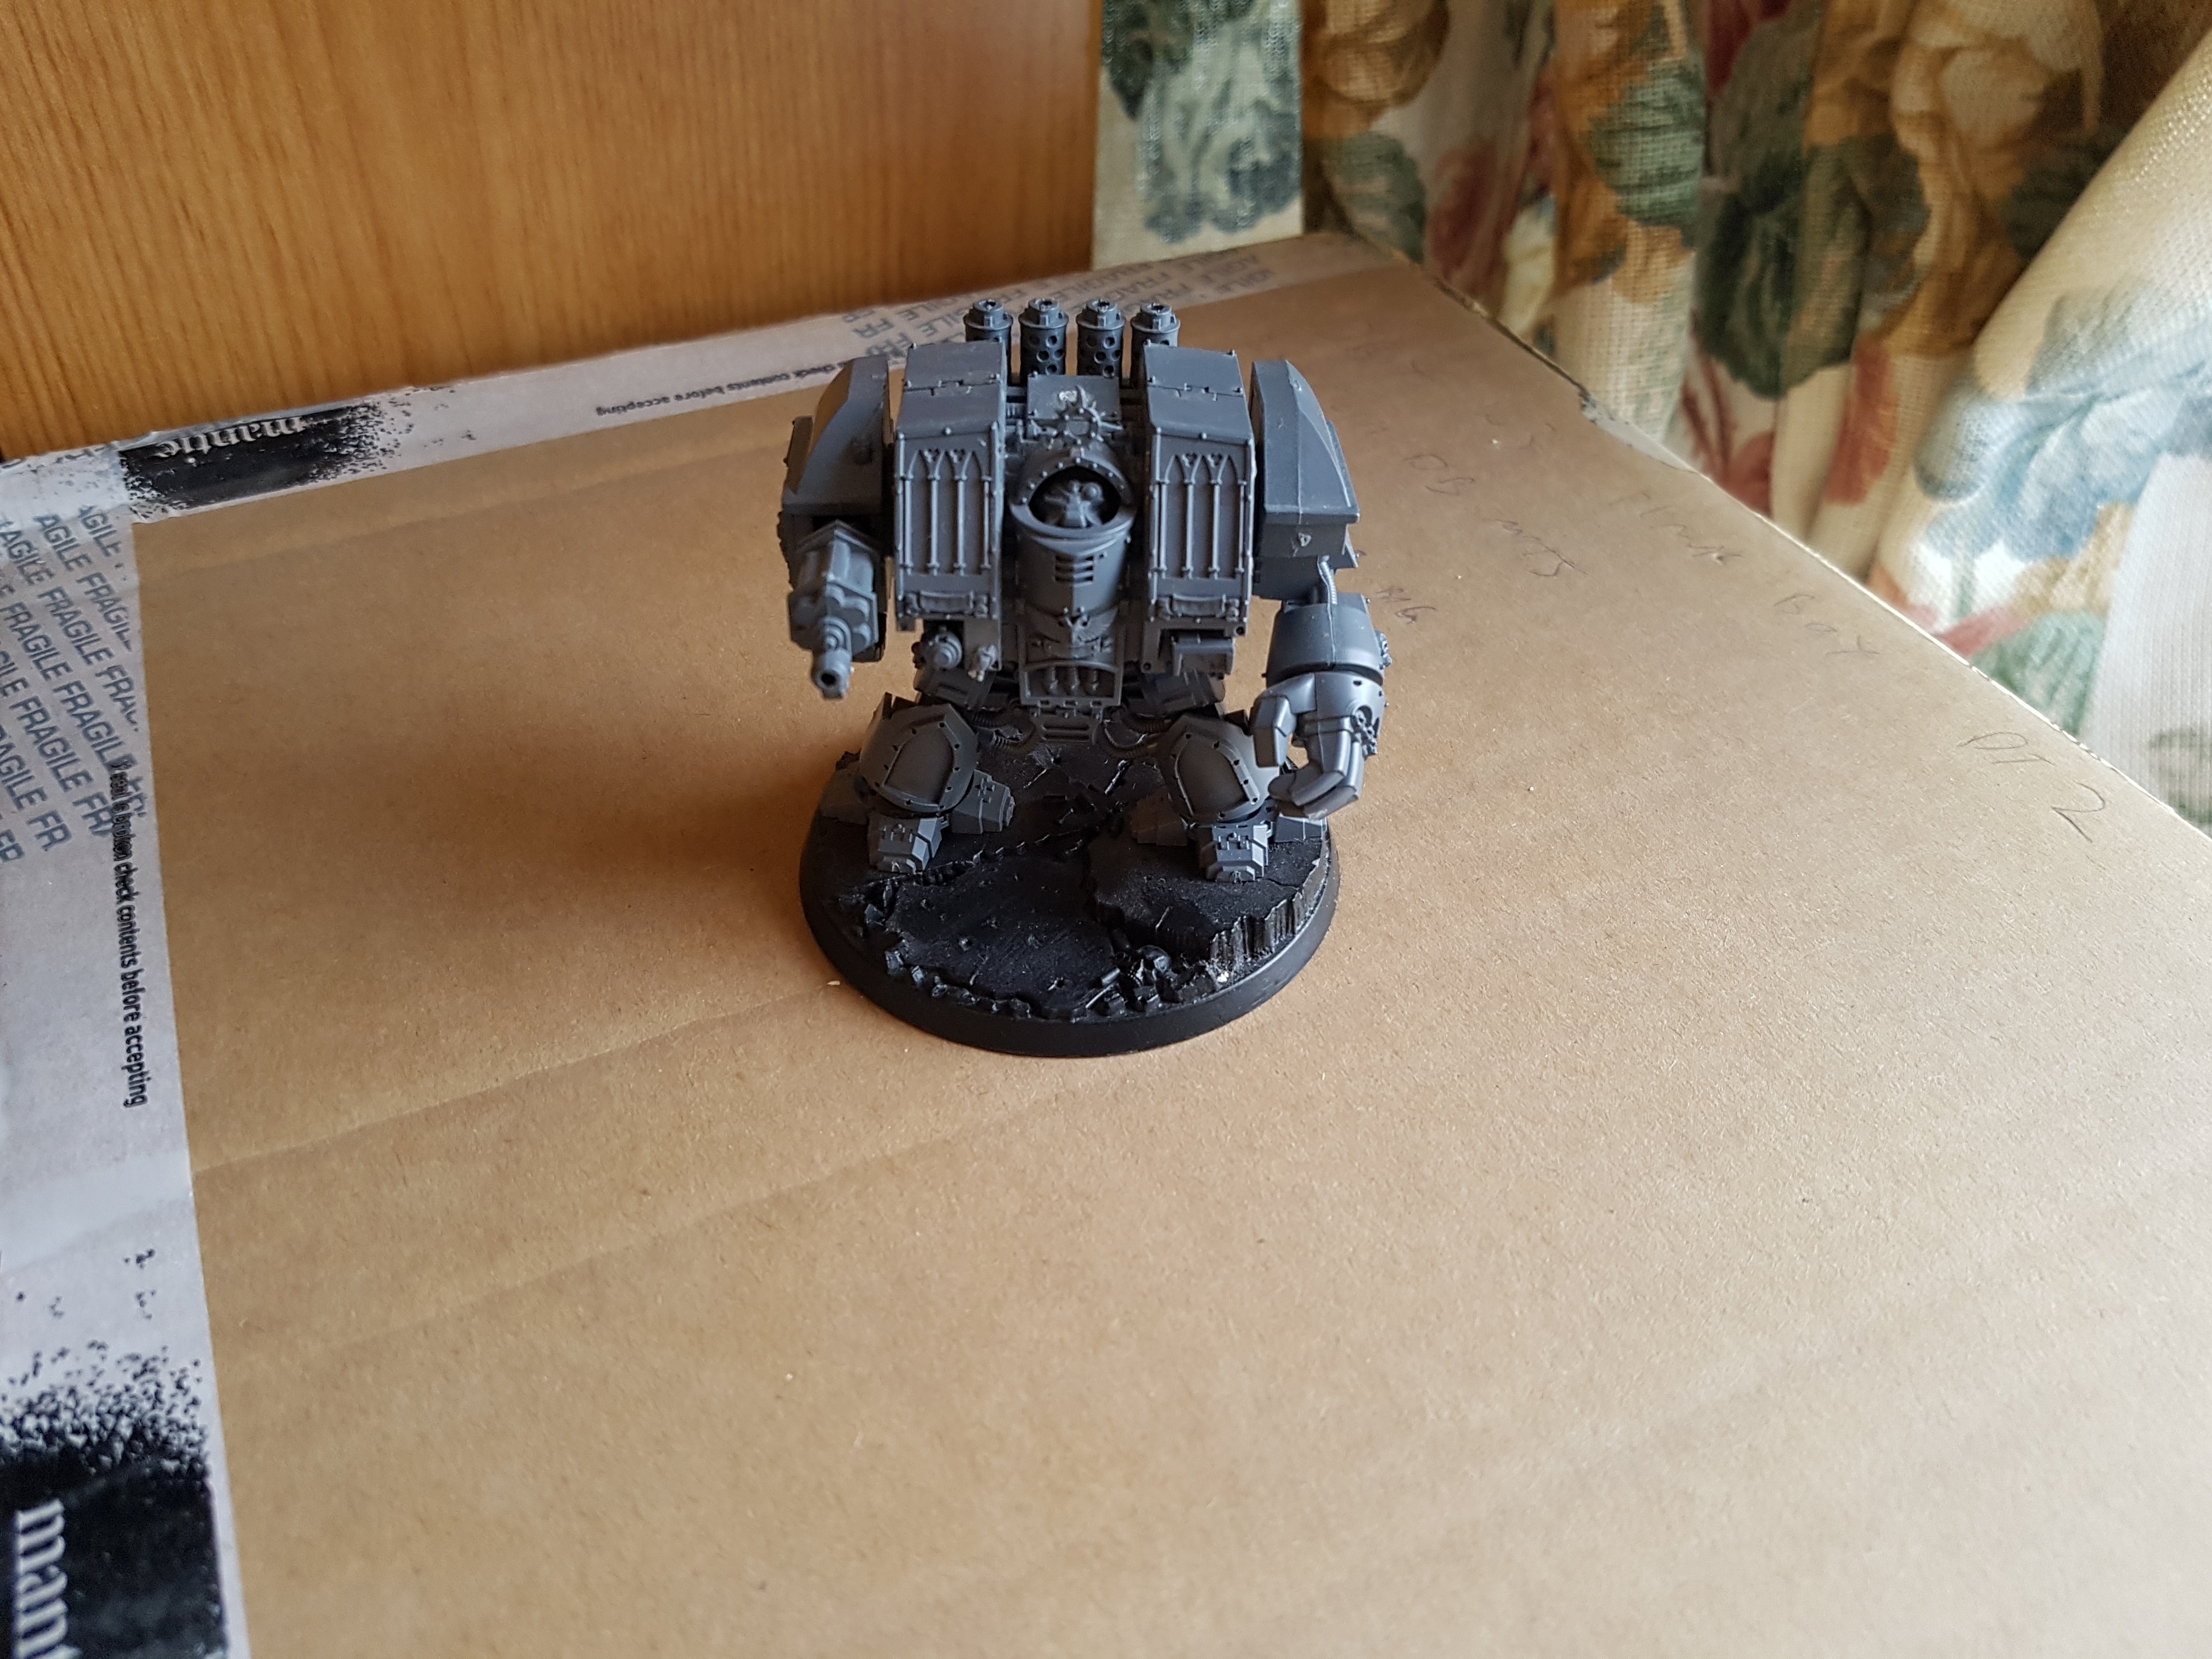

I can’t find one on the web store with this design on it. Any clues? I think I see some Space Wolves in the box if that helps identify anything.
Edit: Found thanks to @lordofuzkulak
https://www.games-workshop.com/en-GB/Space-Marine-Venerable-Dreadnought
Edit 14/01/19
Trying to identify load out. I believe thats a Venerable Dreadnaught Power Fist, and an Assault Cannon. Is that an iron halo? Are Space Wolf Dreadnoughts allowed those? I thought not.
Are there any limits on the weapons Space Wolf Dreadnoughts can have? Are my 2 legal?
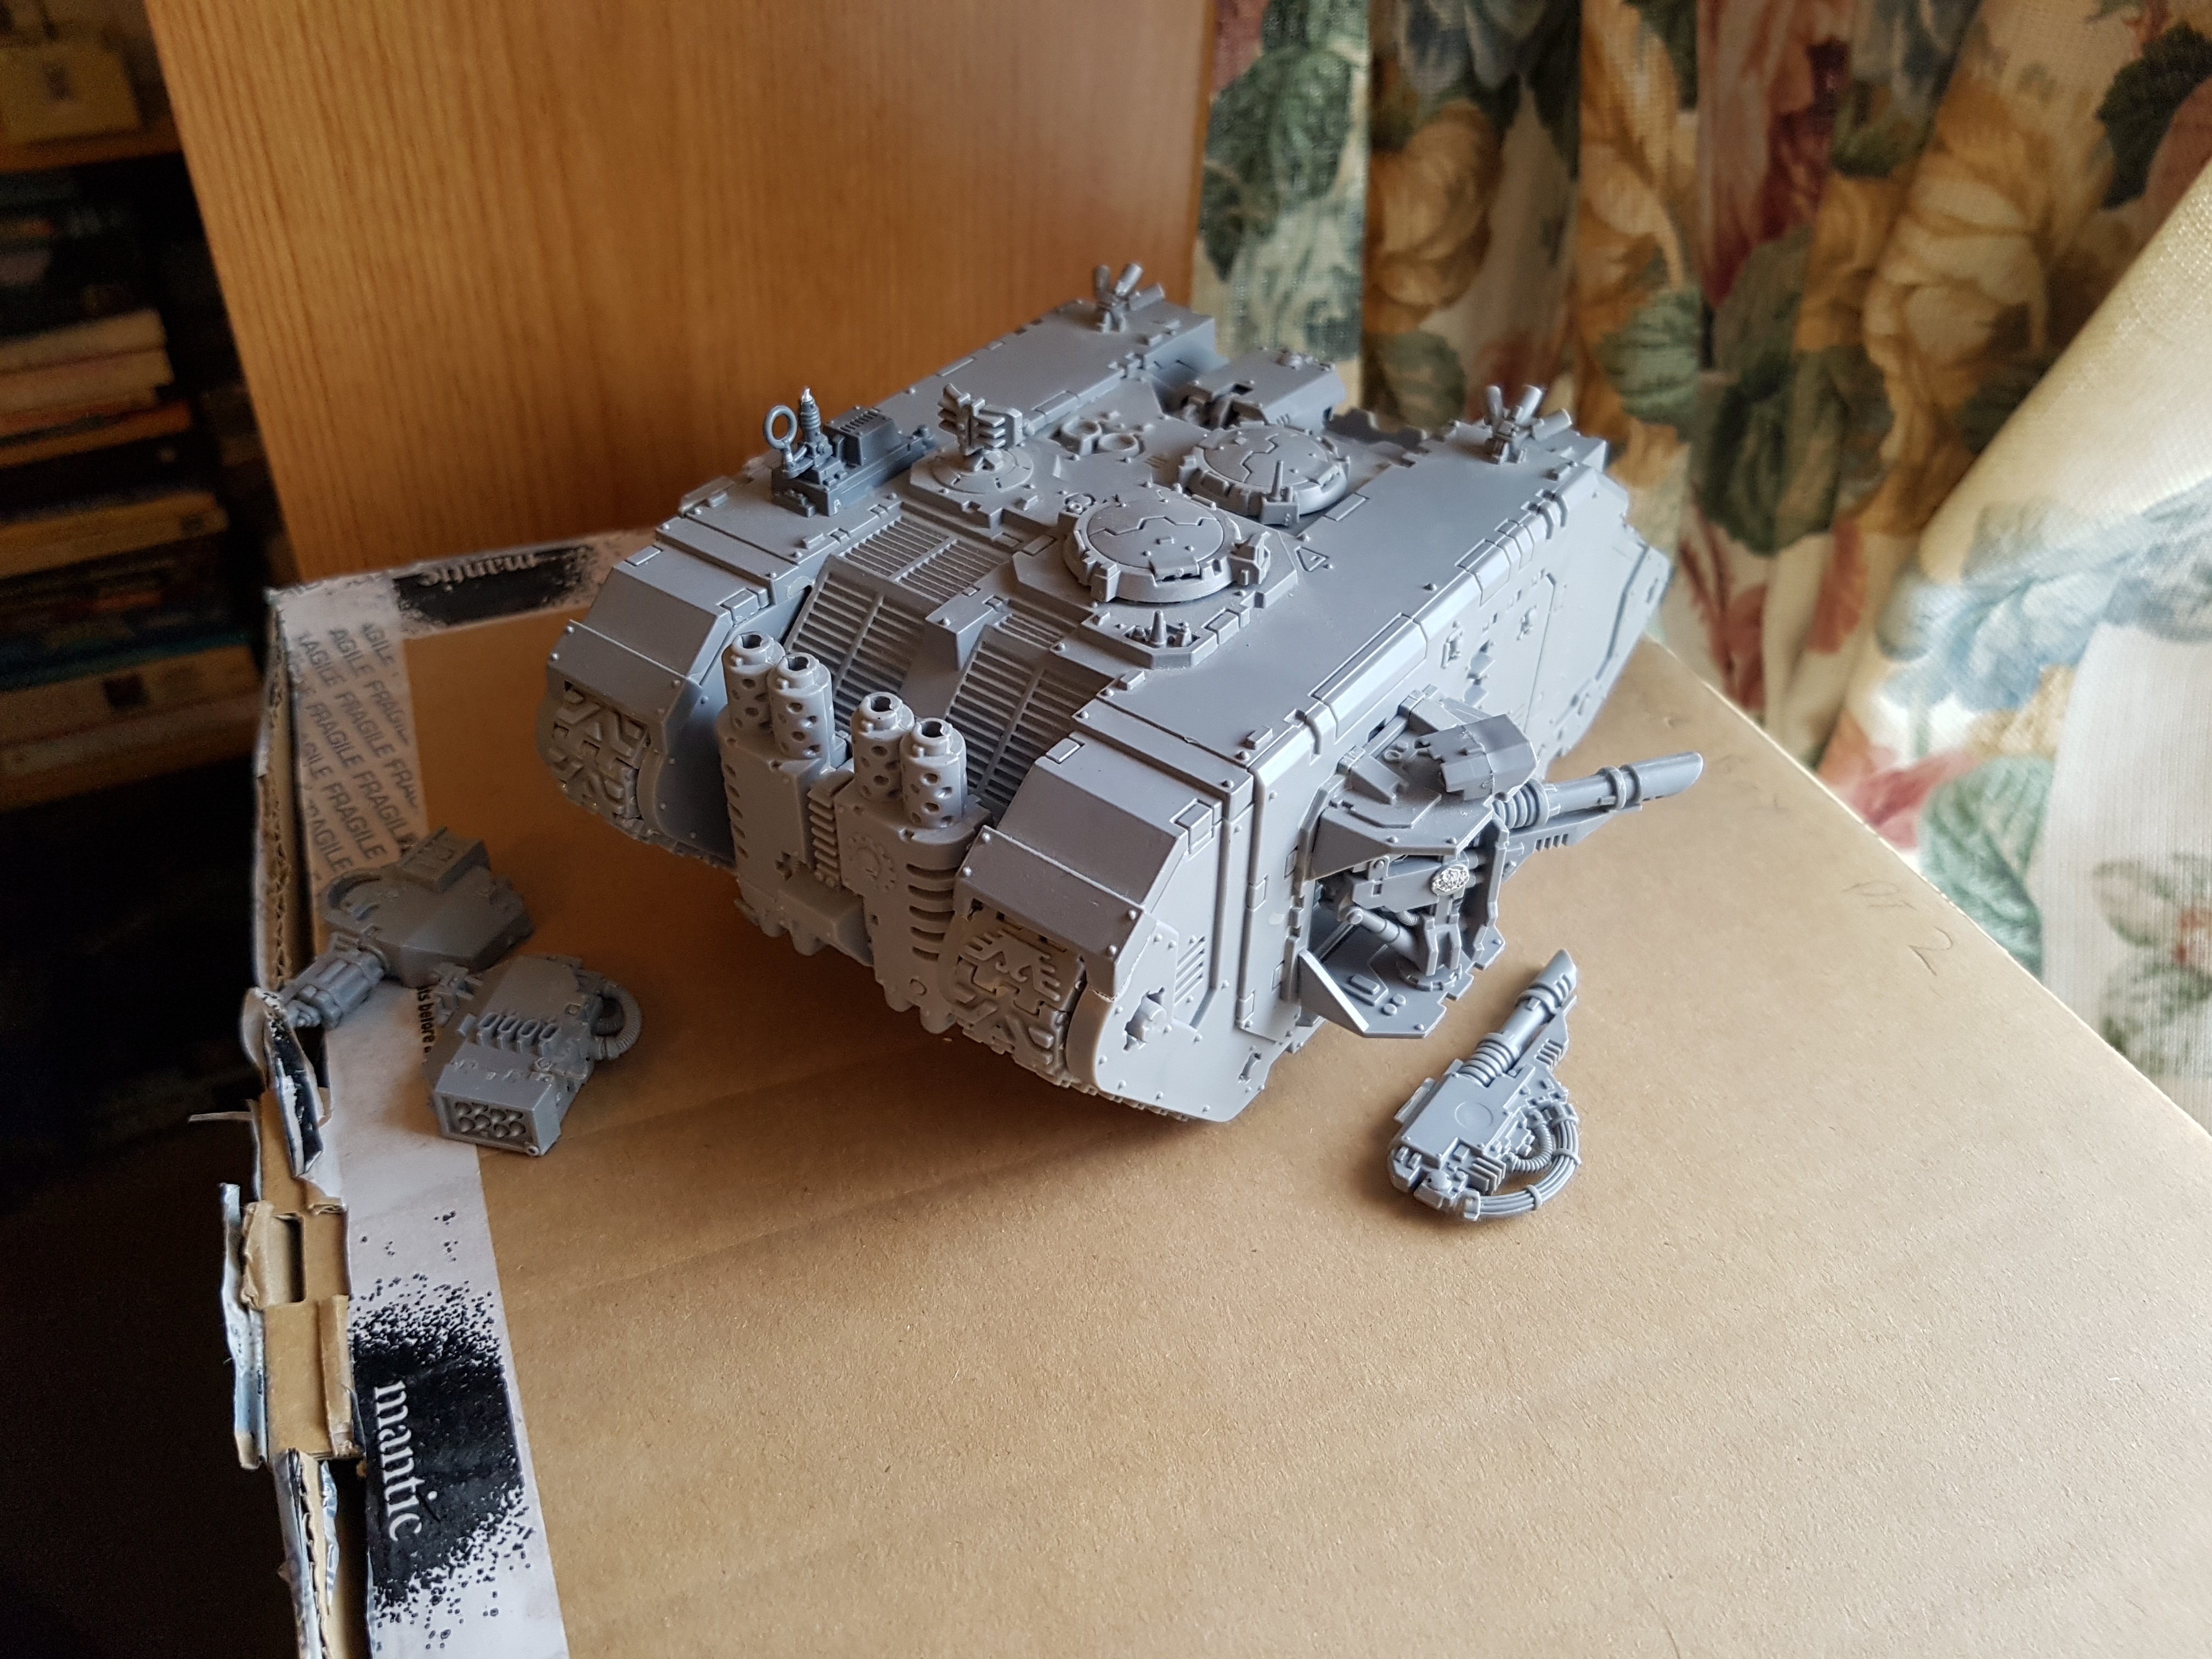
Dreadnaught 2 - Vanilla Dreadnaught, not An Ironclad

Looks like an Ironclad but the plating on the front isn’t a 100% match. I hope the missing shoulder turret things are in a box somewhere. Are the essential or are there variants without them?
https://www.games-workshop.com/en-GB/Space-Marine-Dreadnought
https://www.games-workshop.com/en-GB/Space-Marine-Ironclad-Dreadnought
Edit 14/01/19: Trying to identify the loadout
He has a Lascannon, and Mark V Power Fist.
The spares are a Left Shoulder Missile Launcher and a Right Shoulder Assault Cannon
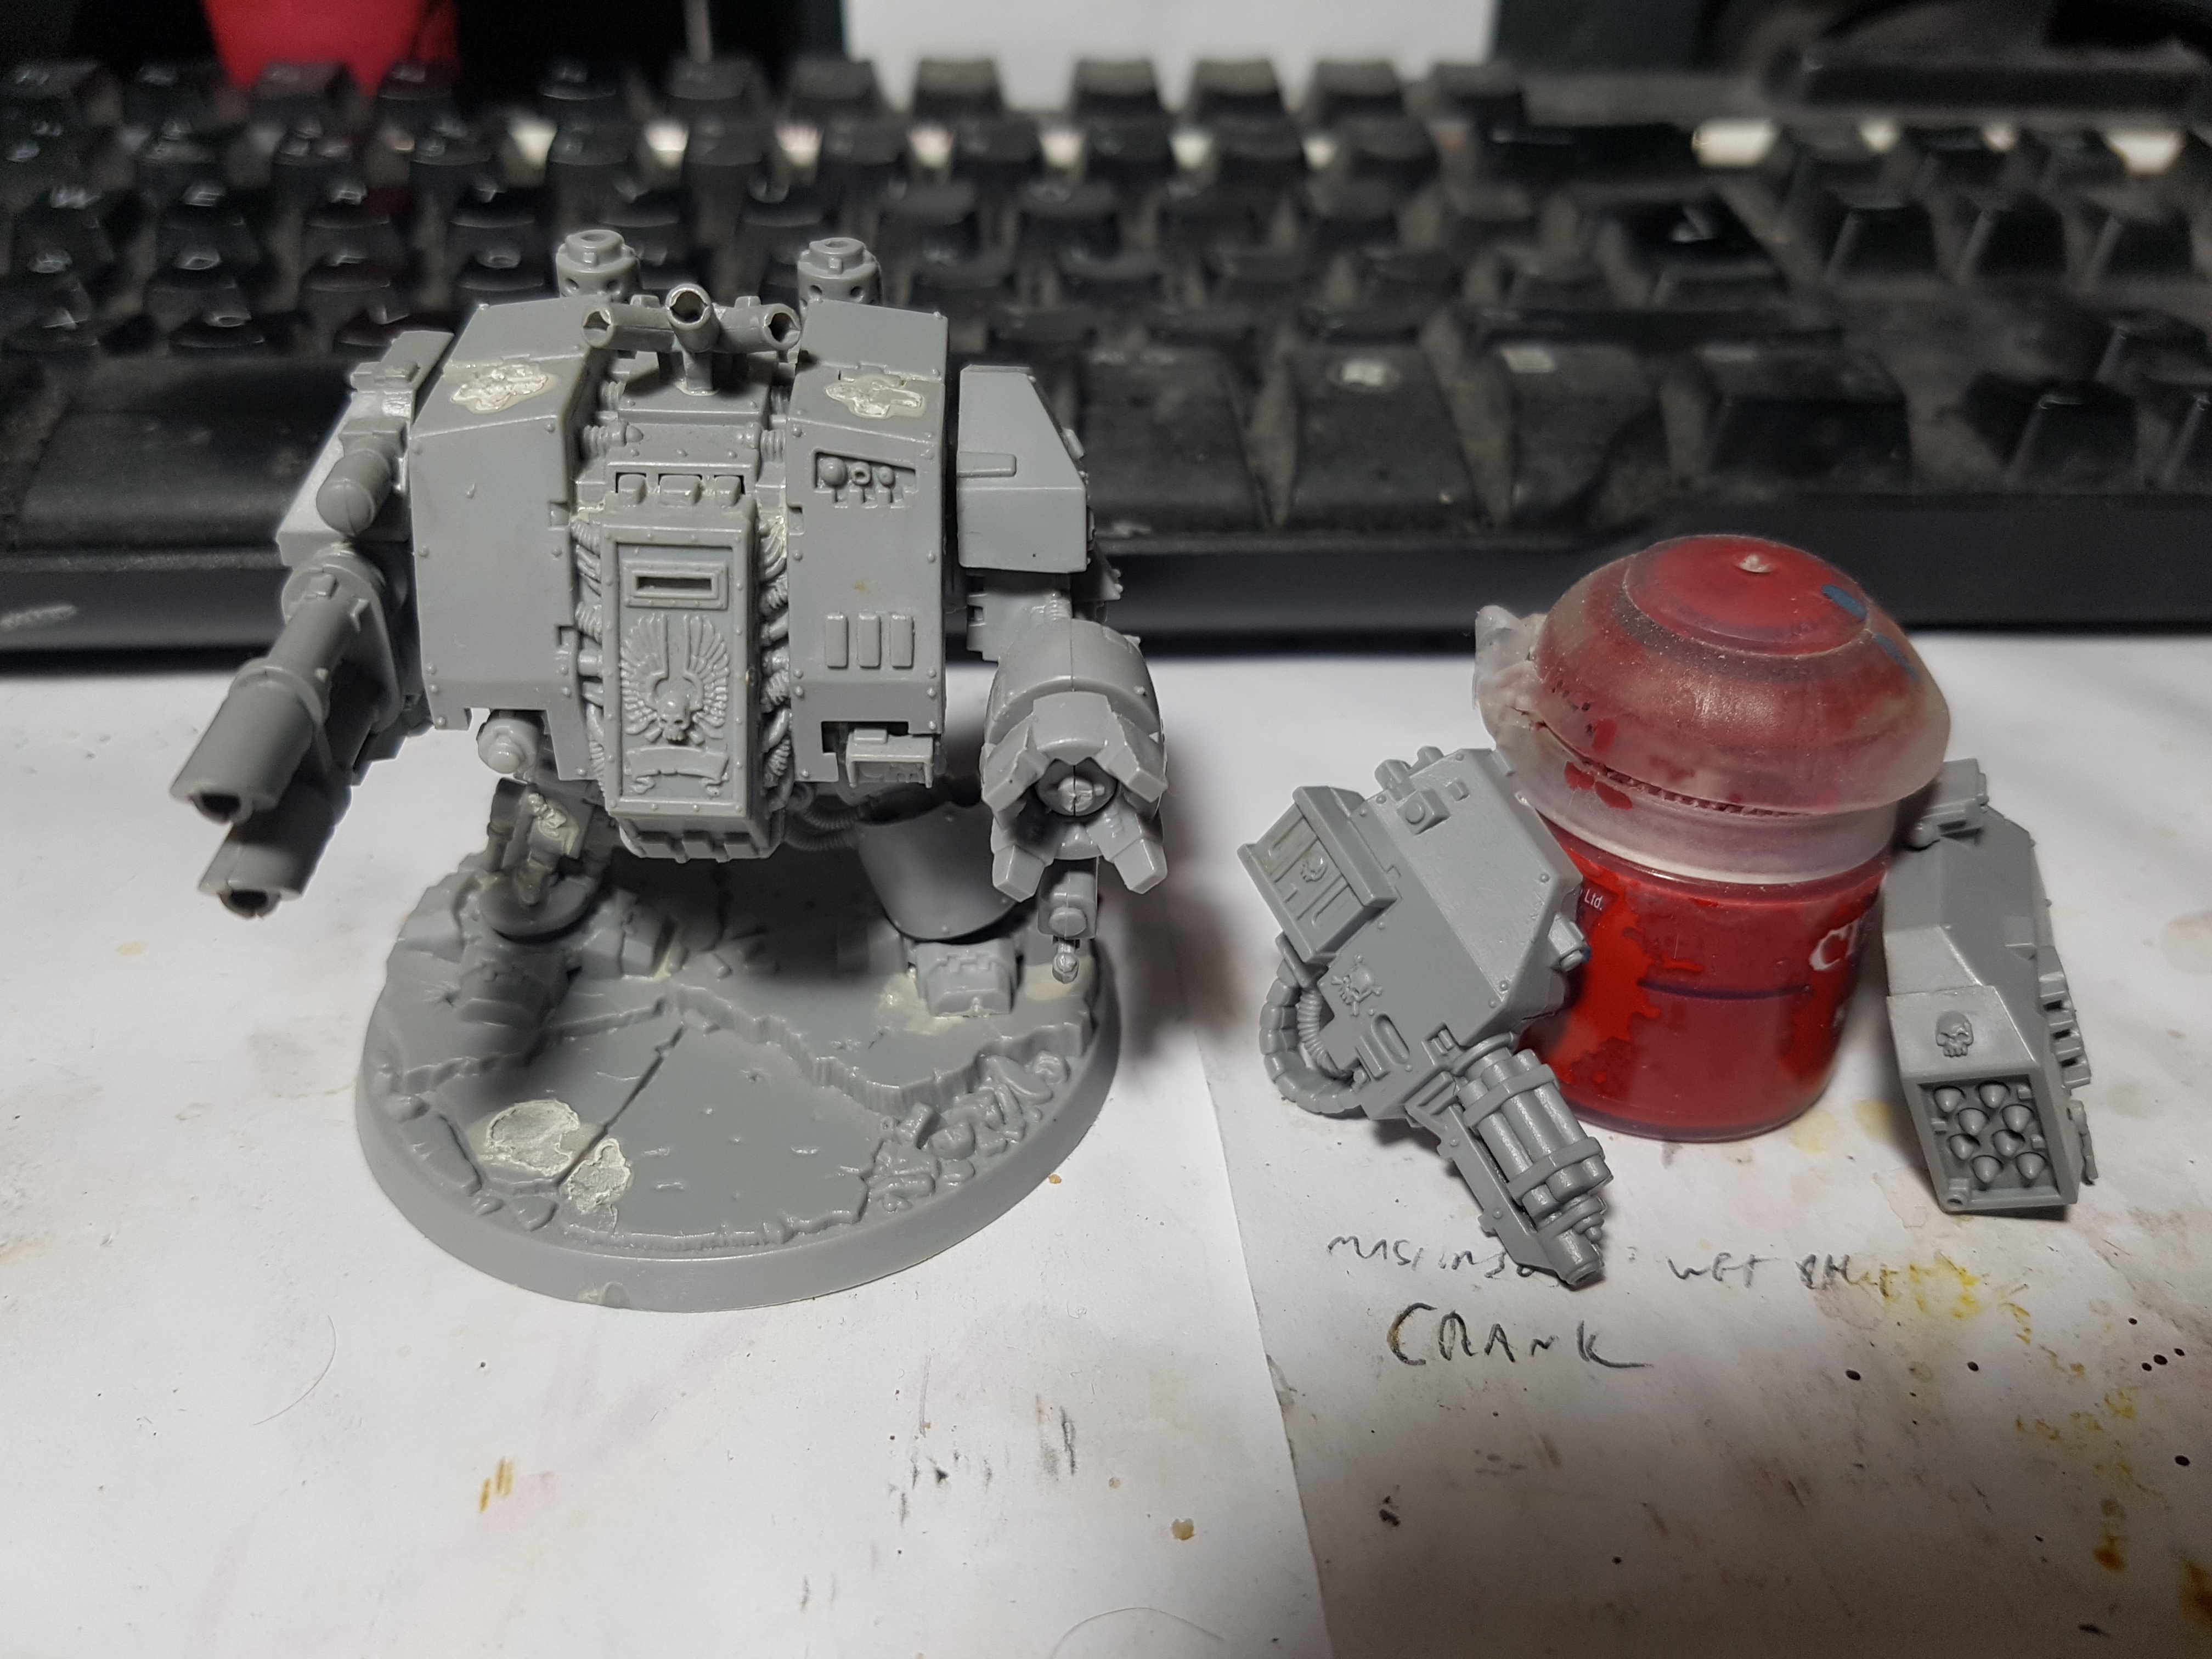 I also have these weapons. If I was inclined, and I could safeley remove the existing weapons I could magnetise both sets to swap in and out. Still not sure what was glued to its shoulders once, but it doesn't seem to matter.
Daemon 1 - Daemon of Khorne?
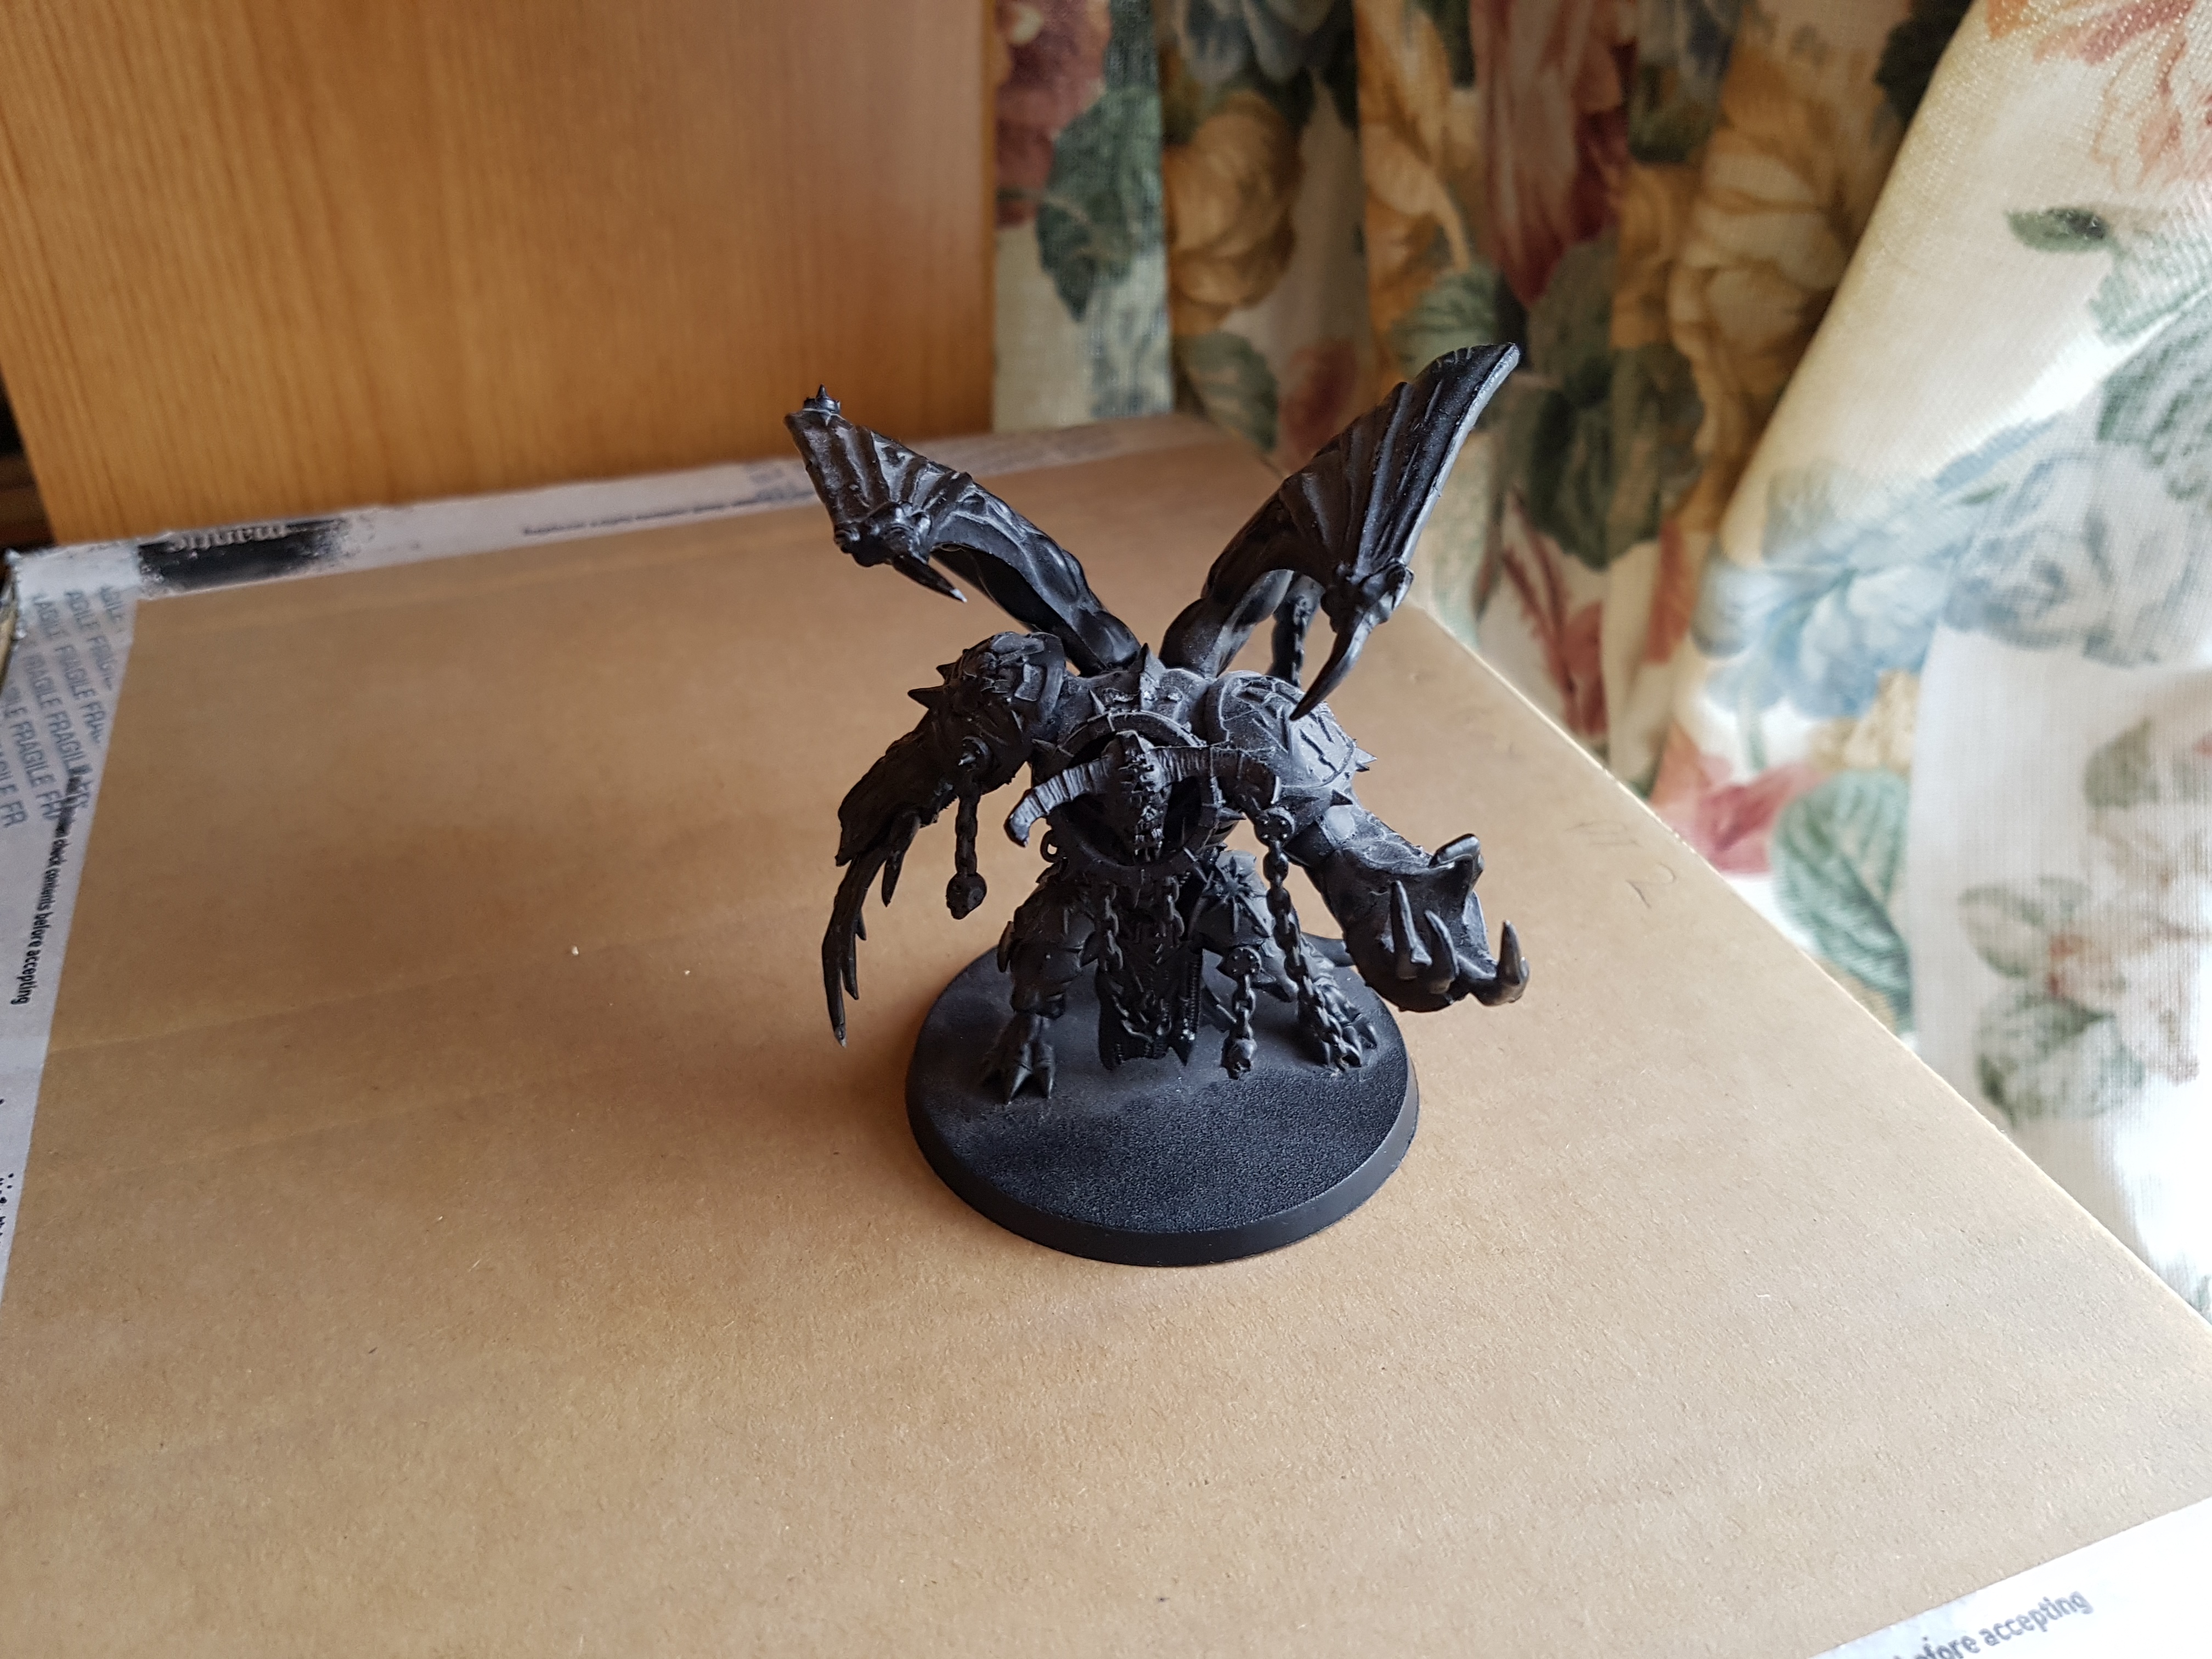
Is this a Bloodthirster? A Daemon Prince? Something else? I see no direct match on the web store.
Edit: Its a Daemon Prince
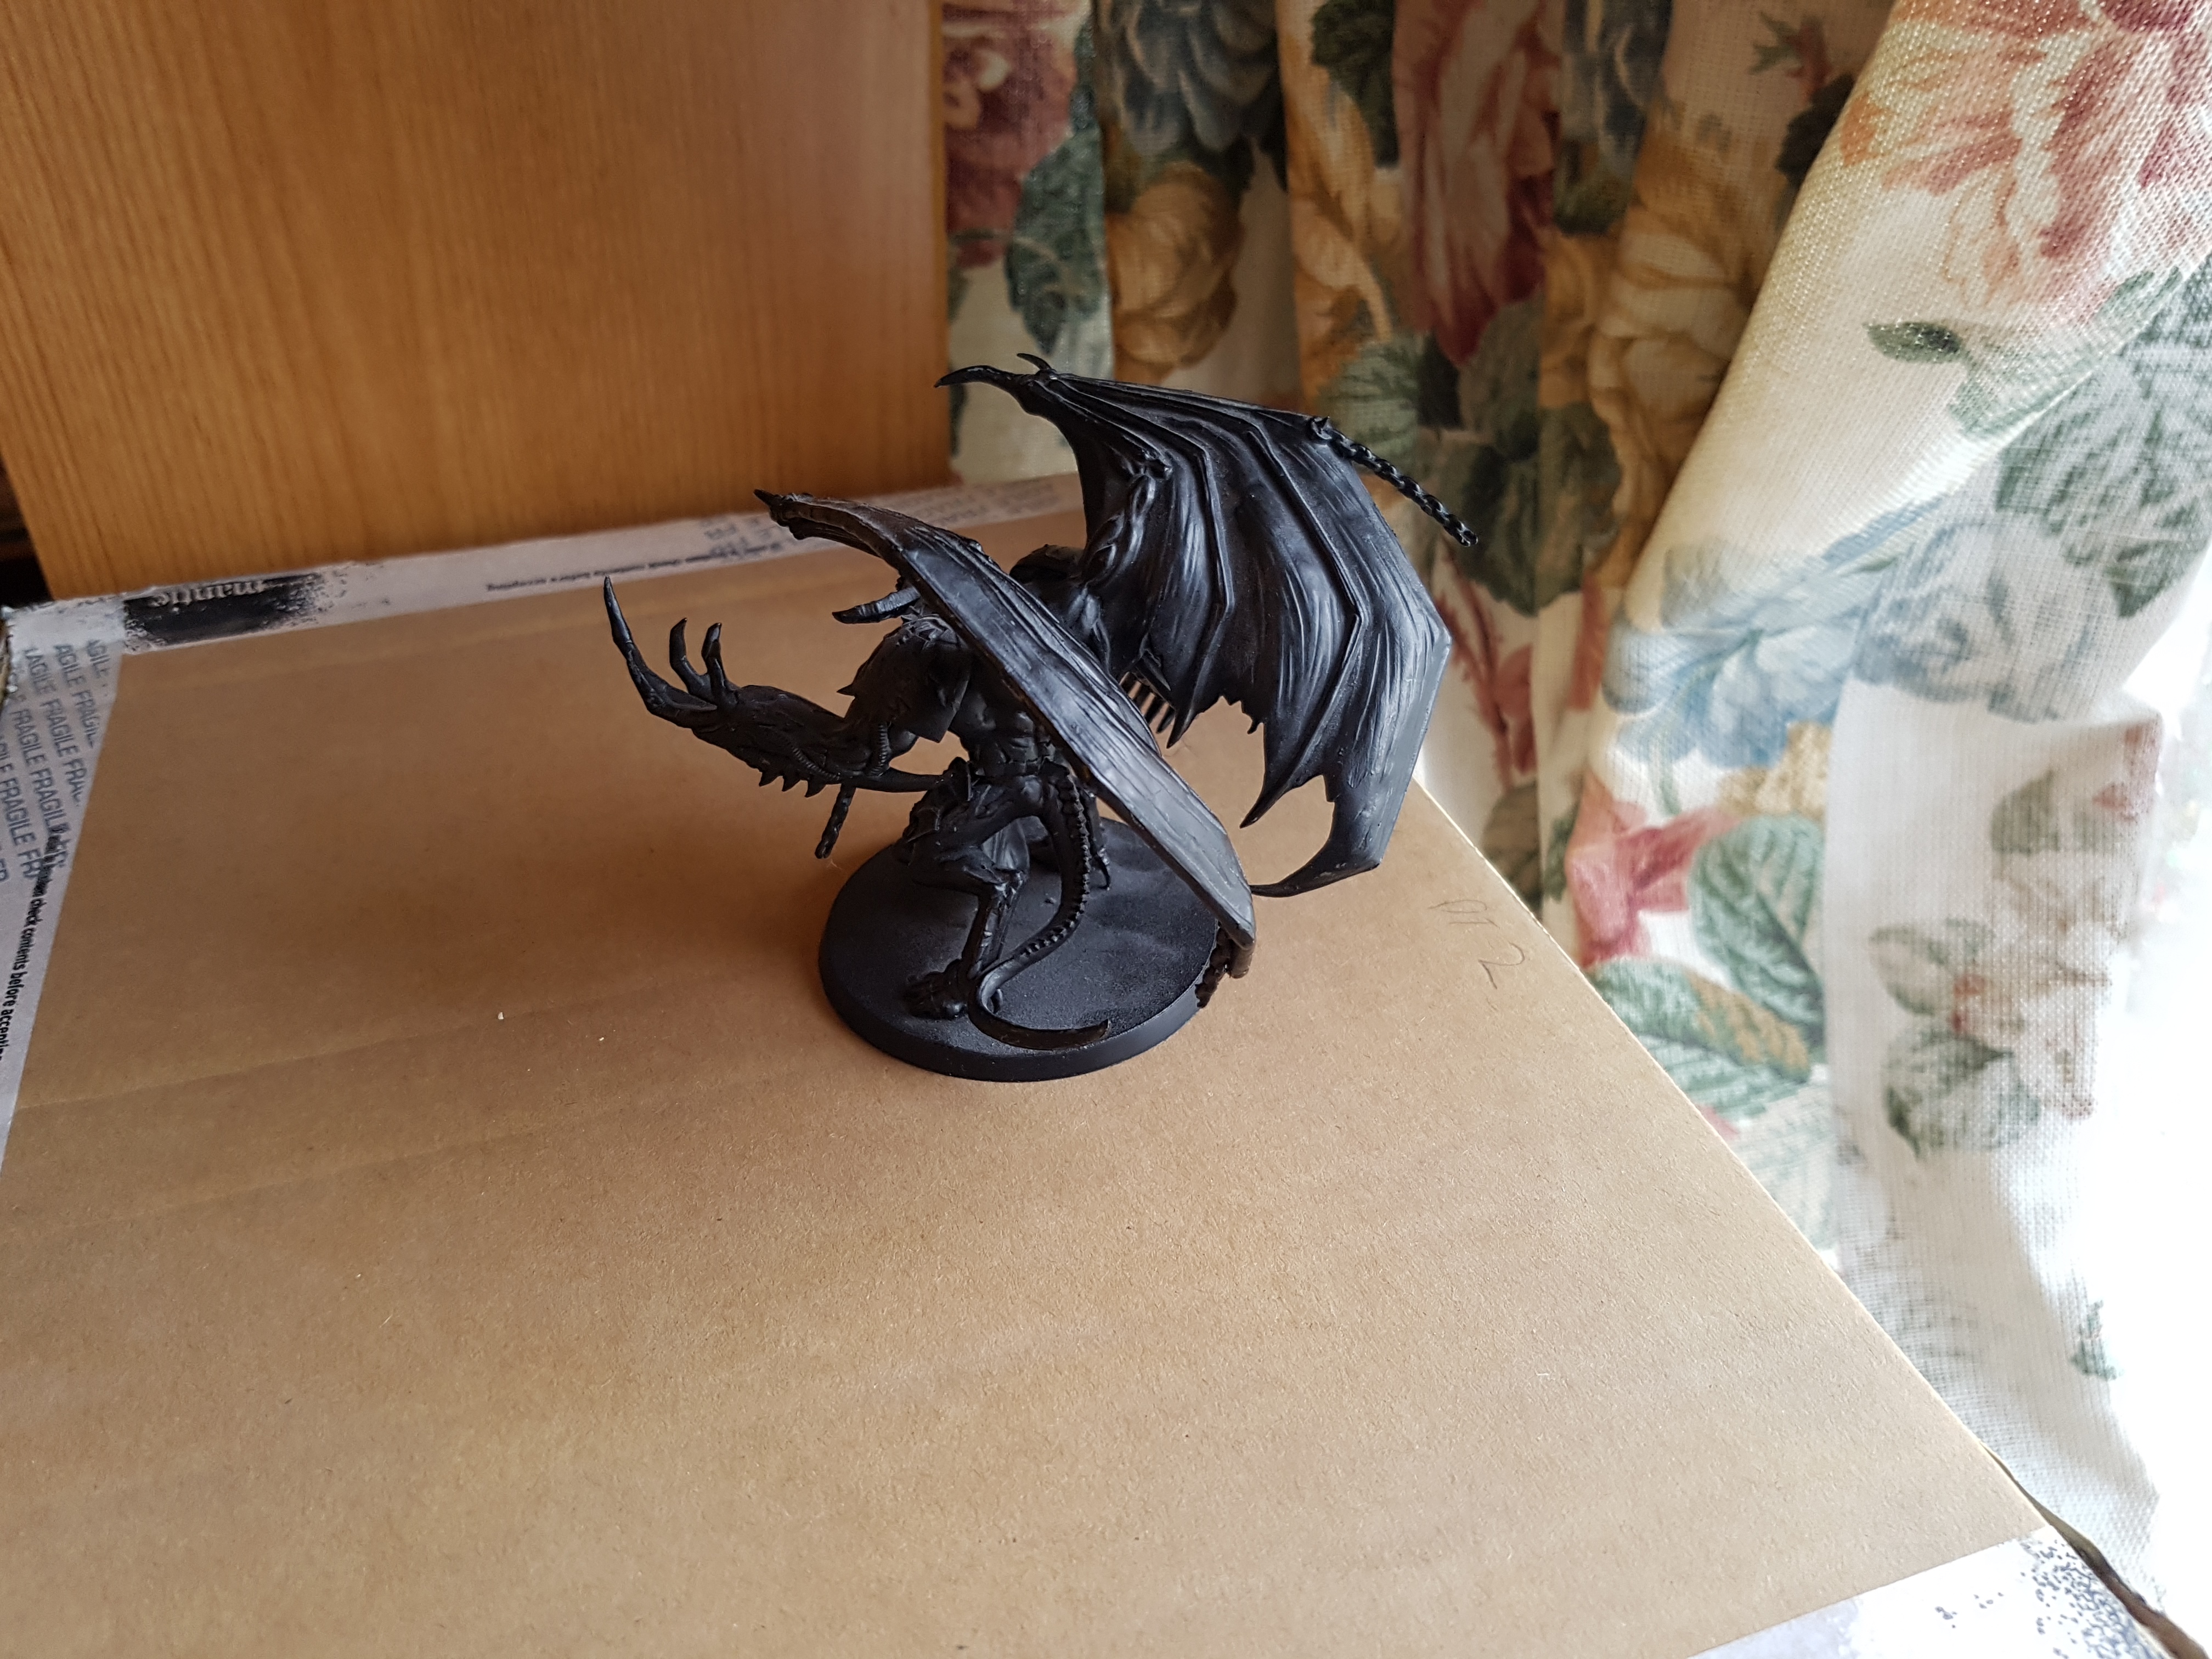
Daemon 2 - Daemon of Khorne Bloodthirster

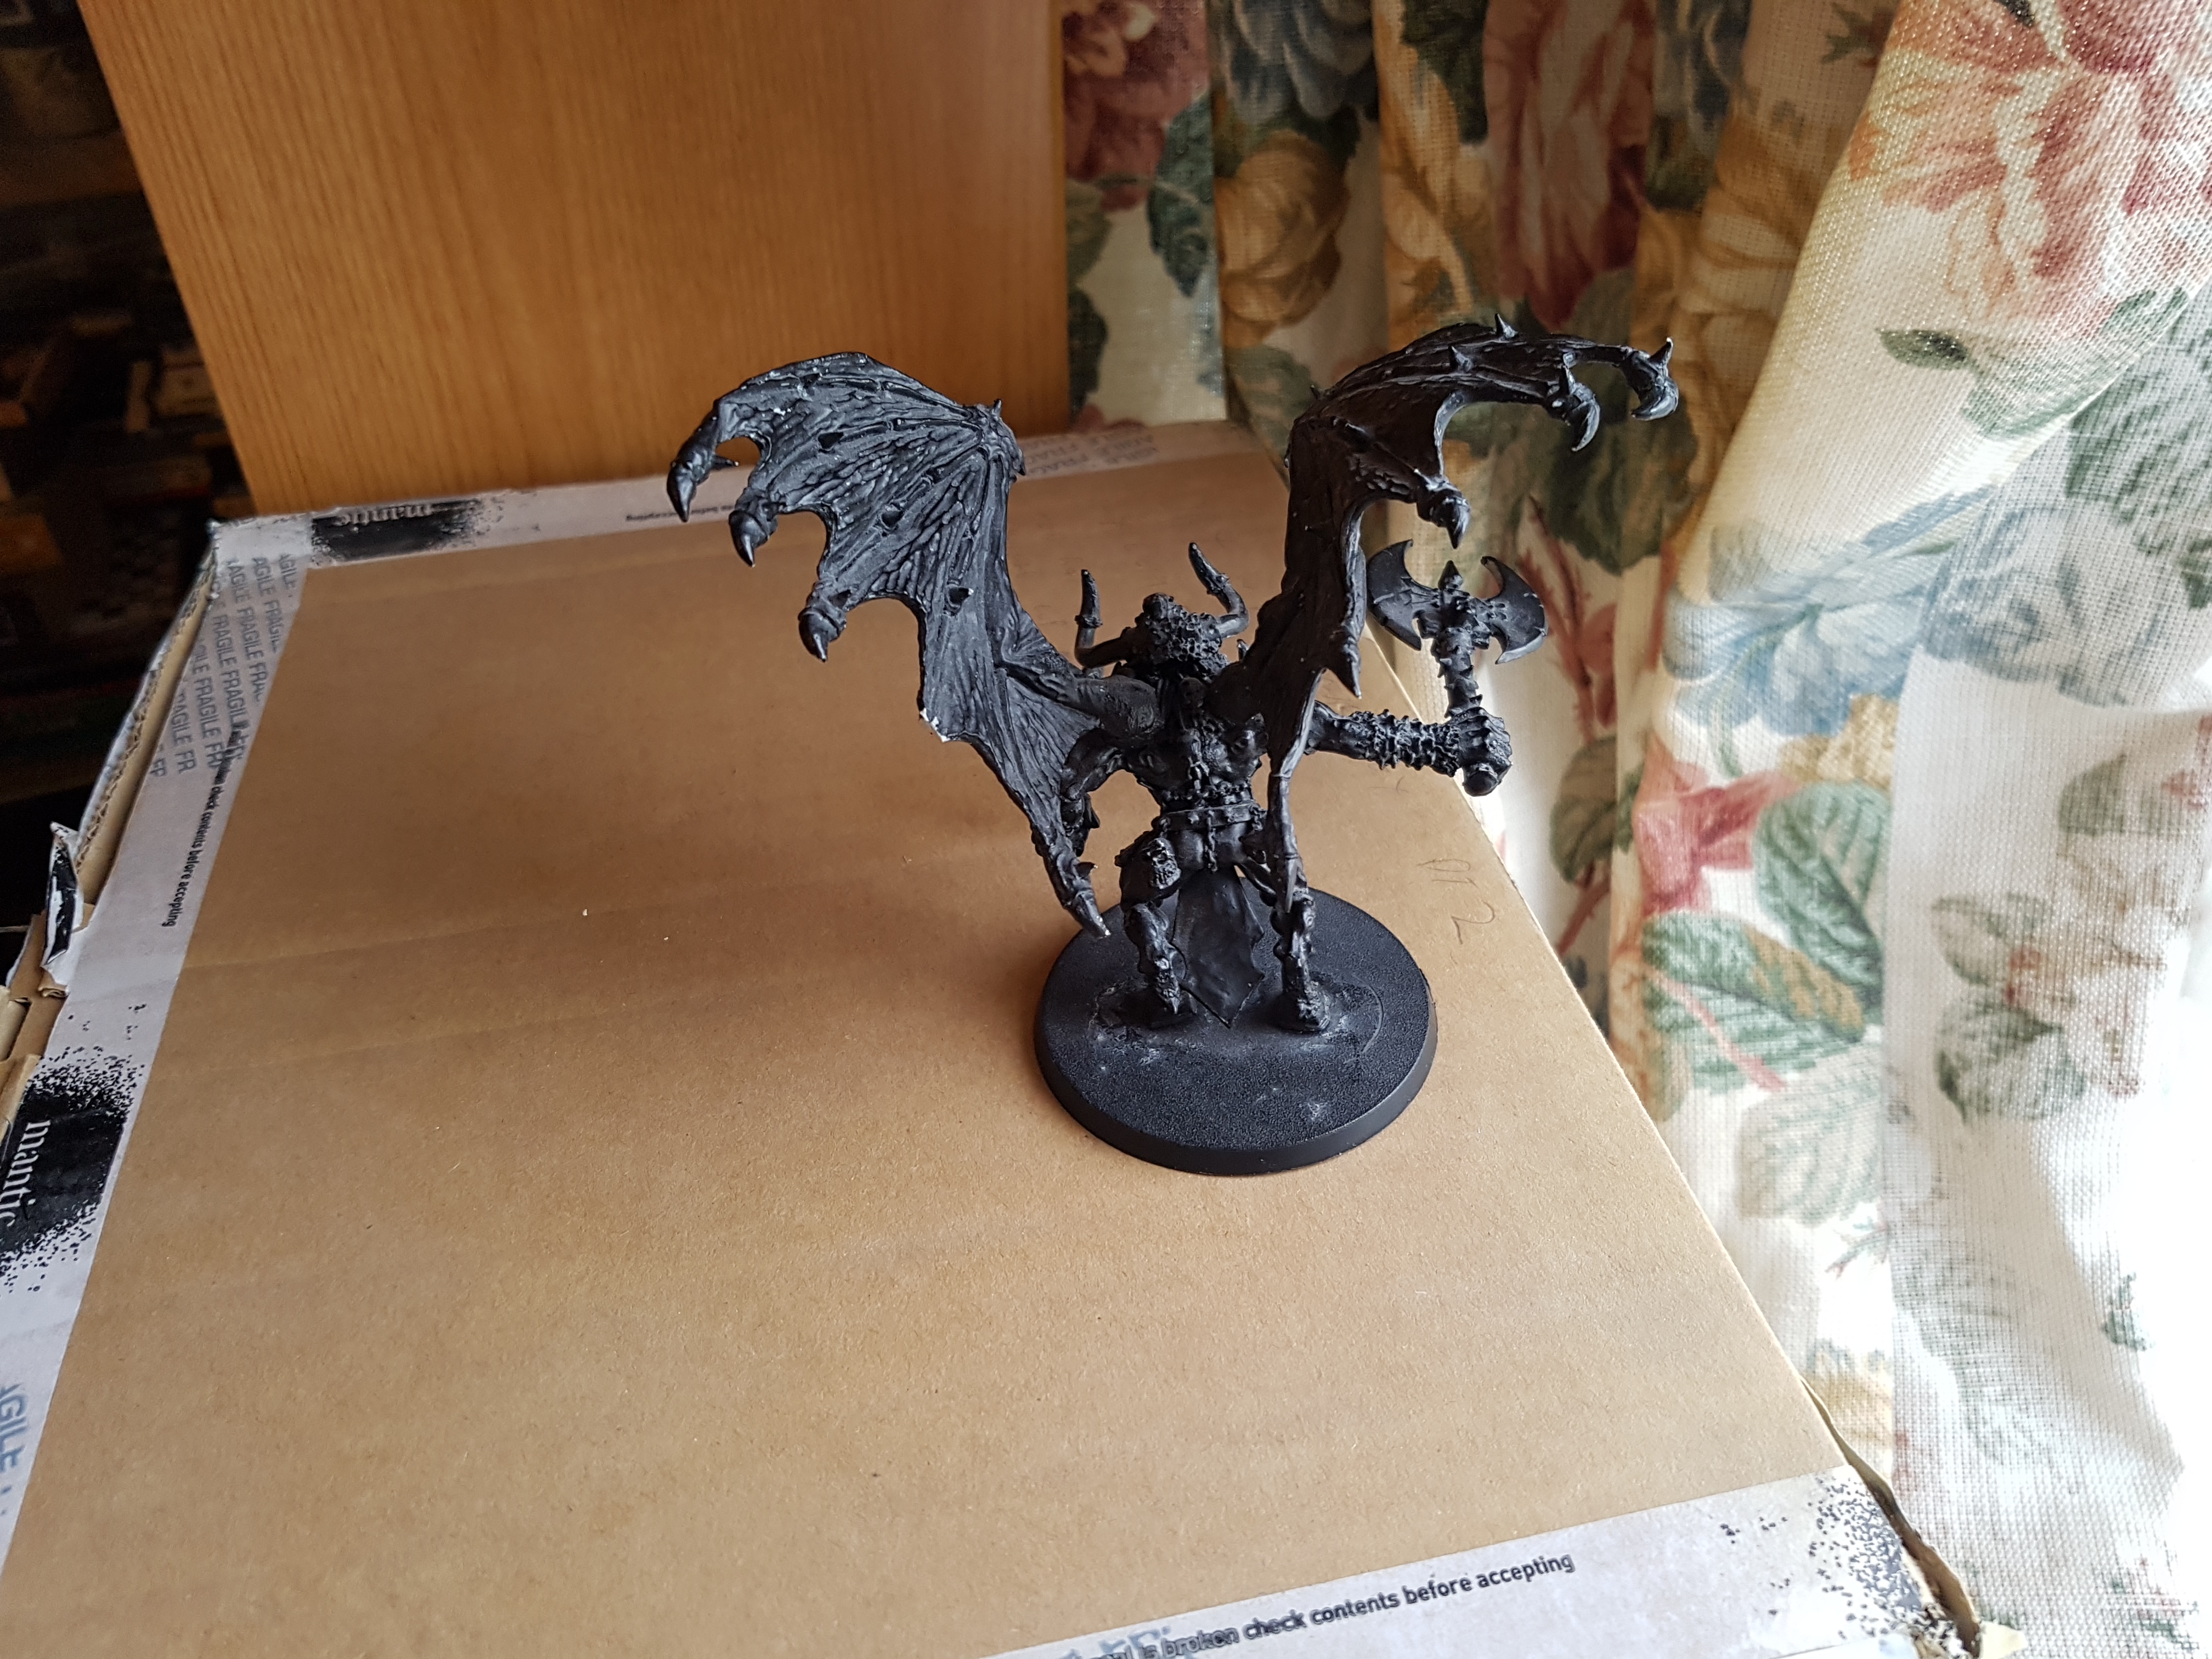
This is an old sculpt of a Bloodthirster, right? One of the spikes on one wing has snapped off but otherwise he appears intact. A missing spike is just battle damage if I can’t find it. I can live with that.
https://www.games-workshop.com/en-GB/Daemons-Of-Khorne-Bloodthirster
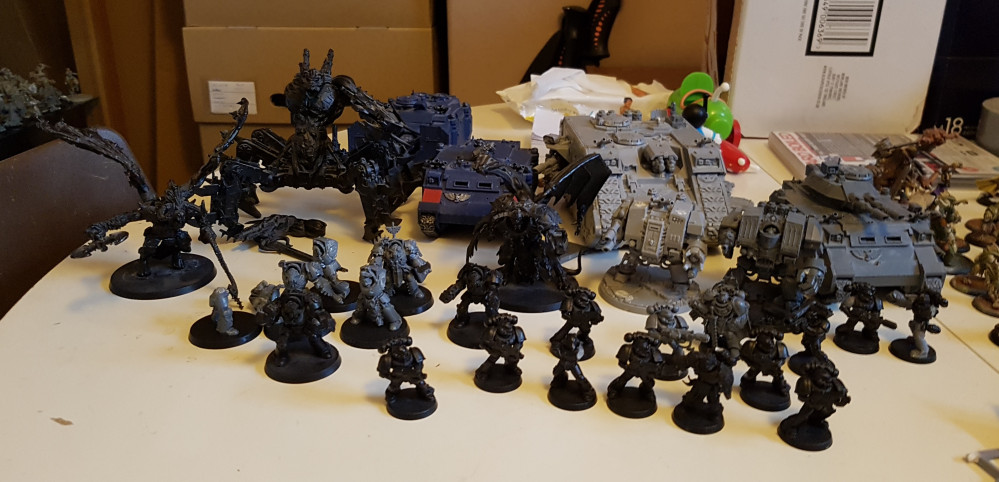
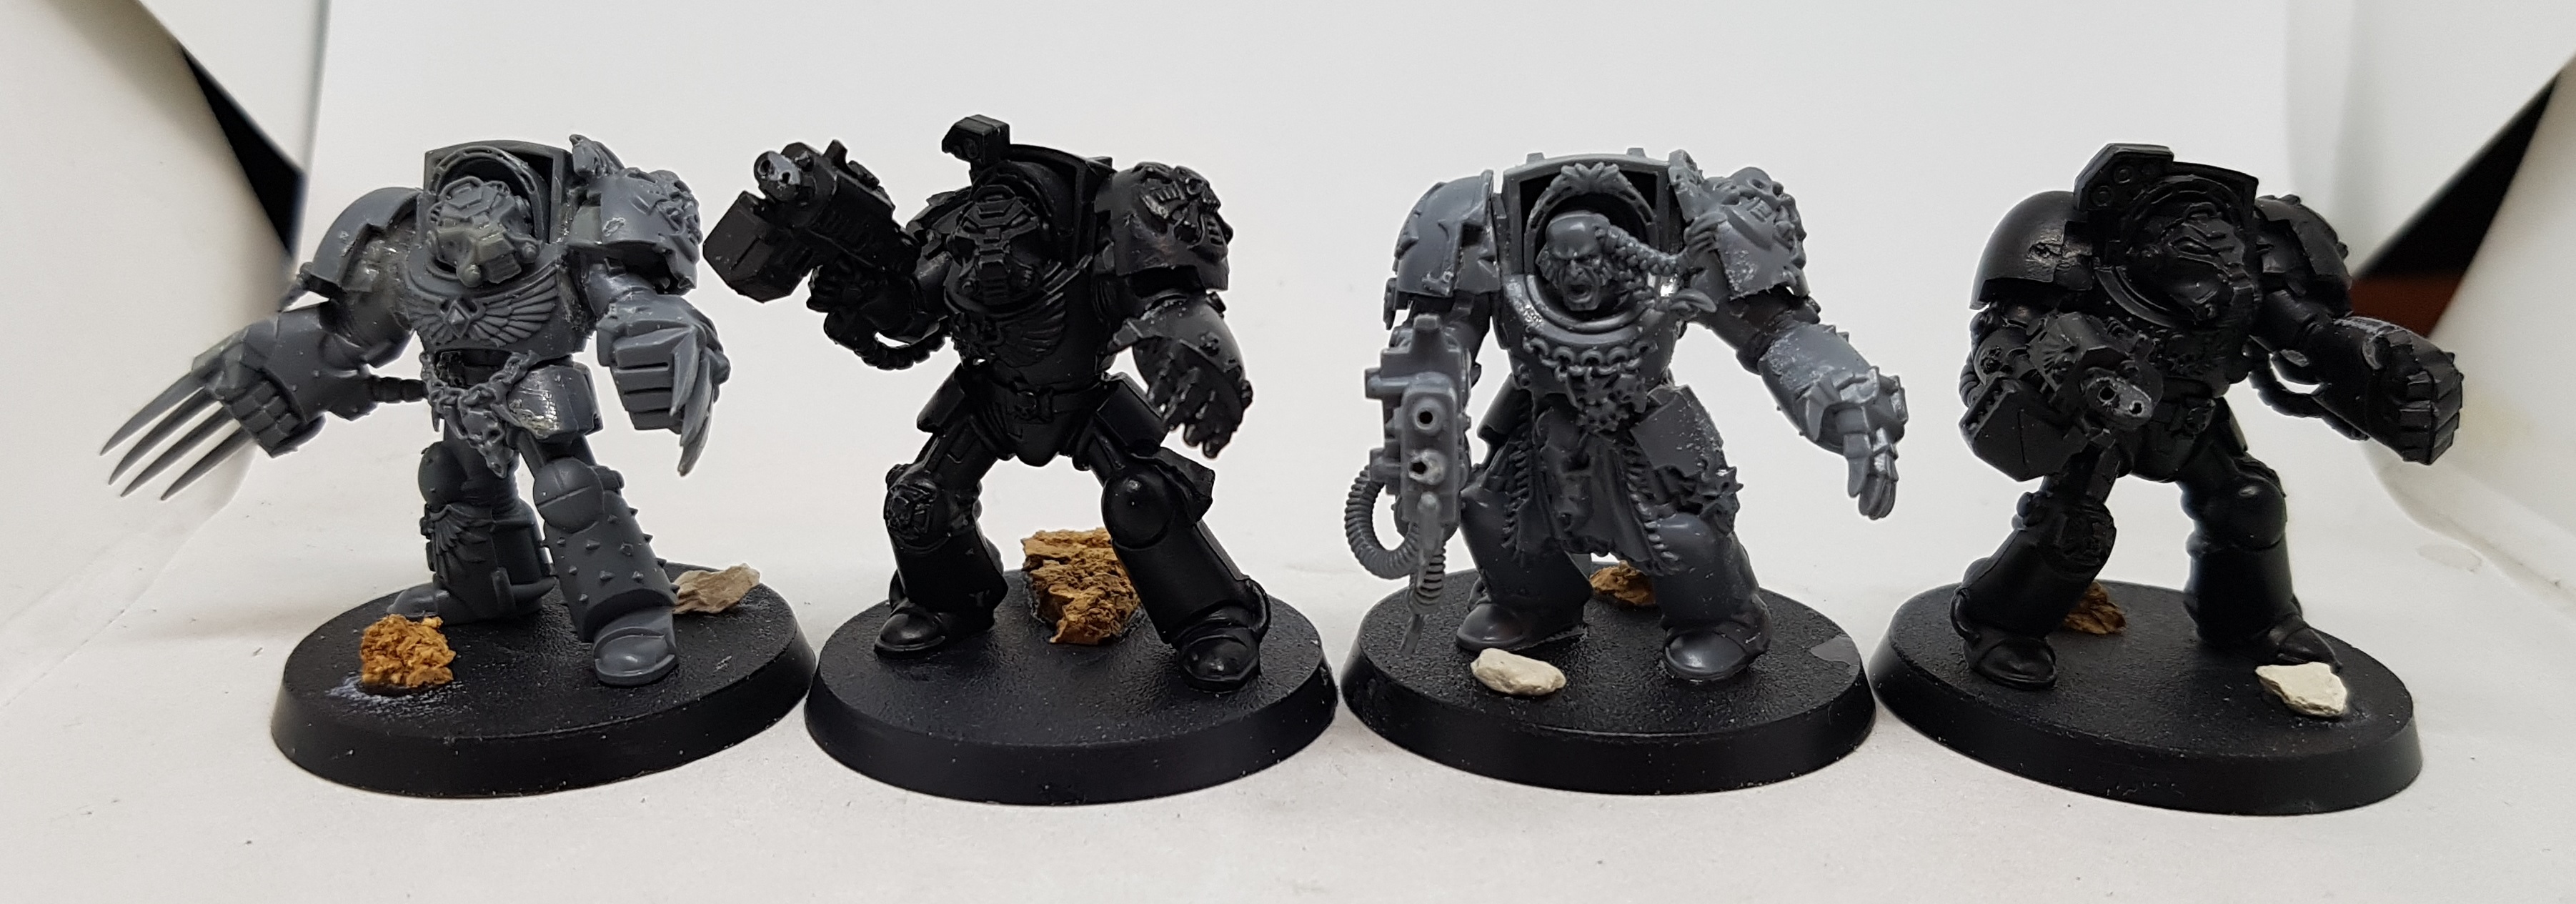
Terminators and Marines and Odds and Sods
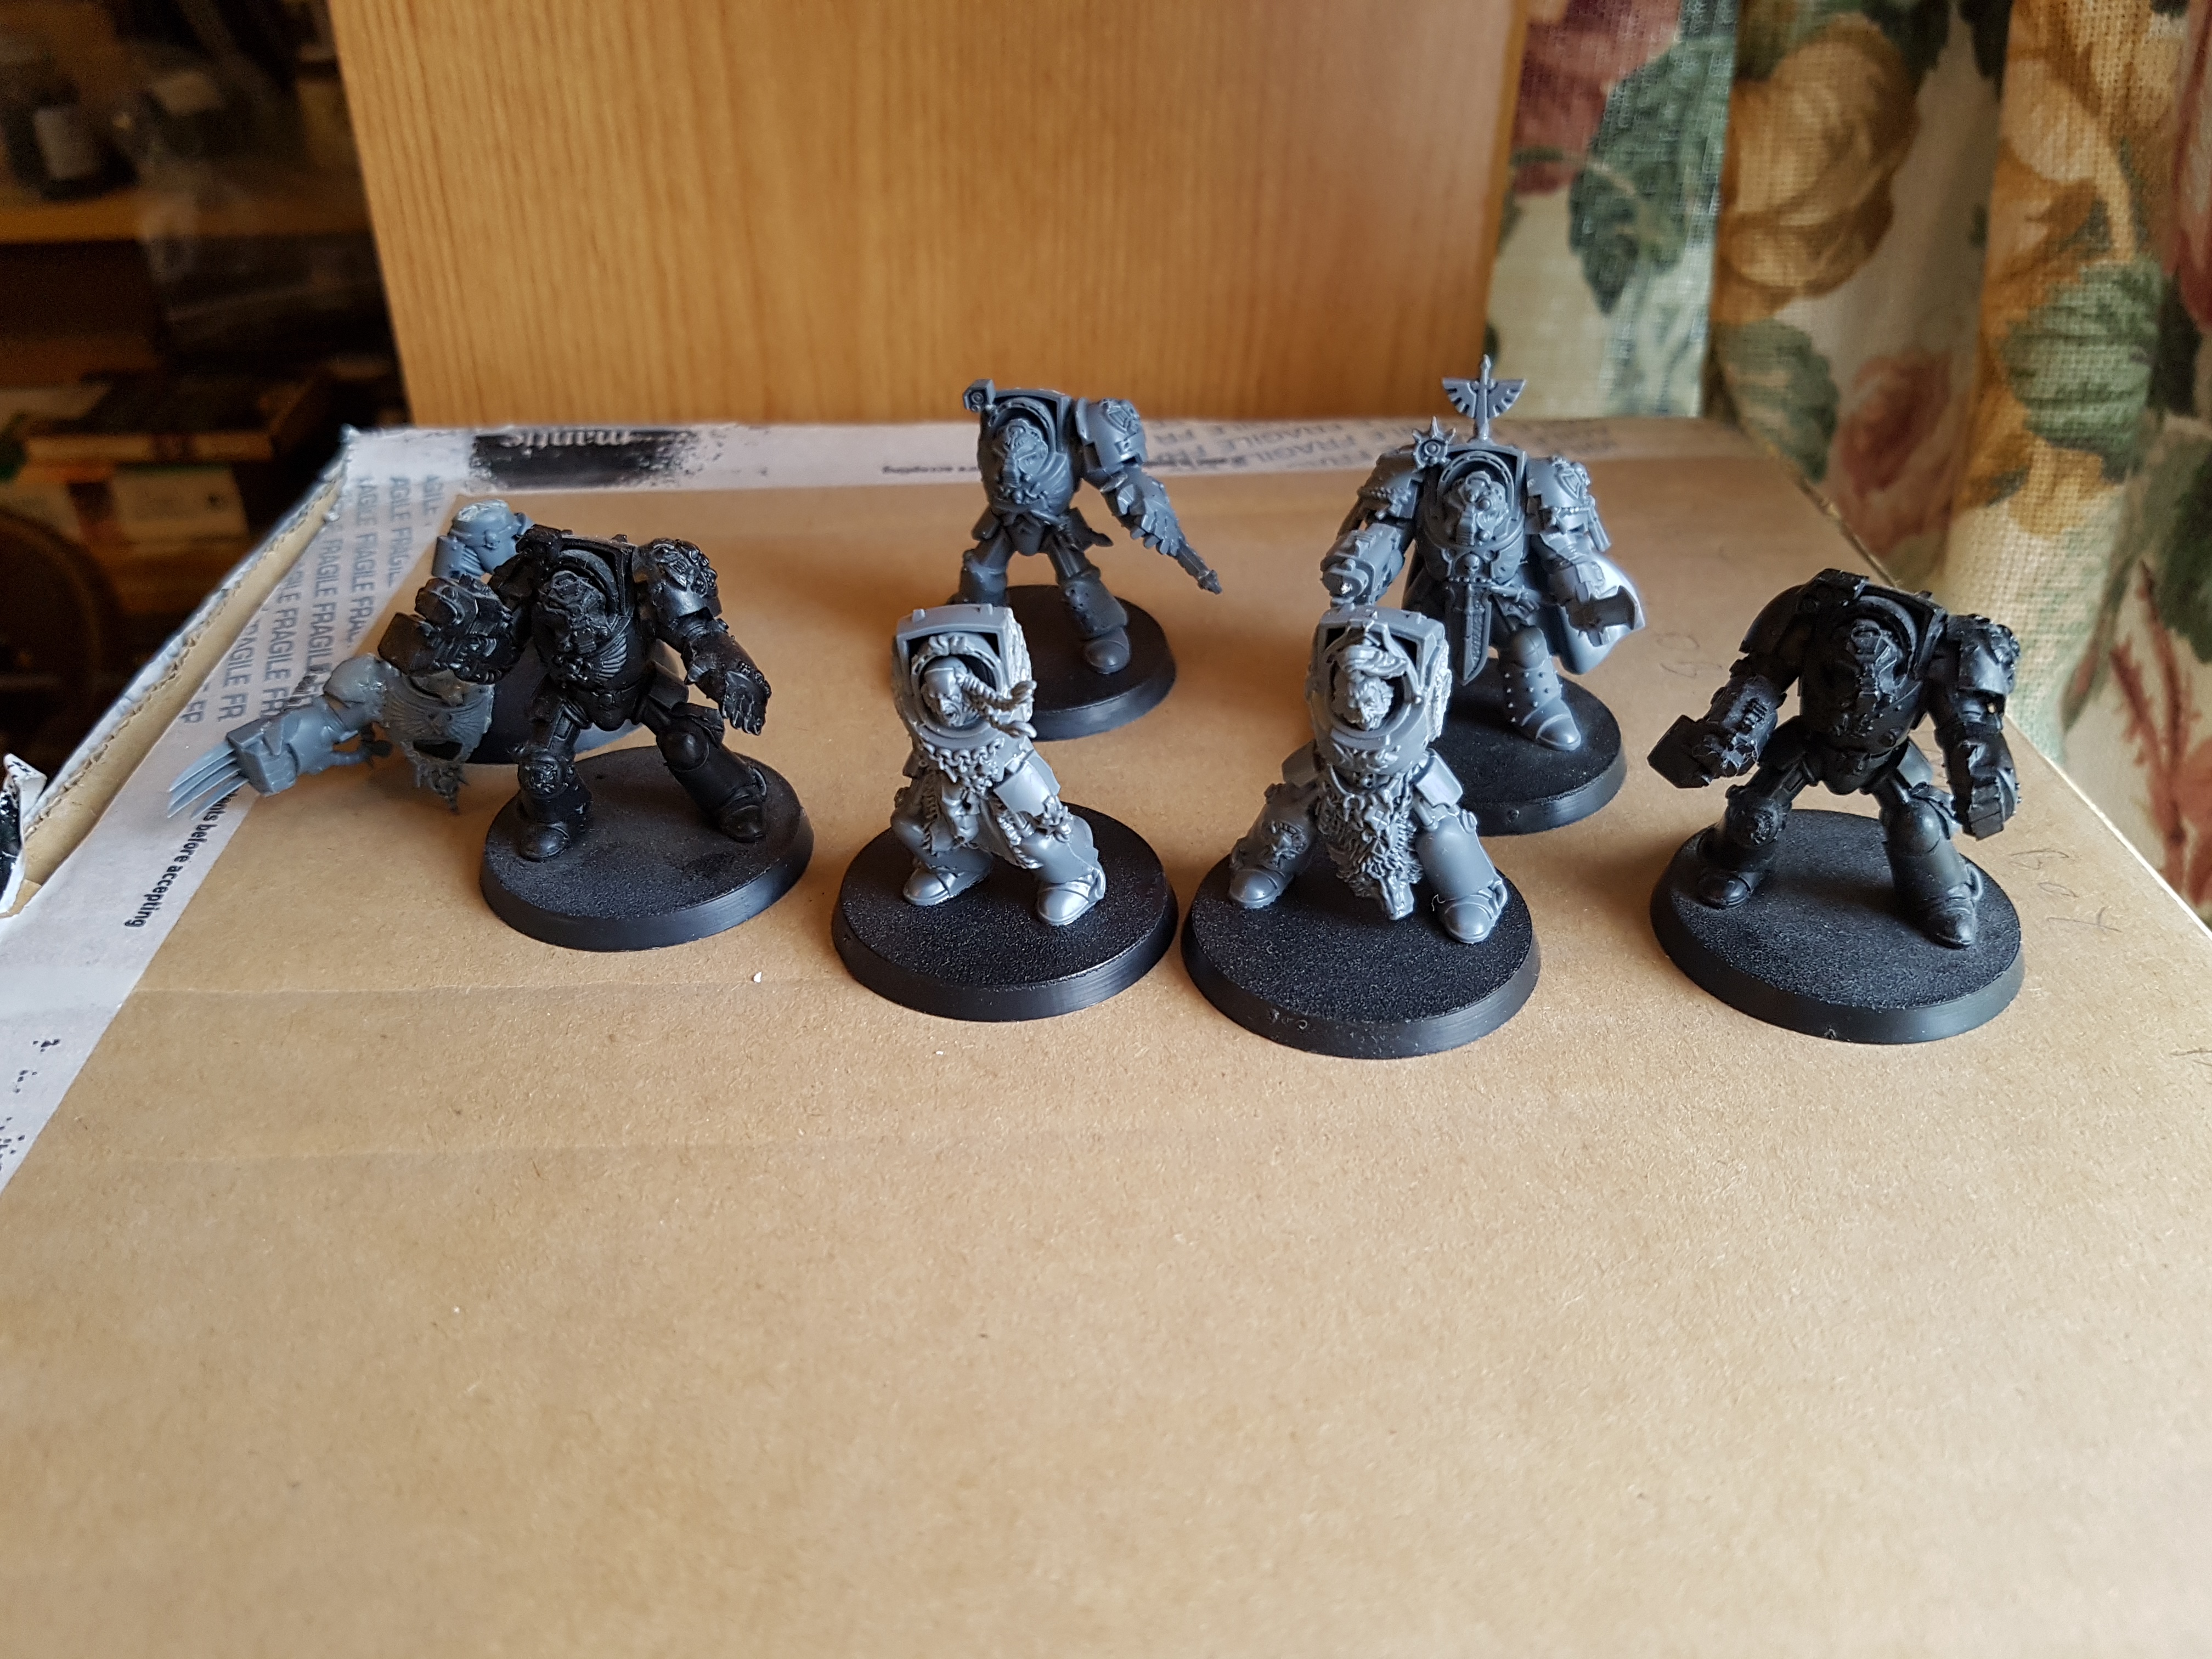 Terminators(?) already on bases. Some have braids and claws. I assume this means I bought a Space Wolves army?
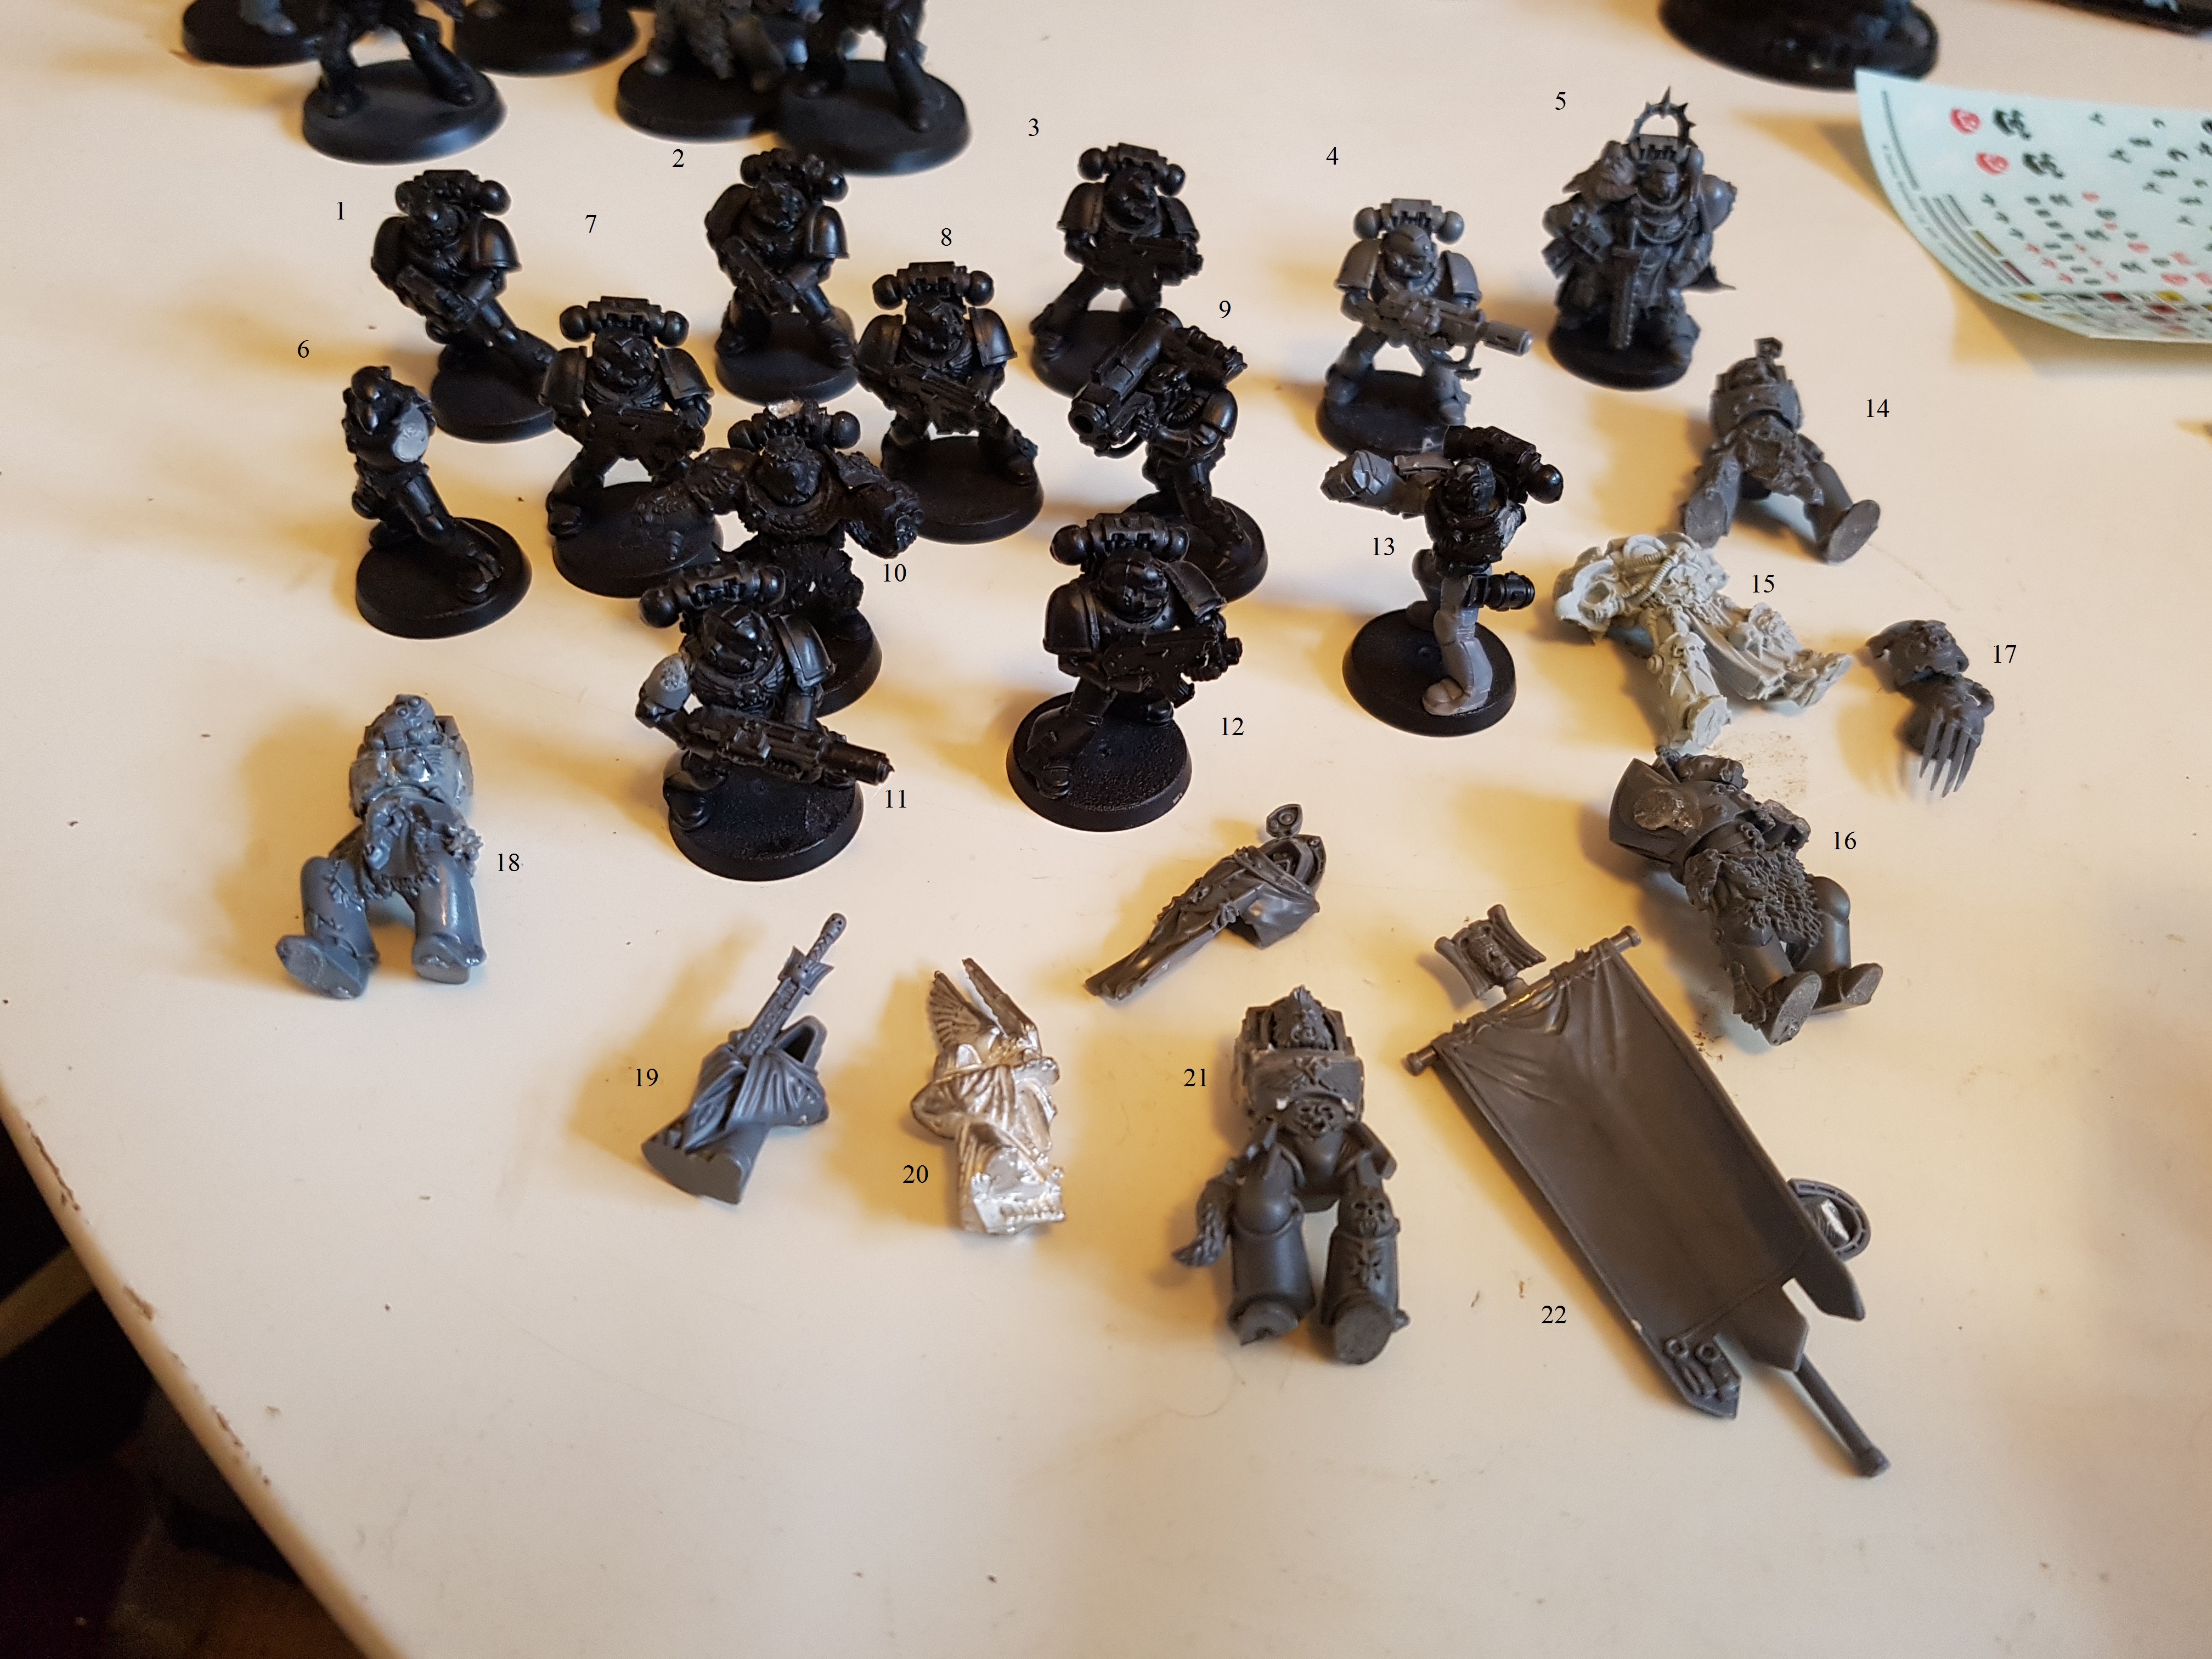 The Marines already on bases or that caught my eye. I see some characters and a beaky marine. Anyone recognise anything?
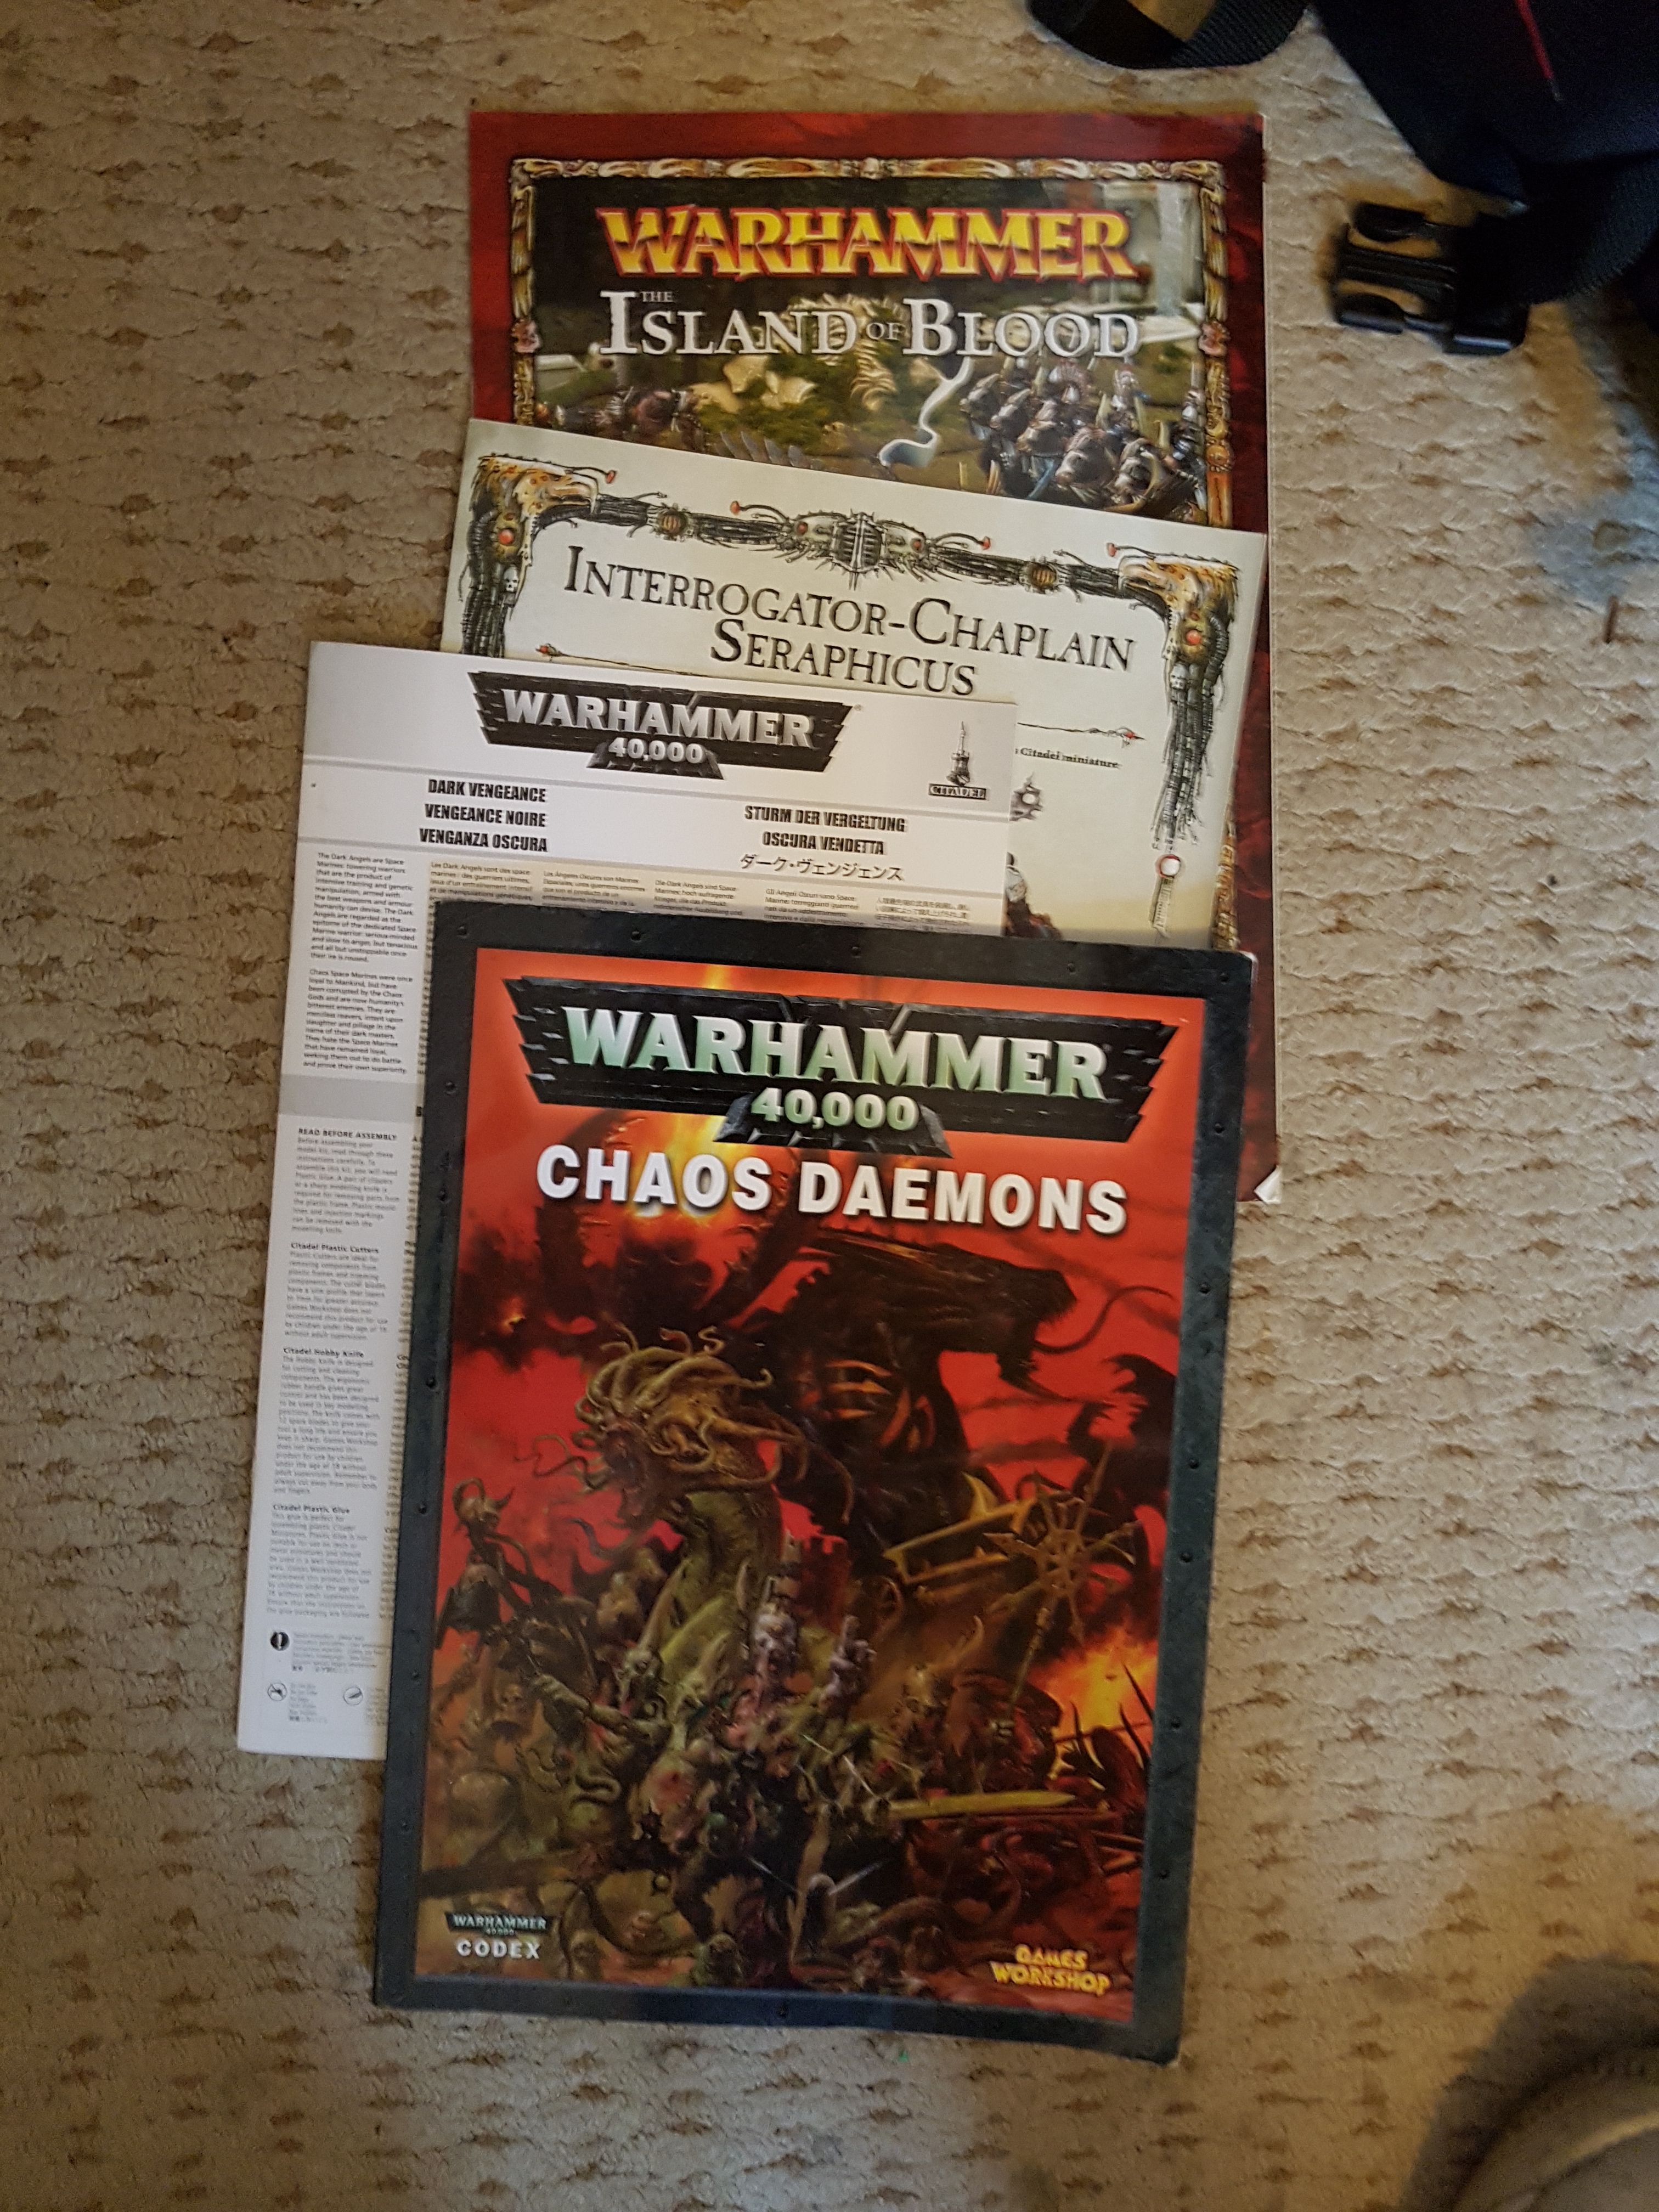
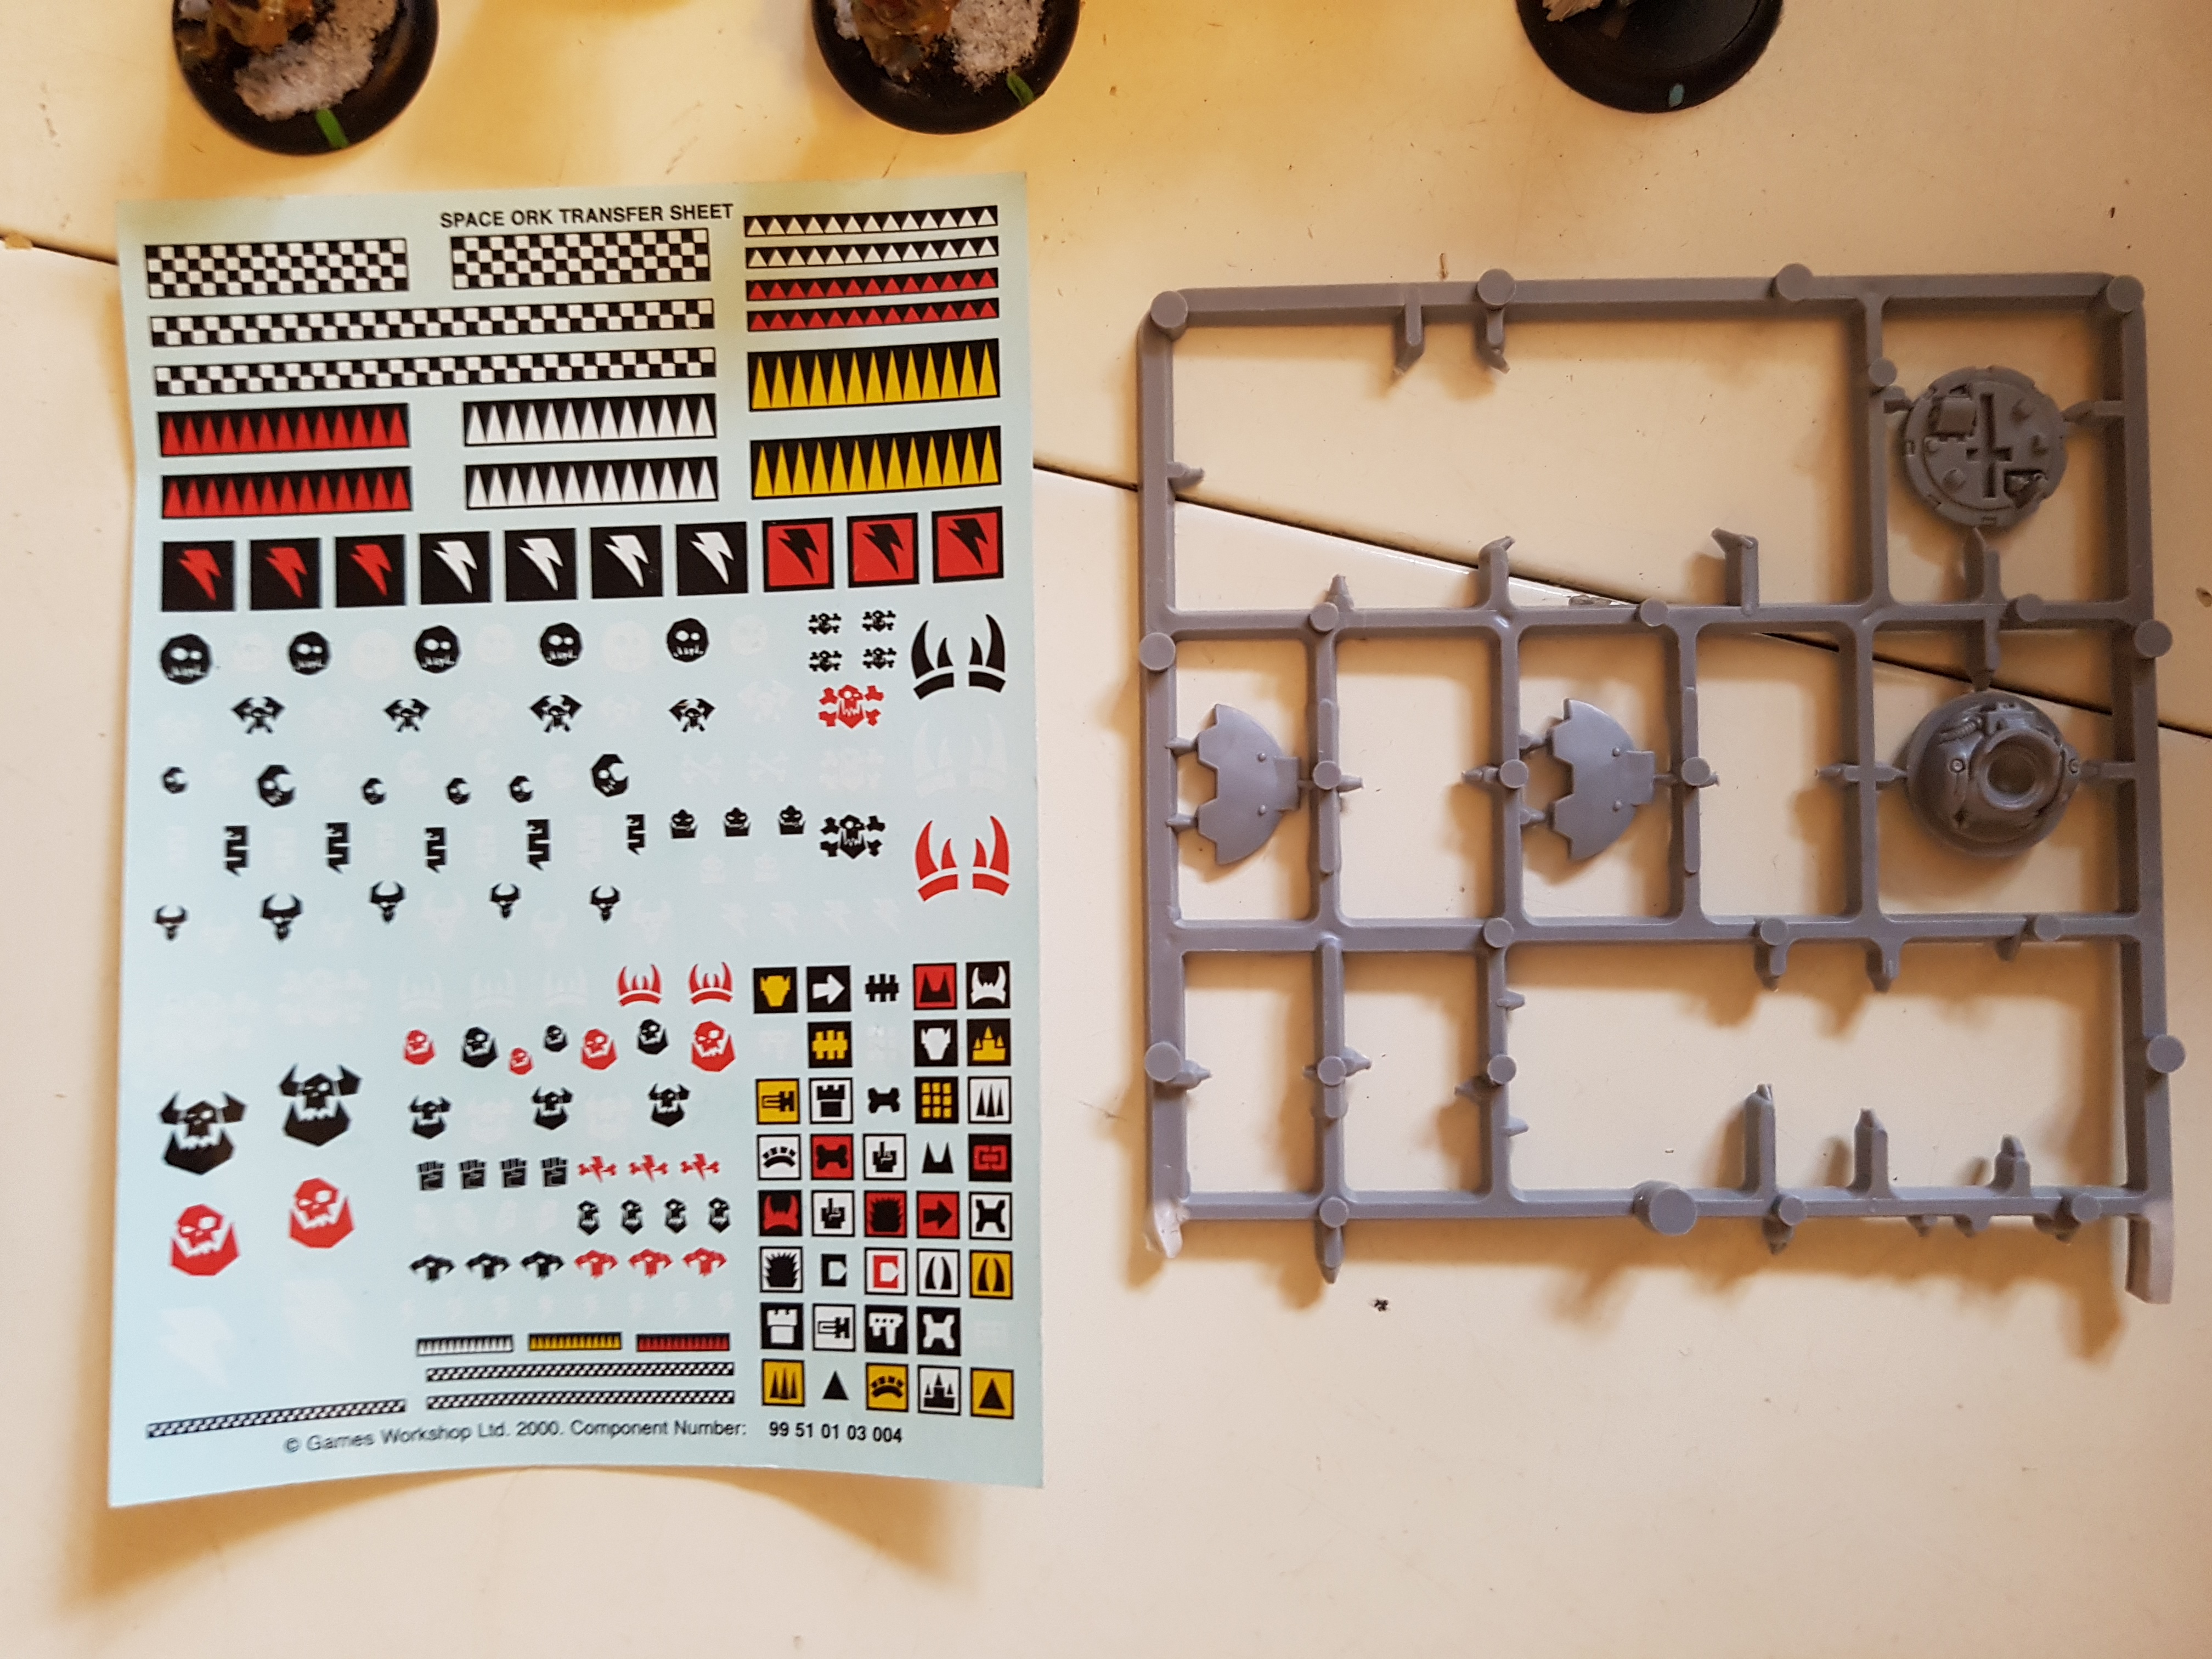
There were a few sprues with lots left on them too. Perhaps they can be used to identify what the other marines are from? They need identifying too. The rule books and assembly guides I found are in the gallery below, if that helps anyone. The most recent White Dwarf was from 2014 so that puts a rough age sinec thic collection was updated.
There were alos some Ork transfers. Are they likely to still be useable or do thise things go of over time? I’m actually painting some Orks right now and they might be useful.
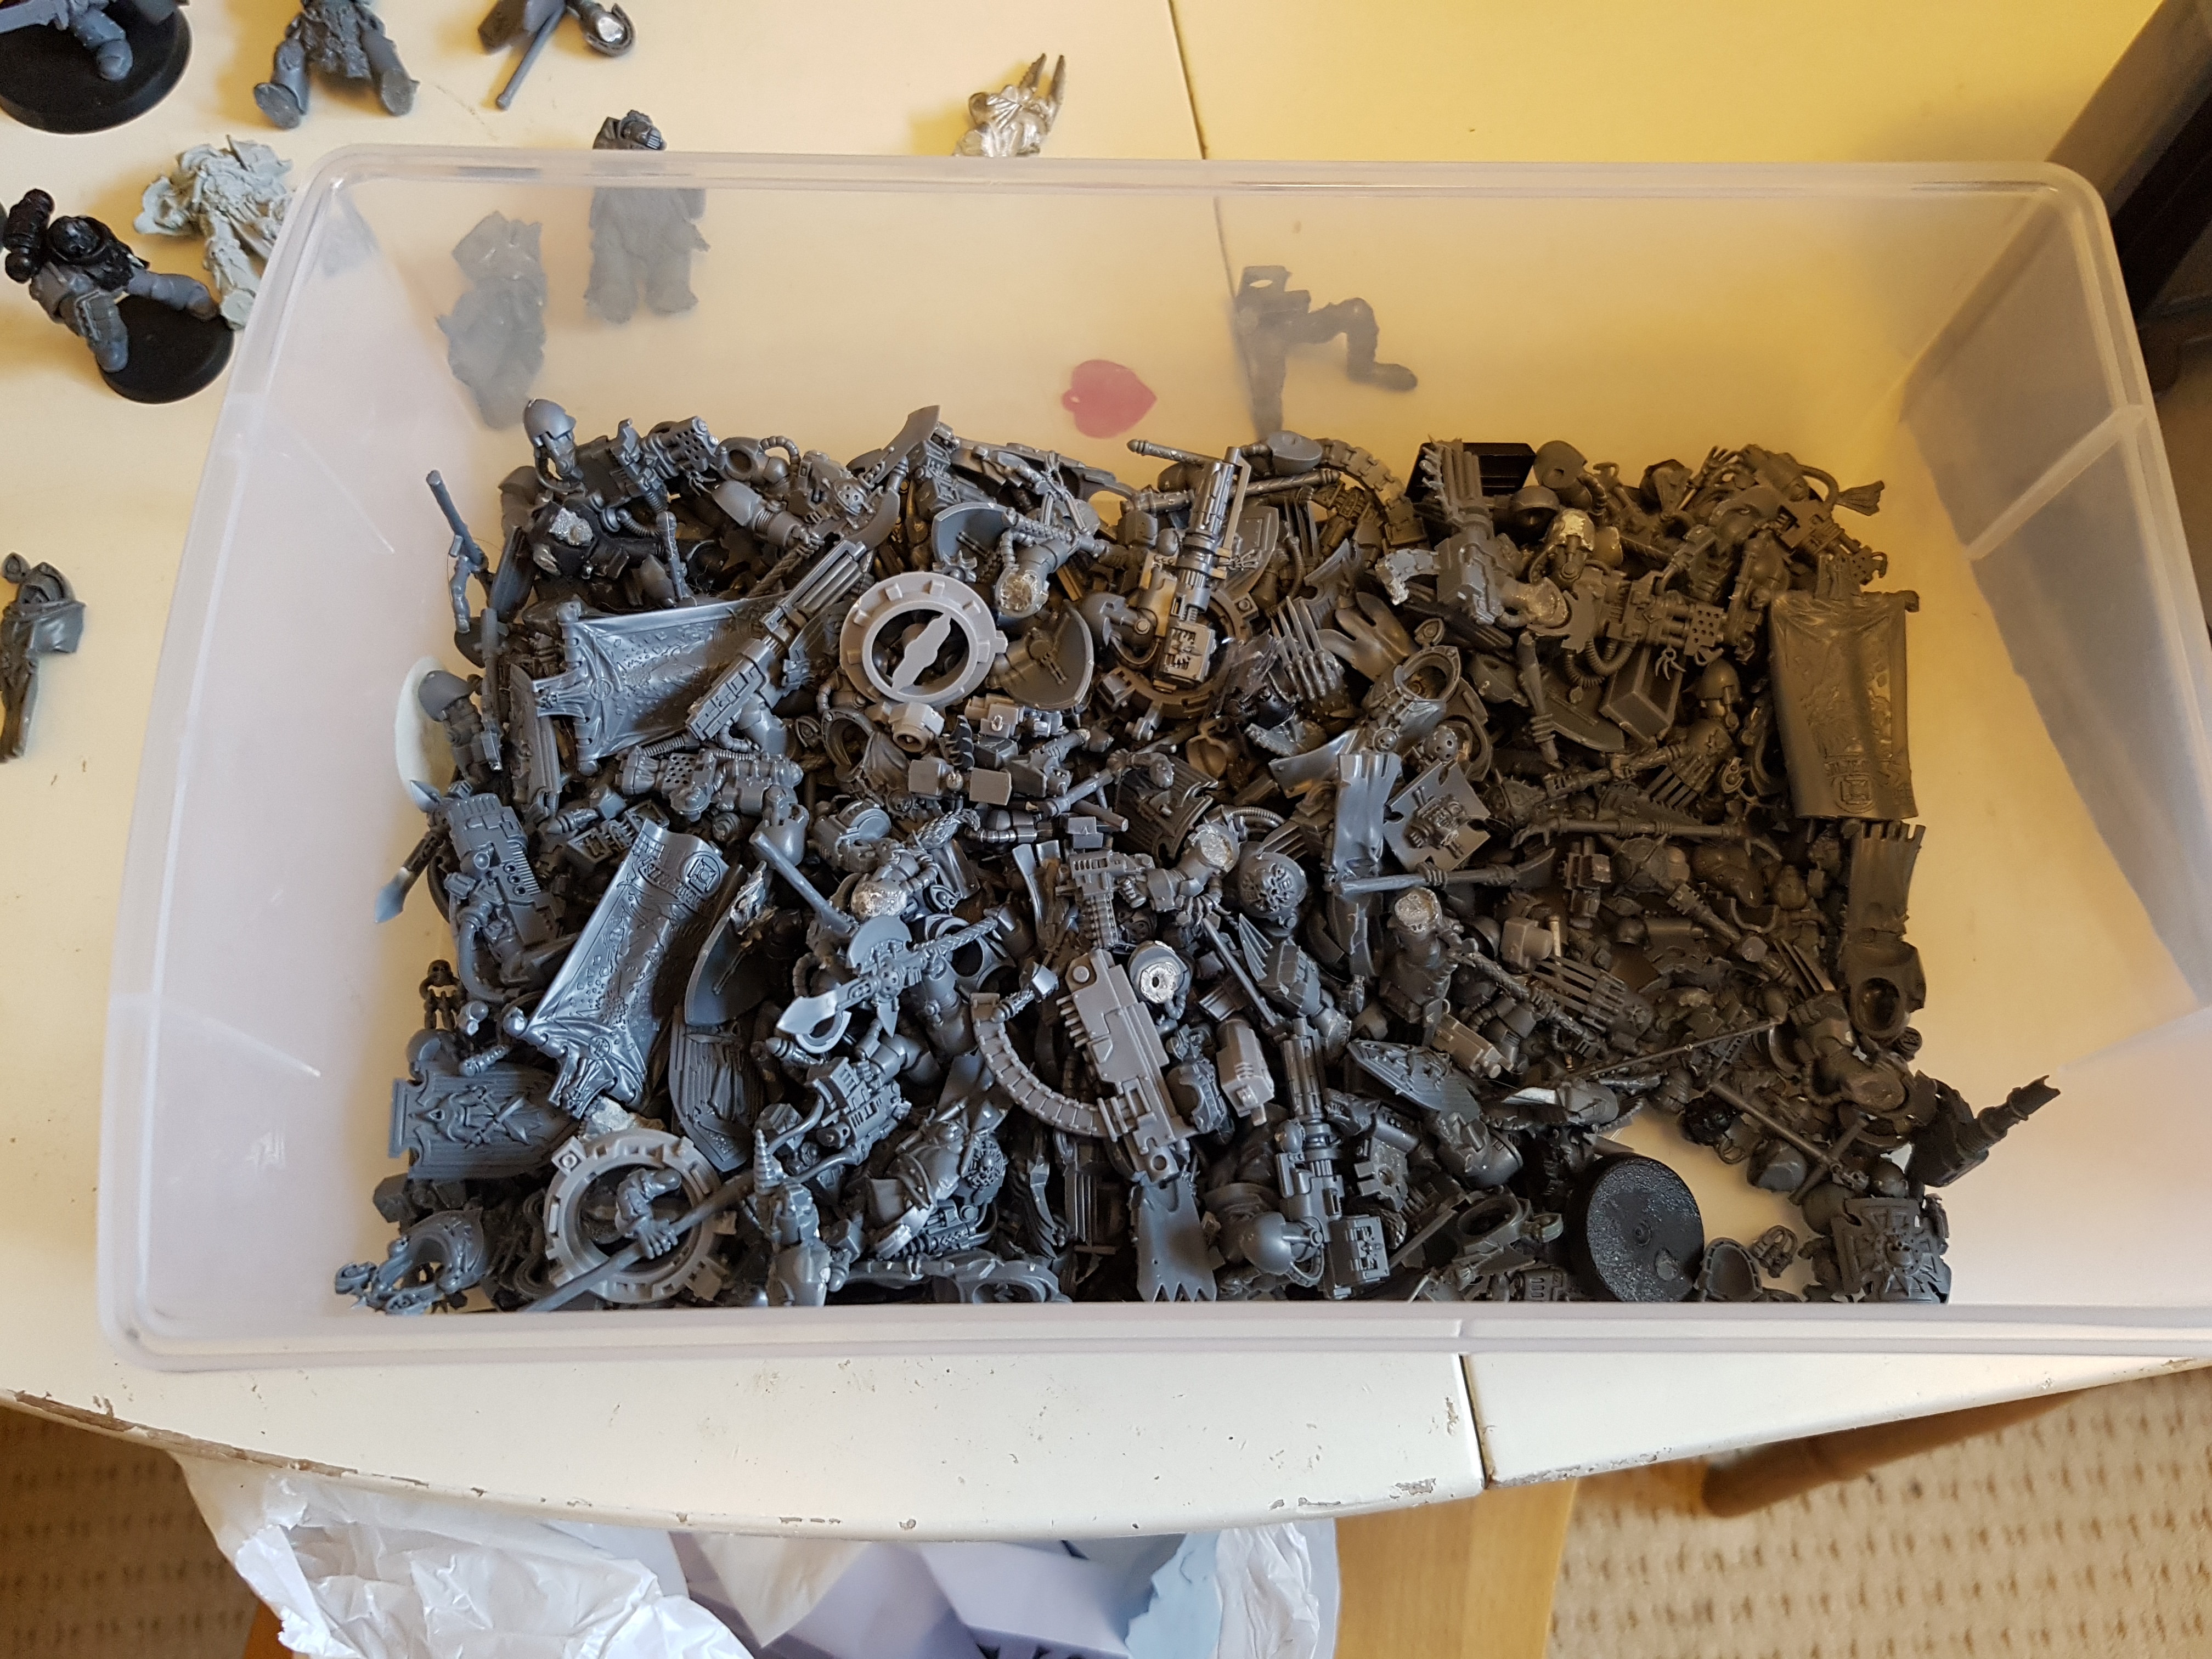
The gallery also shows you the Bits Box.. its over an inch deep and it is BUSY.

 Who does this banner belong with? Terminators or Marines? Do terminators carry banners ever? Would this icon free banner ever be limited to a chapter?
Update: I have pieced together 10 Space Wolf / generic Terminators, 11 generic Tactical Marines, with just enough iconographly on their leader to be Space Wolves, and a Techmarine with Space Wolf weapons and symbols.
While I am down 3 weapons from tanks, which I hope to pick up soon I estimate that everything compete from this would have cost £423 (Edit: after remembering the Rhino this is £445.50) if I walked in to the store to buy it today. Theres also a butt load of incomplete things I’m not looking at, mainly dark angels with no arms and legs. Only 25 complete (Or soon to be complete) models too. There’s still one or two bits to identify properly so this may yet change.
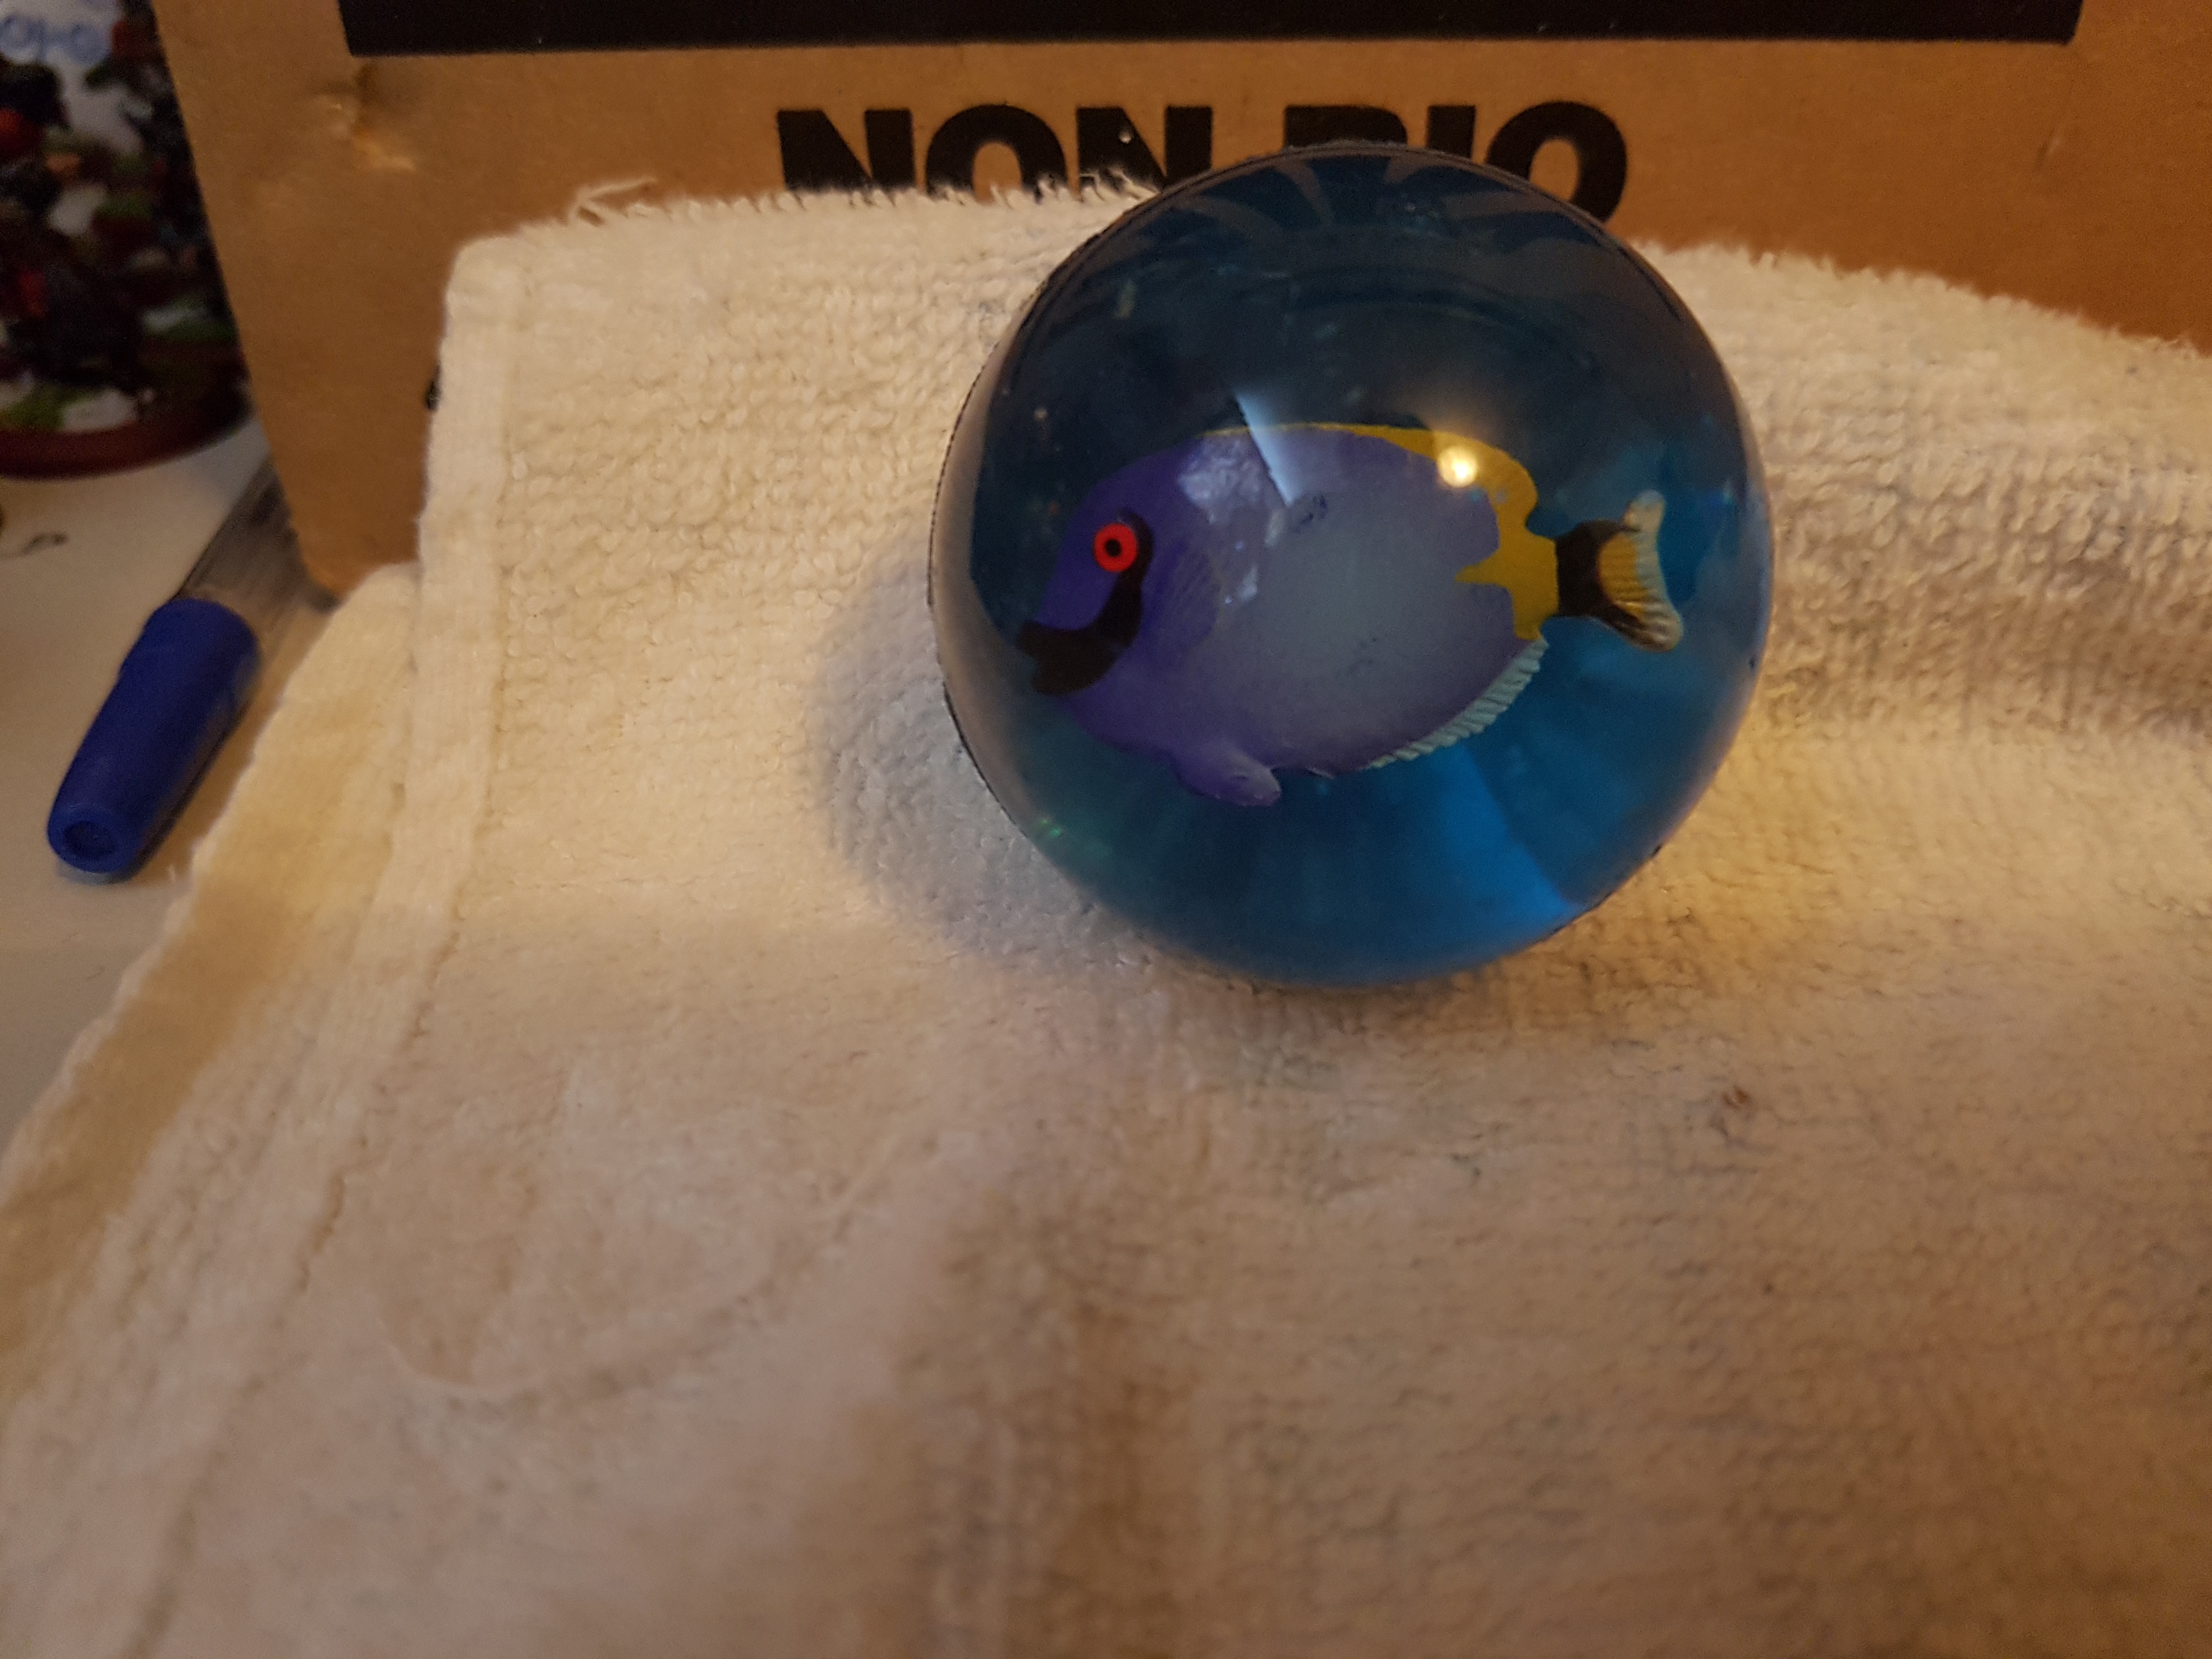
The box also contained a set of drawers, a Skaven, a Purestrain Genestealer, an Elf, a Lizardman, a Zombie, and a random pair of rubber legs, none of which I’ve identify yet. Pointers there would be appreciated, but I’ve not really begun to look for them yet. I also found the most inportant item: A bouncy rubber ball with a fish in it!

Please start at other end for more information
Please look through this gallery and help me identify everything, cornim my identification, and look for missing parts. If you can also link to decent pictures of any missing parts you may help me find them in my bits box.
Thank you for your help.
Converting models from one chapter to another
This guy is currently a Dark Angel. Most of my stuff is Space Wolves and i’d like to unify what I can. I’m not sure how much of his iconography says that. The right shoulder does. Does the wings in the corner of the sape, and how about the breastplate and crotch guard? What about the right shin? If it is just the shoulder this would be an easy fix. The cloak may be fixable by filing. Not sure about the rest.
What is the unit size for Space Wolves Terminators? This guy would be my 11th. Would he even fit? Or would a Captain be an extra or a solo/character? Not sure how 40K works.
EDIT: He’s a Deathwing Terminator Captain, isn’t he? im pretty sure I have those wing things from his shoulders. Everything on his is Dark Angel iconography, isn’t it? Theres no converting him I assume and I should just enjoy the model as it is.
https://www.games-workshop.com/en-GB/Dark-Angels-Deathwing-Terminator-Squad
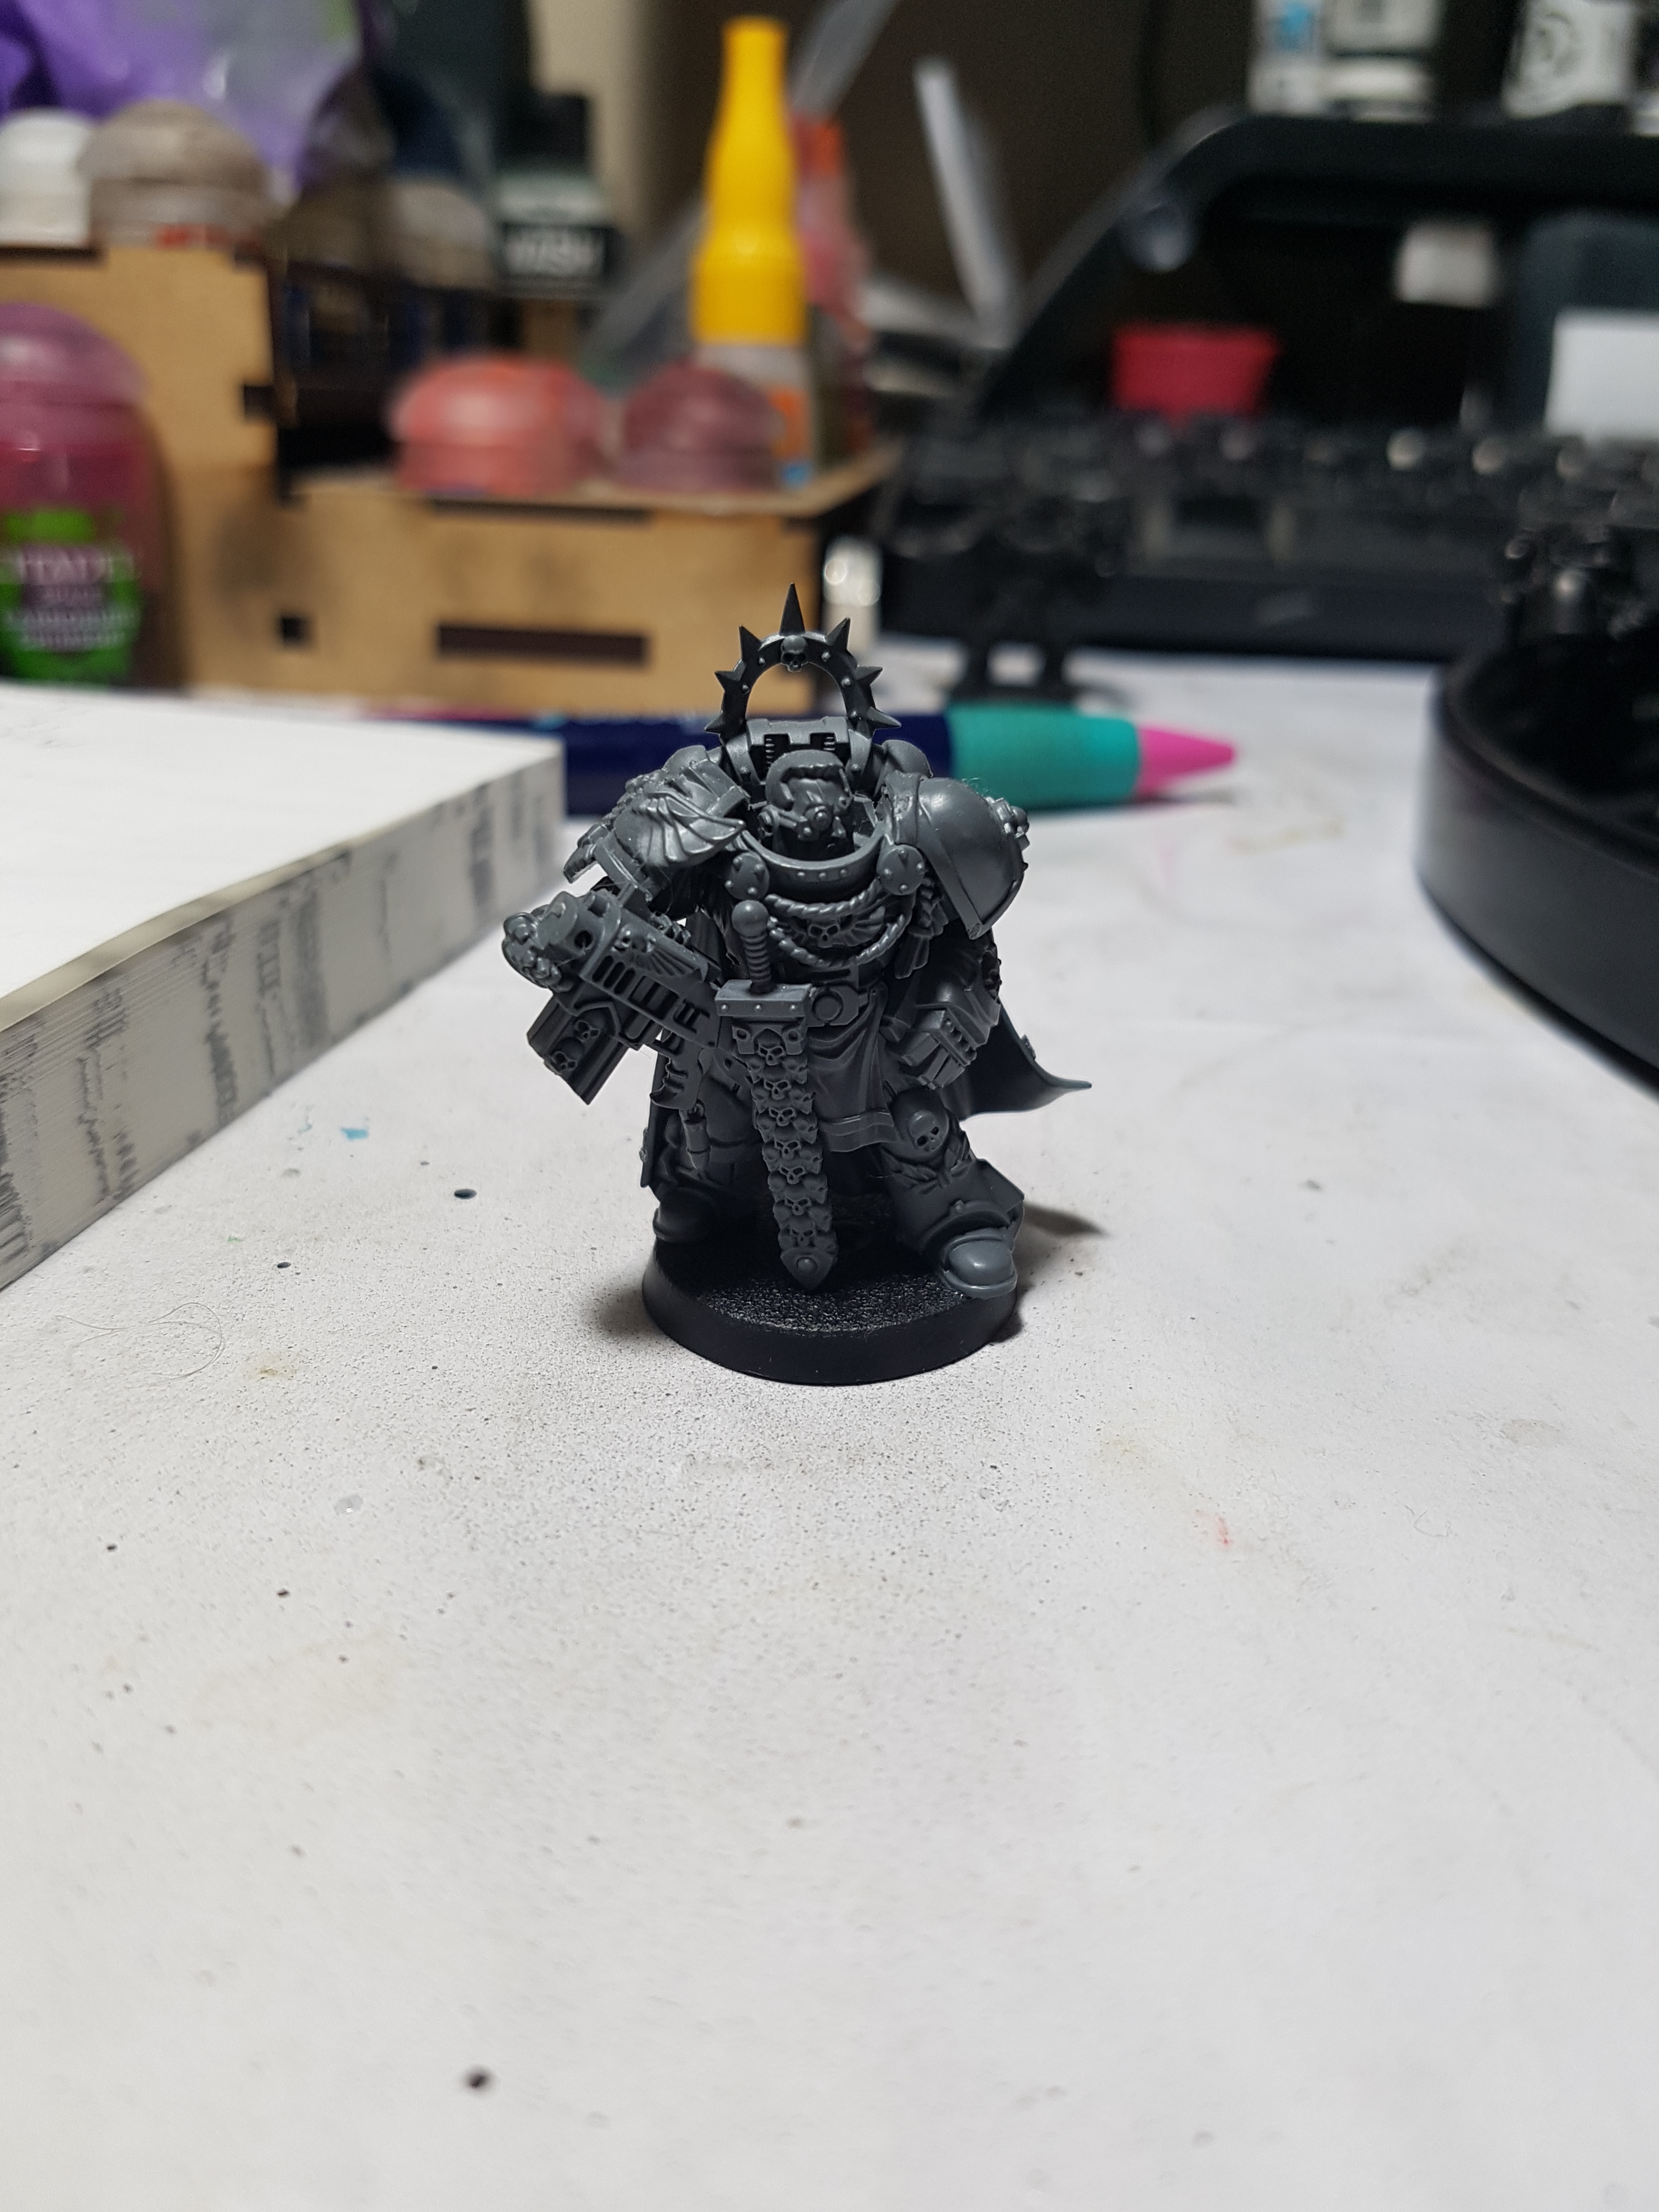
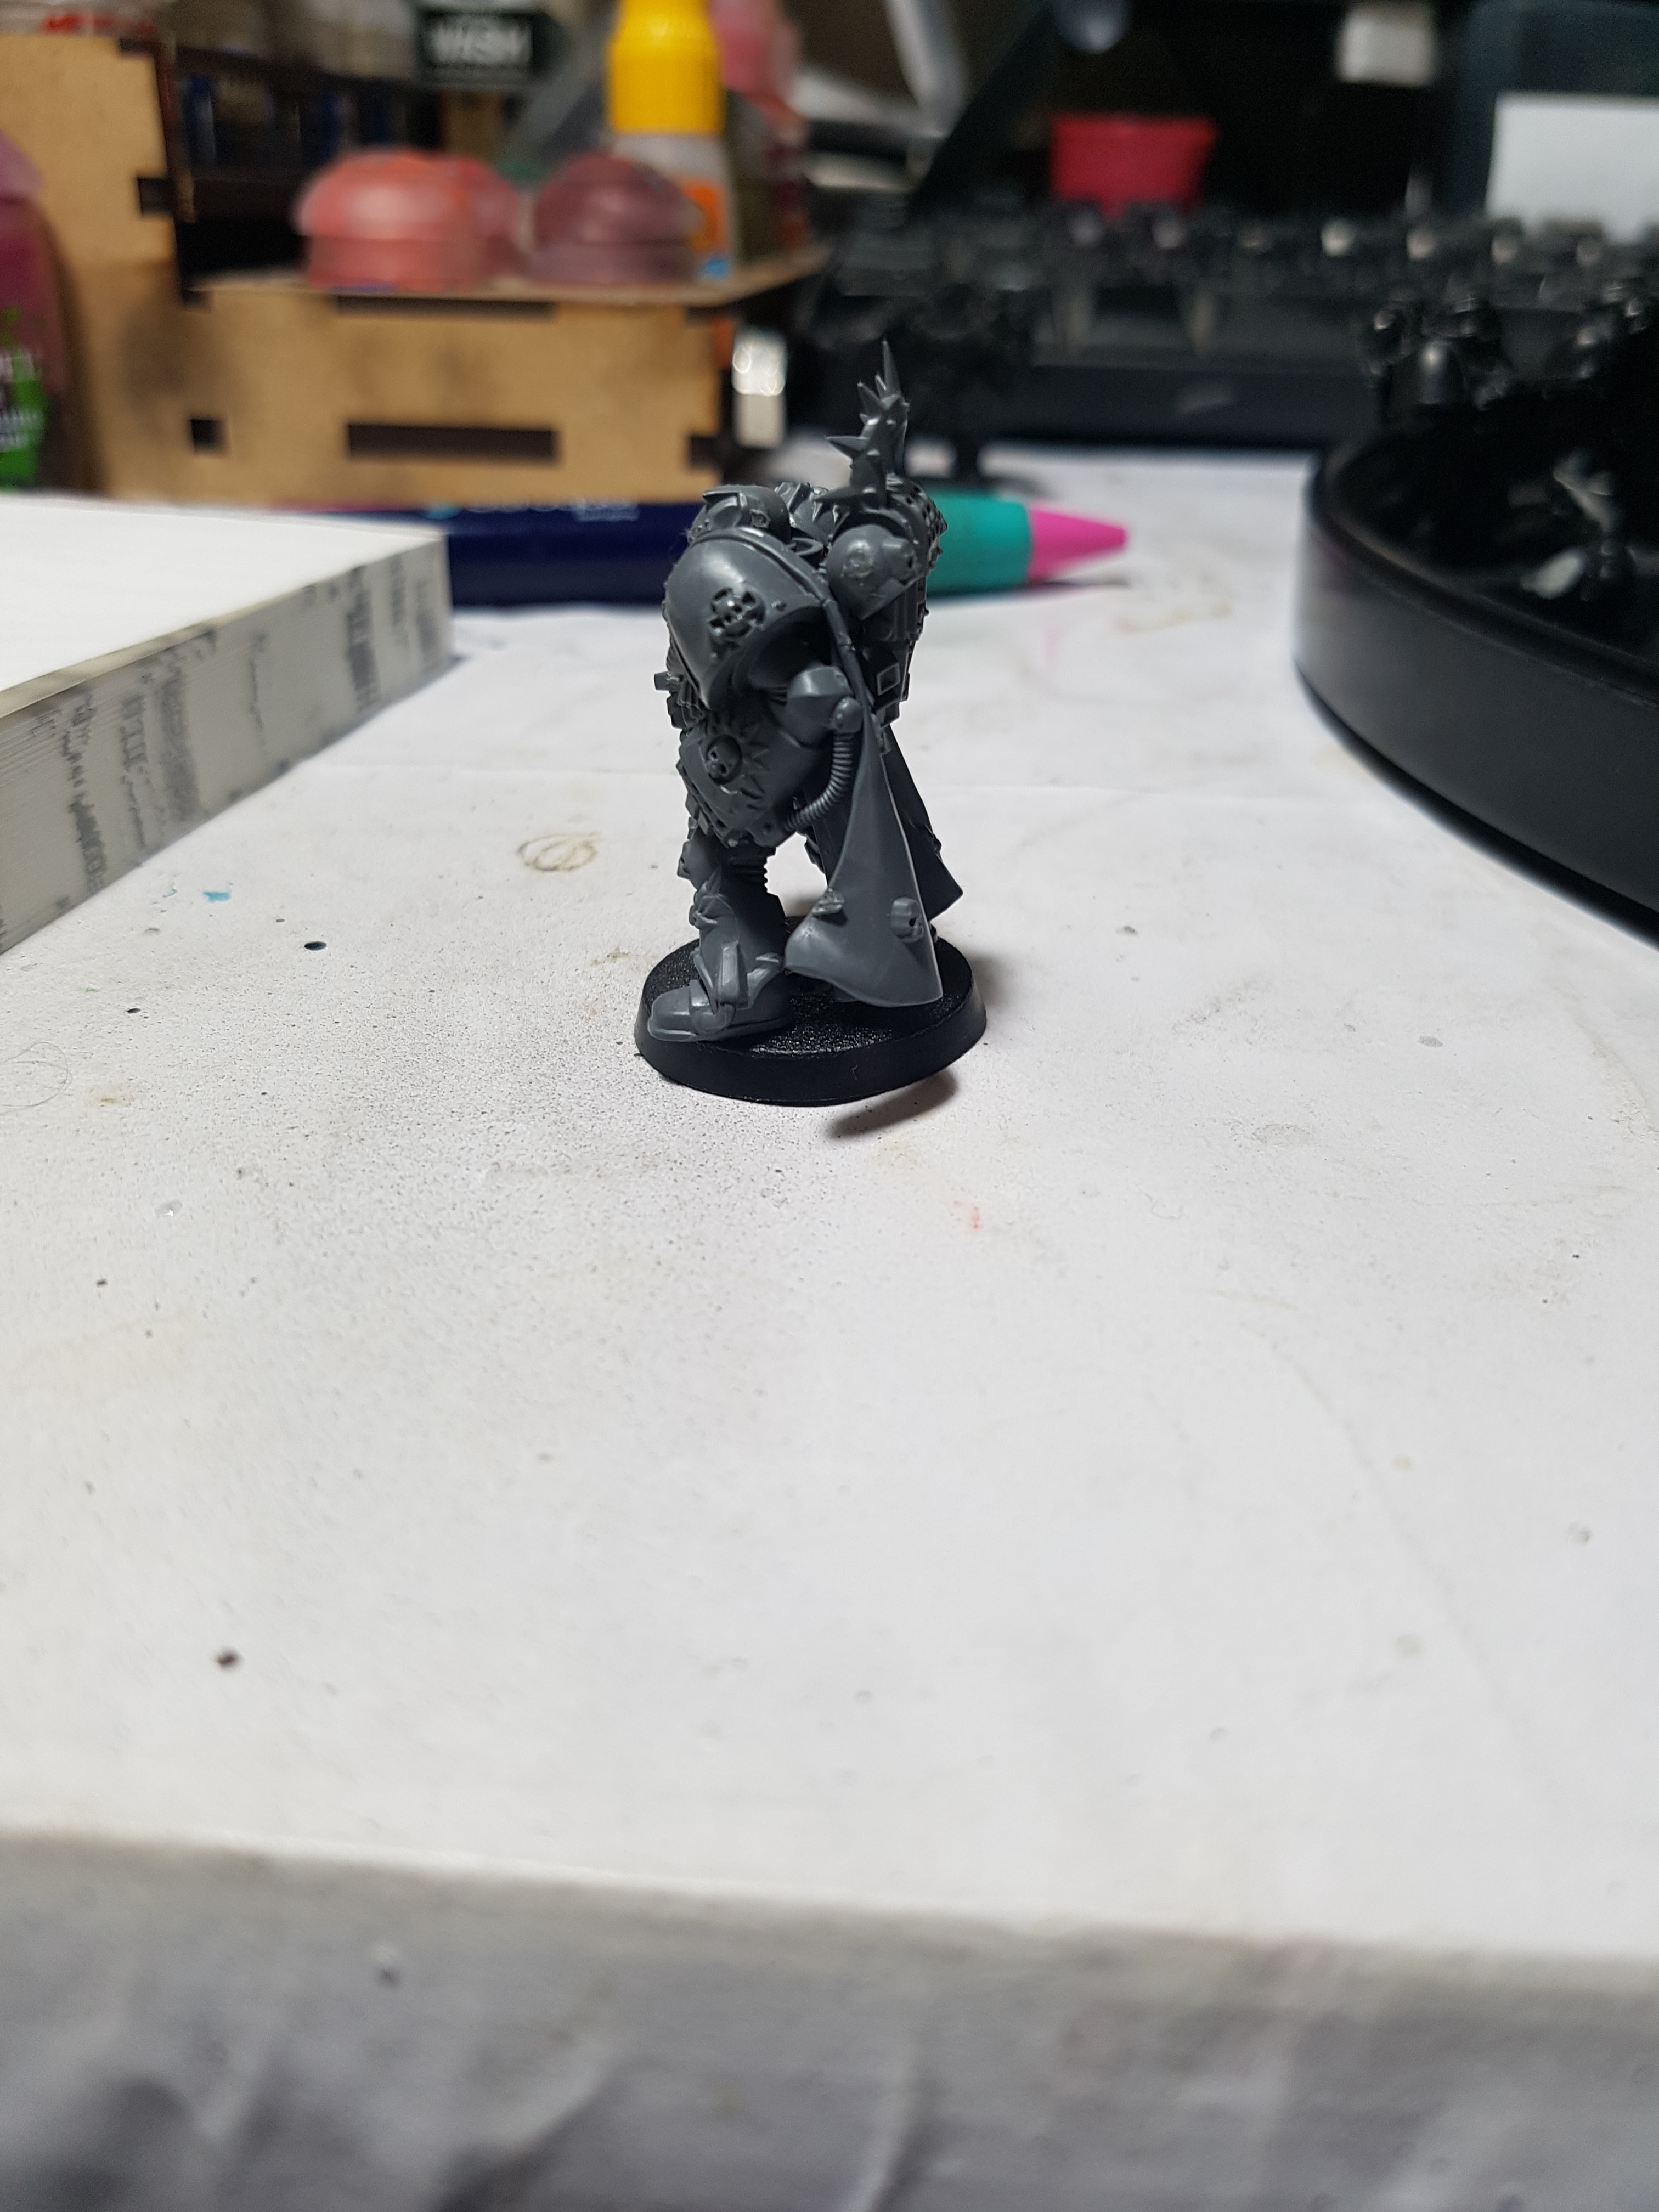
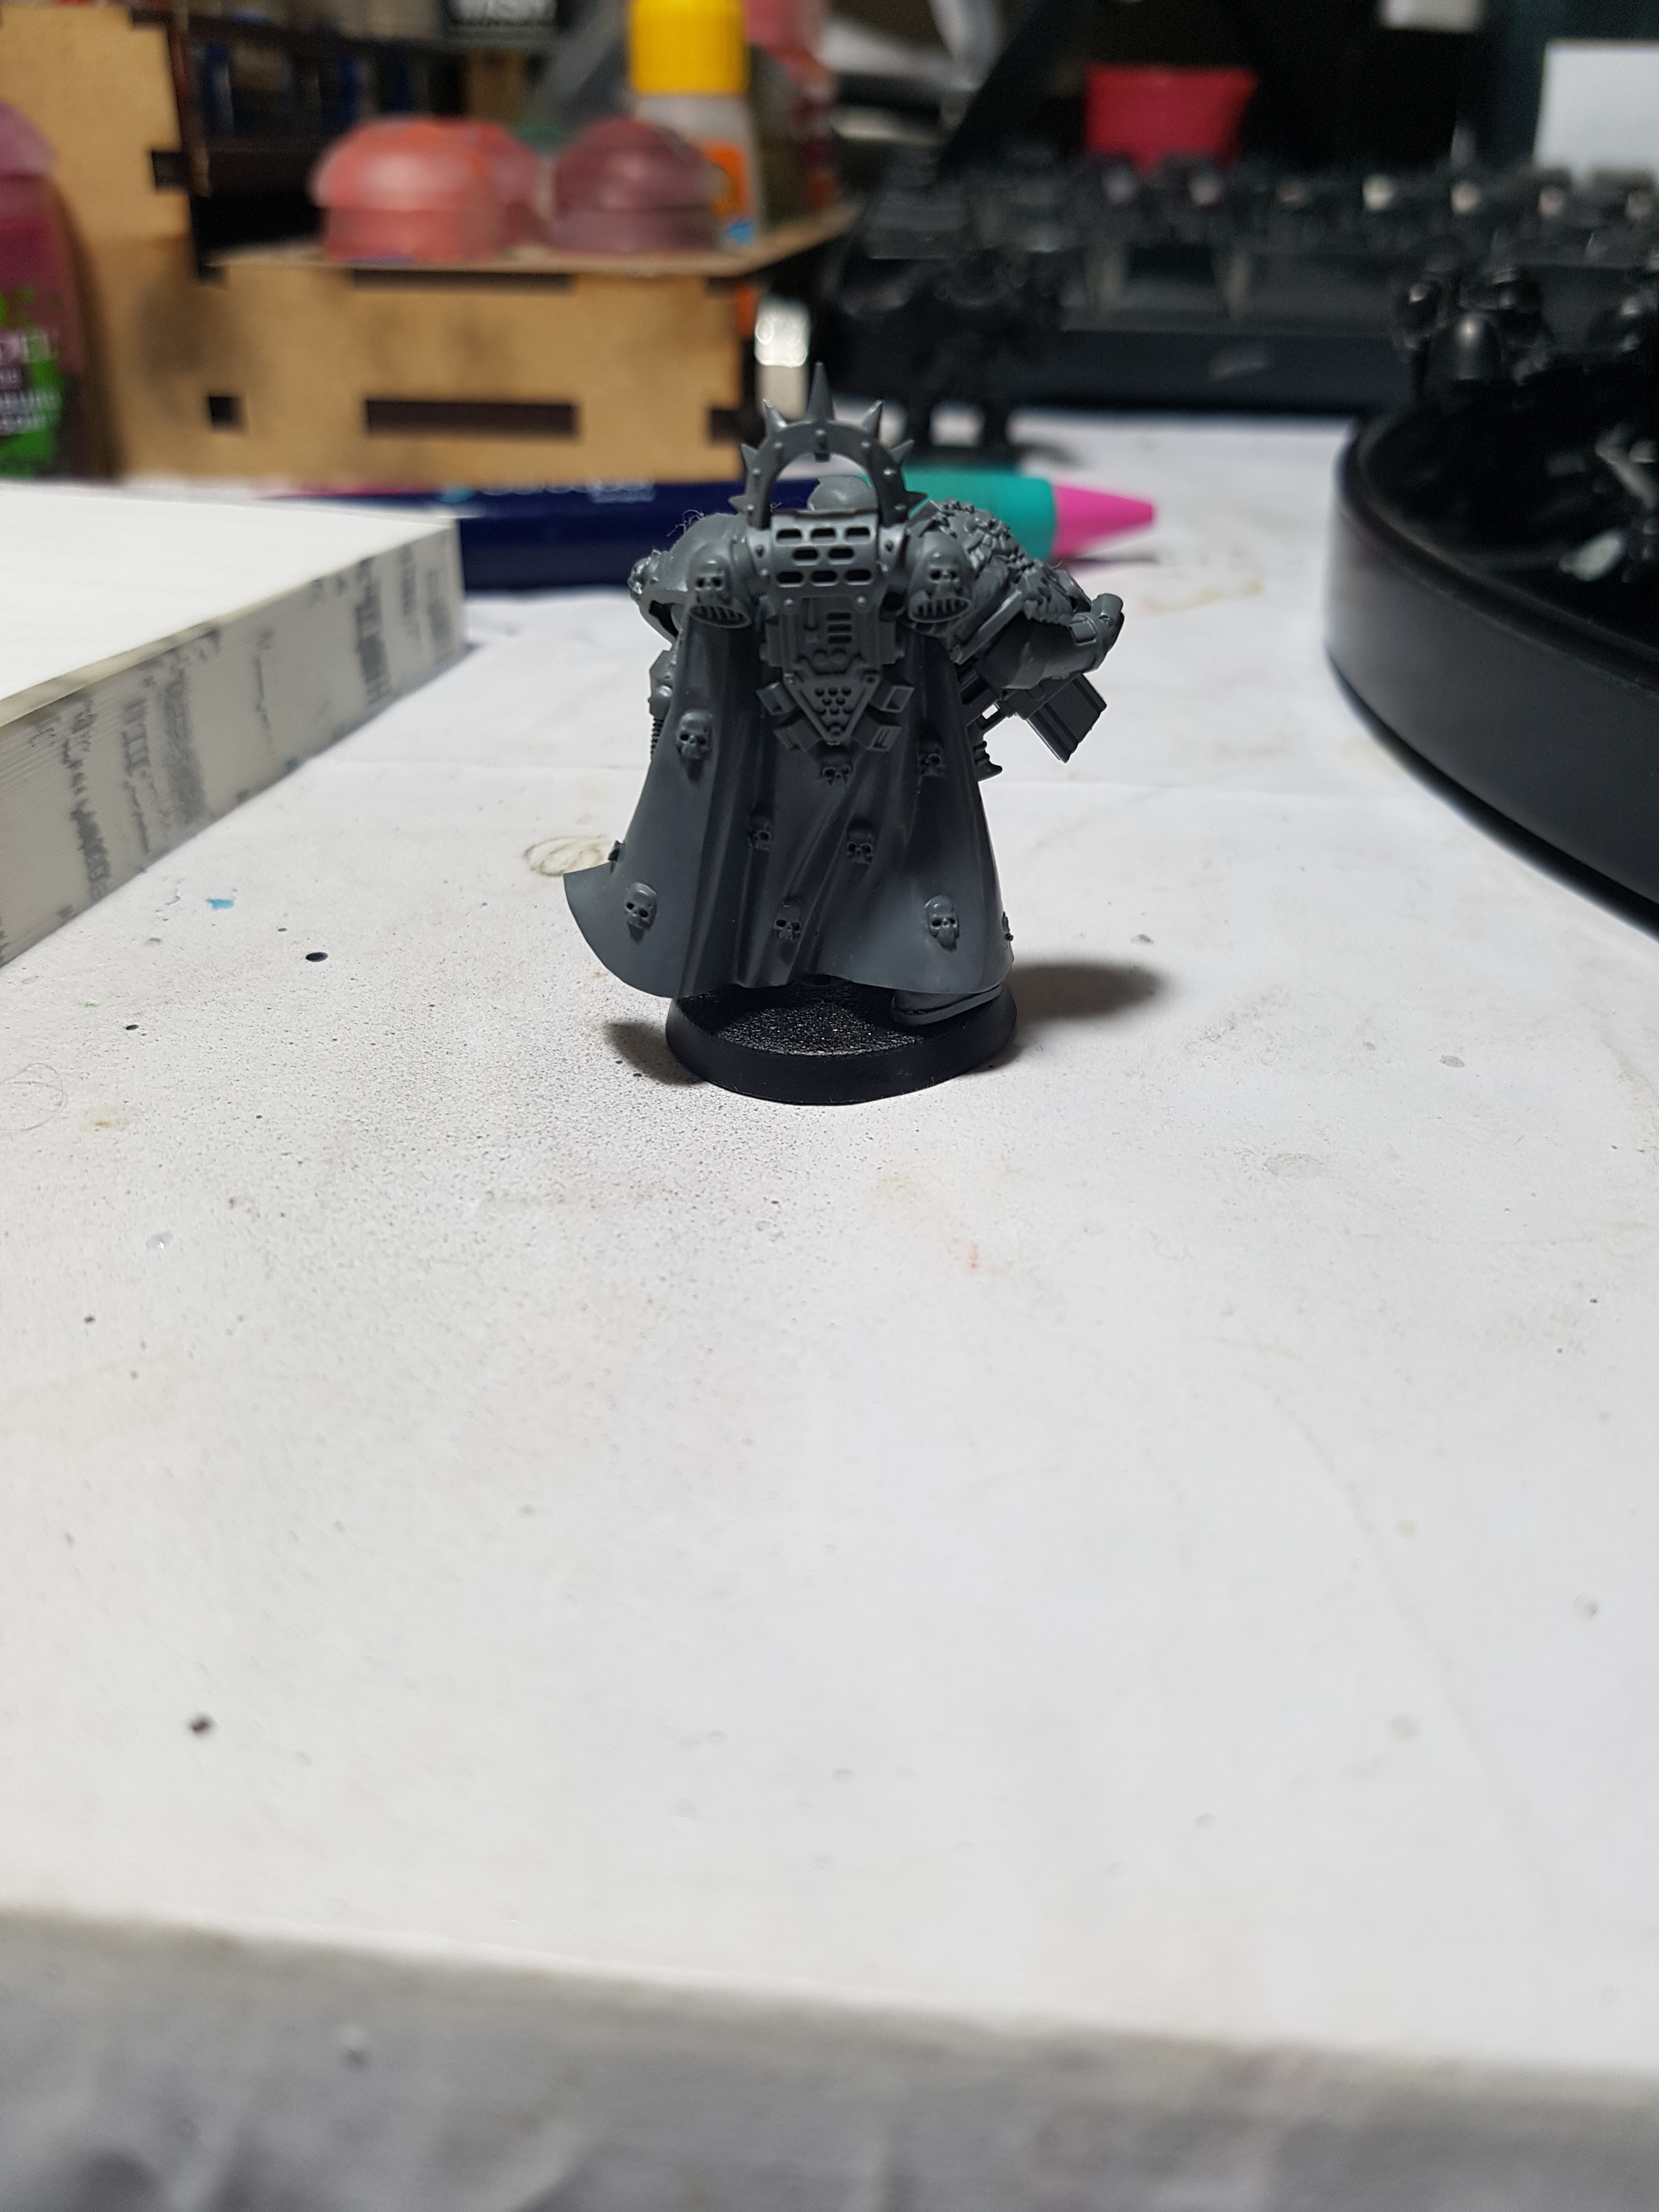
I’m told this next guy is a Grey Knight. Whats parts of the model mark him as such and can anything be done to turn him in to a Space Wolf, or a generic marine? Given he is metal, and a nice sculpt, would I be better off just enjoying him as he is? Something appears to be missing from the top of his backpack. Any ideas? Anyone know what the original sculpt is called and perhaps have a link to images?
This next guy looks a lot like Captain Tycho of the Blood Angels. is he perhaps a previous sculpt of him? Is there anything about him that ties him to a Chapter? Should his gun have extra parts on it? It looks like maybe the barrel is missing a piece? There is no detail on the end there, but otherwise it looks like a fancy version of many other guns I have.
Update: He’s a Web Store exclusive from 2014 for ordering more than £50 of stuff. he is based on the 1991 games day limited edition mini.
http://www.kriswallminis.com/2014/04/pretty-effing-awesome-space-marine.html

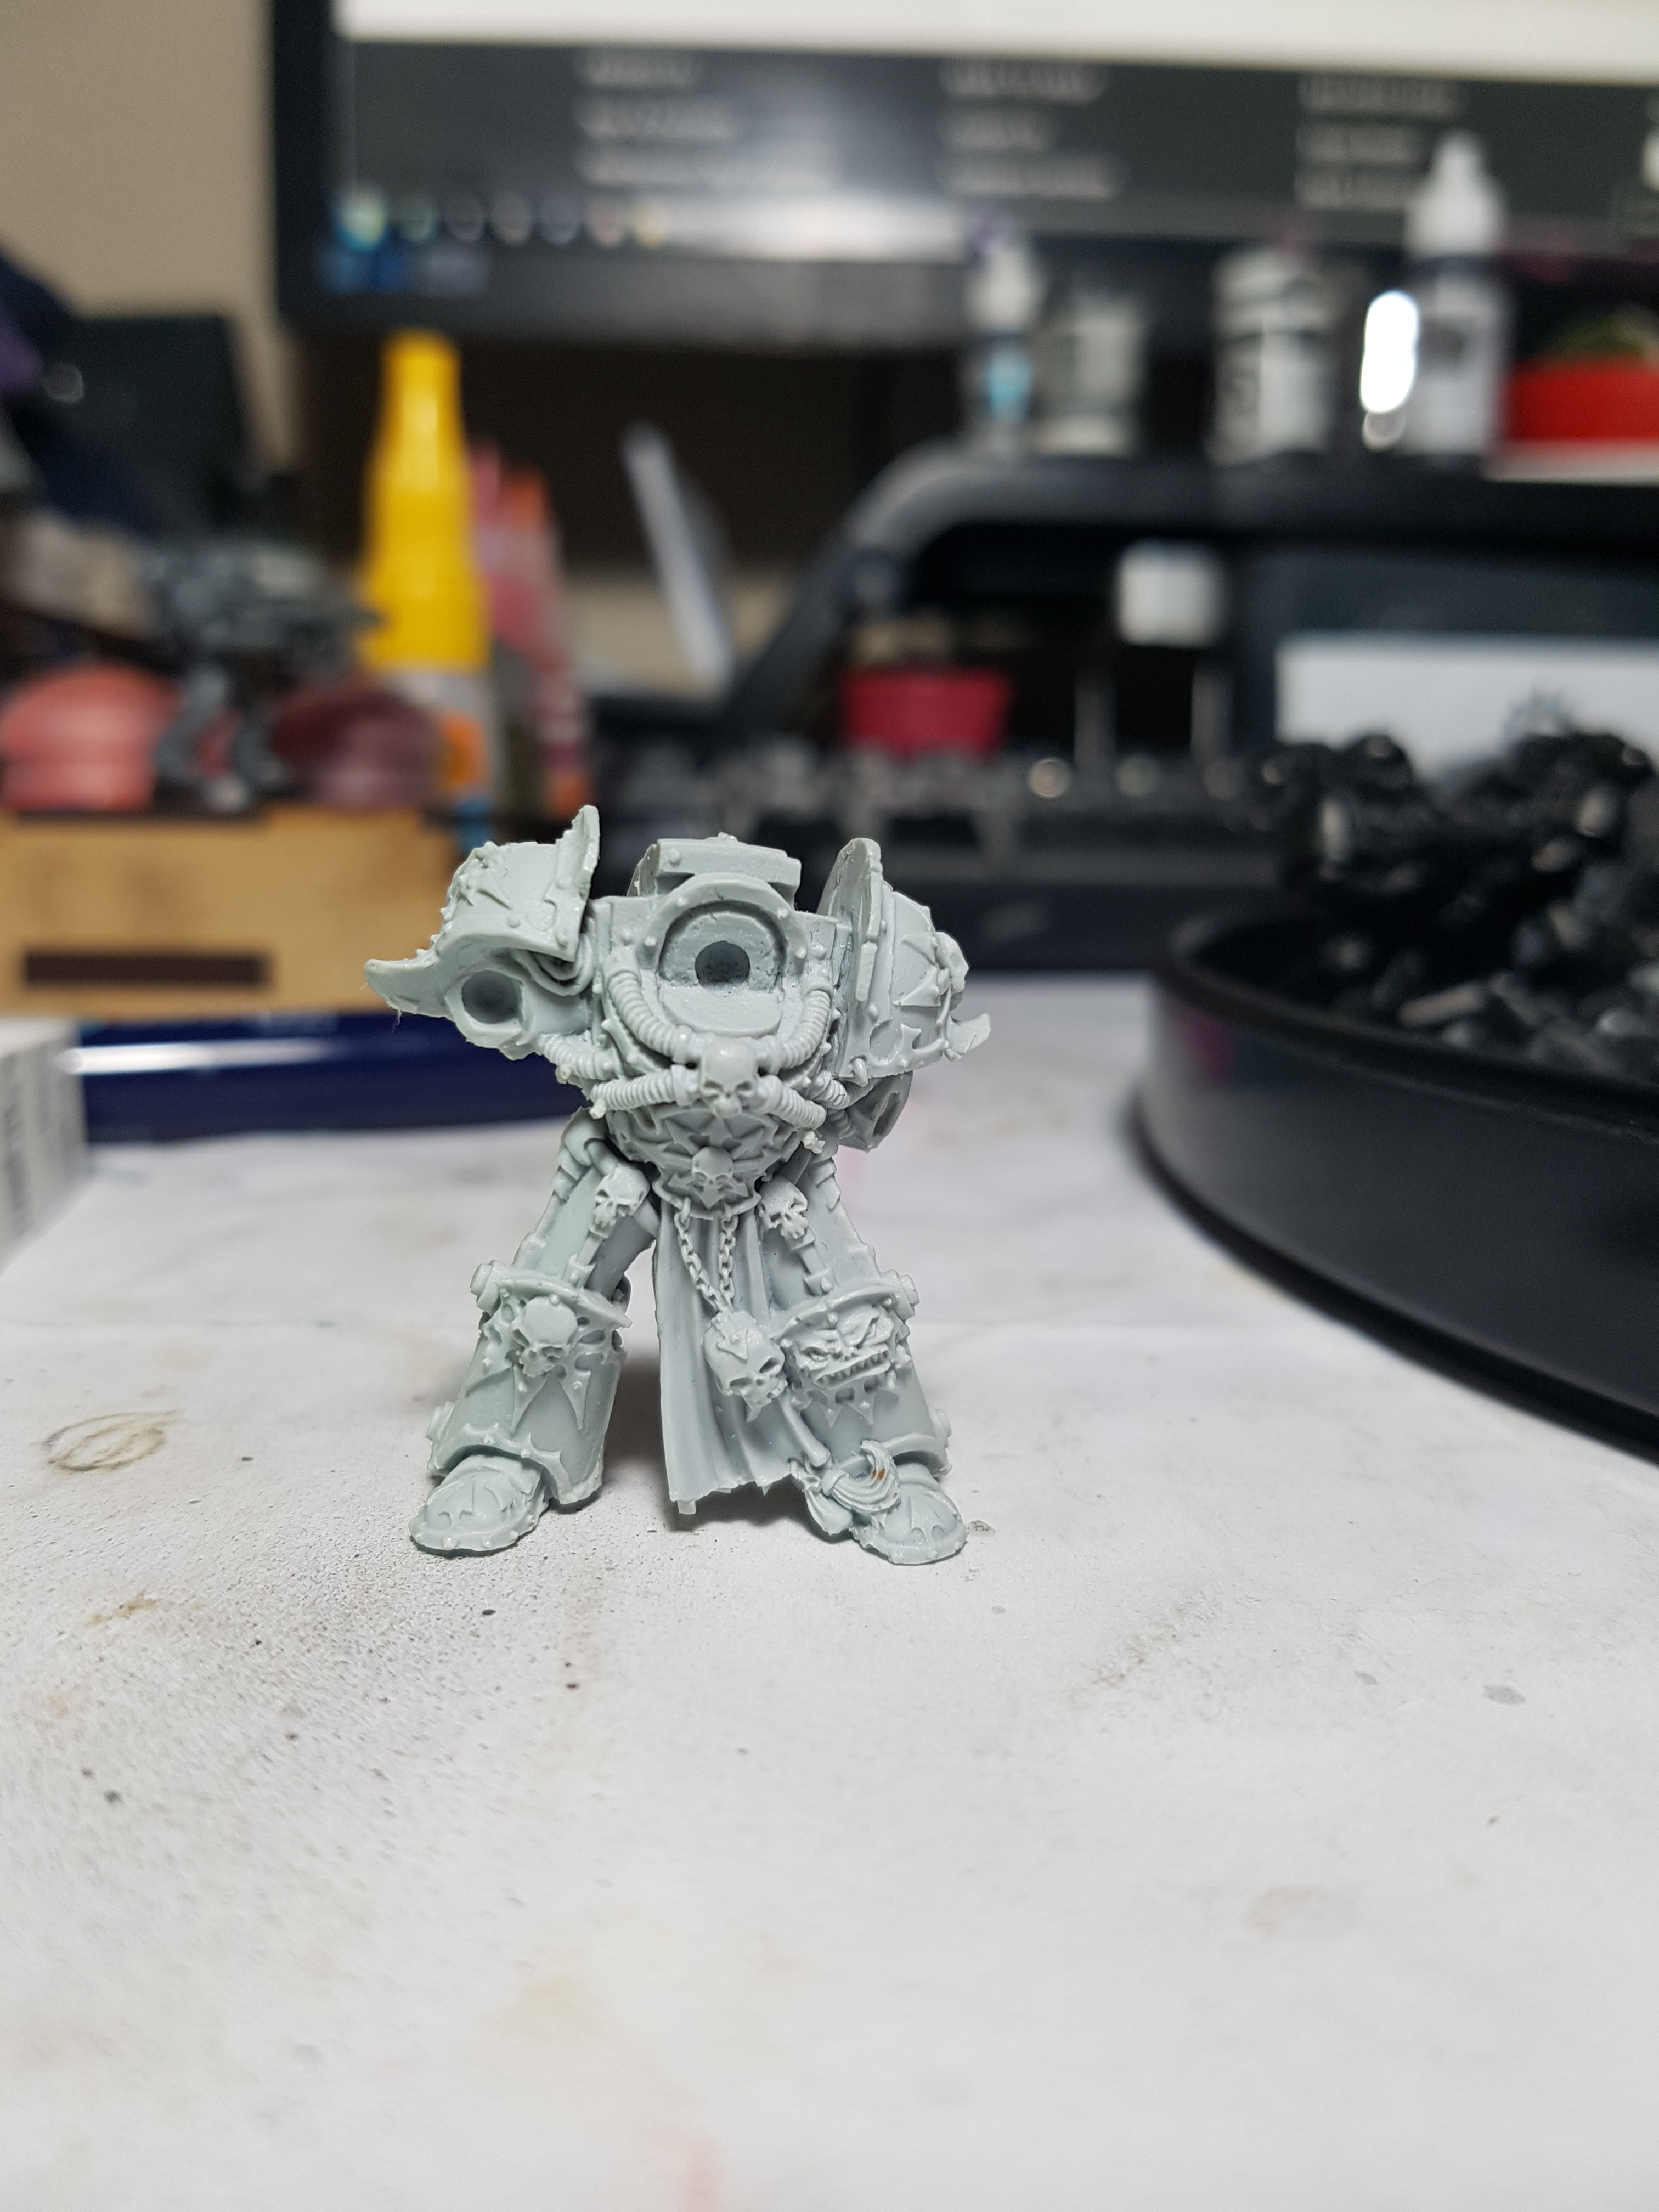
Son of Horus Terminator Character? Terminator Lord? Who is he?
I found this guy in the mix. He’s probably resin. I think theres a resin hammer in the bits box that might be his. He is a stron match for the Forgeworld Suns of Horus Terminatos, but he has much fancier knee pads and a different back. he knee pads remind me of the Chaos Terminator Lords so perhaps he is a SoH Terminator lord, perhaps 30K? I can’t find him on either web site. Anyone recognise him? he has odd cut marks on the bottom of his feet, suggesting he was stood on something once, but perhaps I’m just reading too much in to that?


Rhino
I missed a tank! With so much to post I forgot to inclide the Rhino. The gun is missing off the top, but it is present. Otherwise it appears intact. Correct me if I am wrong.
https://www.games-workshop.com/en-GB/Space-Marine-Rhino-2017

Painting, clean up and prep for the future
I ran these guys under the tap in warm water and rubbed them gently with a toothbrush and they look much cleaner. 32mm seems to be the future for space marines so I’ll likely re-base them before painting. I know the old bases aren’t a problem to stick with, at least for this edition. I have a few questions I’d like some feedback on:
1: If I wanted to strip the paint off the tanks without dismantling them, is my best option actually a big bucket of Dettol? I usually use a jam jar, which needs a lot less fluid.
2: If I didn’t strip and just primed over the top with my airbrush, does anyone foresee any issues?
3: I’ve seen the Citadel paints app for the Space Wolves colour scheme, but GW paint pots hate air brushes. Anyone got a Vallejo recipe they like and care to share? otherwise I’ll look at the DakkDakka chart and just compare GW and Vallejo pots down the store one day, and that’s not always representative of their dry colours.
4: Space Wolves deserve snowy rocky ground. I have some PrecisionIceAndSnow fake snow which I’ve used and like, but it really wants lots of peaks and troughs on a base to work well. I could put down cork rocks, and bits of kitty litter. I could base stamp some green stuff broken ground. Anyone got any other suggestions for adding spots of height to the base that won’t stop me drilling pin holes through them and sticking a marine down with them?
5: If anyone has some spare Las Cannons for a Predator tank or a Land Raider (Which also needs a sponson optic) and doesn’t mind parting with them please let me know. I also have the resin body for Abaddon the Despoiler. He either needs all the other parts sending to me, or he needs to be adopted by someone else who has the parts.
6: Anyone any experience with Oyumaru or other mould making sticks? Think I could make moulds from the las cannons I have and then mod them to fit the other sides of these tanks? Would it take lots of practise to get it right? Would I be better off casting the guns in two halves (top and bottom) and then gluing them together after, or trying to make a full clamshell mould?
UPDATE 10/10/18
I found the parts for the Predator, one Land Raider Las Cannon and 2 Las Cannon armour plates/covers on eBay yesterday and ordered them. Assuming they turn up all I need now is one Land Raider Las Cannon and one sponson optic/sensor, and I can replace that with a couple of wires and say it was shot off if need be. Looking for donations or trades if anyone has those 2 parts?
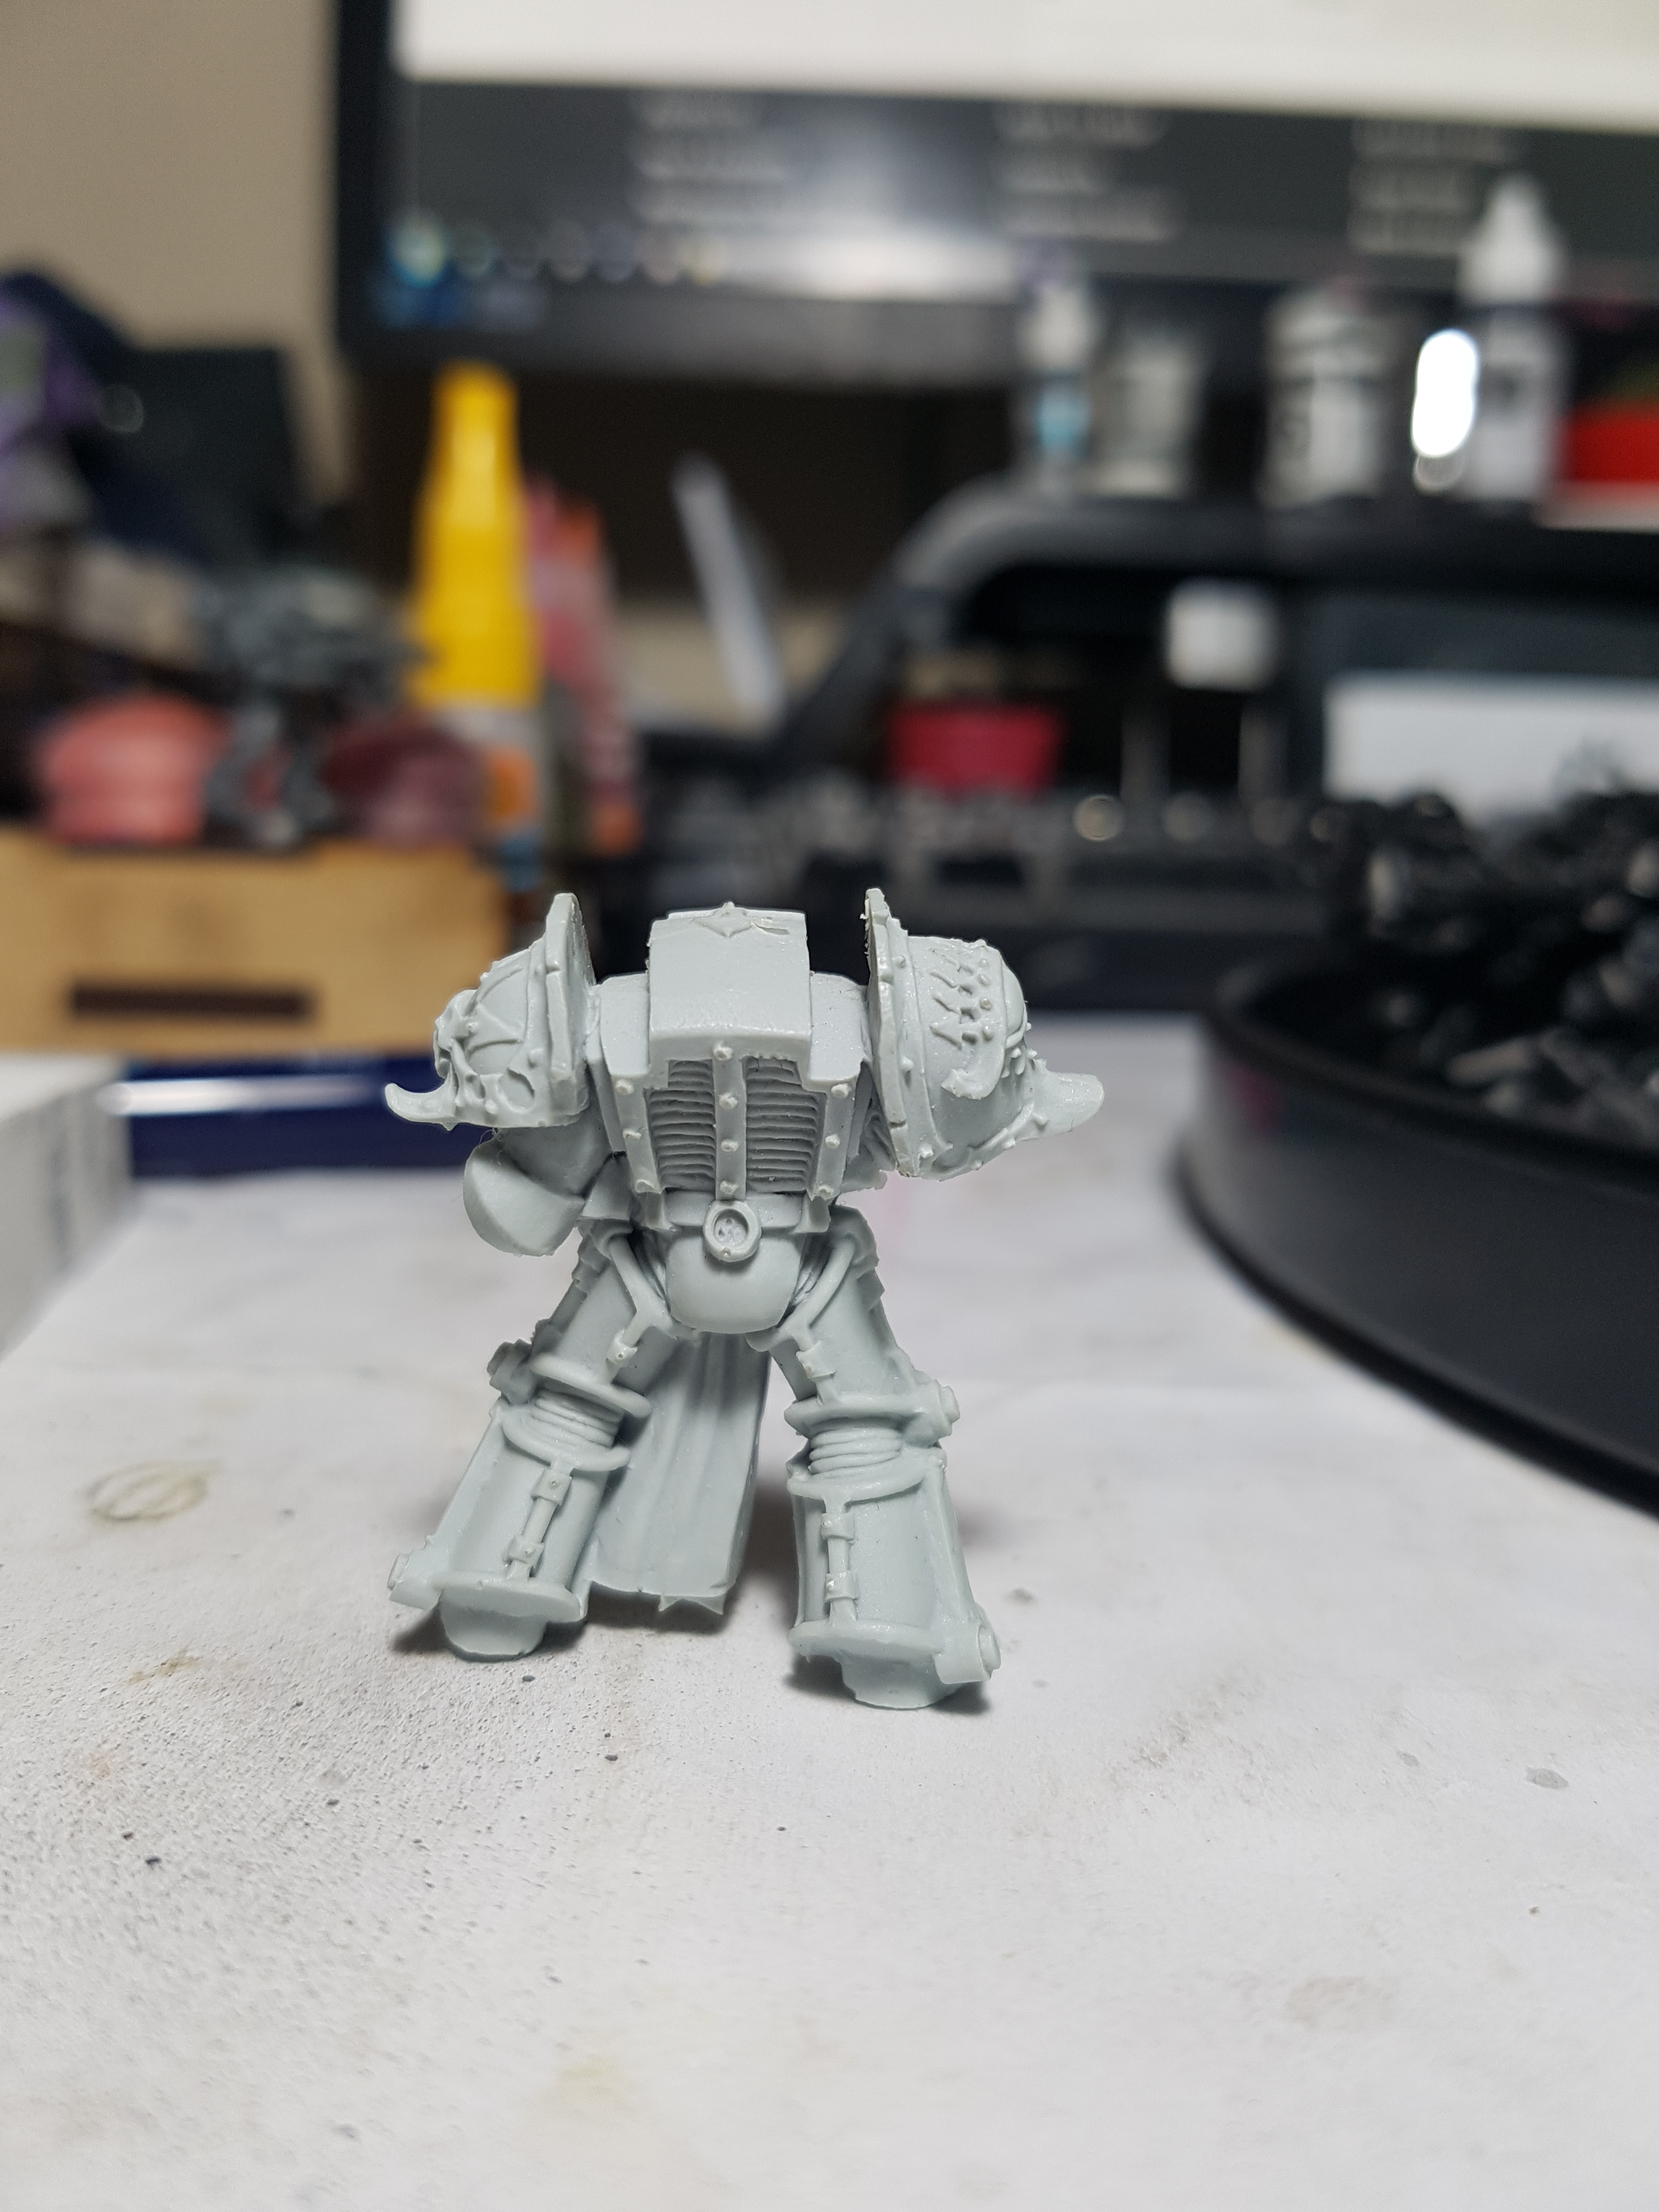
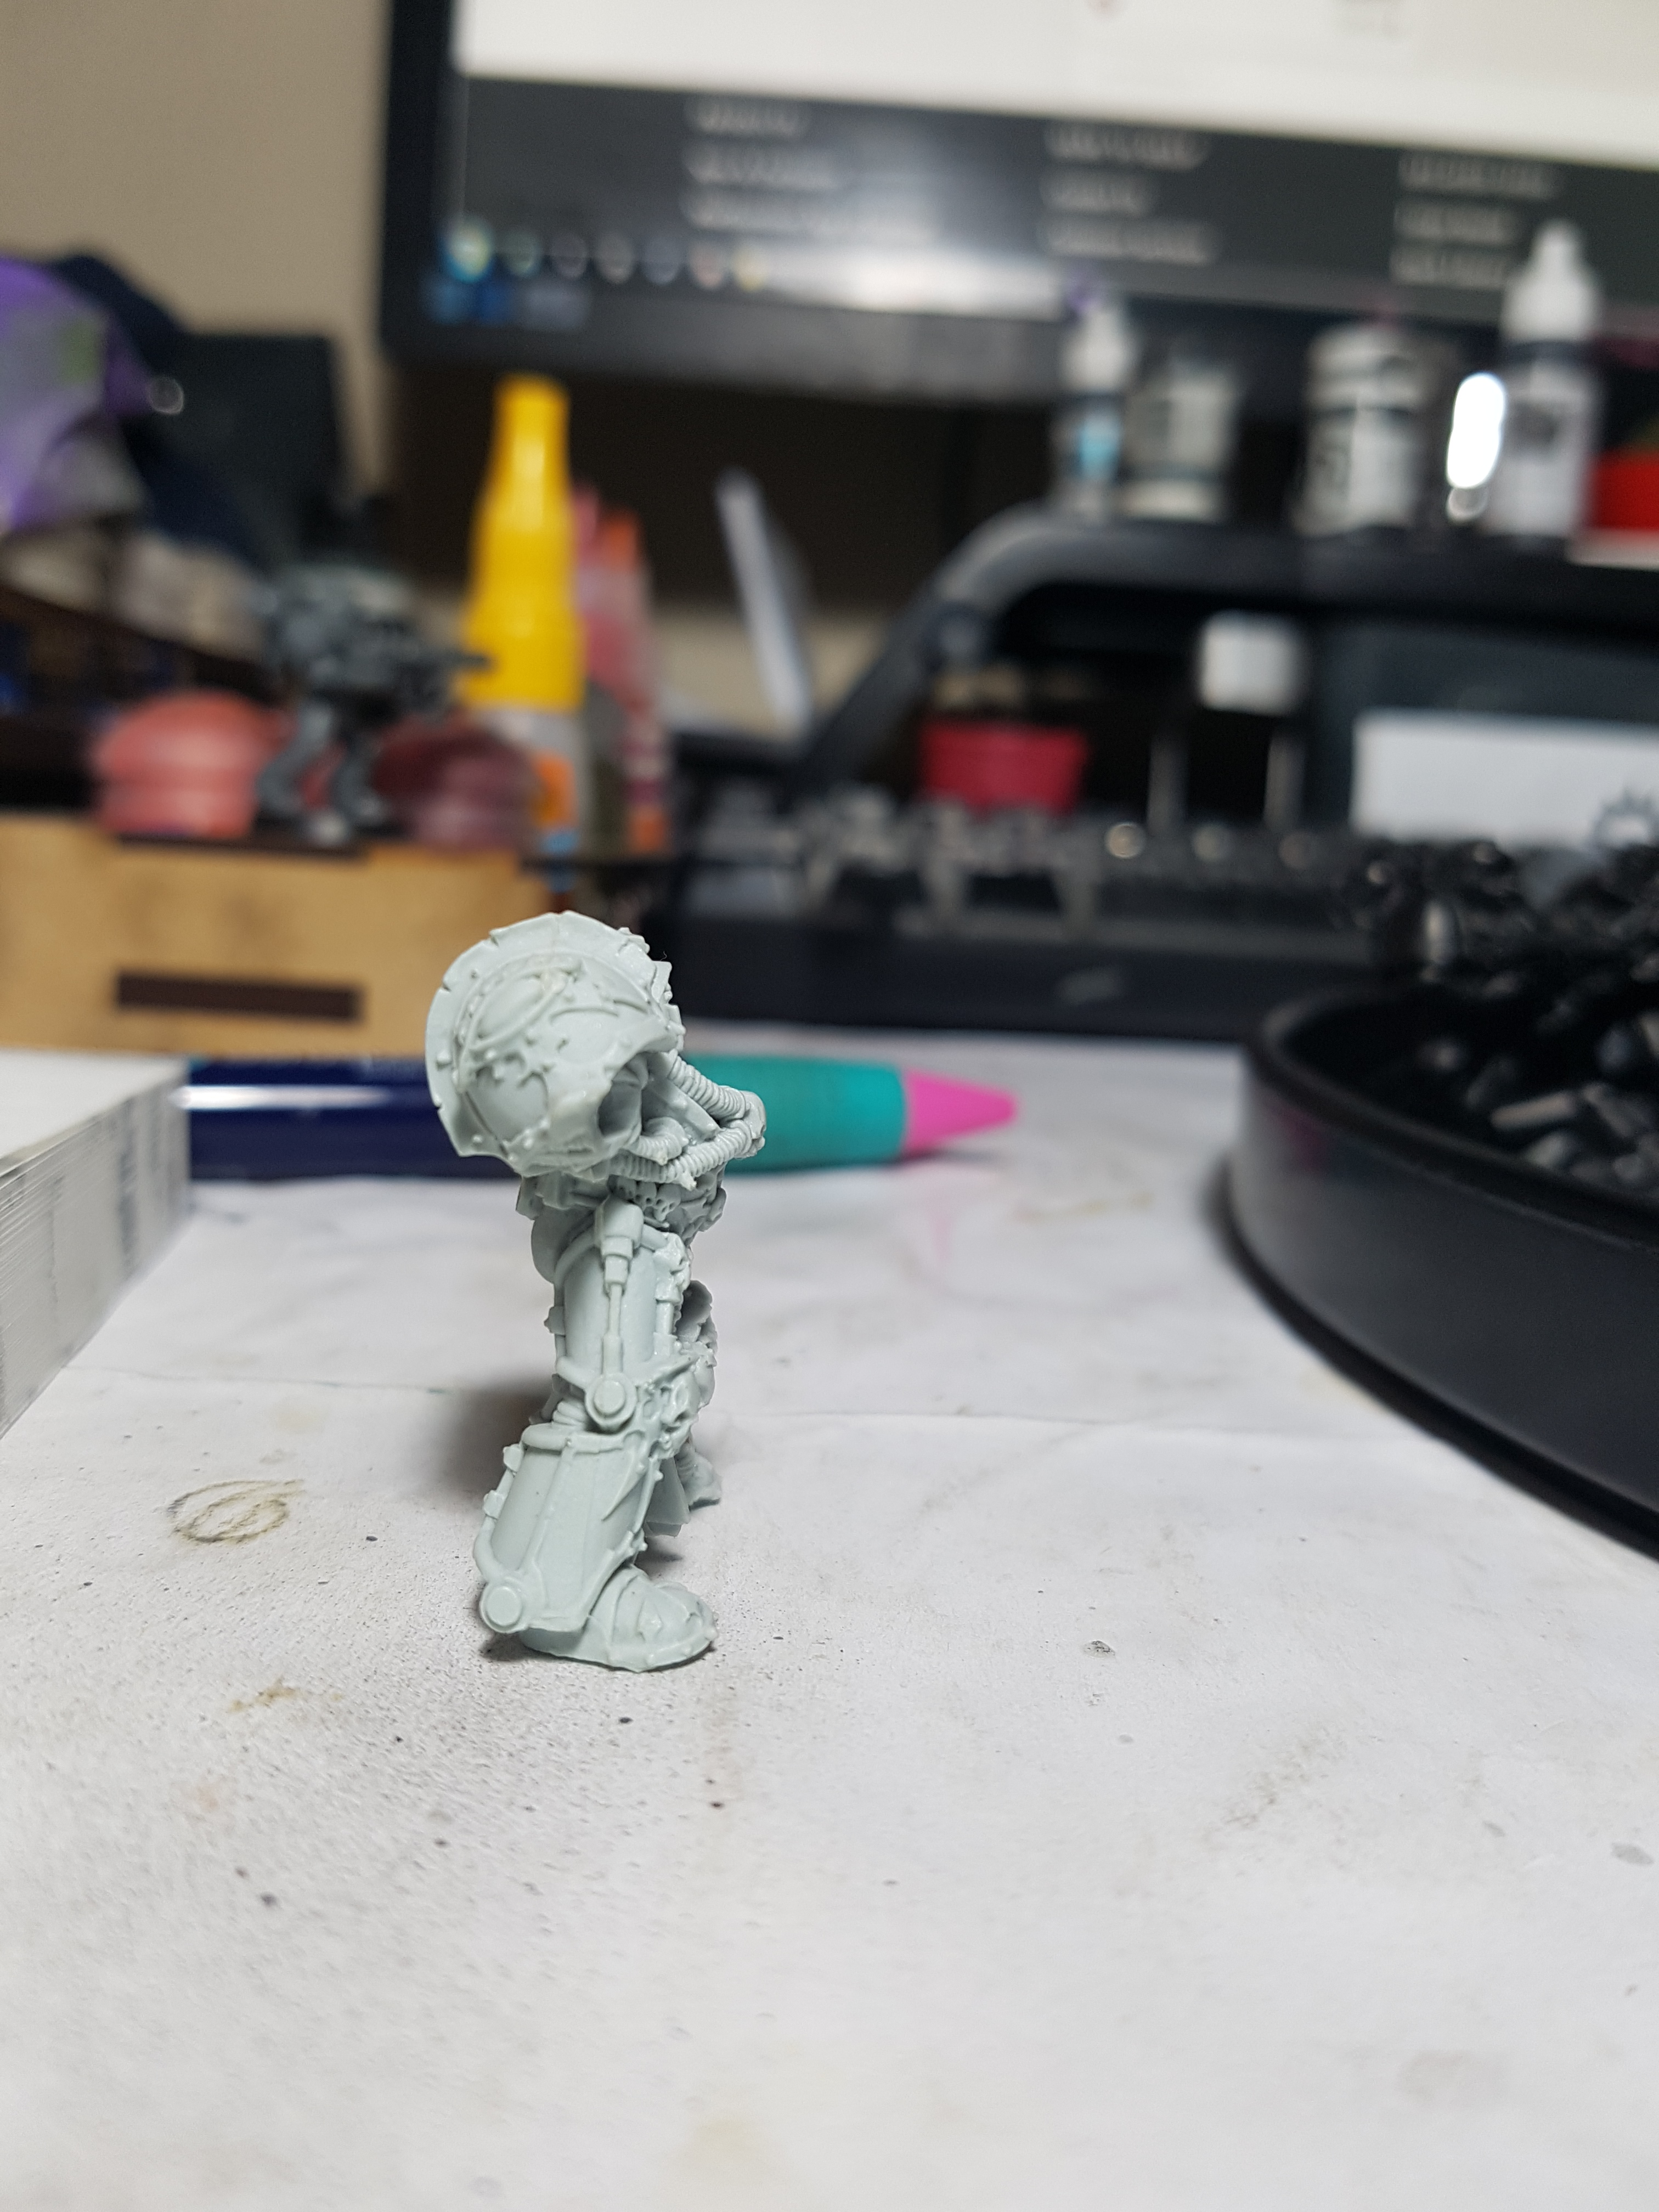
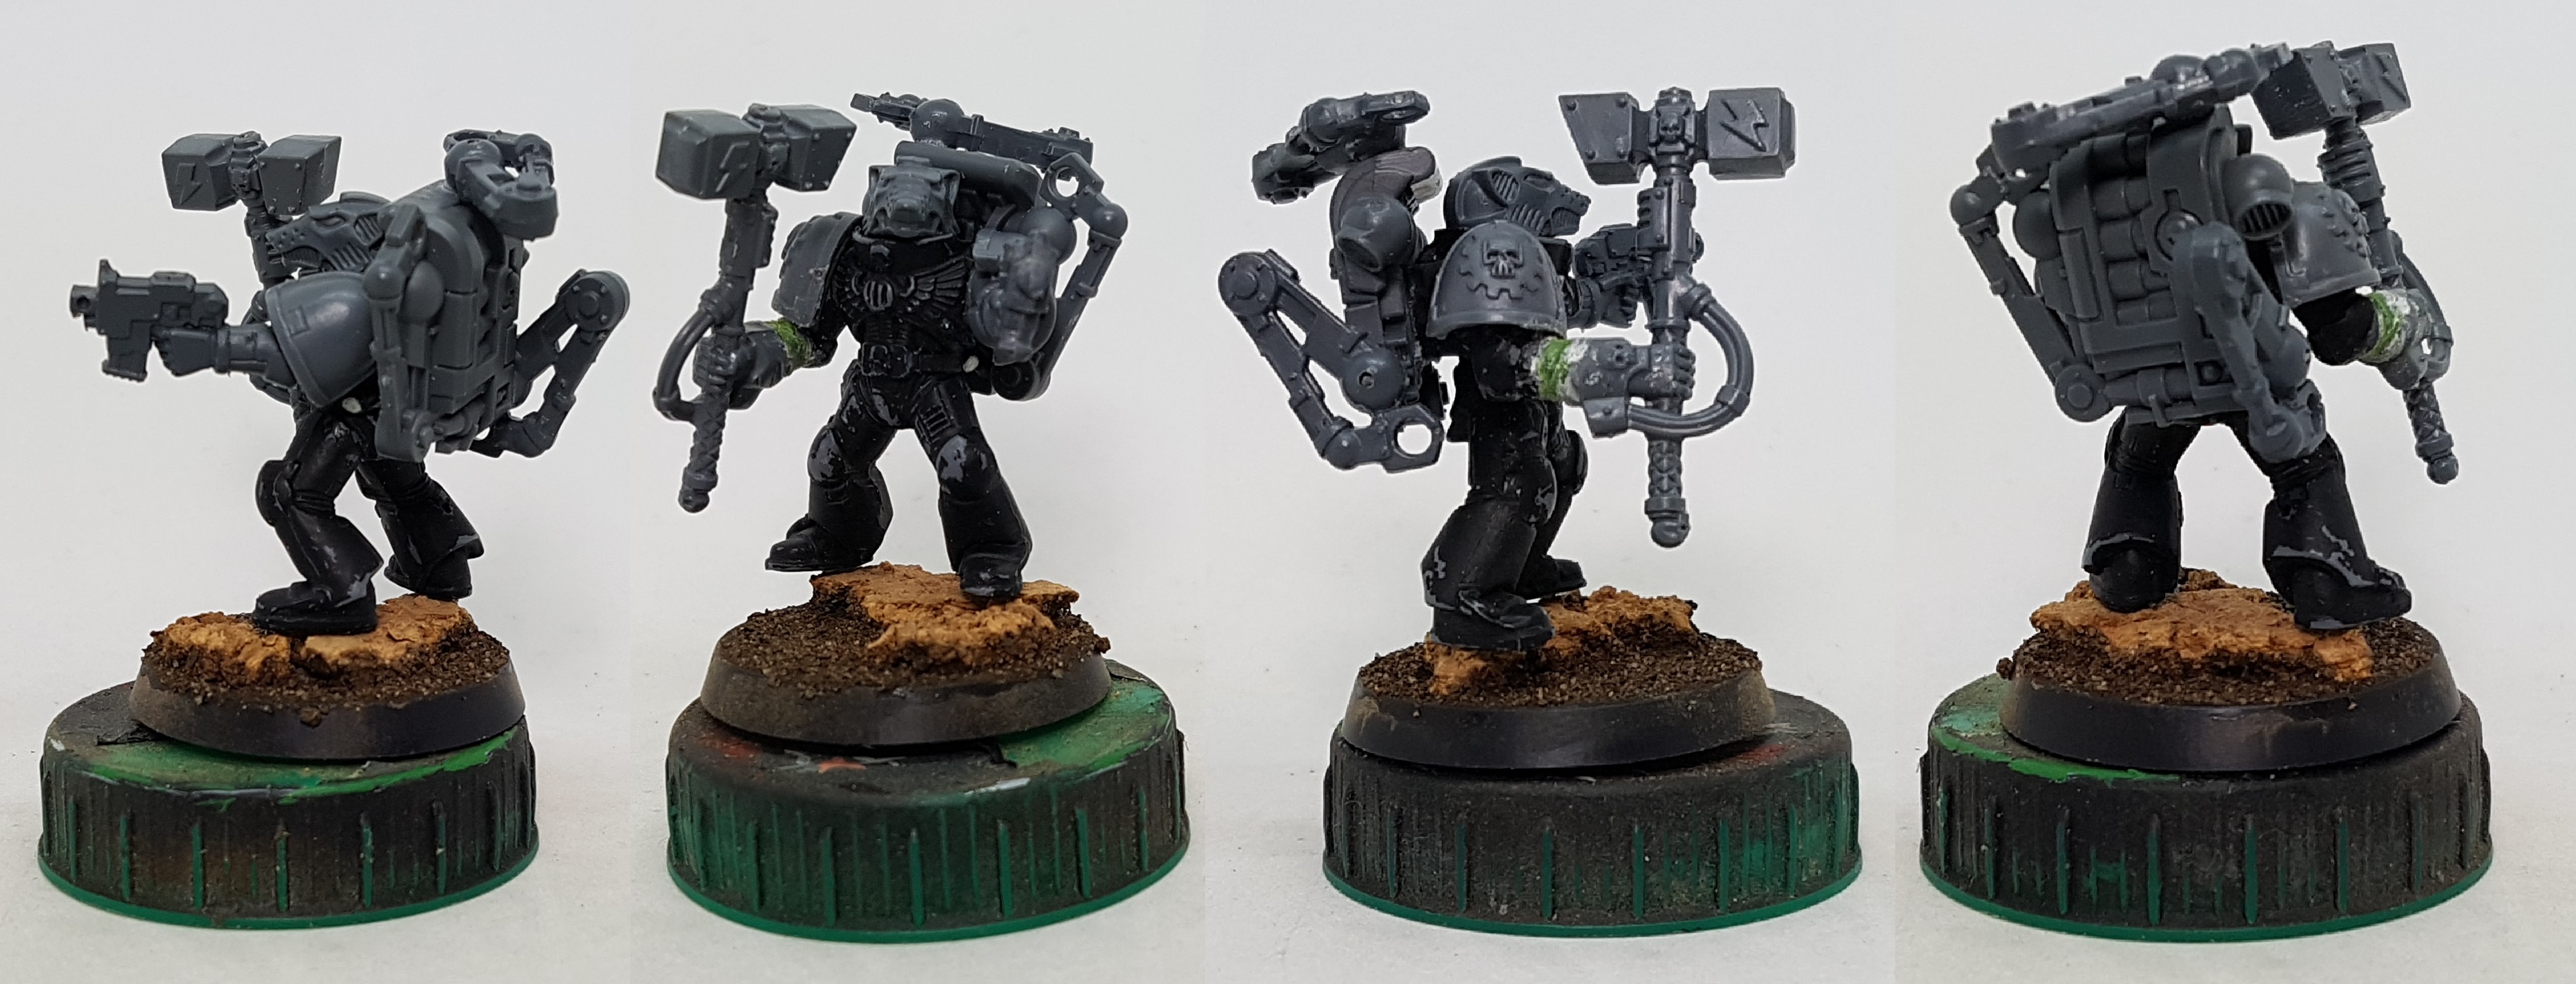
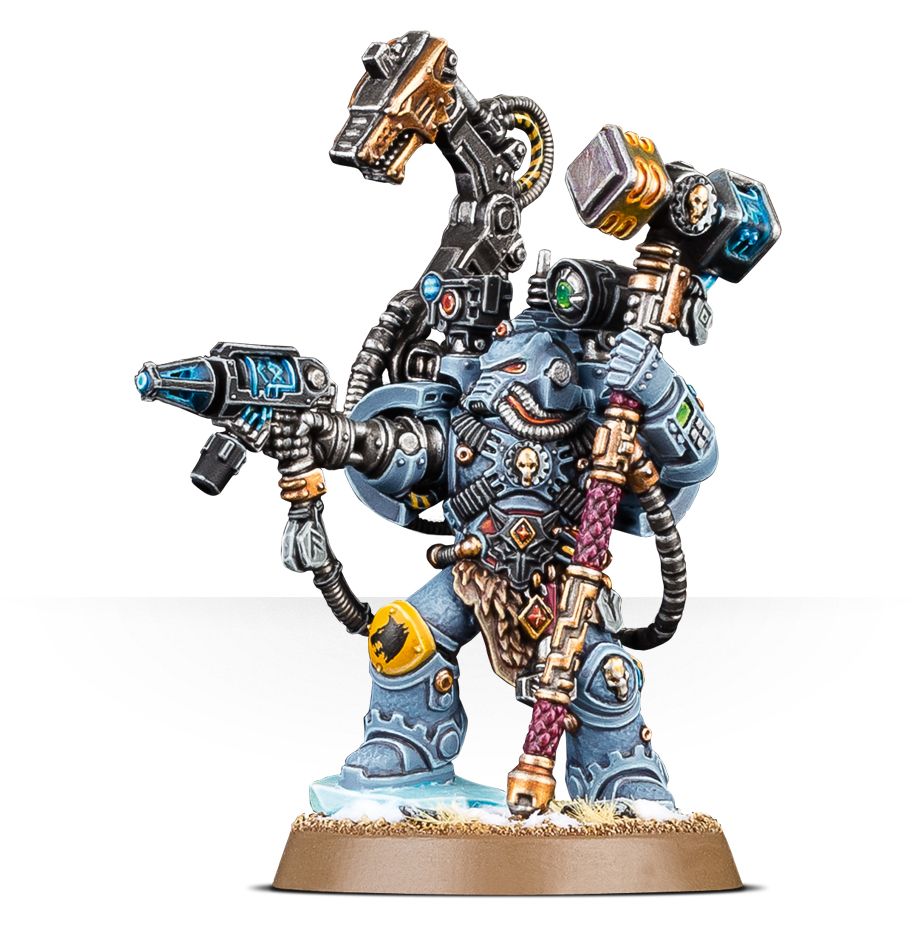
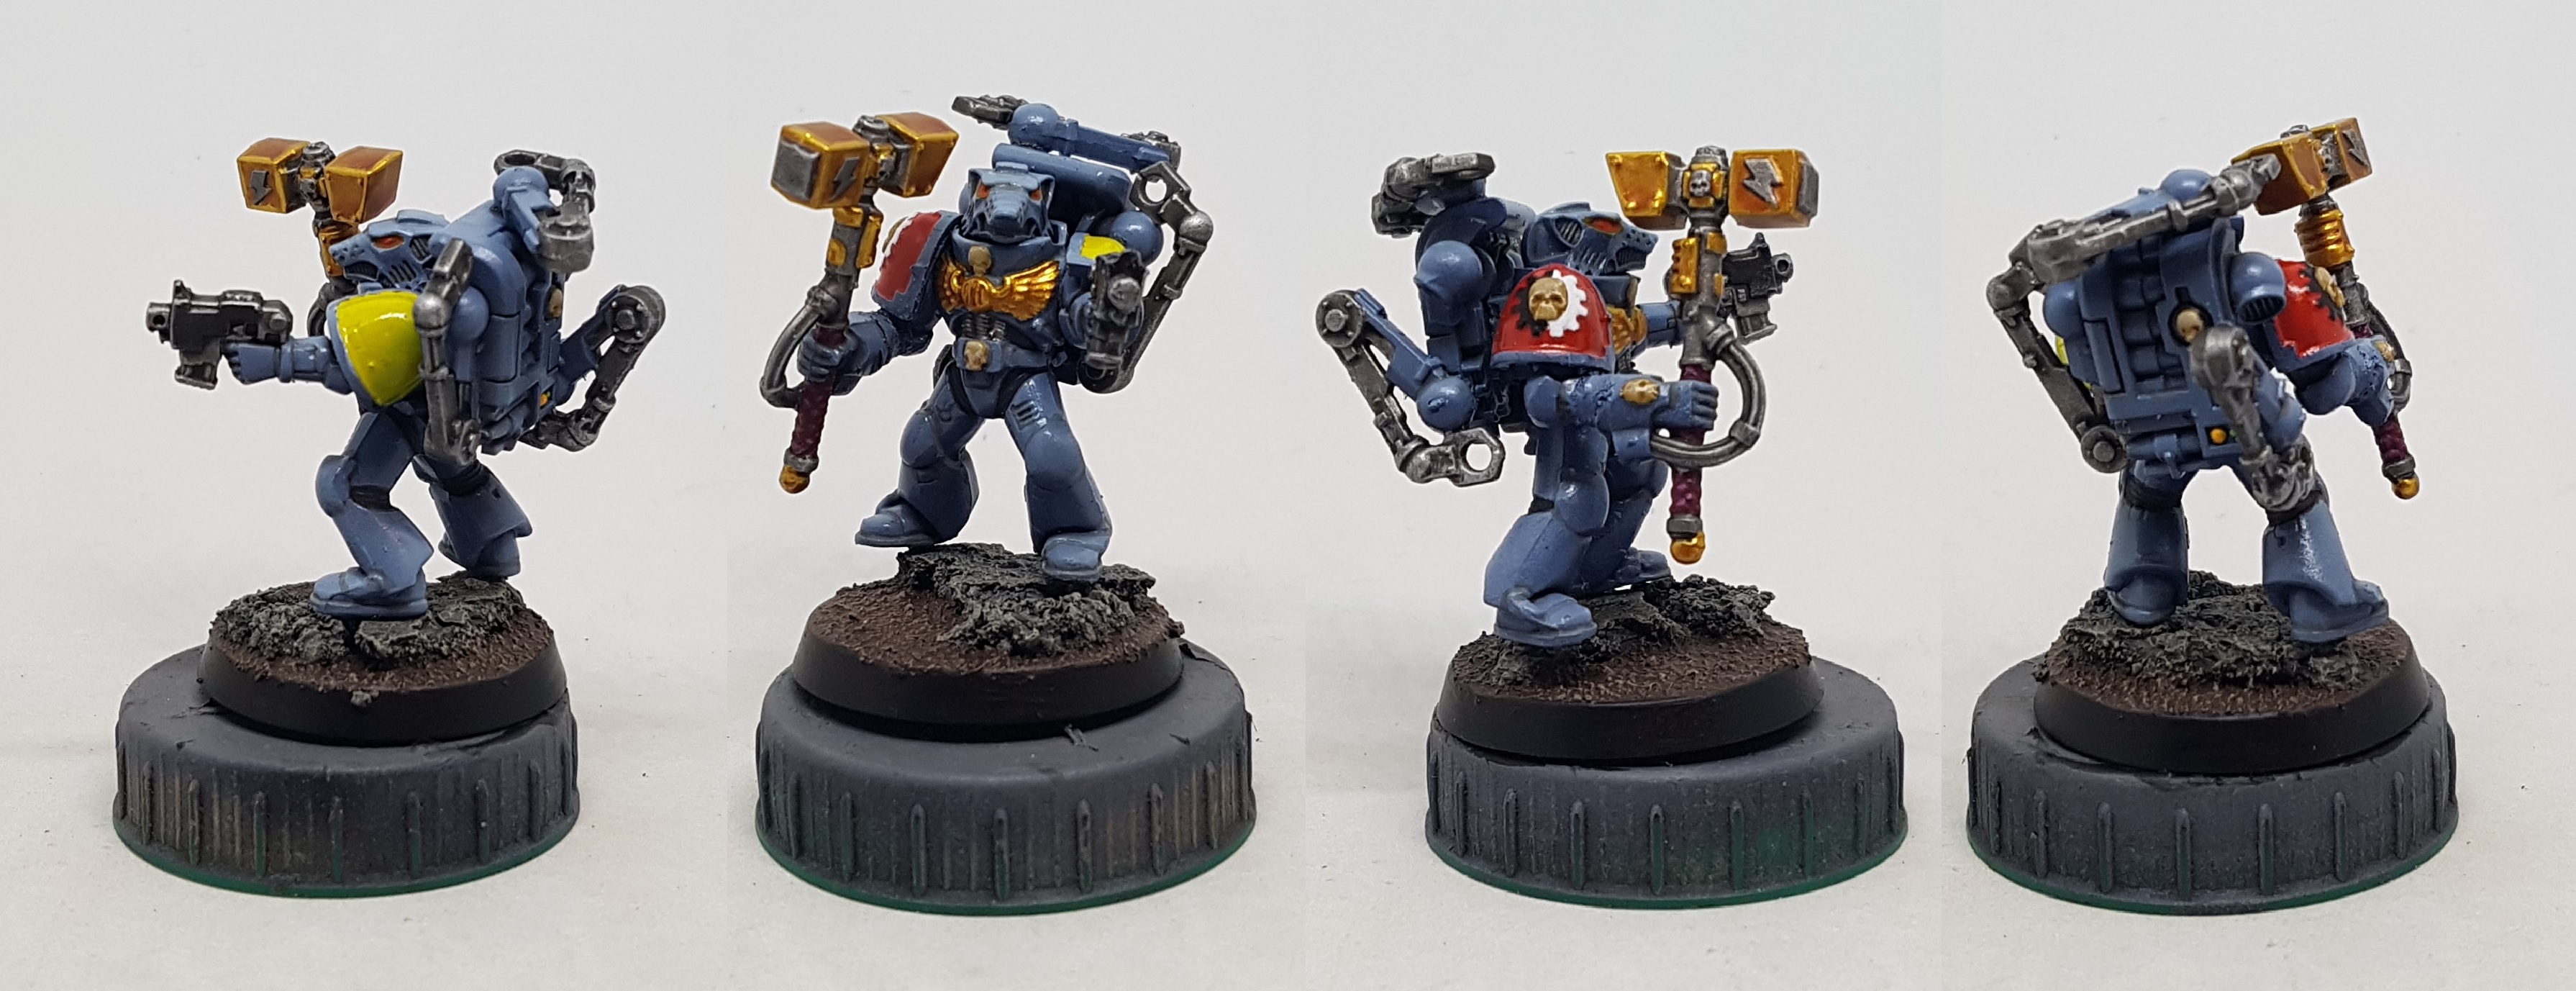
Iron Priest Test Piece & Space Wolf Model Inventory
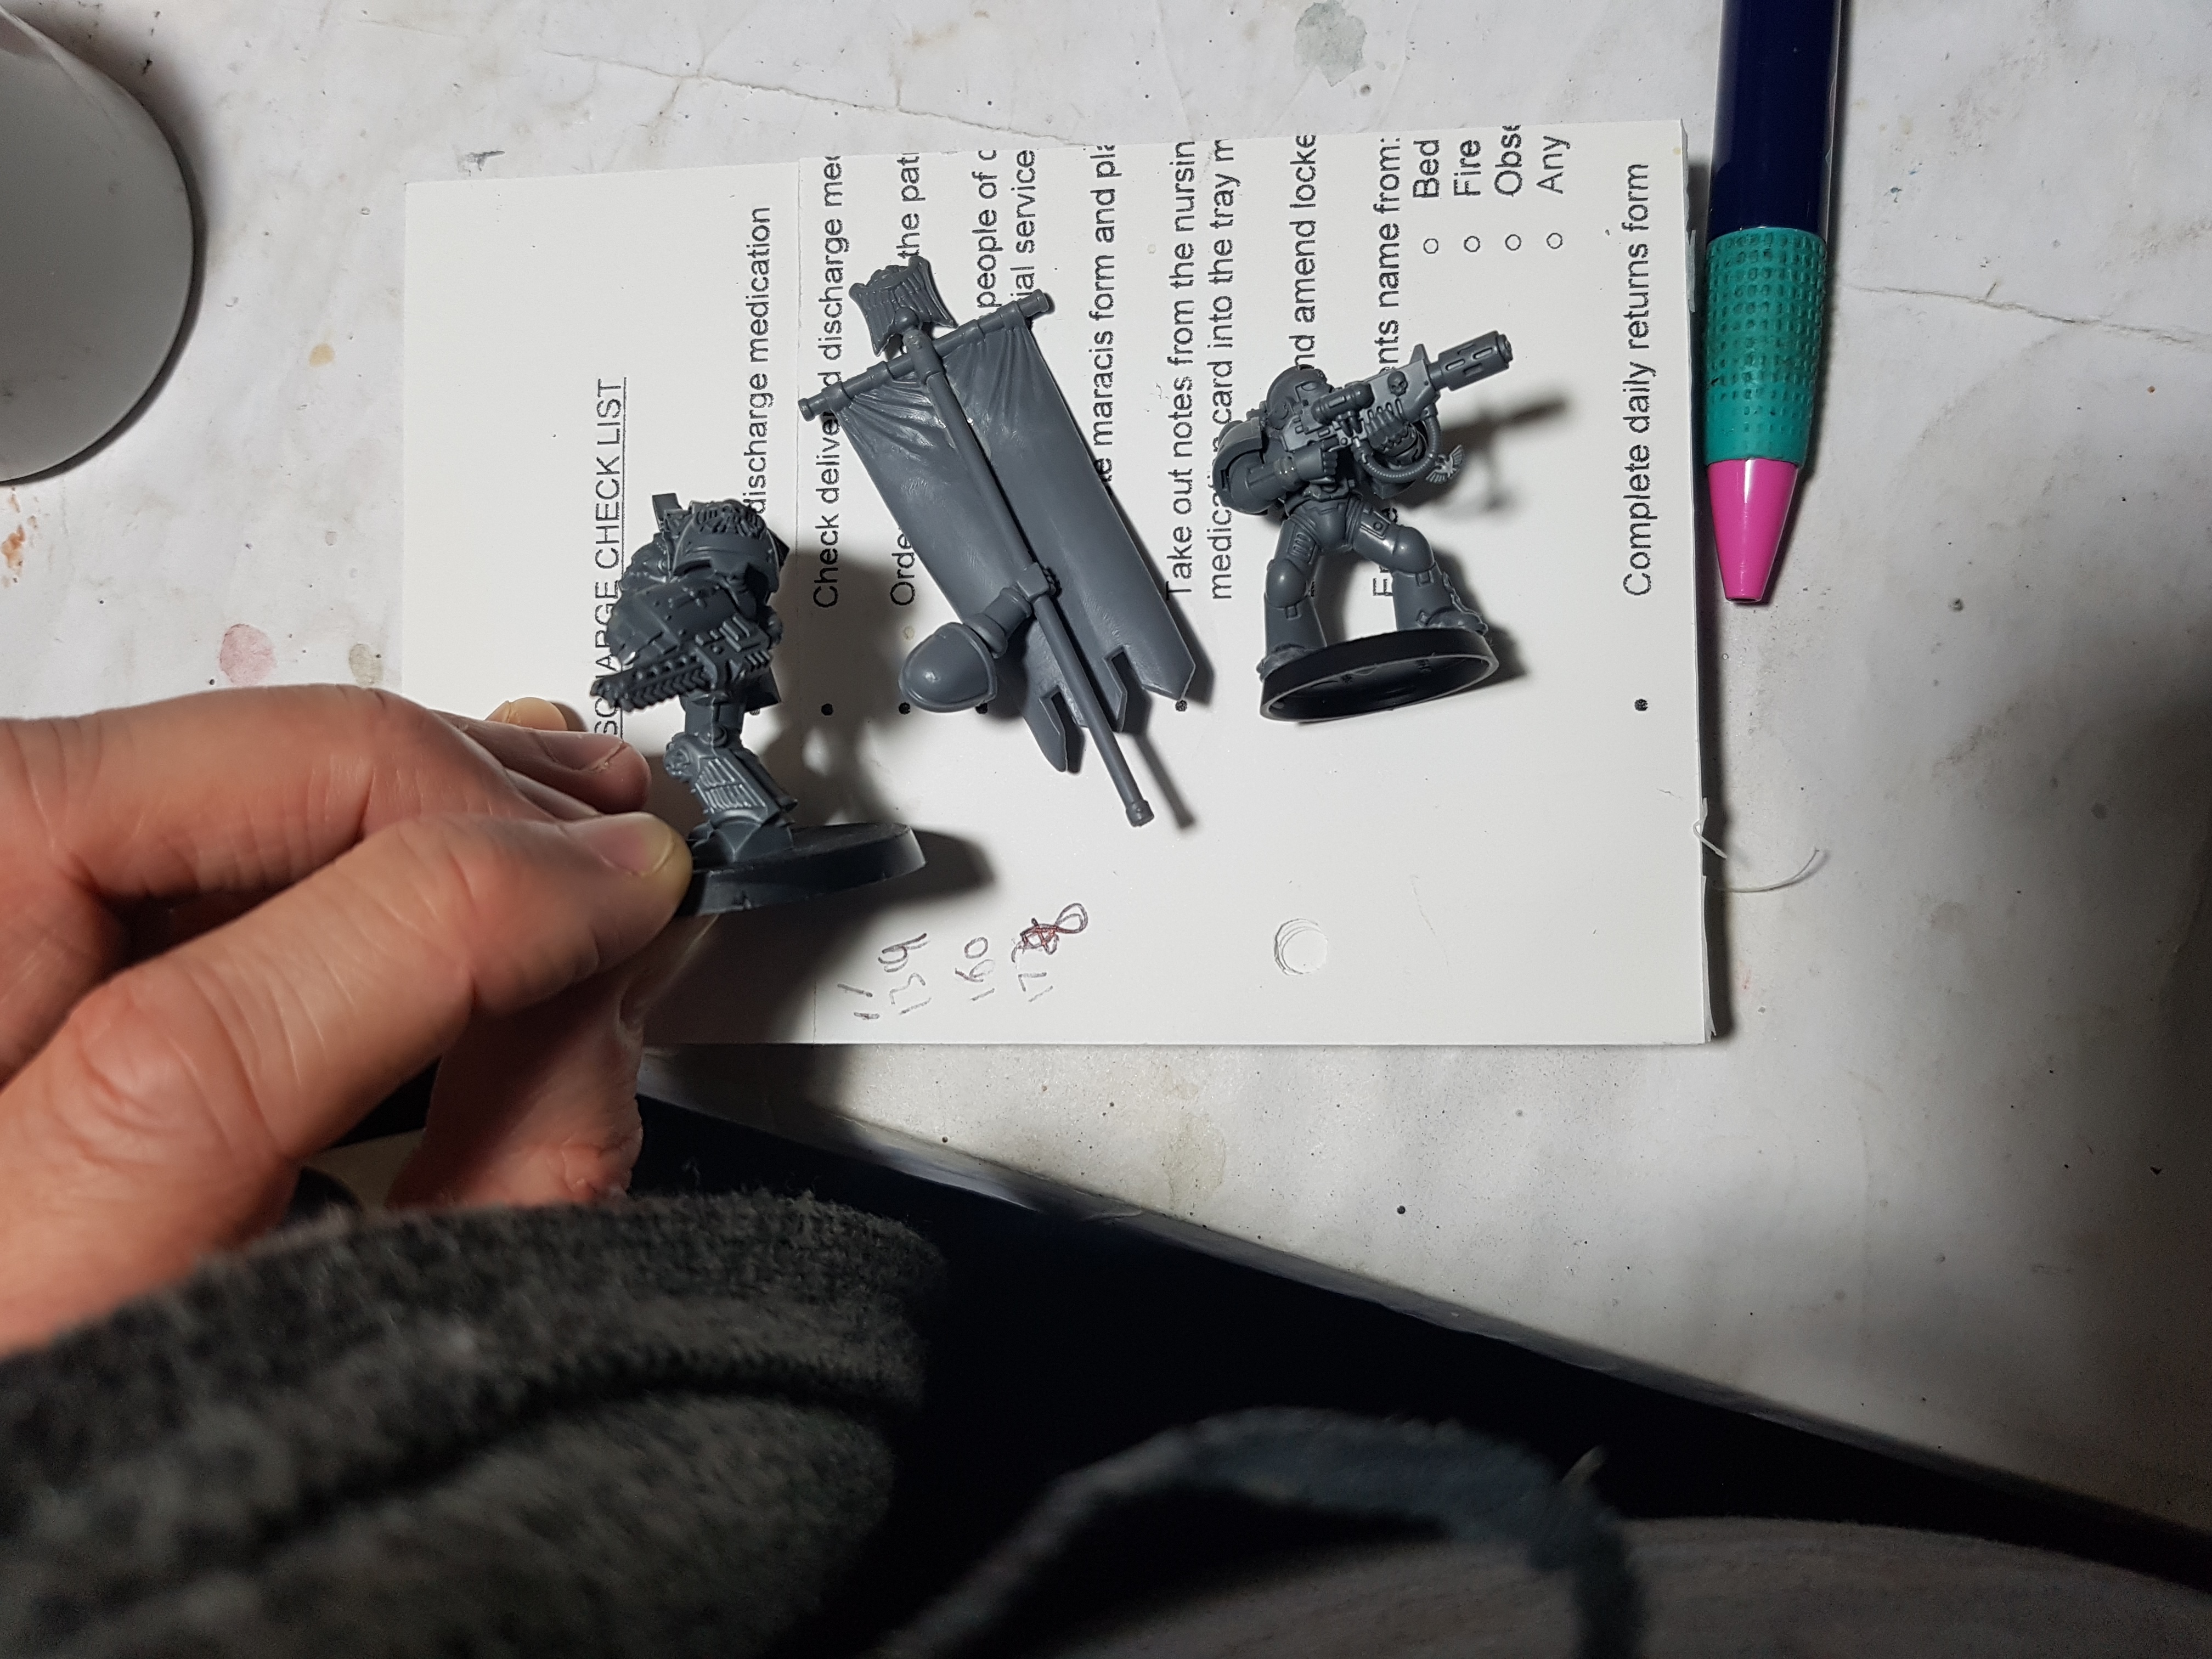
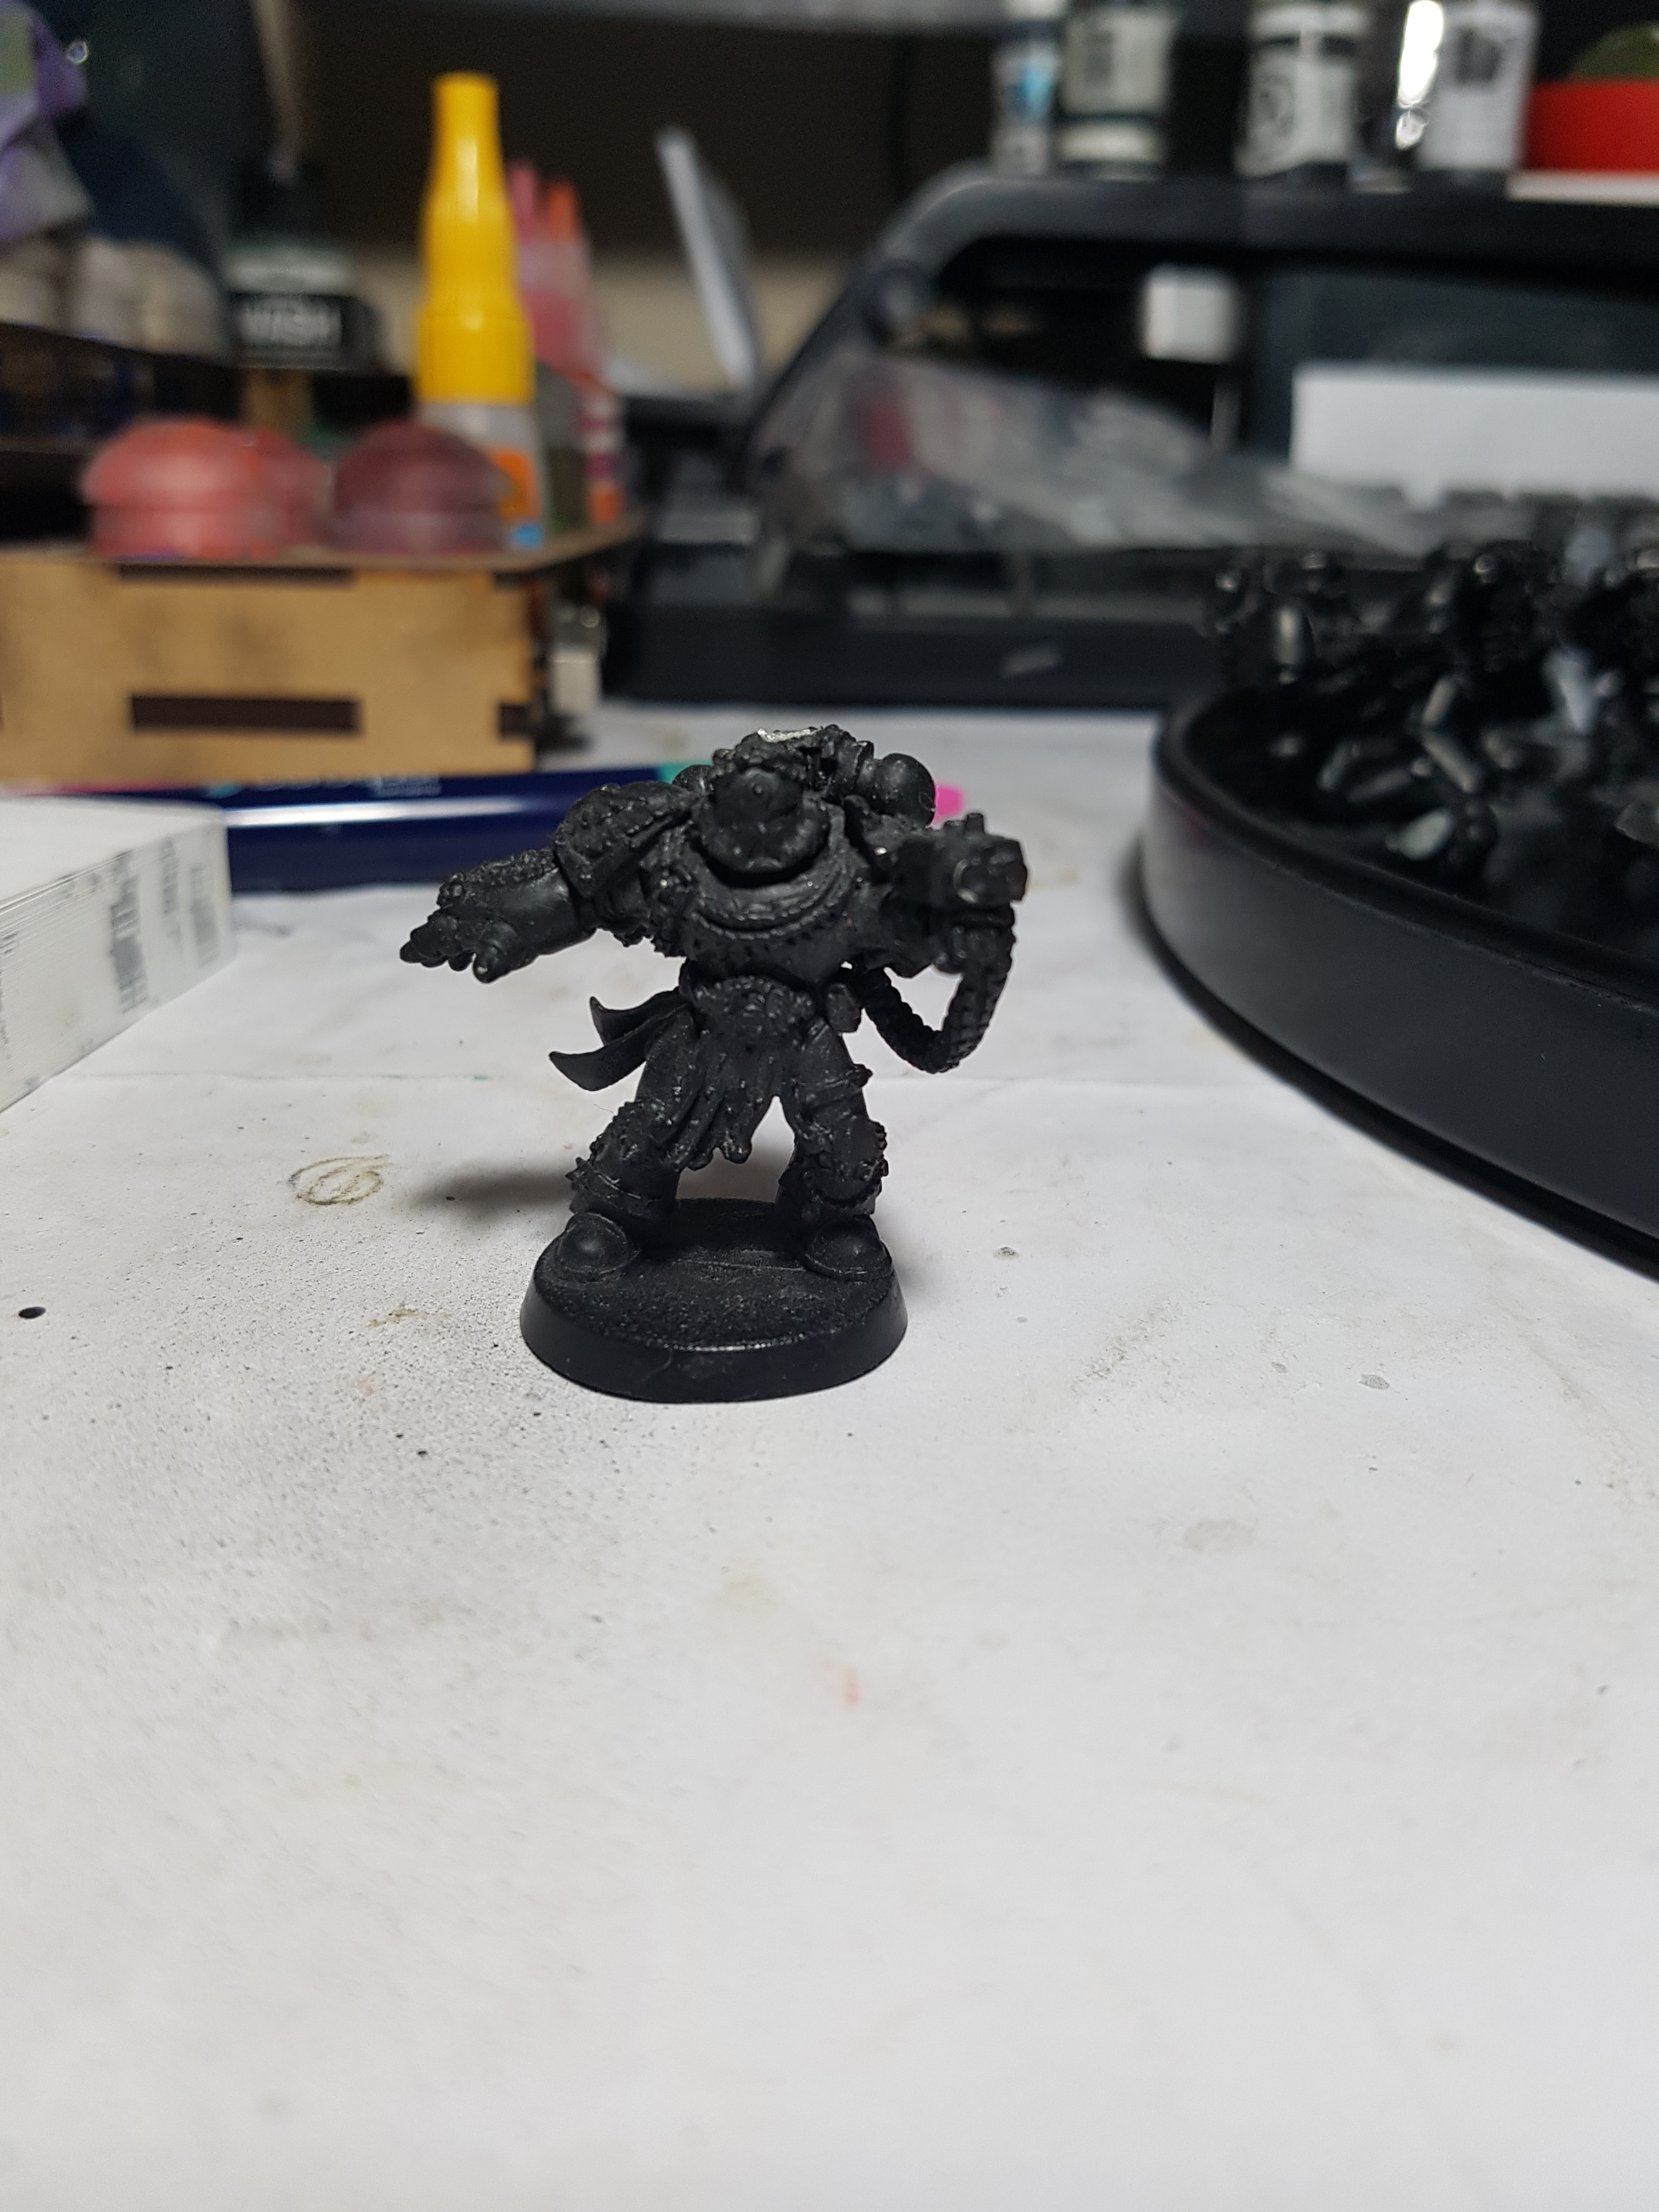
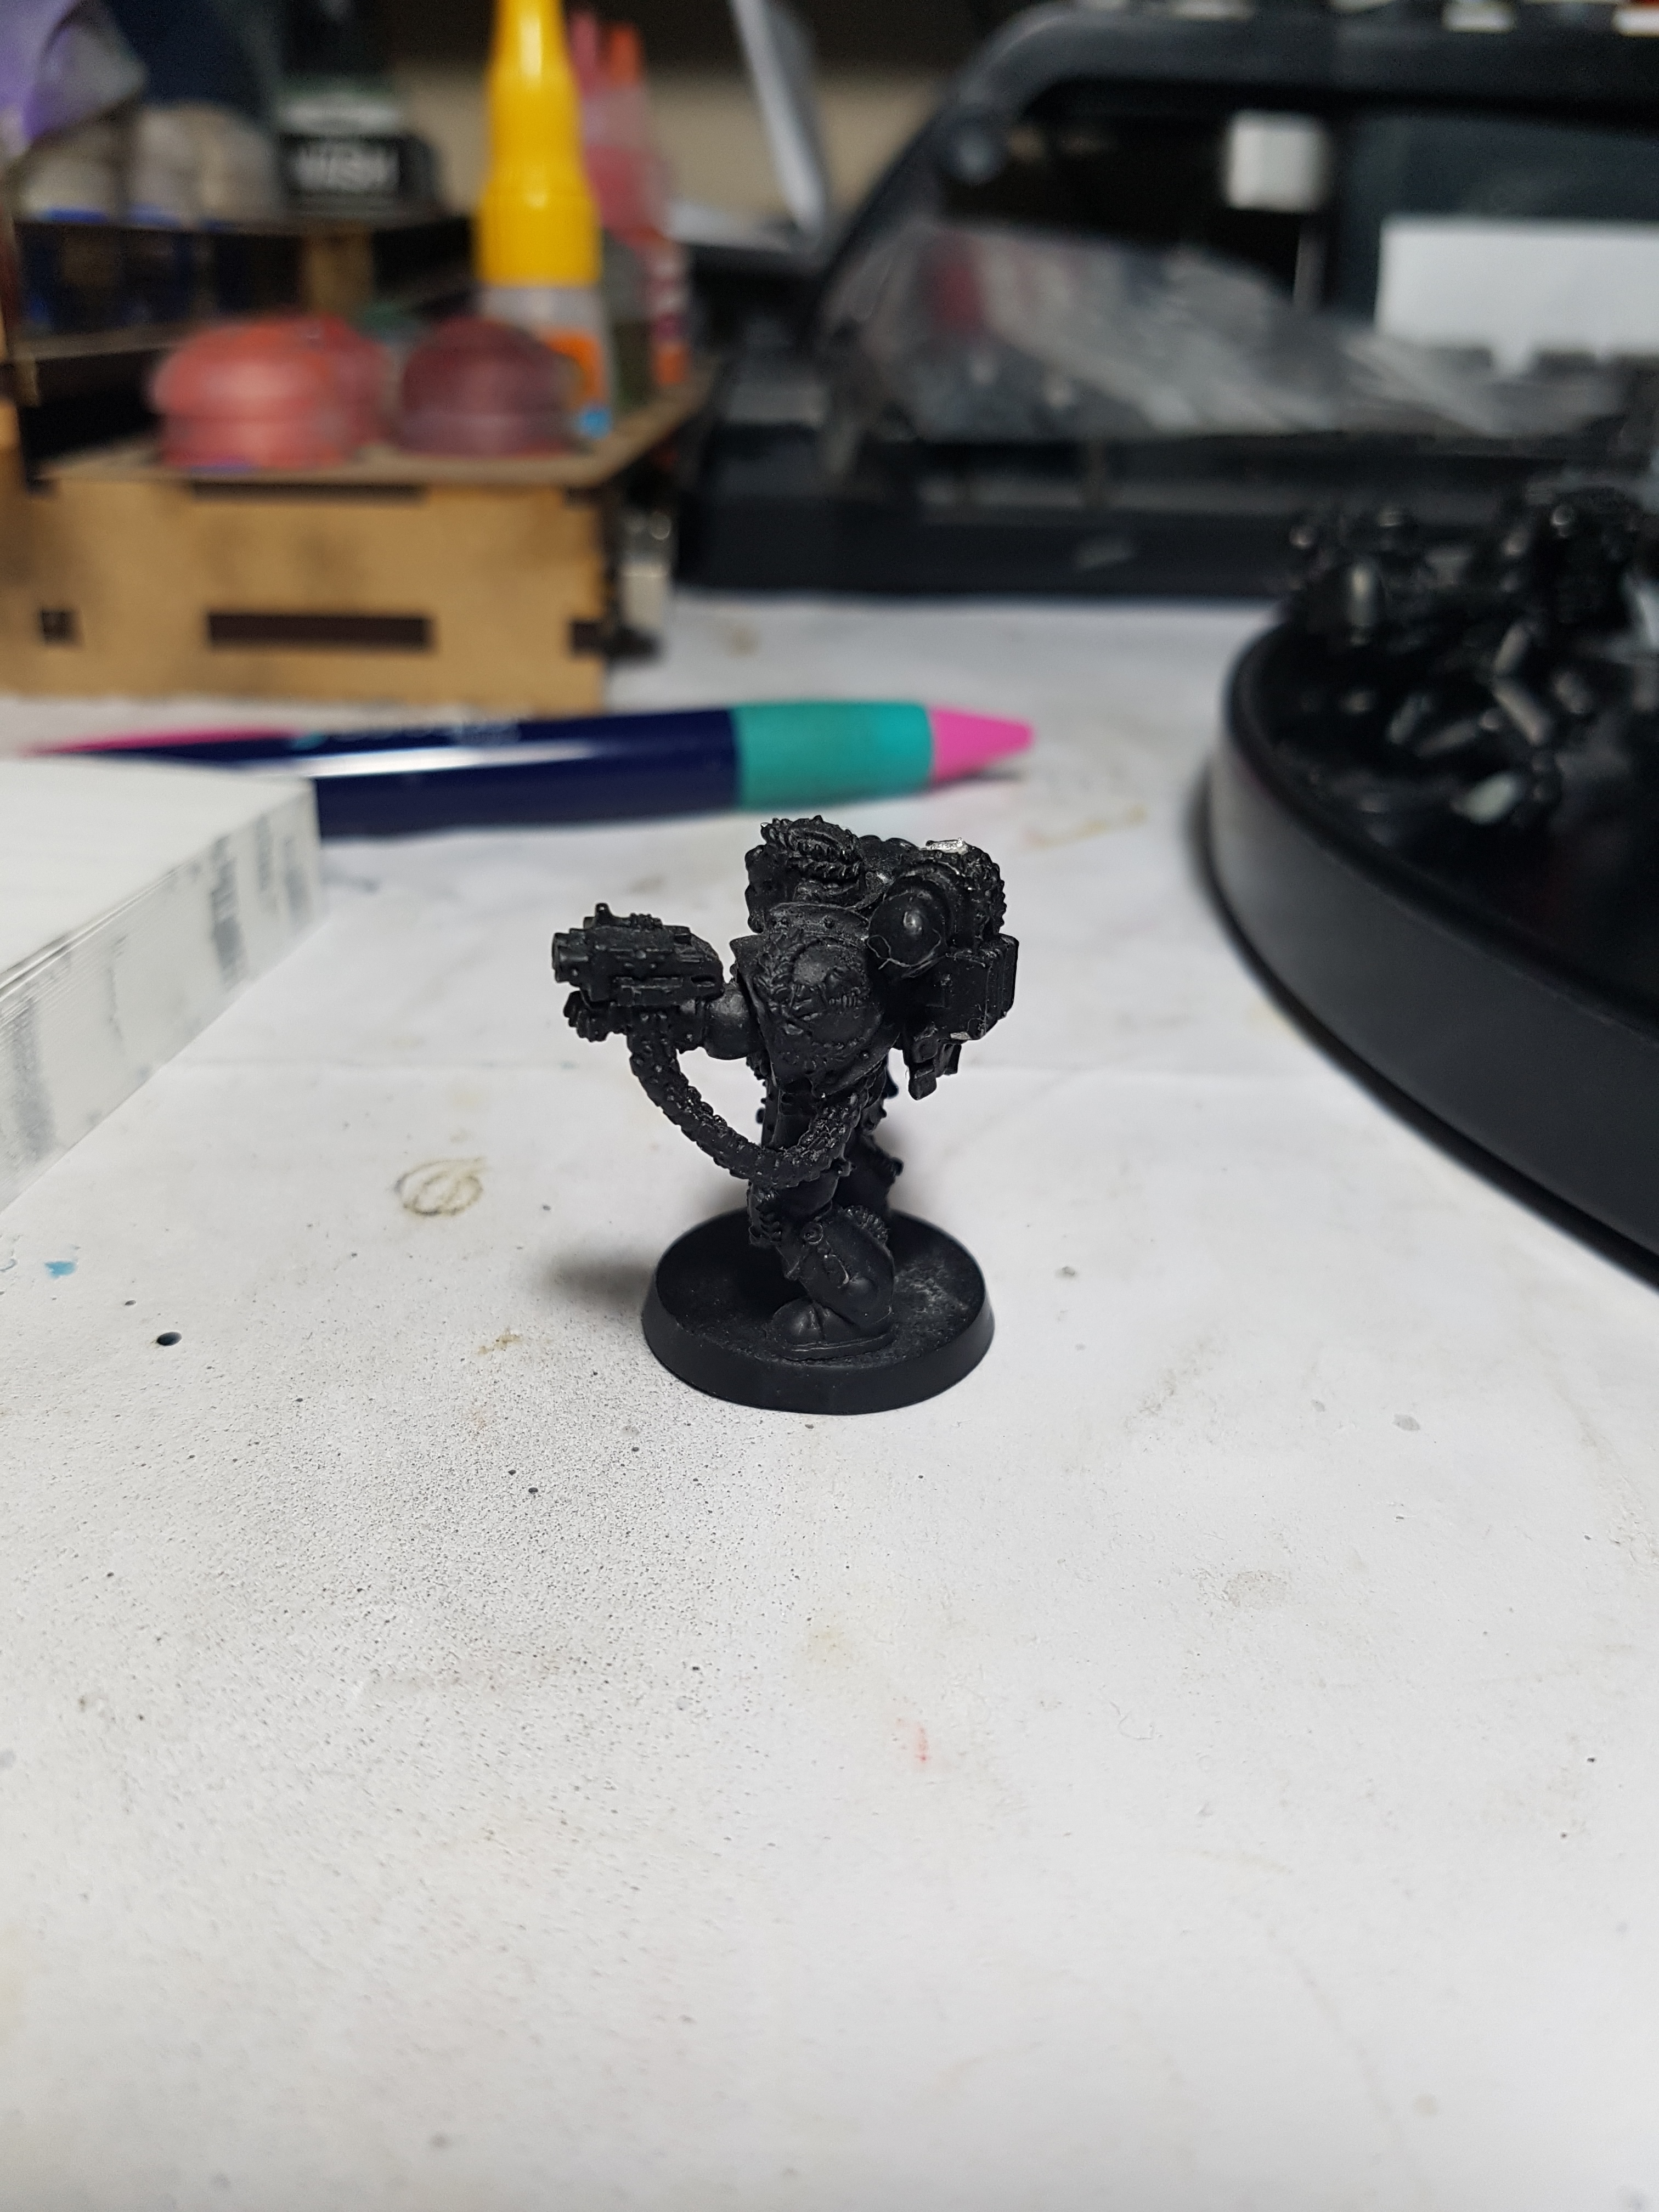
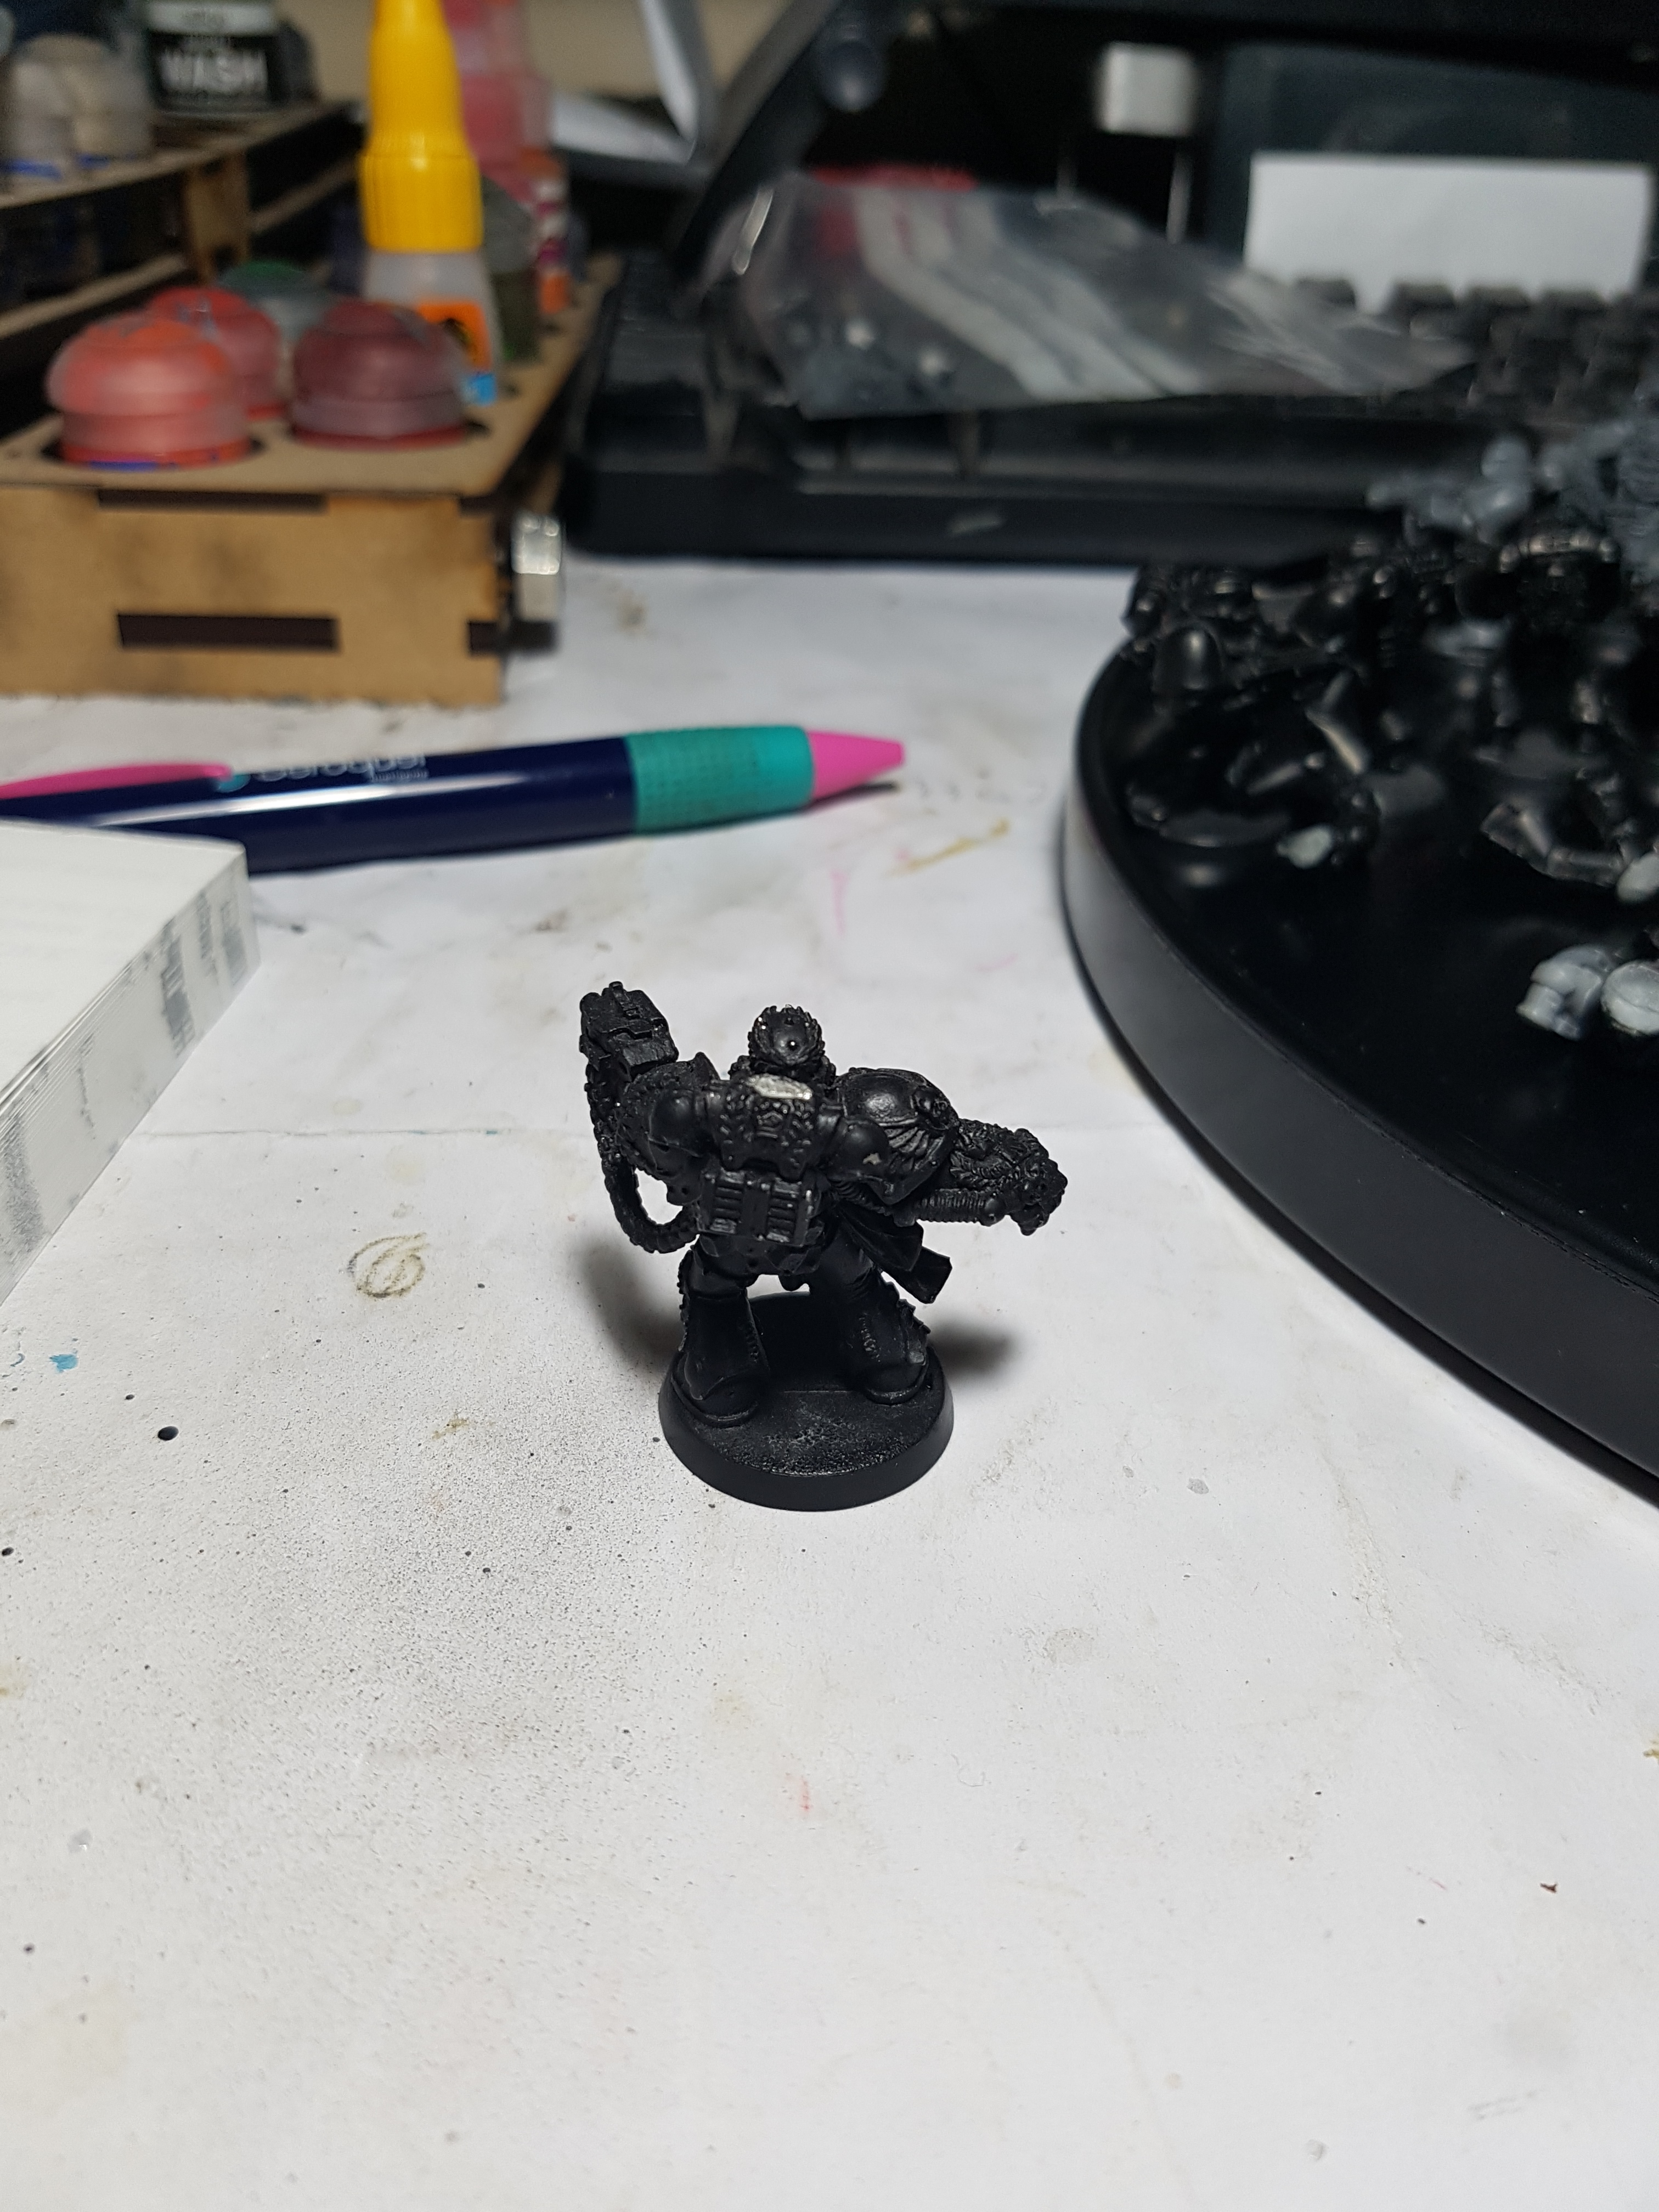
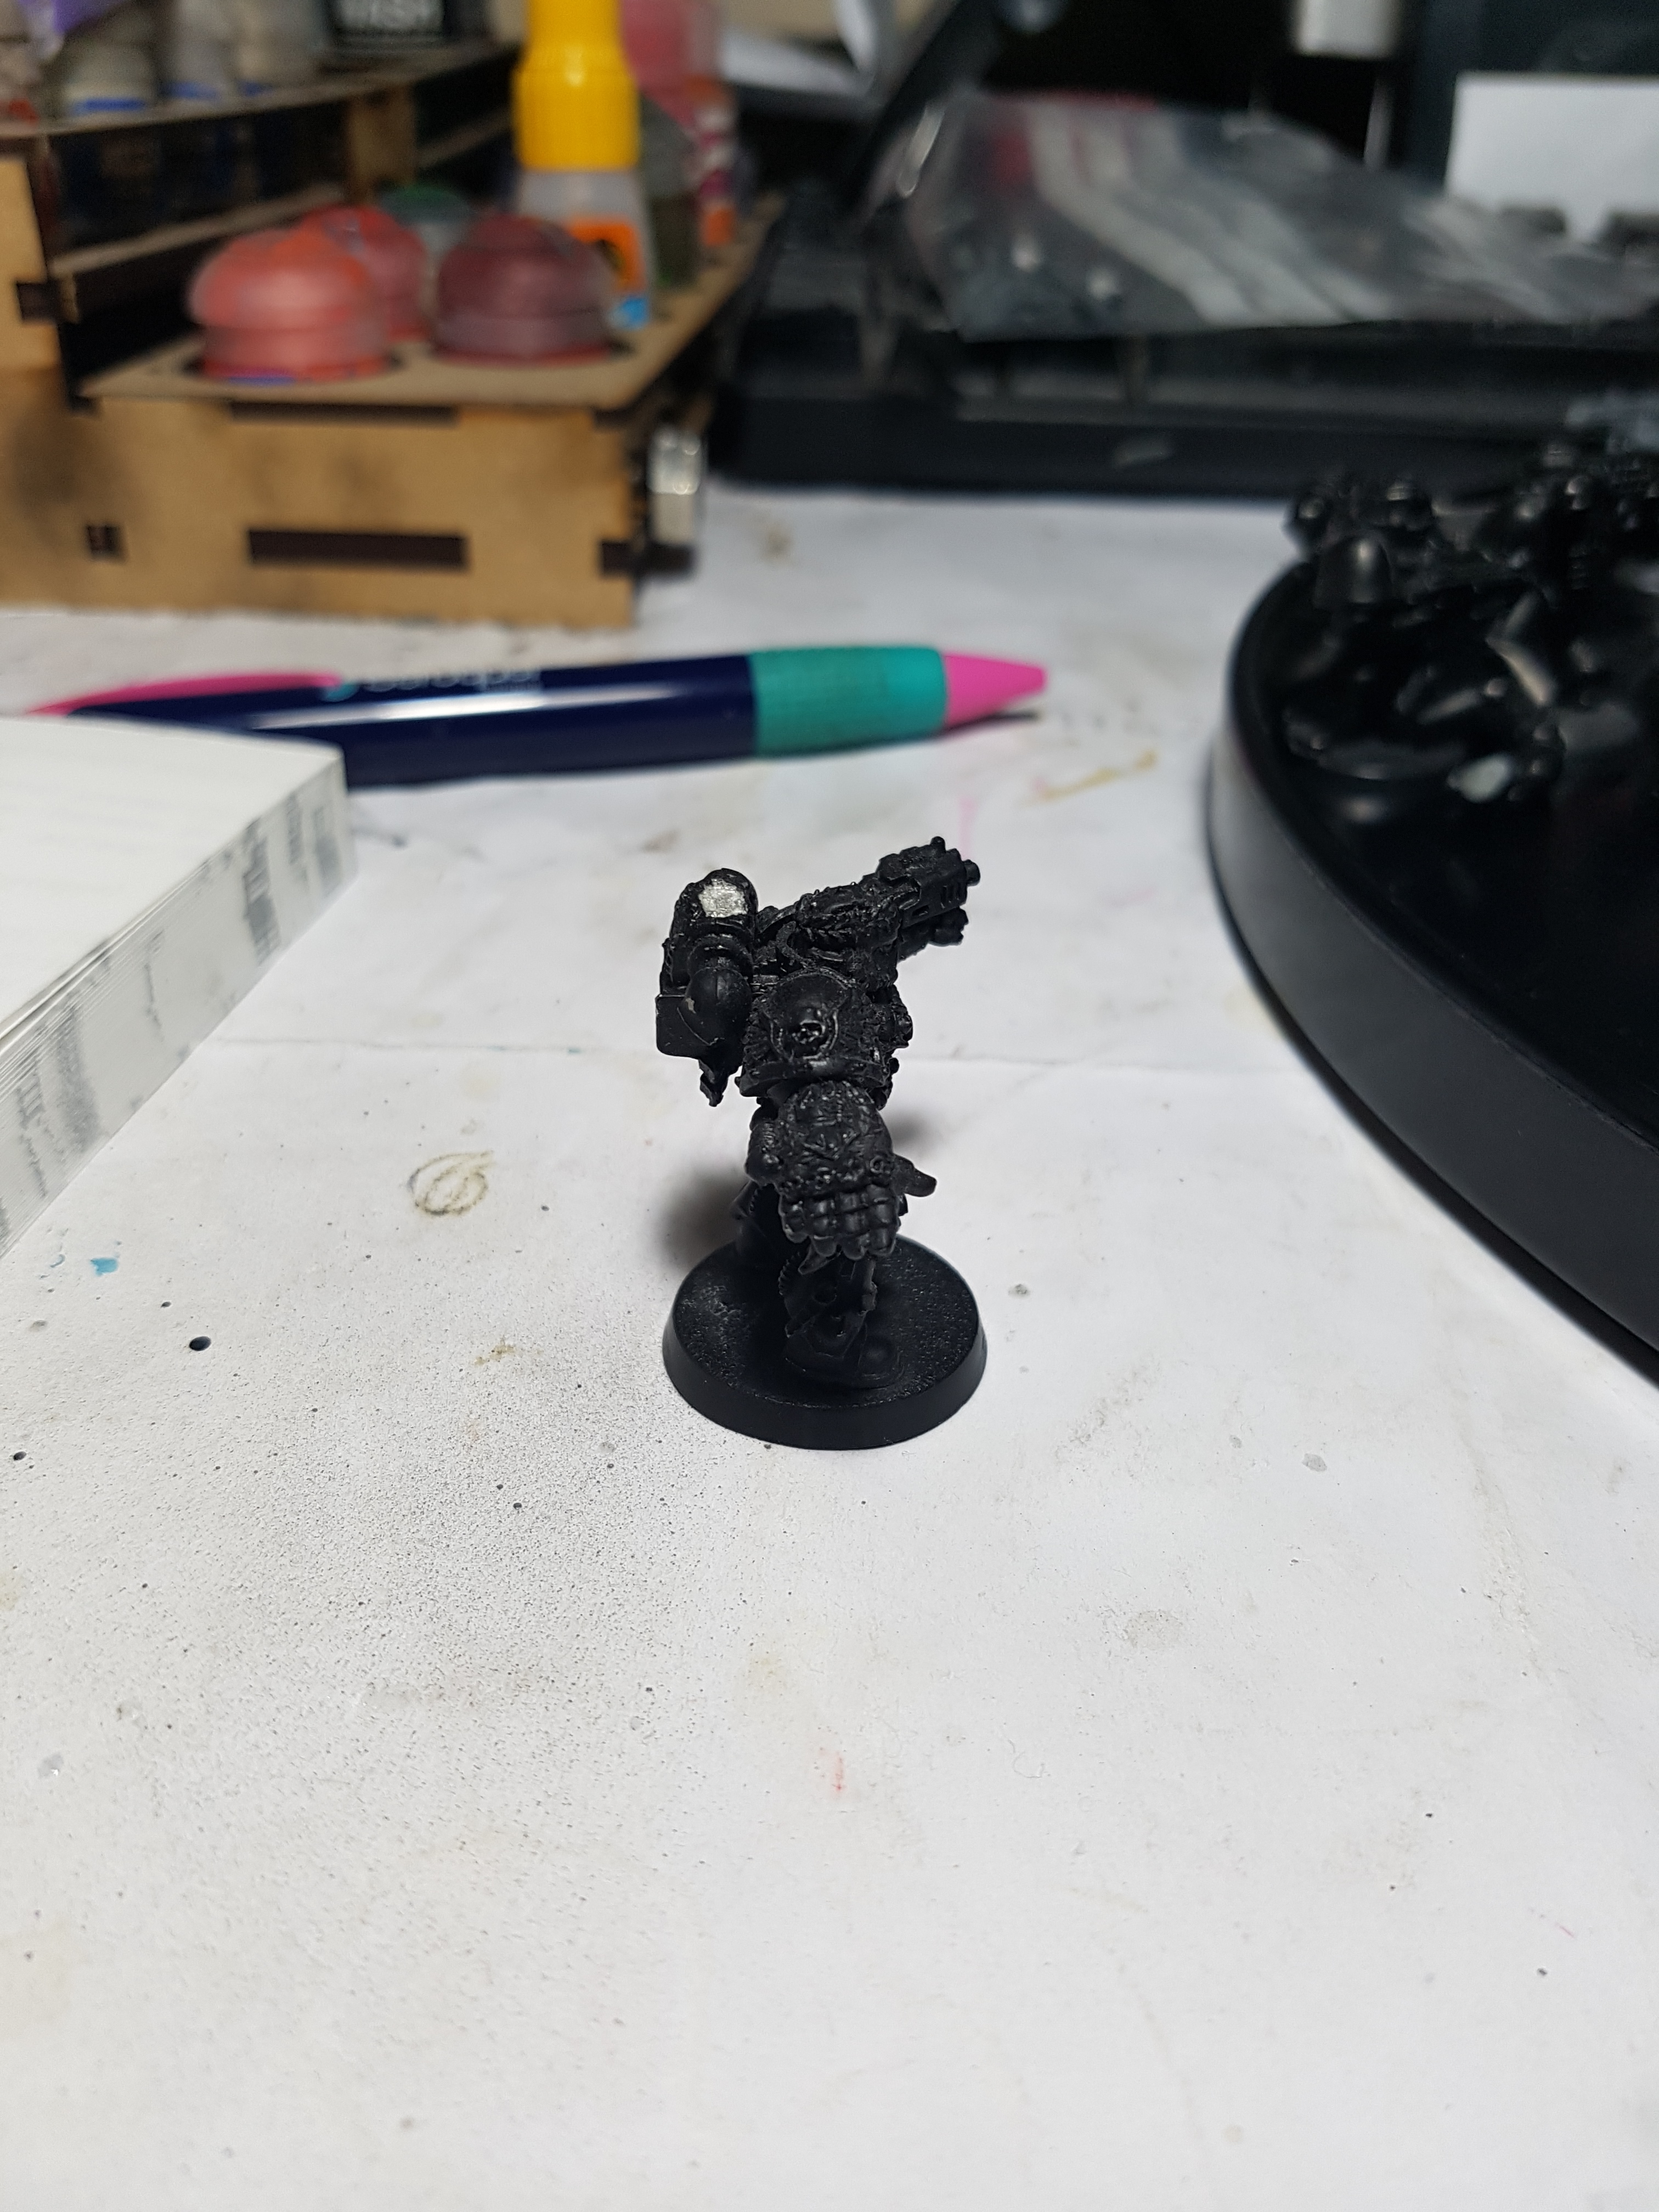
I want to test out the colour scheme for the Space Wolves before I go full in to mass production so I’ve picked a solo to work on first. I had 11 marines so thats 1 spare from a unit. I had 3 mechanical arms so why not turn him in to an Iron Priest? His arm was broken so that needed patching up with Green Stuff. I know the backpack is technically for loading rockets in to a launcher, but my rocket launcher guy already has a backpack so I’m going with it. Below you can see what I’ve built, and the current GW stock model for the Iron Priest. What do you think? See any issues? I’ll likely prime him in the morning and put him on one side to start painting once I’ve cleared the current minis off my paint station.
I don’t know about 40k iconography so if anyone sees me using something definitively wrong please let me know. I want to be mostly correct and this is also a good opportunity for me to learn more about the universe and the lore.
As a summary, here’s what I think I own towards a Space Wolves army. I’d be interested to hear if this is a solid basis for a competitive list ot not, and what I’d need to add/remove to make it so:
HQ: Kitbashed Iron priest
Elites: Dreadnought & Venerable Dreadnought
Heavy Support: Land Raider, Vindicator, & Predator
Transport: Rhino
Troops: 10x Tactical Marines, 10x Terminators, 3x Primaris Intercessors from the magazine (Can you field just 3? Looks like 5 is the minimum)
I can’t seem to find regular Terminators or Marines in the GW Combat Roster program. Are all Space Wolf Terminators called Wolf Guard Terminators, or are they different? I assume base level SW Space Marines are known as a Space Wolf Pack? I’m not seeing them in the app either. GW Don’t like to make this game easy to access, do they?
Back to painting
- I started with a preshade
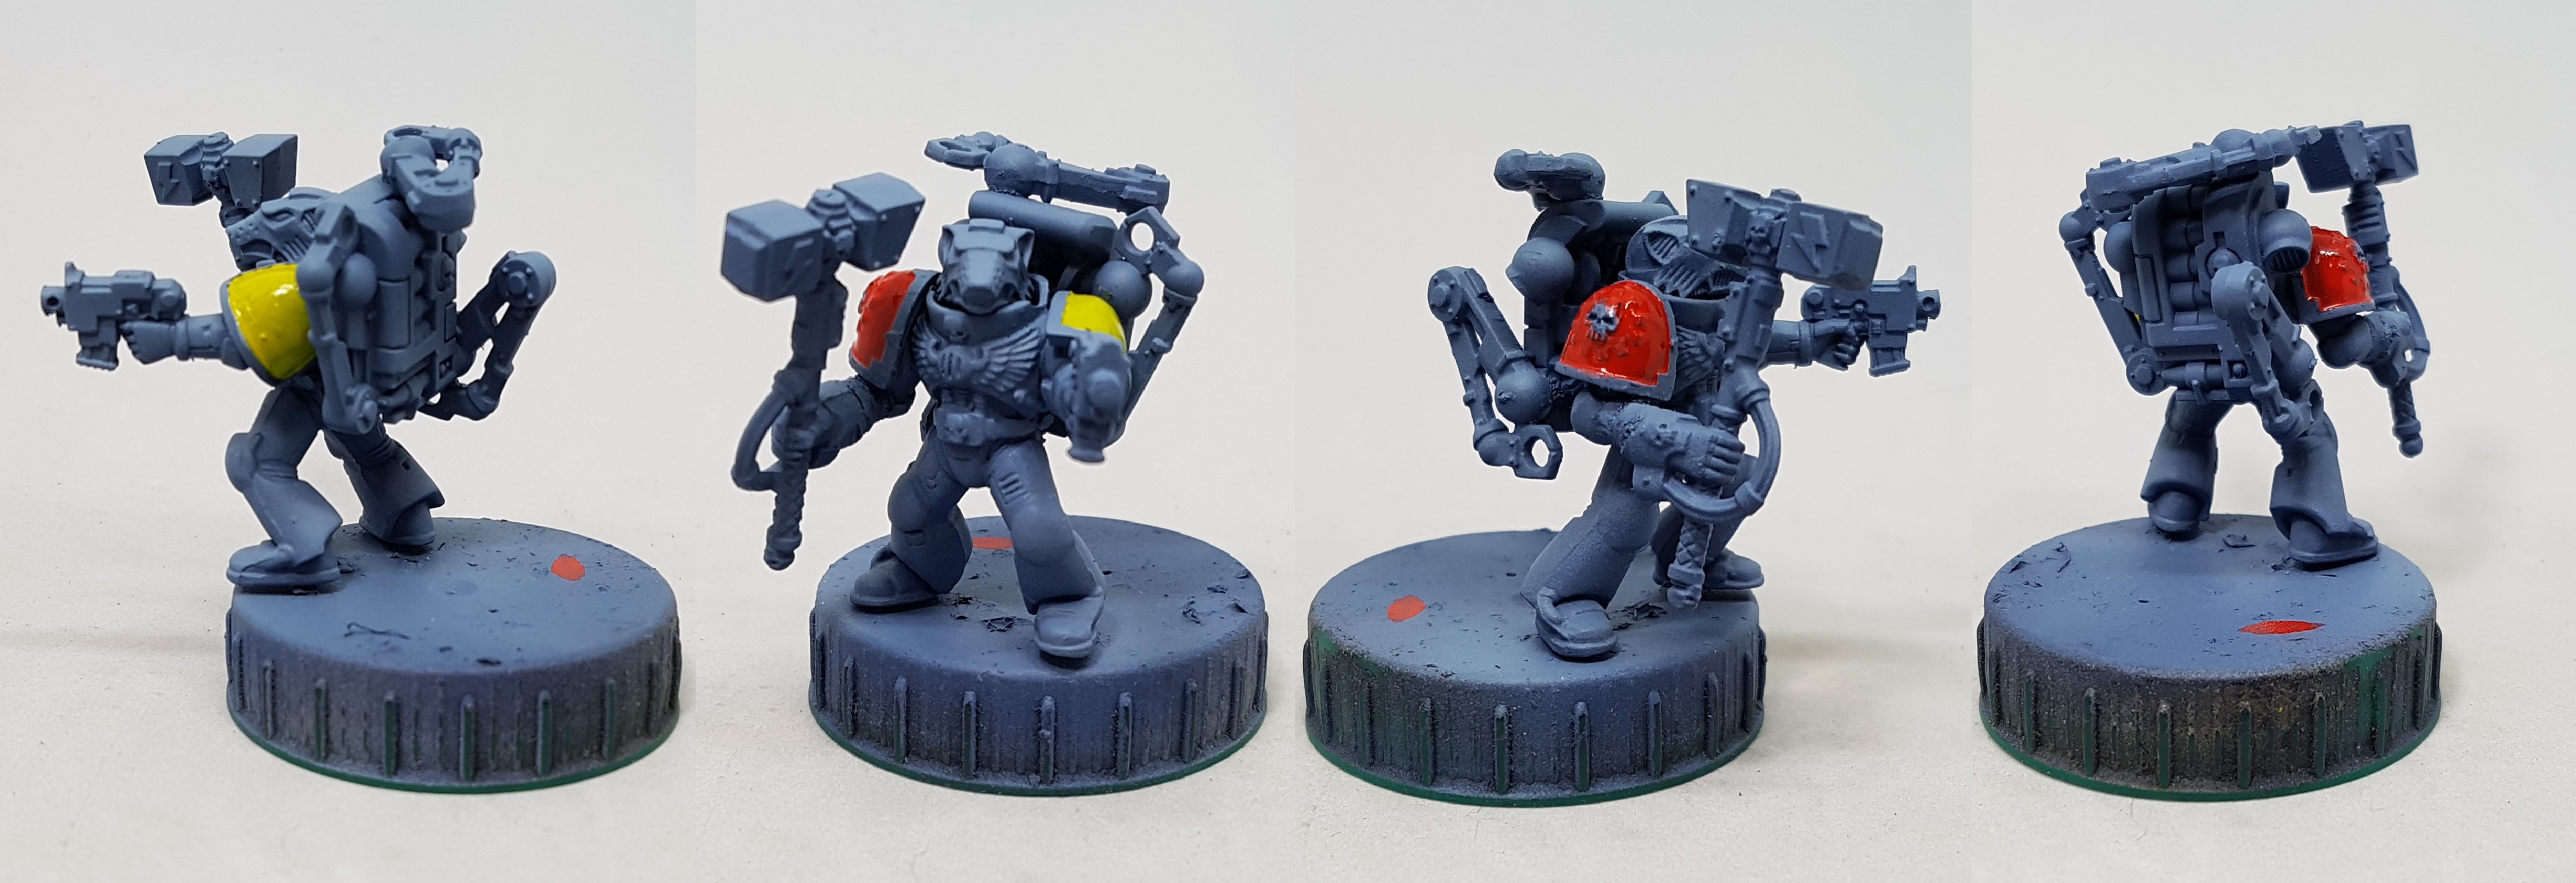
- Using inks I built up the colour on the shoulders. This should benefit from the preshading if I don’t go too far. Working with the inks I already own, I chouse to try Coat d’arms Ink Wash Red and Coat d’arms Ink Wash yellow. The red appeared too bright so I ended up dulling it down later with a little P3 Skorne Red glaze. I may revisit this later and change it again.
- The shoulders were then coated with gloss varnish to protect them during the next few steps.
- The shoulders were given 2 heavy coats of liquid mask. Thick is easier to remove later.
- Using my airbrush I laid down an even base coat of GW The Fang. First highlight was GW Russ Grey sprayed from above and down to almost 90 degrees. Final highlight was GW Fenrisian Grey sprayed from above and out to 10-20 degrees at most. This should build up a natural highlight over all those curved surfaces
- The liquid mask was removed and the areas were checked to see if they needed touching up.
- The model was given a coat of gloss varnish and then pin washed with GW Agrax Earthshade
- I should have gone in and edge highlighted the blues but I did not. I will likely do this with future models and do this guy with them. This might require adding a little ivory, or P3 Frostbite to the highlight colour. We will see.
- The flex between armour plates was based with VMC 70.995 German Grey and washed with GW Nuln Oil
- I picked out the iron with GW Leadbelcher, washed id with Nuln oil, and highlighted up with P3 Cold Steel. The dark plates on the guns were painted with VMC German grey and washed and highlighted with the iron to give them a metallic effect
- The gold was done with GW Retributor armour, washed with diluted Green Stuff World (GSW) 1713 Pecatum Flesh Wash Ink, and then highlighted back up with P3 Solid Gold.
- The skulls were painted with P3 Jack Bone, washed with GW Seraphim Sepia and highlighted with P3 Menoth White Base.
- The axe handle was based with P3 Murderous Magenta, washed with Agrax Earthshade and highlighted with a mix of Murderous Magenta and P3 Menoth White Highlight.
- The eyes were given a dot of P3 Ember Orange and then washed with red ink.
The base was sprayed with VMC Neutral Grey, washed with Nuln oil and drybrushed up with P3 jack Bone. The mud was painted with P3 Battlefield Brown, then drybrushed with P3 Bootstrap Leather and then a little P3 Jack Bone. It will eventually be coated with snow, but it is more efficient to do this with multiple bases at the same time so I am not doing this just yet.
I’m calling him done for now. I’ll likely be adding some edge highlighting to the armour while painting some troops and I may revisit the red too. We will see. I plan on using these steps as a basis for the rest of the army.
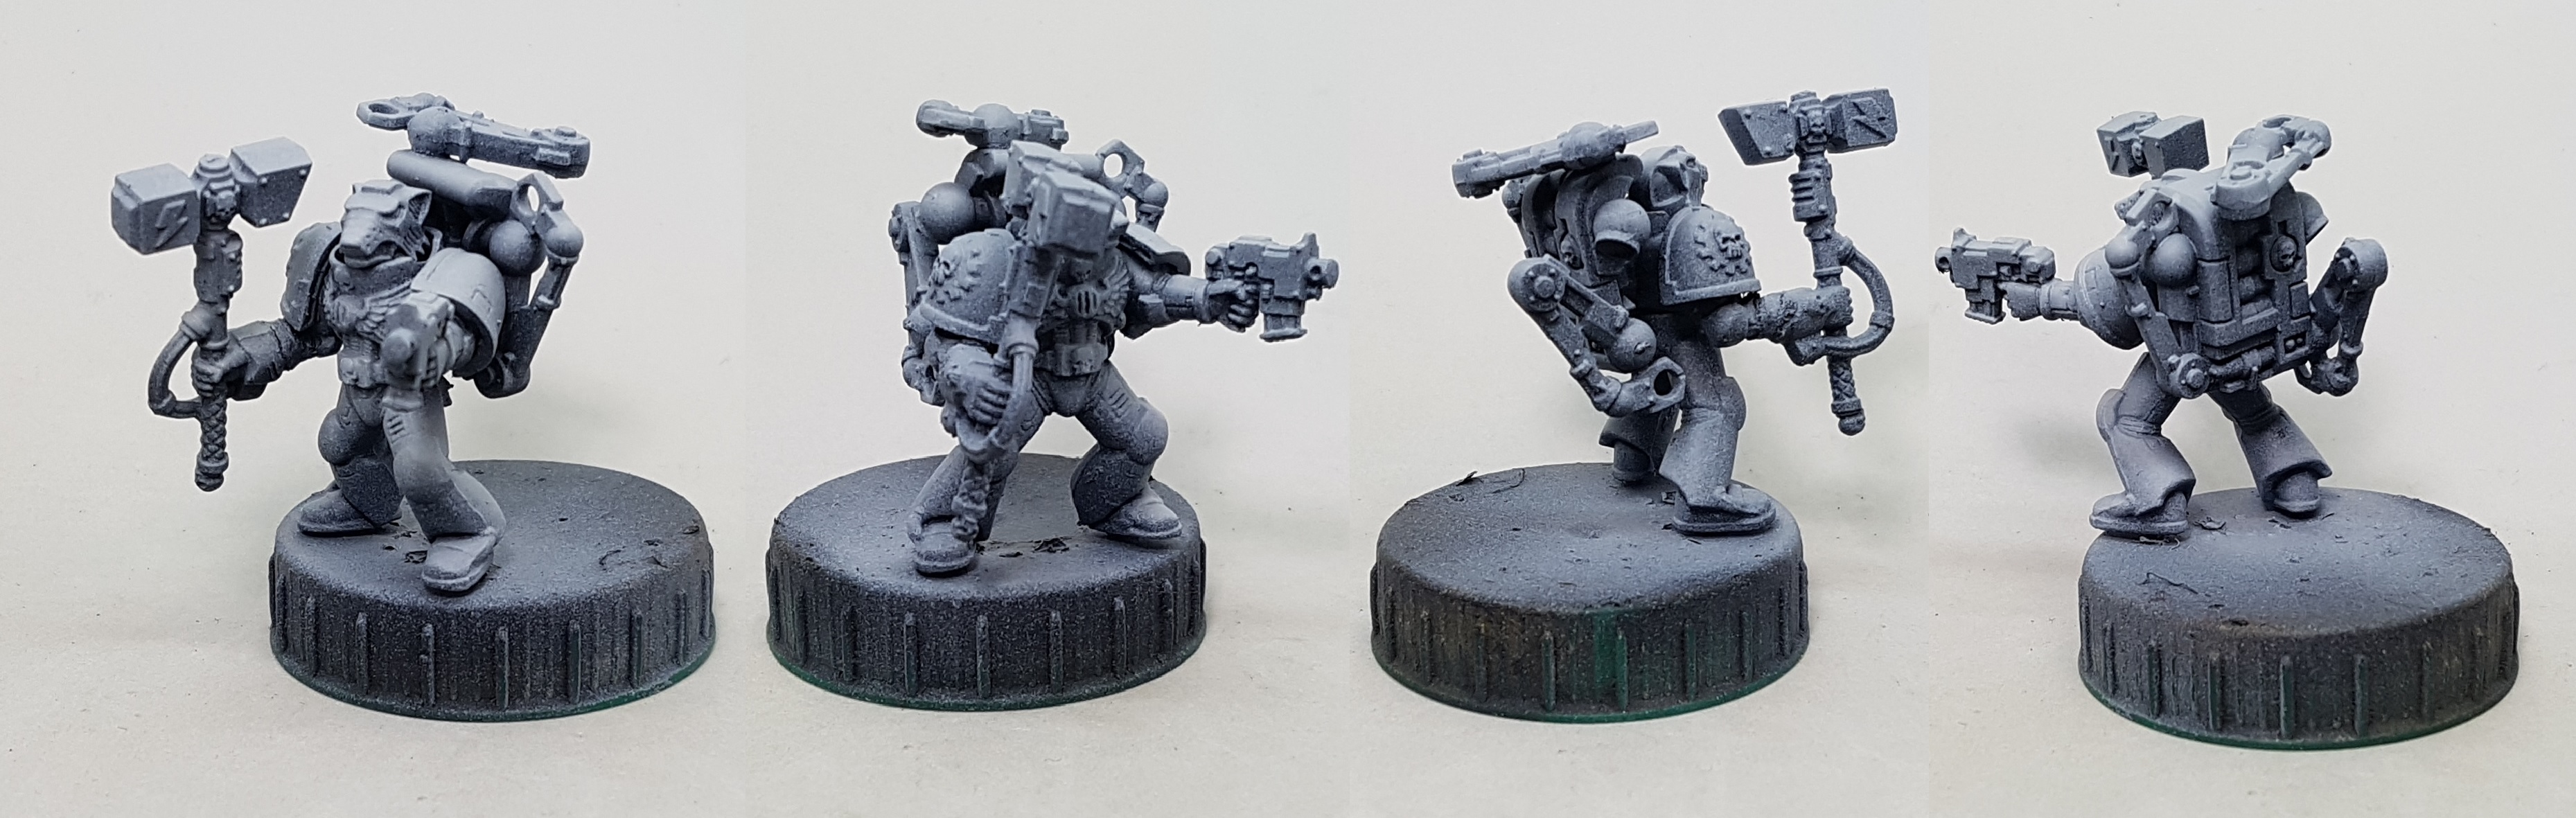
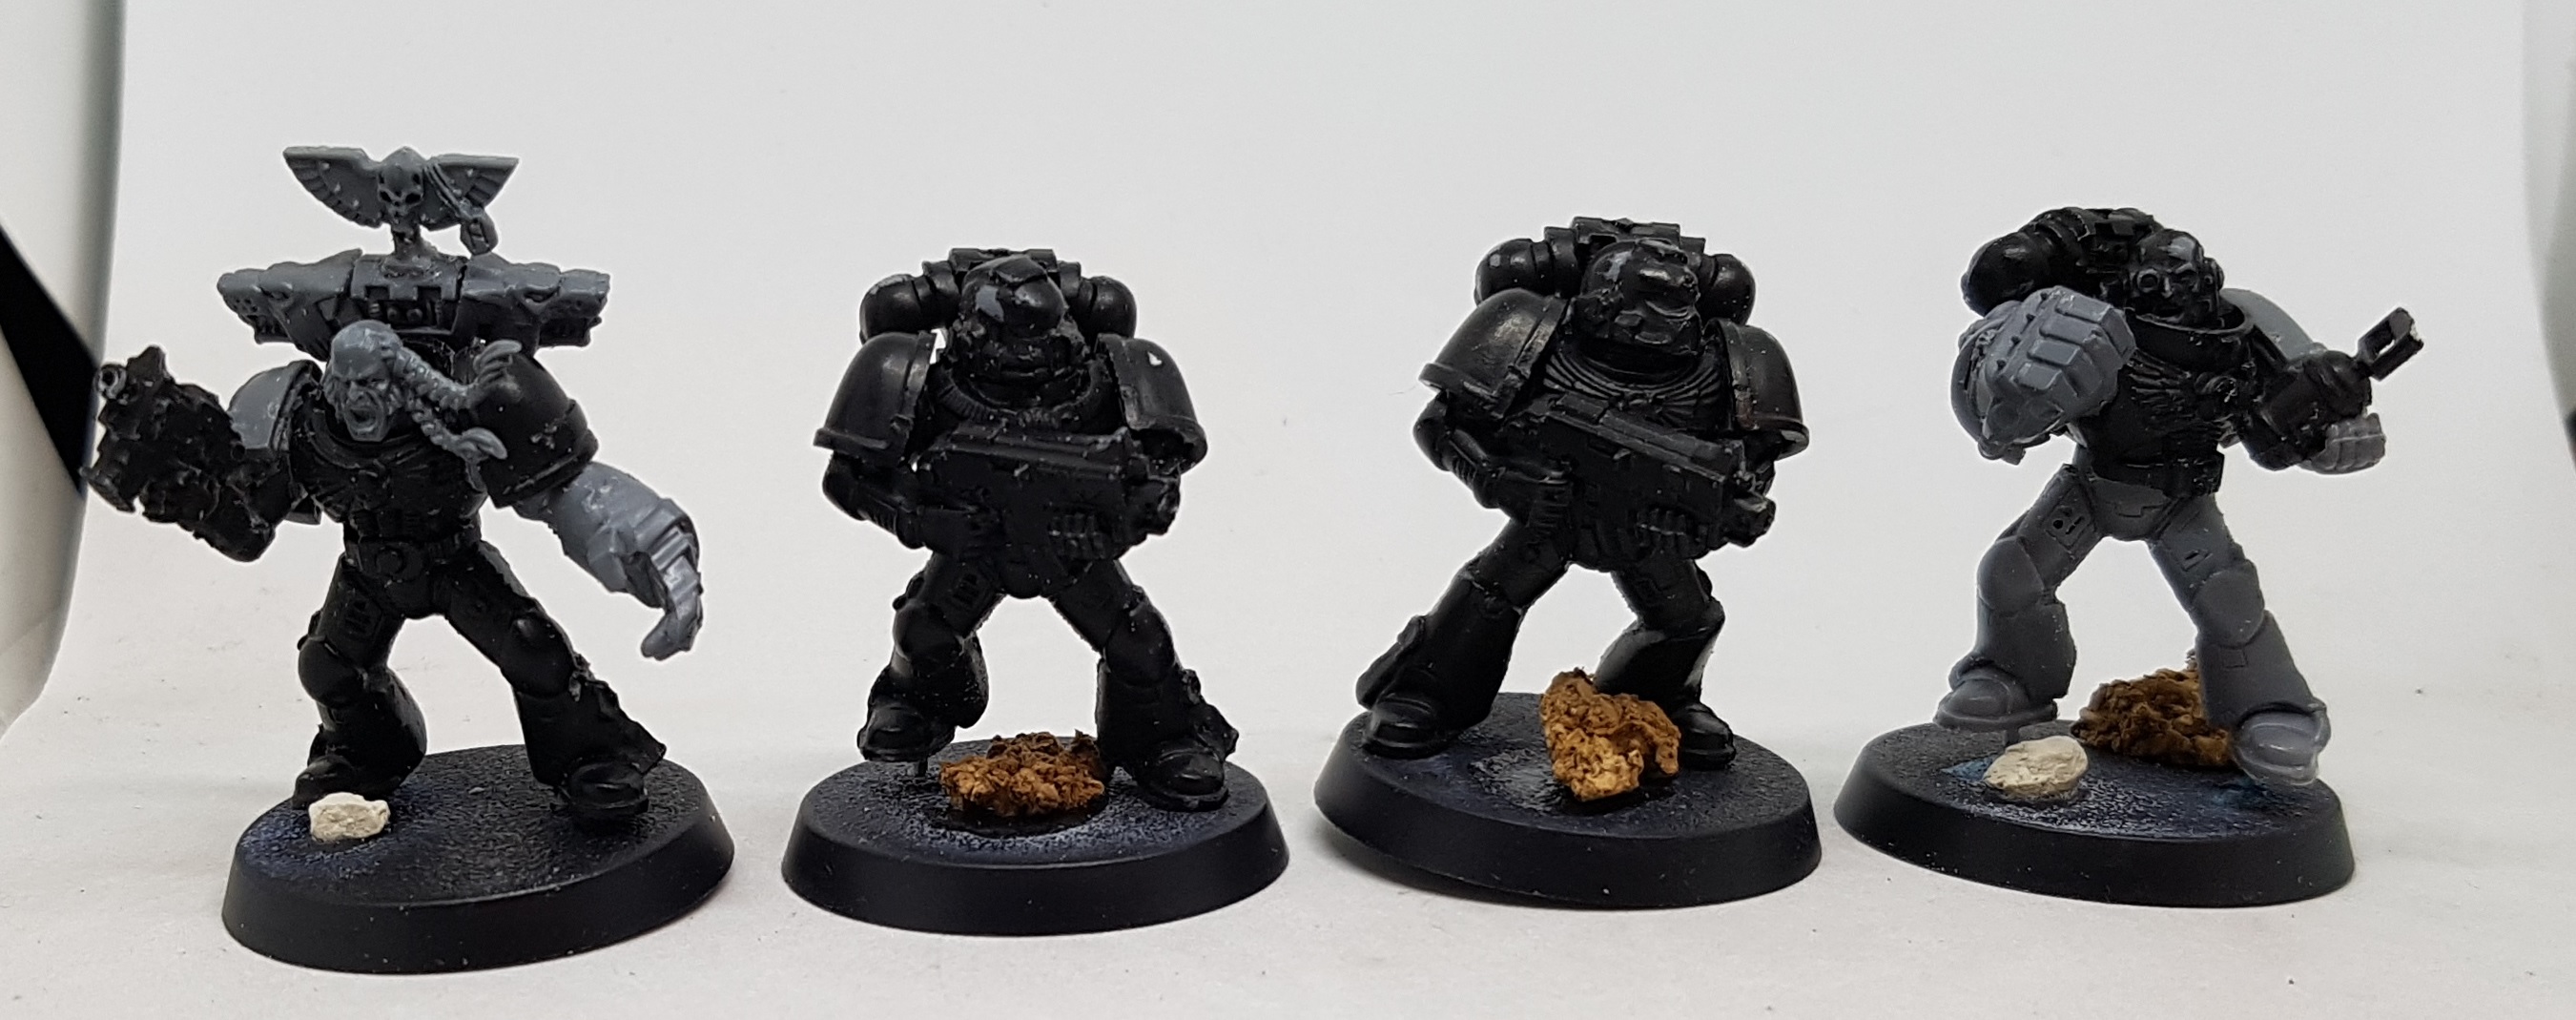
Building and Prep Work for Space Marines and Terminators
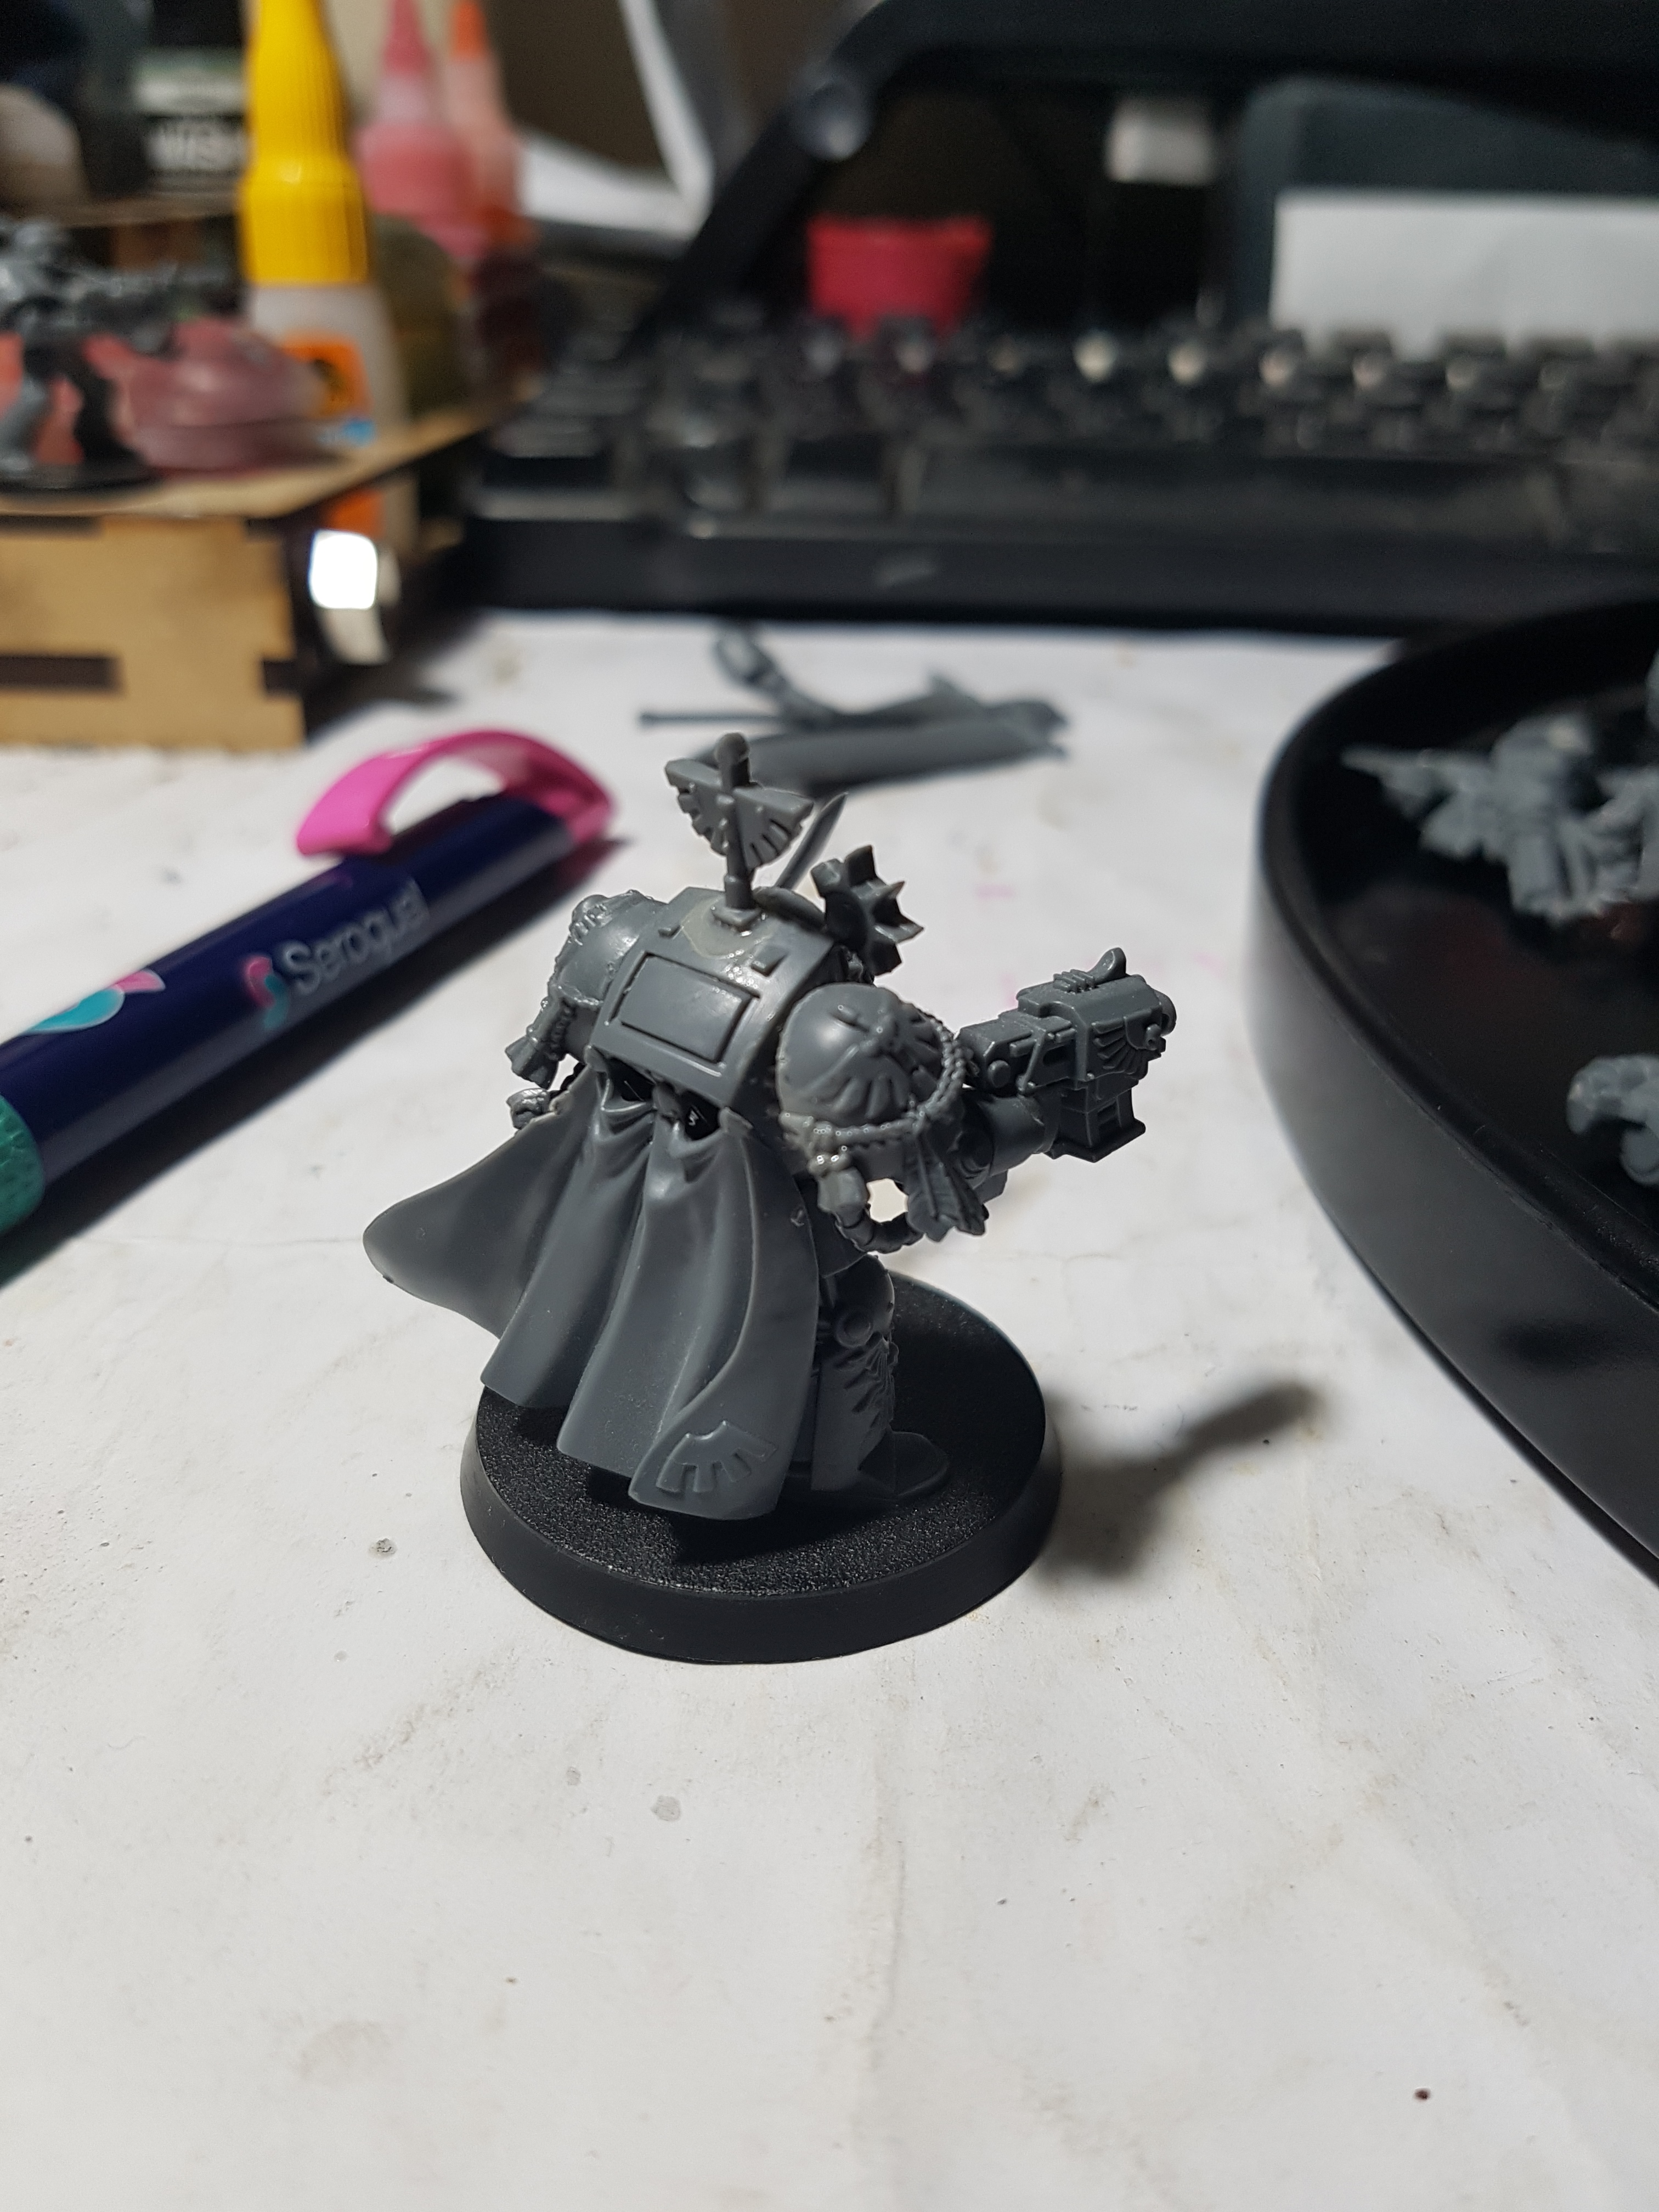
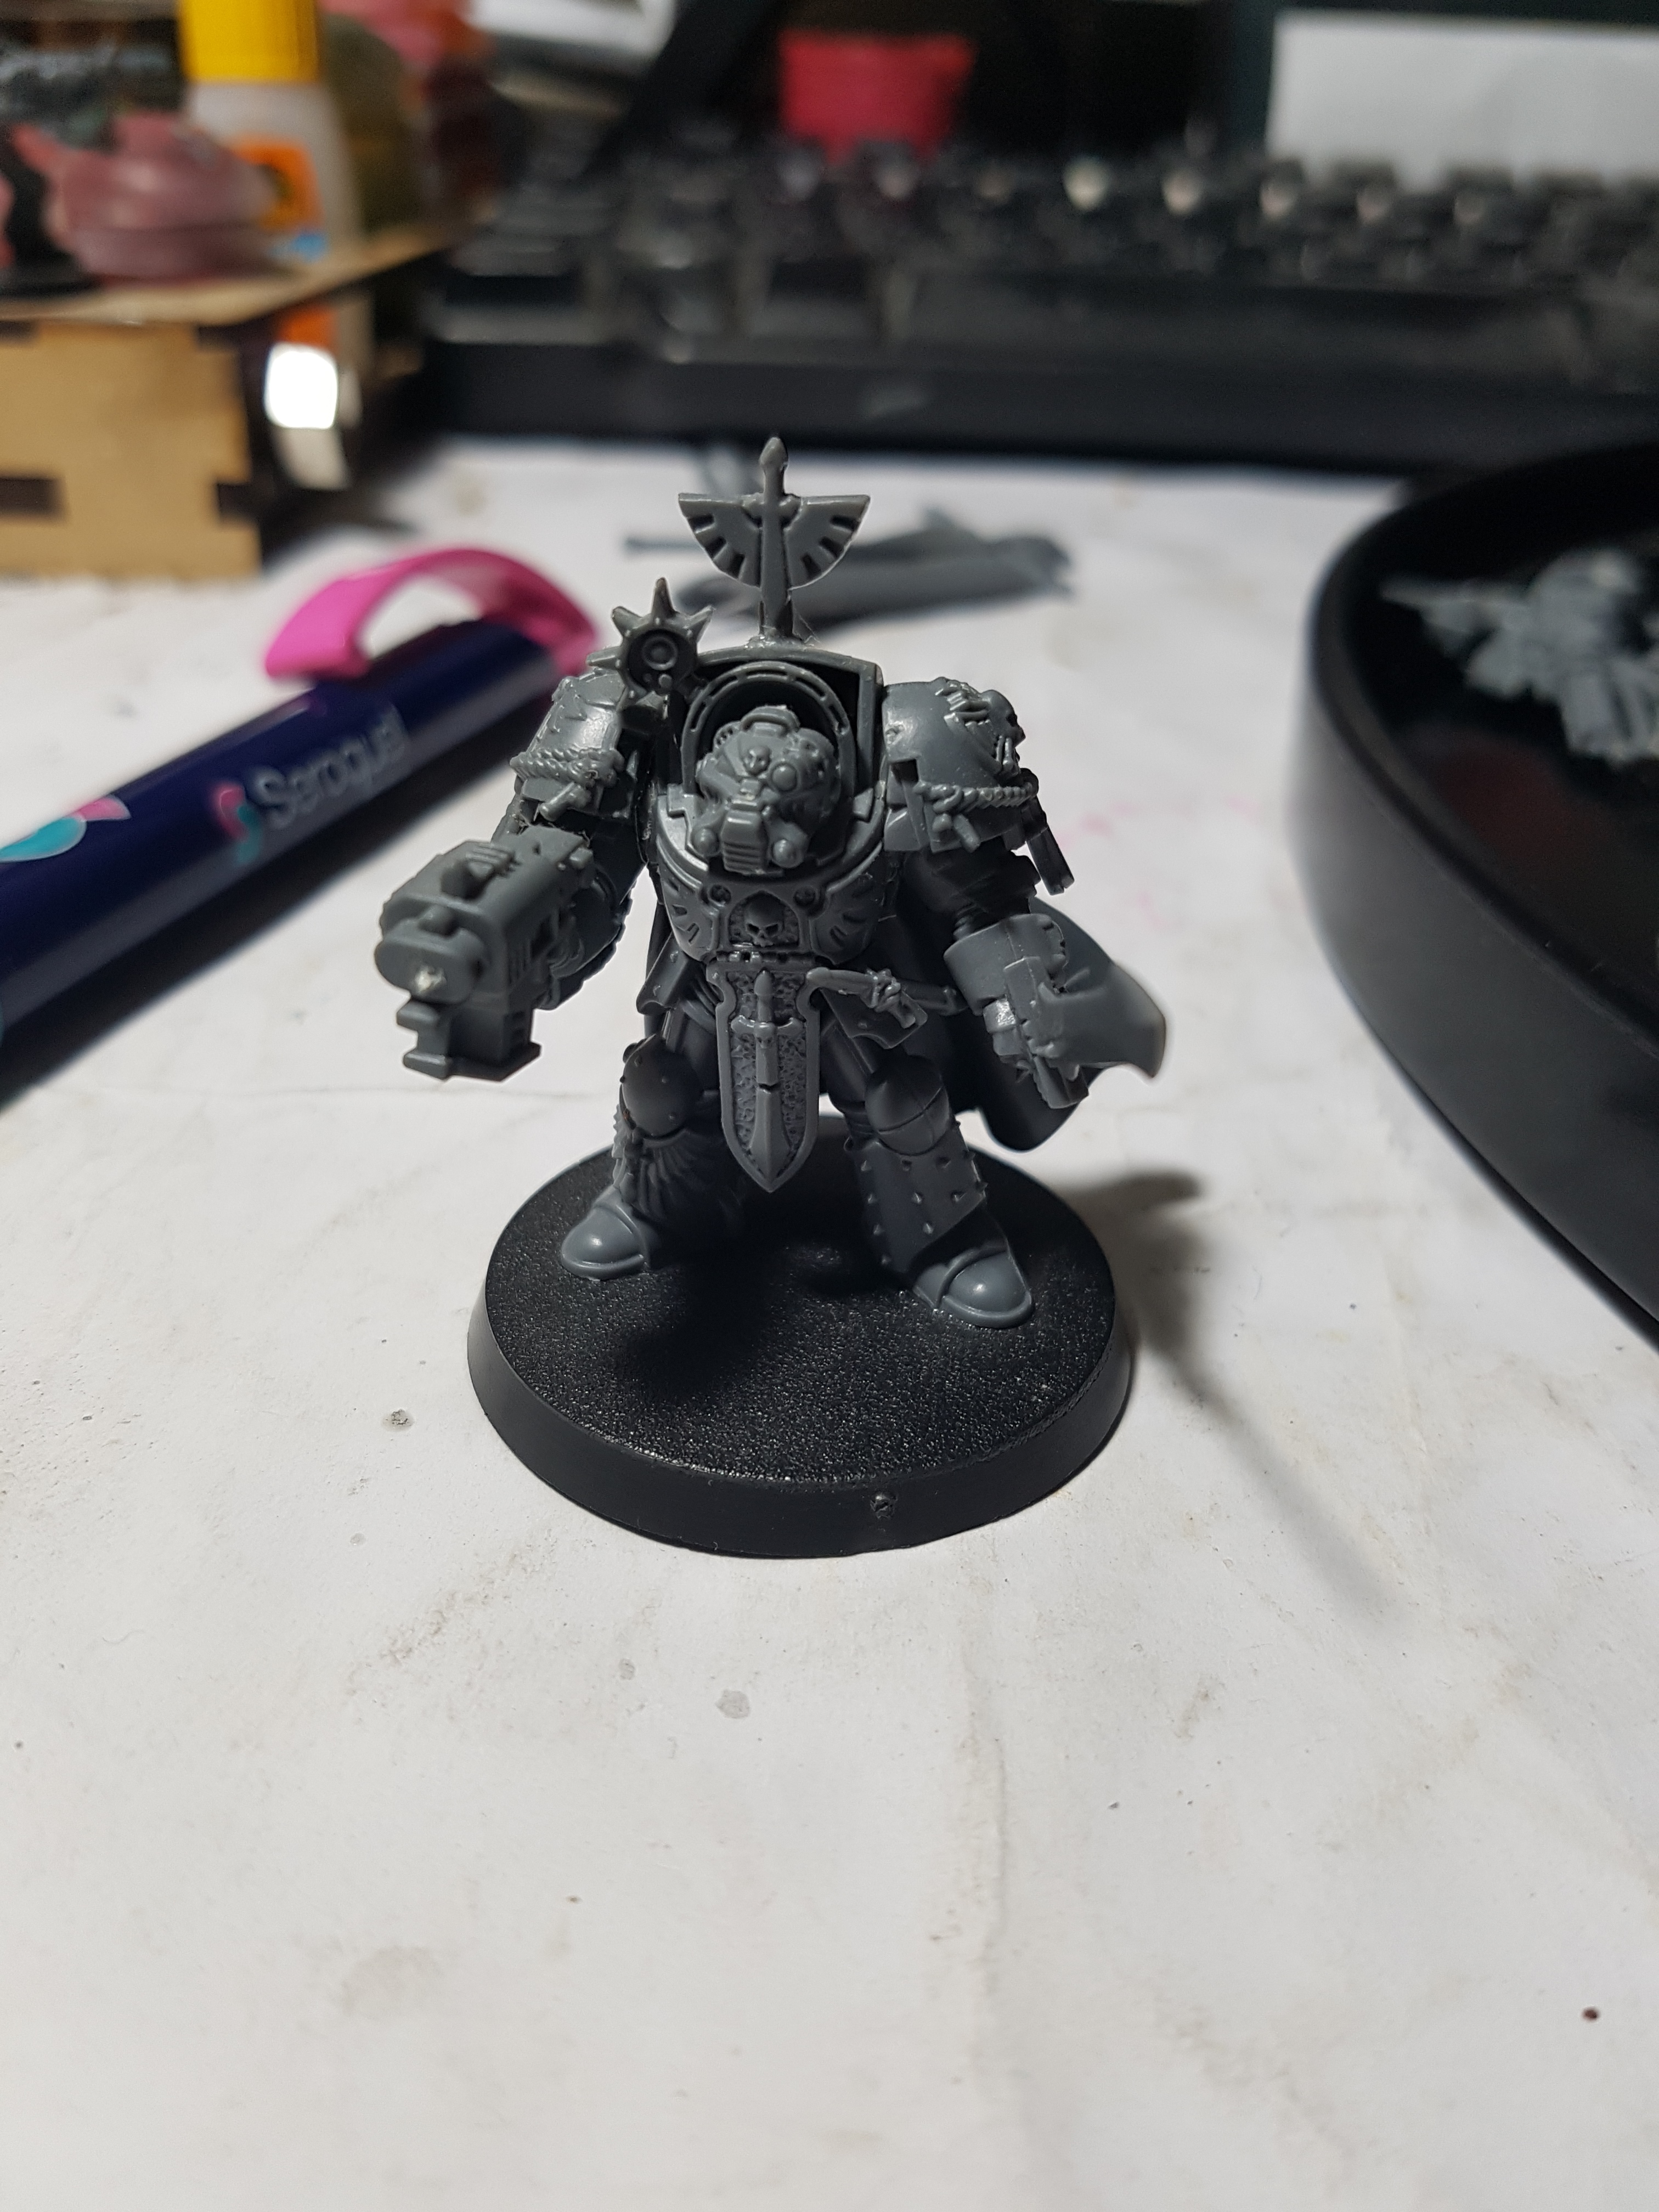
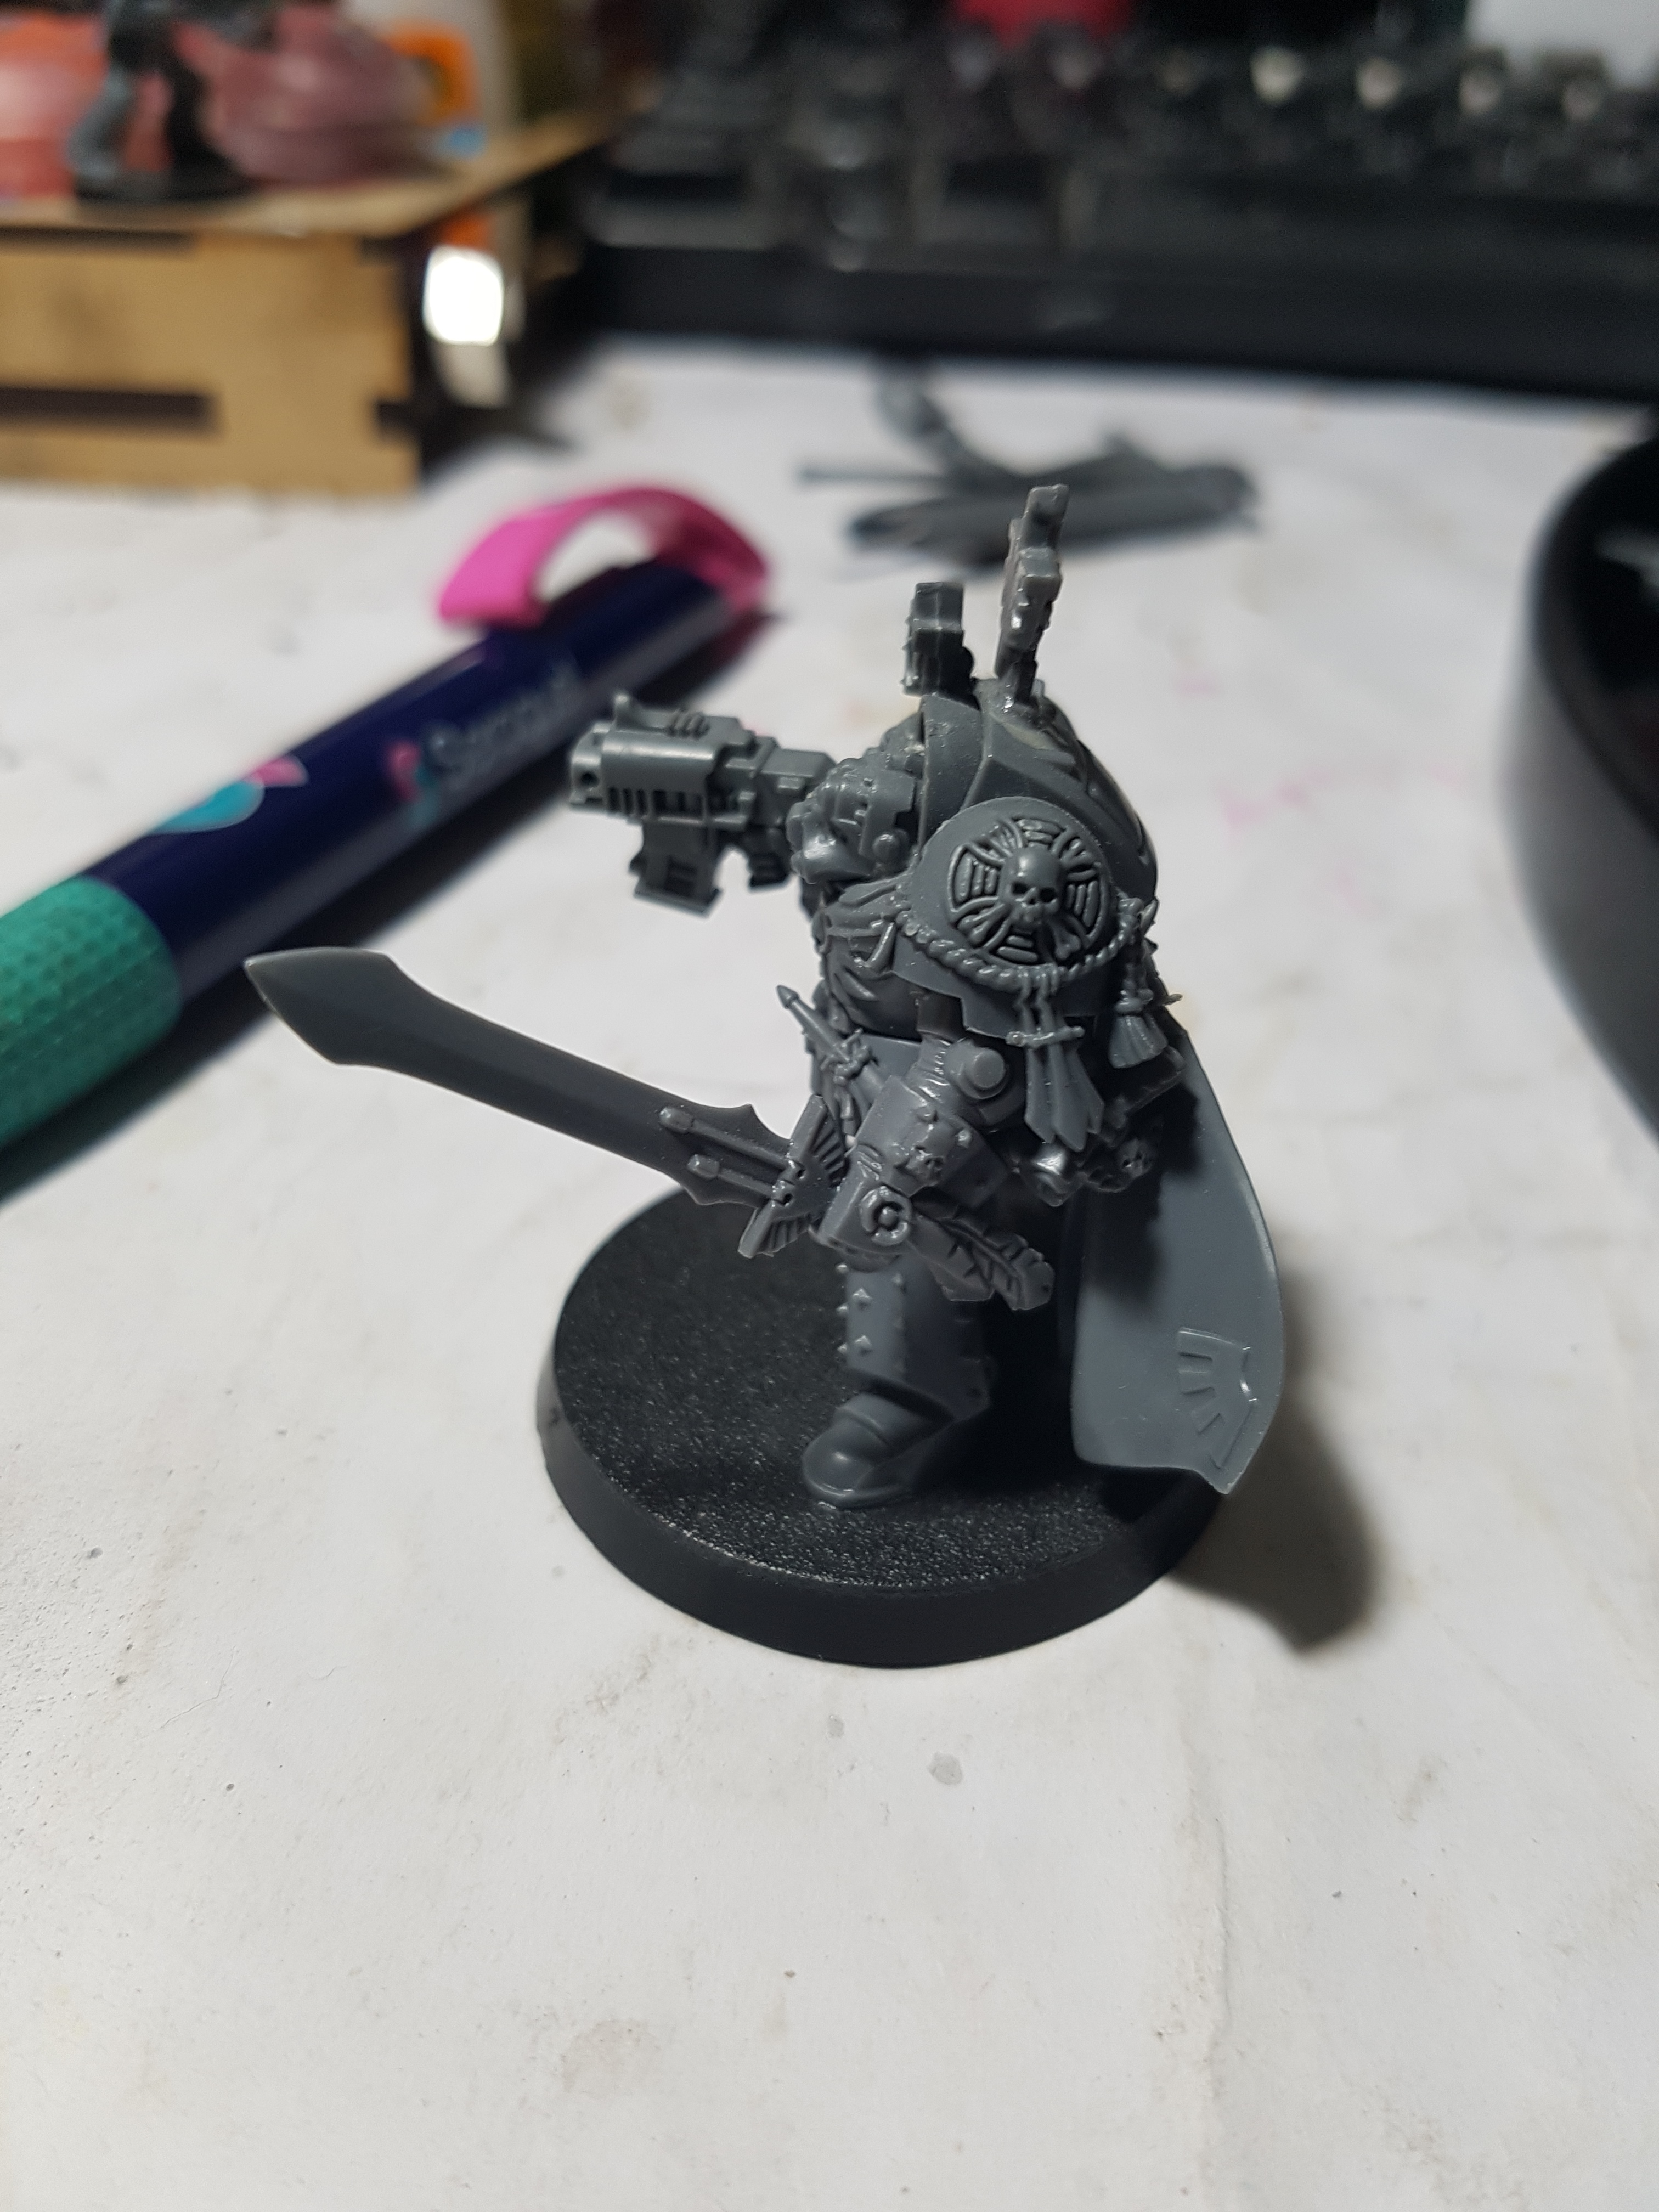
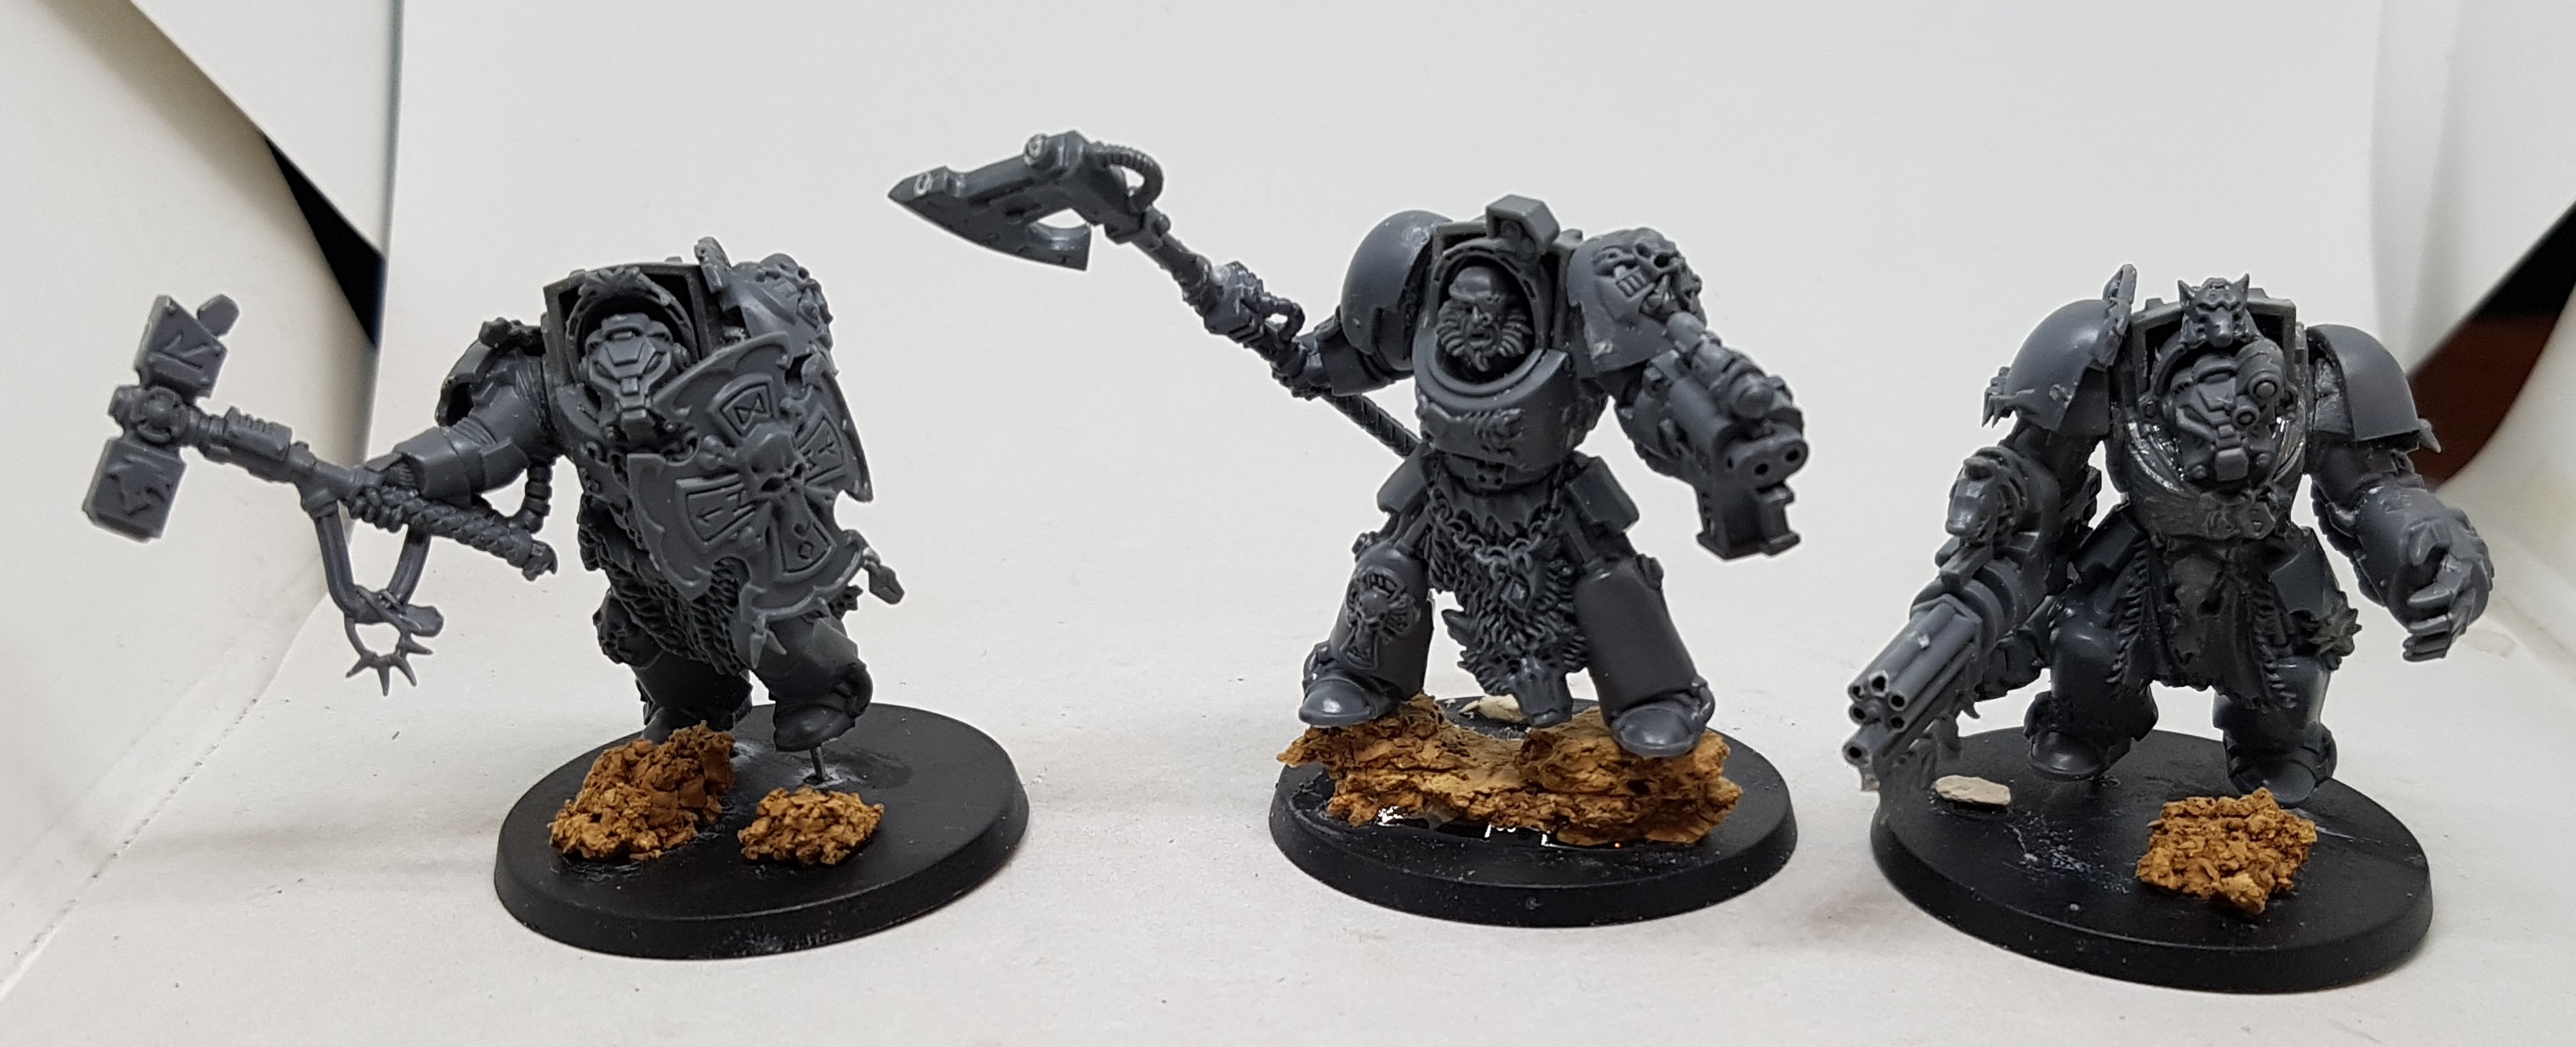
I’ve built and repaired all the Space Marines and Terminators from the parts available. I do not have enough parts to avoid using damaged parts, or to avoid using two sets of Terminator legs that I believe have Dark Angels symbols on them. I could file them off but I’m afraid I’ll just ruin the models. I think Terminators come in units of 5 men so this gives me 2 units, instead of one and some spare models. I also have 13 Tactical Marines built, and 3 Primaris from the front of the Magazine yet to assemble. Two marines needed green stuffing to repair, and one Terminator was holding a handle with no blade so I cut an axe head off a spare weapon and pinned it on, probably adding more than an inch to its length. It also had a cool wolf head on its bottom so i also transferred that over extending the axe even further. The guy is now wielding a pistol in one hand and a very long axe in his other hand. It might not be practical, but it is cool. See the middle guy in the last image of the gallery
Everybody has had a mix of cork and kitty litter glued to their bases for rocks. They will have cleaned dirt applied with matt medium as a glue, and then sealed in with dilute PVA. Watery PVA will also be applied over the cork so it can soak in and reinforce it. I might do this part twice as some of it is fragile. My plan is to apply winter tufts and snow to all the bases at the end. Height and texture will help make this look good.
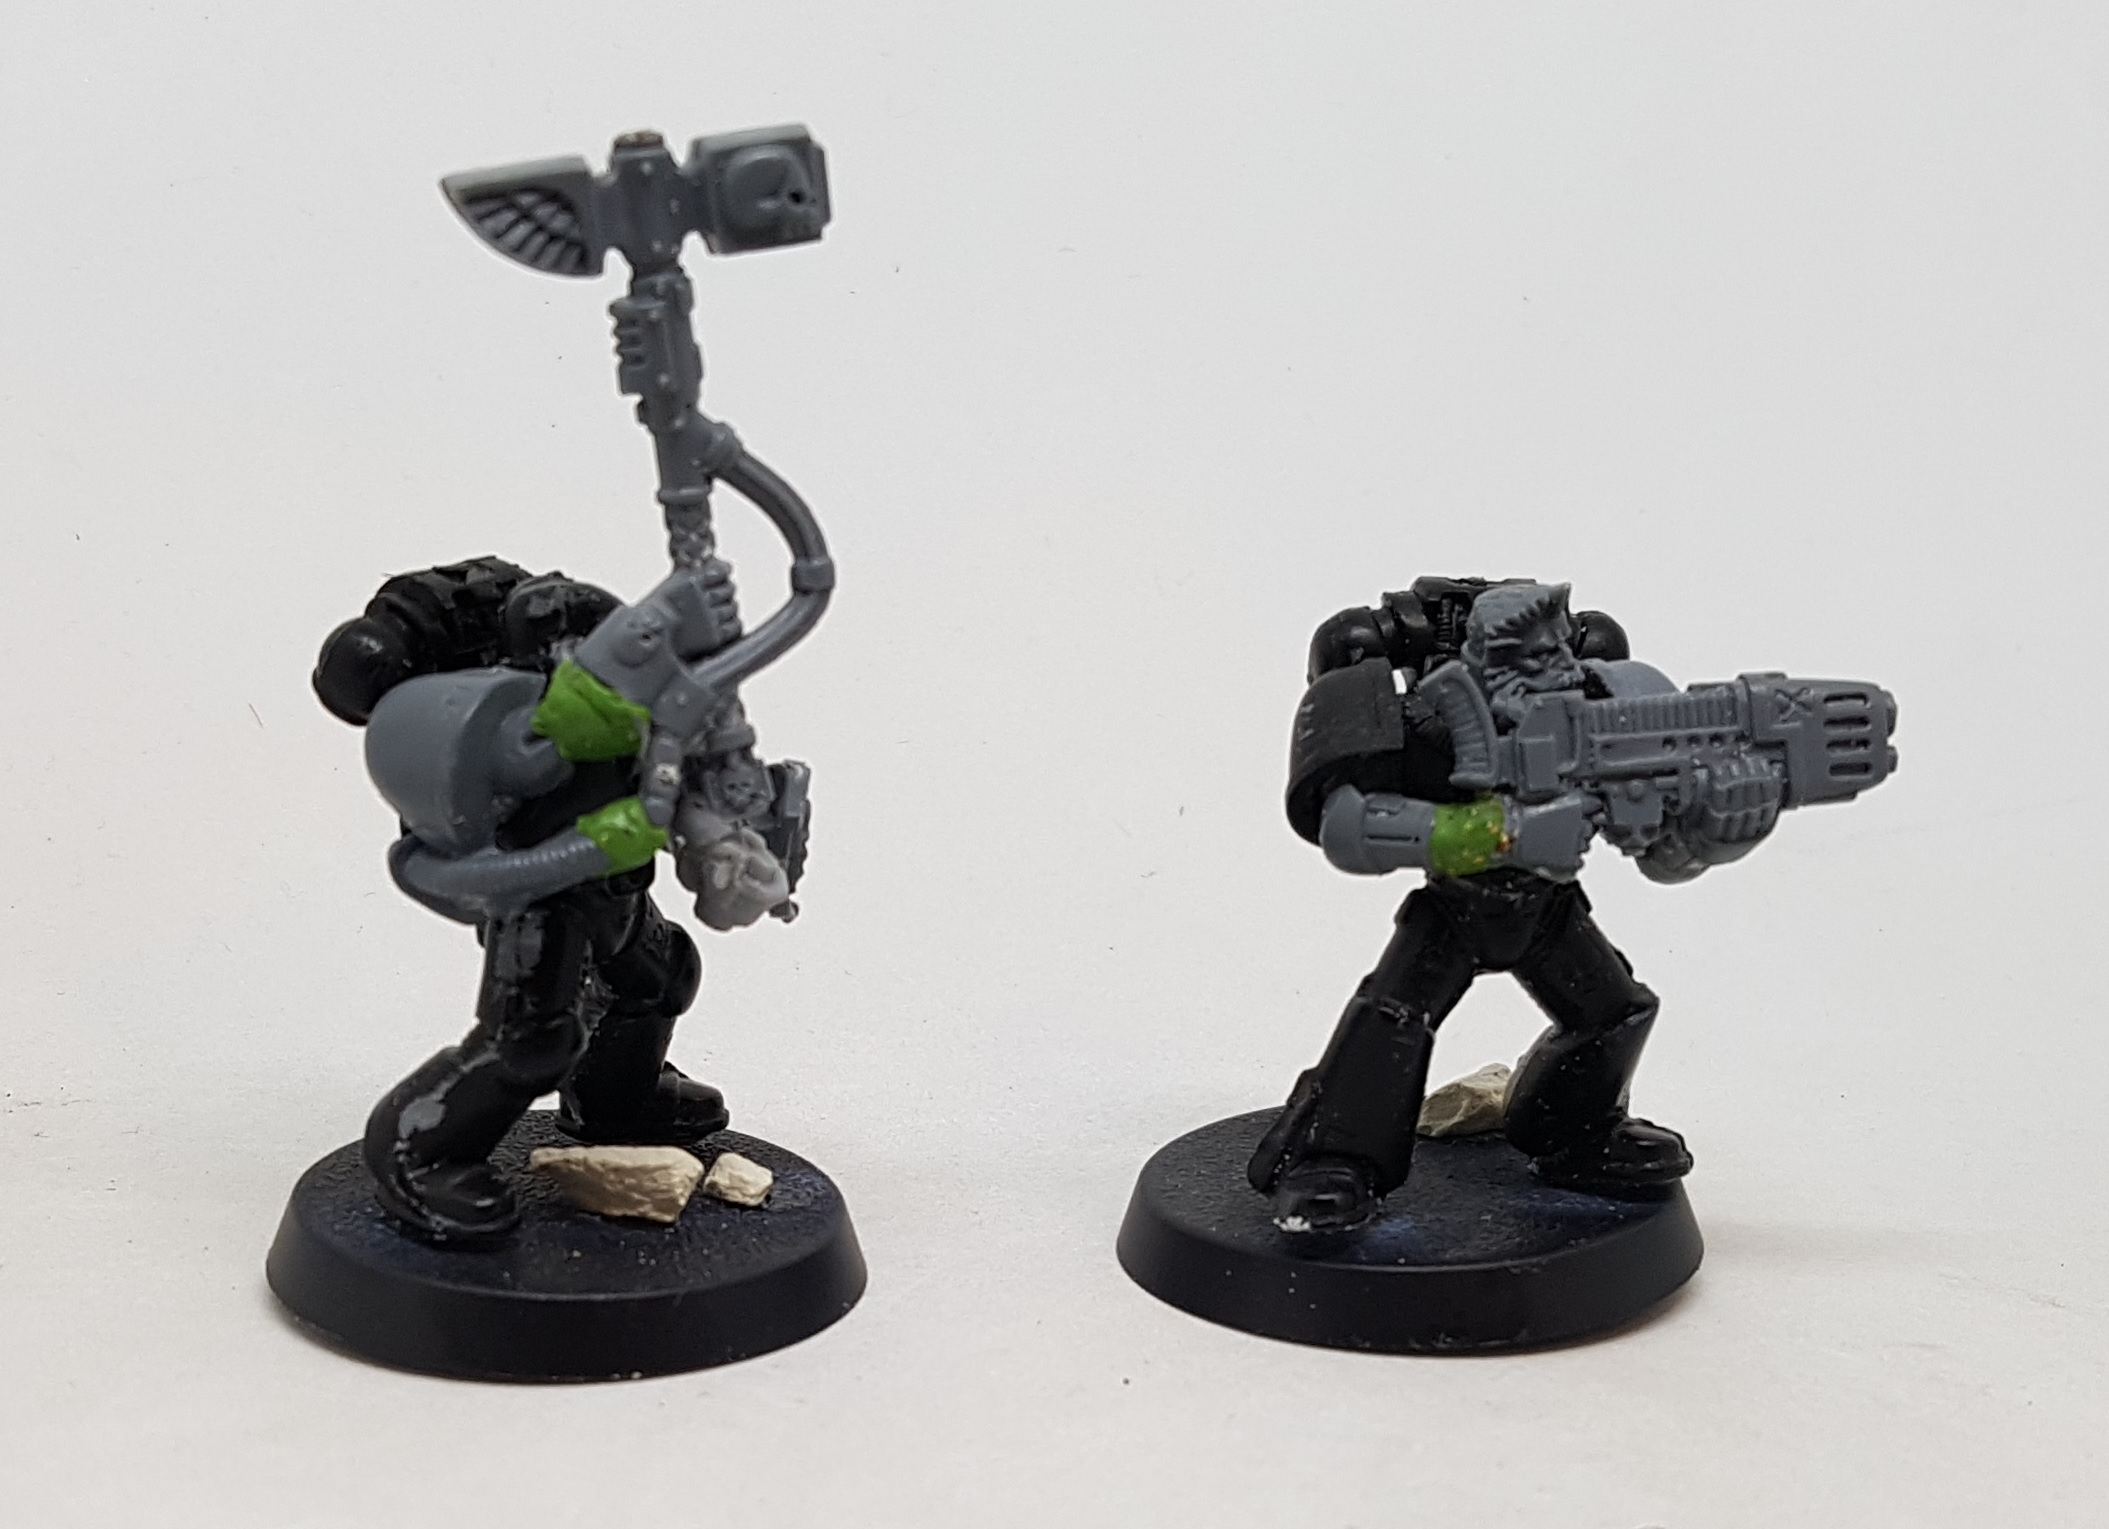 These two had to have limbs repaired or extended with Green Stuff. it was left 24 hours to dry, and then filed down as best as I can. Hopefully once primed it will be less noticeable
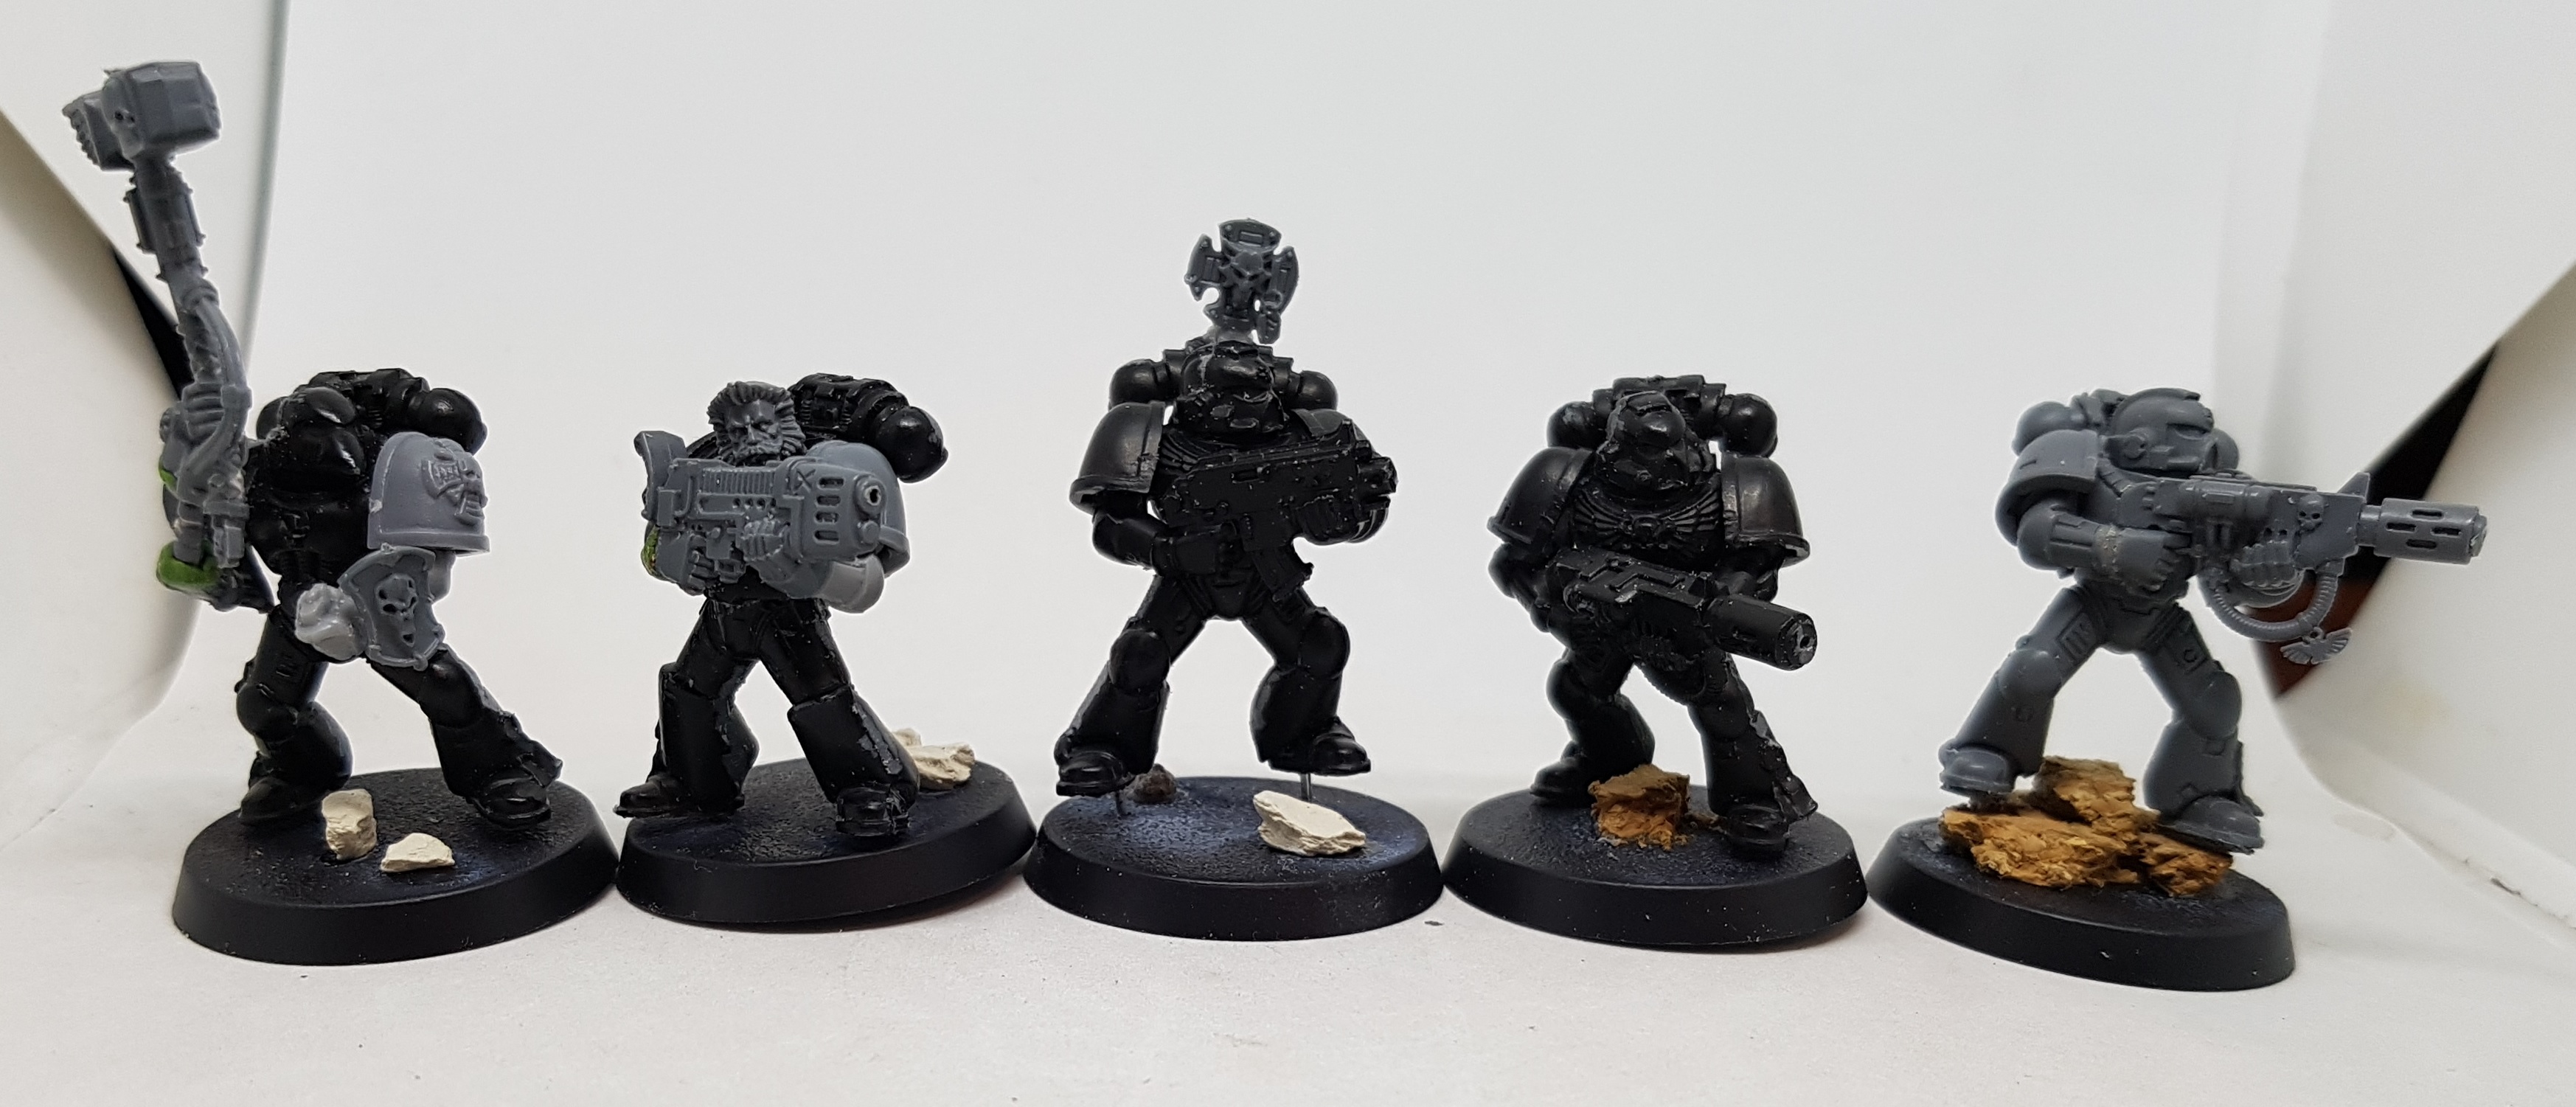


I also have 2 Dreadnoughts. Their arms are already glued on but I have 2 spares. I am considering removing the arms and magnetising them. Anyone had any experience with this? Is one magnet a limb enough to not only support the weight but stop weapon droop / the limbs rotating until the point downwards? I’ve seen a guide where someone put 3 magnets per side of the body and put a metal plate on each limb. This means it only takes 6 magnets per body, and there are no issues about lining up magnets and pins across multiple limbs. I finished off a tub of Twiglets last night. The bottom is ferrous metal and thin and light. I suspect I could cut it with a decent pair of scissors too. It might be worth a try.
Has anyone any experience and opinions on making Dreadnought limbs swap-in-and-out-able through any methods?
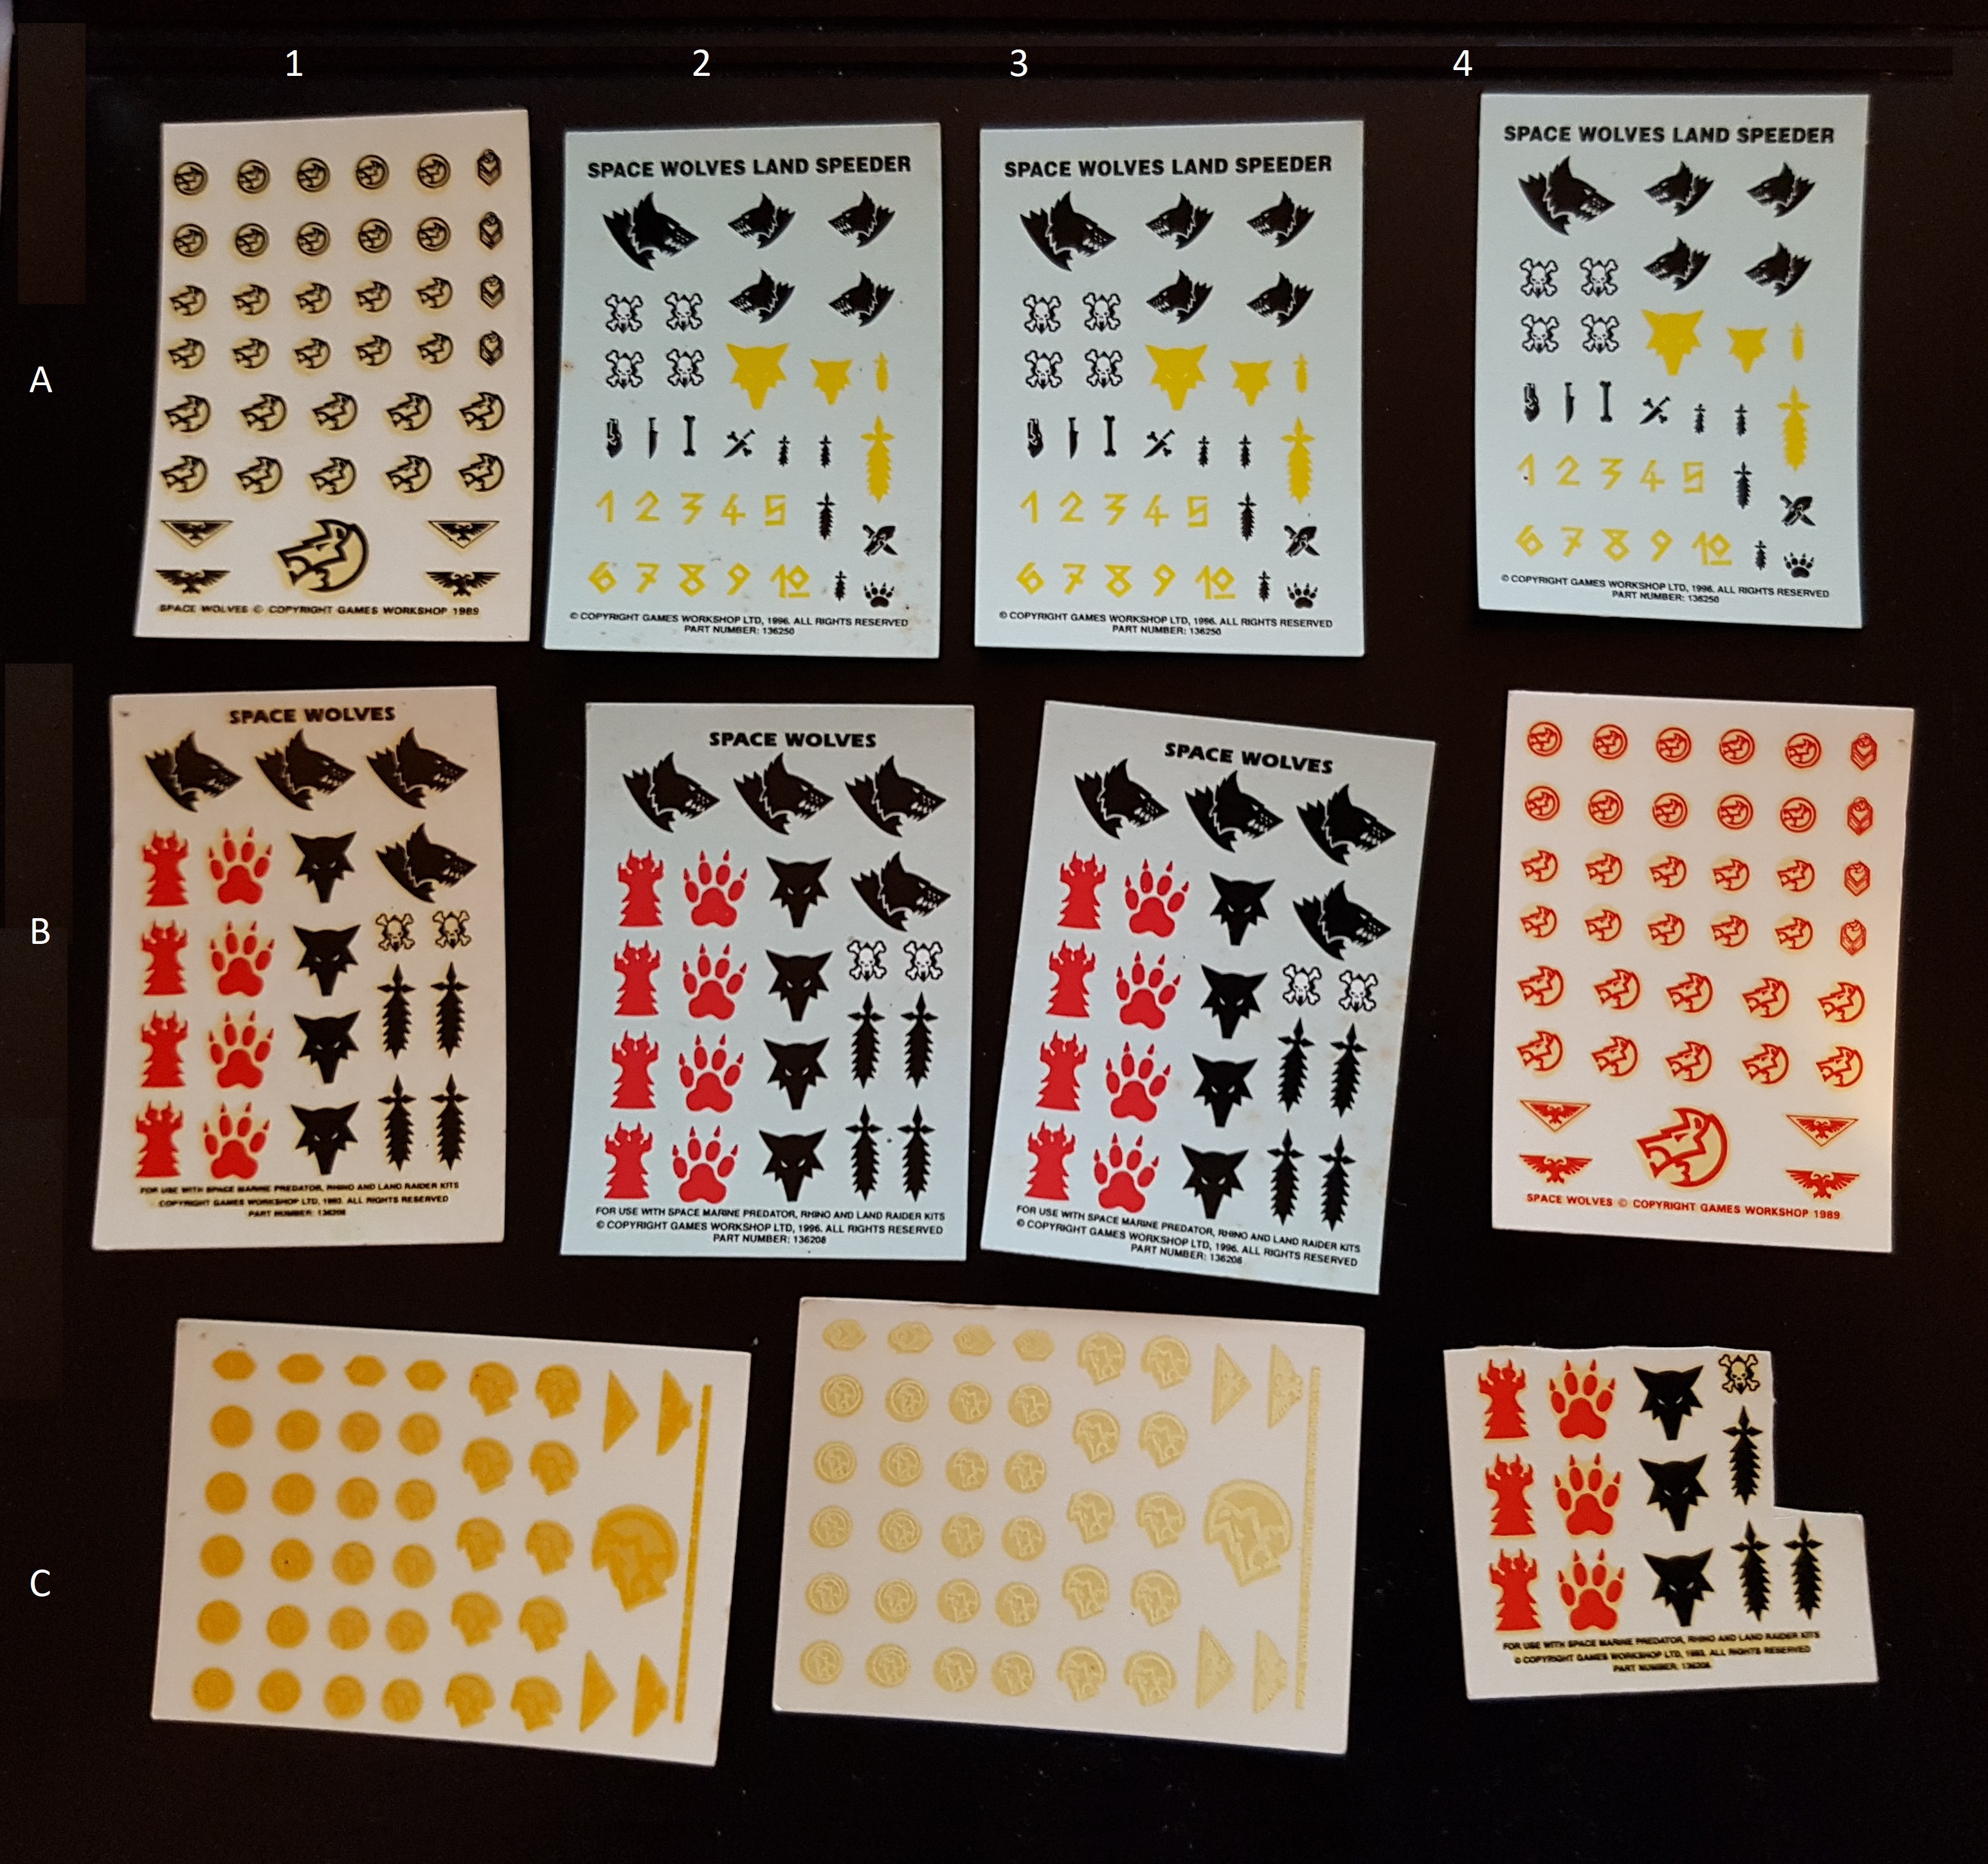
Reviving Old Transfers
I was having a chat on the forums about iconography, chapters, division etc, and transfers, and @Rayzyr was awesome enough to offer to post me his old Space Wolf transfers. He’s sent me quite a bit too so I should be able to cover everything. Some of these have 1989 printed on them which makes them around 30 years old (which makes me feel very old!) and as a consequence of their age they have yellowed a bit. This might not matter if I place them on yellow shoulder pads, but it might, and it will on any other colour surface so I’ve looked in to ways to recover them
A google hunt led me to a video which said that placing them in direct sunlight for a few days can bleach them back to their original colour. The guy was talking about waterslide transfers for model cars, but the technology is surely the same? He loved in Scotland and a few days to a week was enough for him, so the British sun should be equally capable. (I do love that they have travelled from Australia to England in the winter to then be placed in the sun!)
I have Blutacked them to a folder clipboard and it is currently stood like a Christmas card on my bedroom windowsill being careful to ensure no condensation can possibly get to it.
I’ll report back later with the results of this experiment. If anyone has any advice to offer with recovering these transfers, or using them I’d be interested to hear it. I do not own any Microsol. I’ve always been fine applying transfers over a gloss varnish with just water, and then sealing it with more varnish. Does their age really preclude this method?
(PS I’m almost done with the infantry in the previous entry. I’ve just the basing and transfers to do. I’ll update the previous entry when the basing is done. Most of the work is the same as for the entry before anyway.
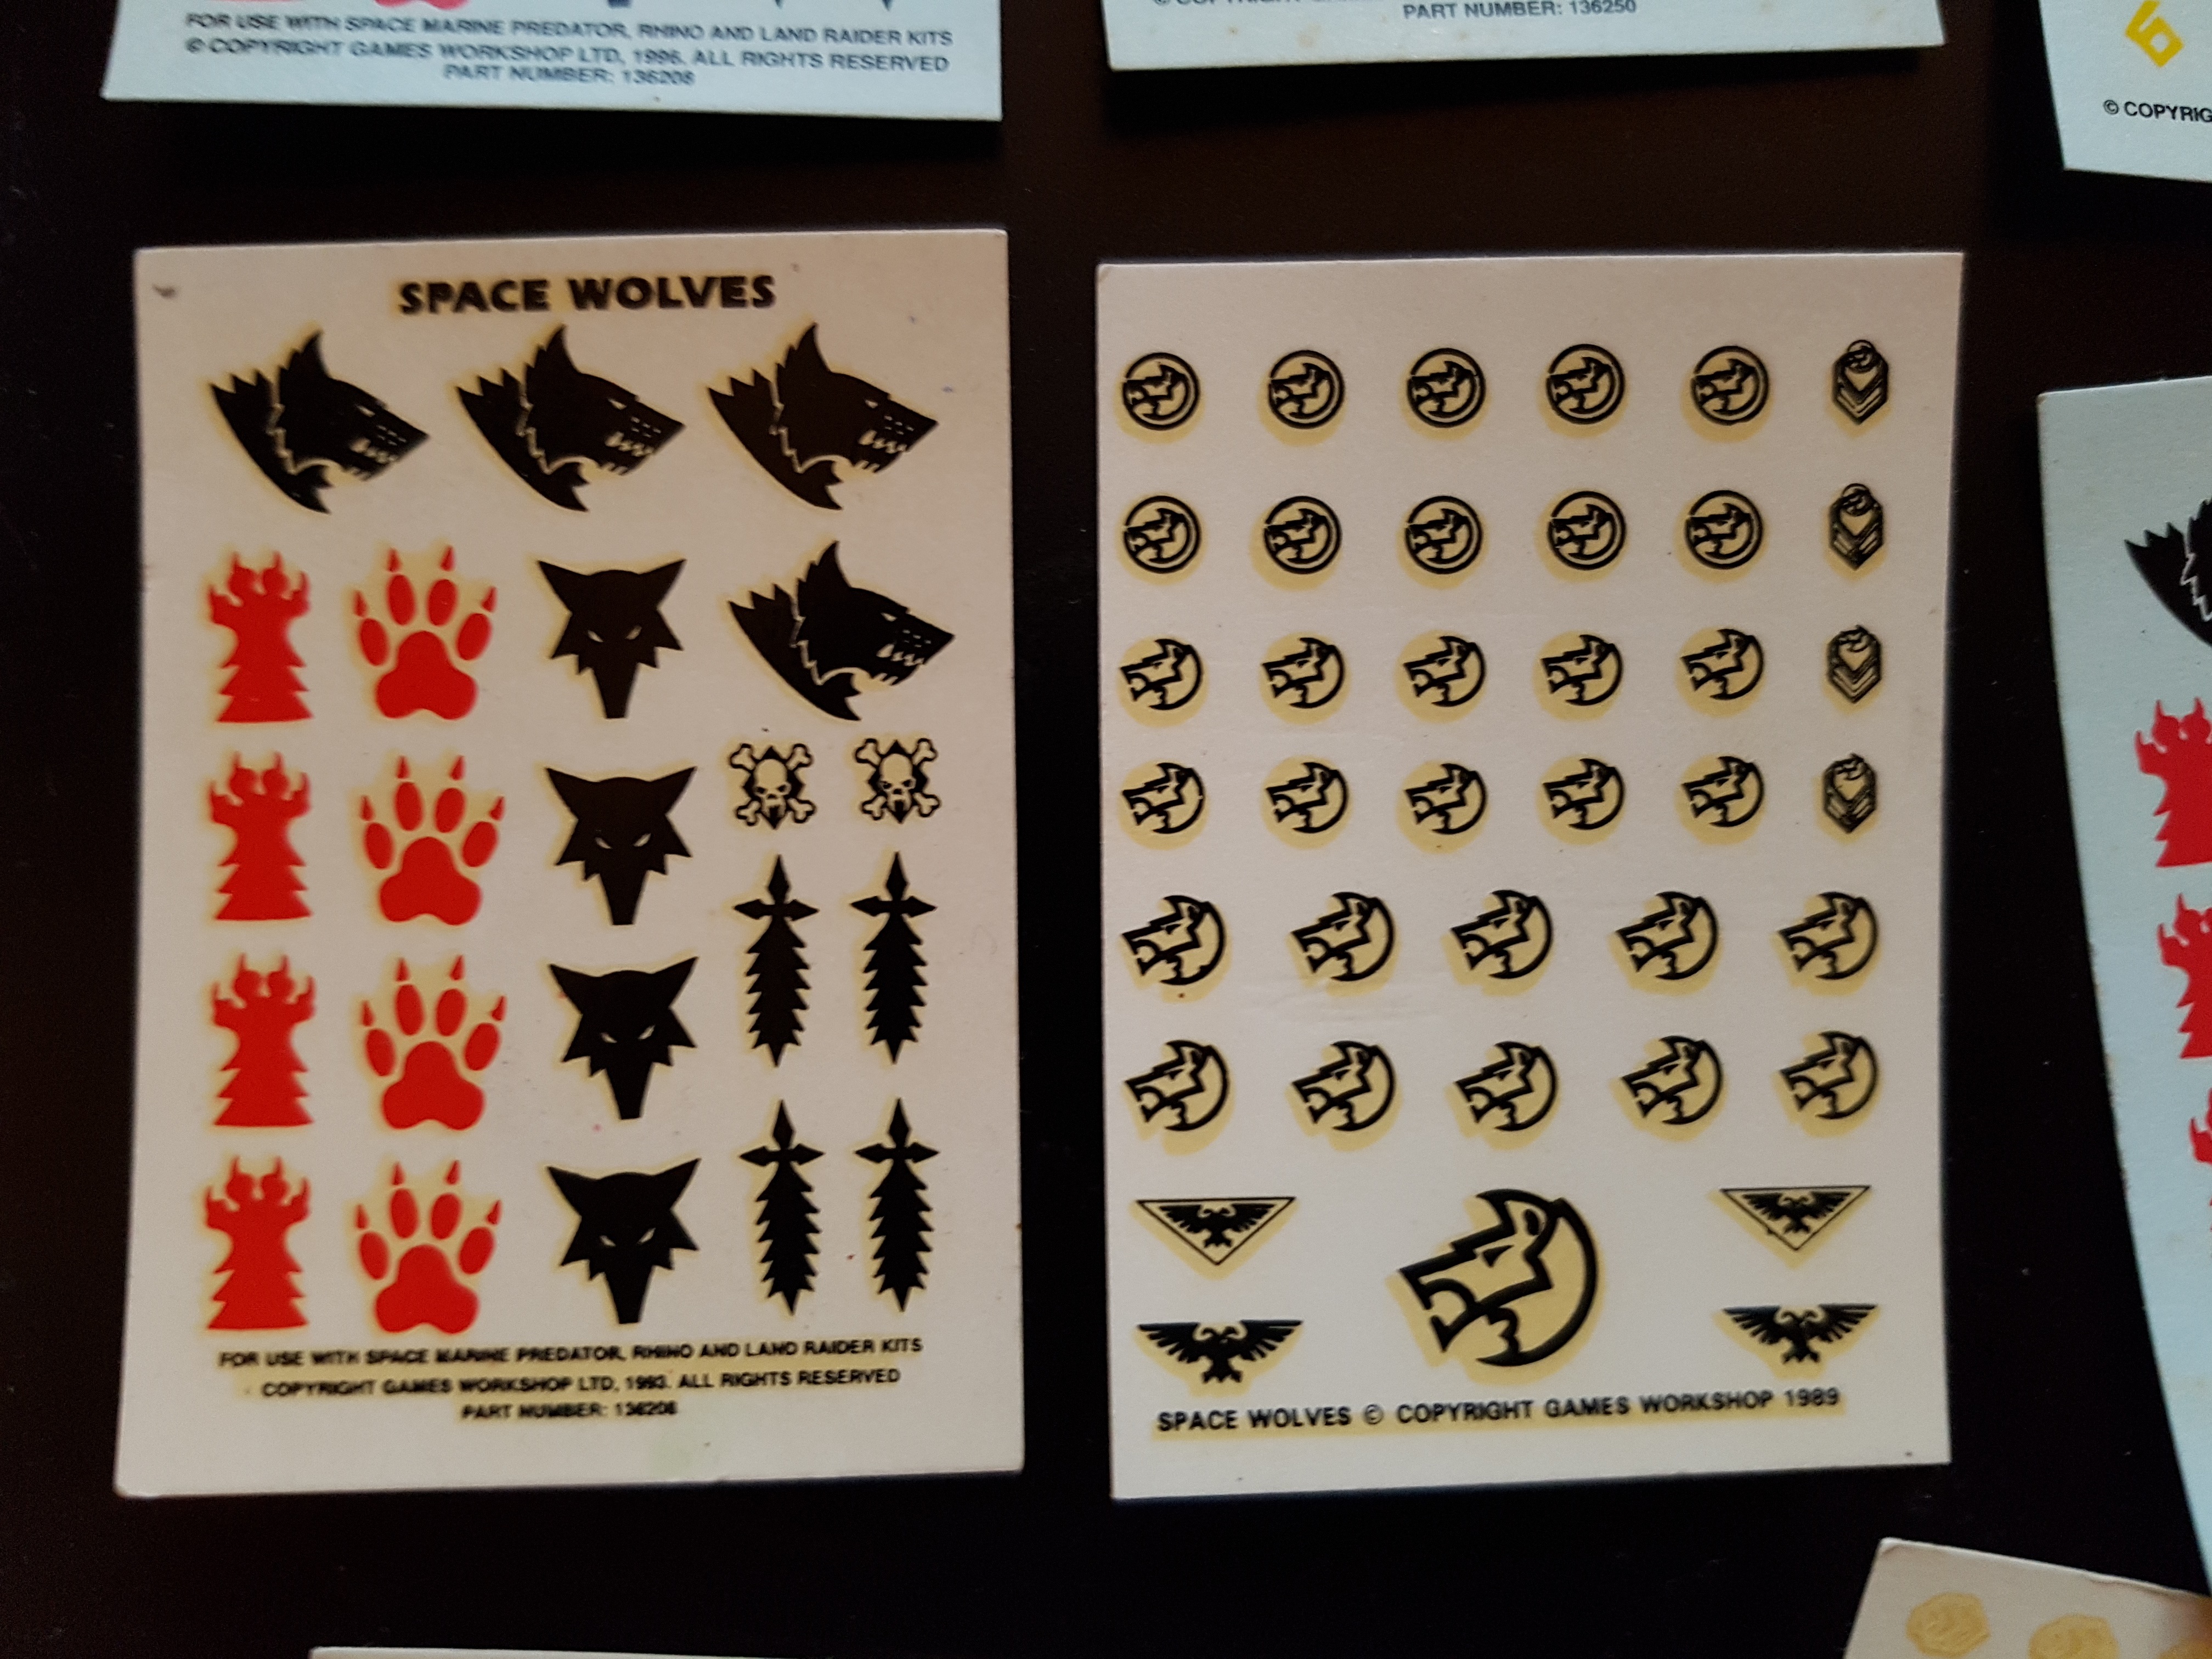
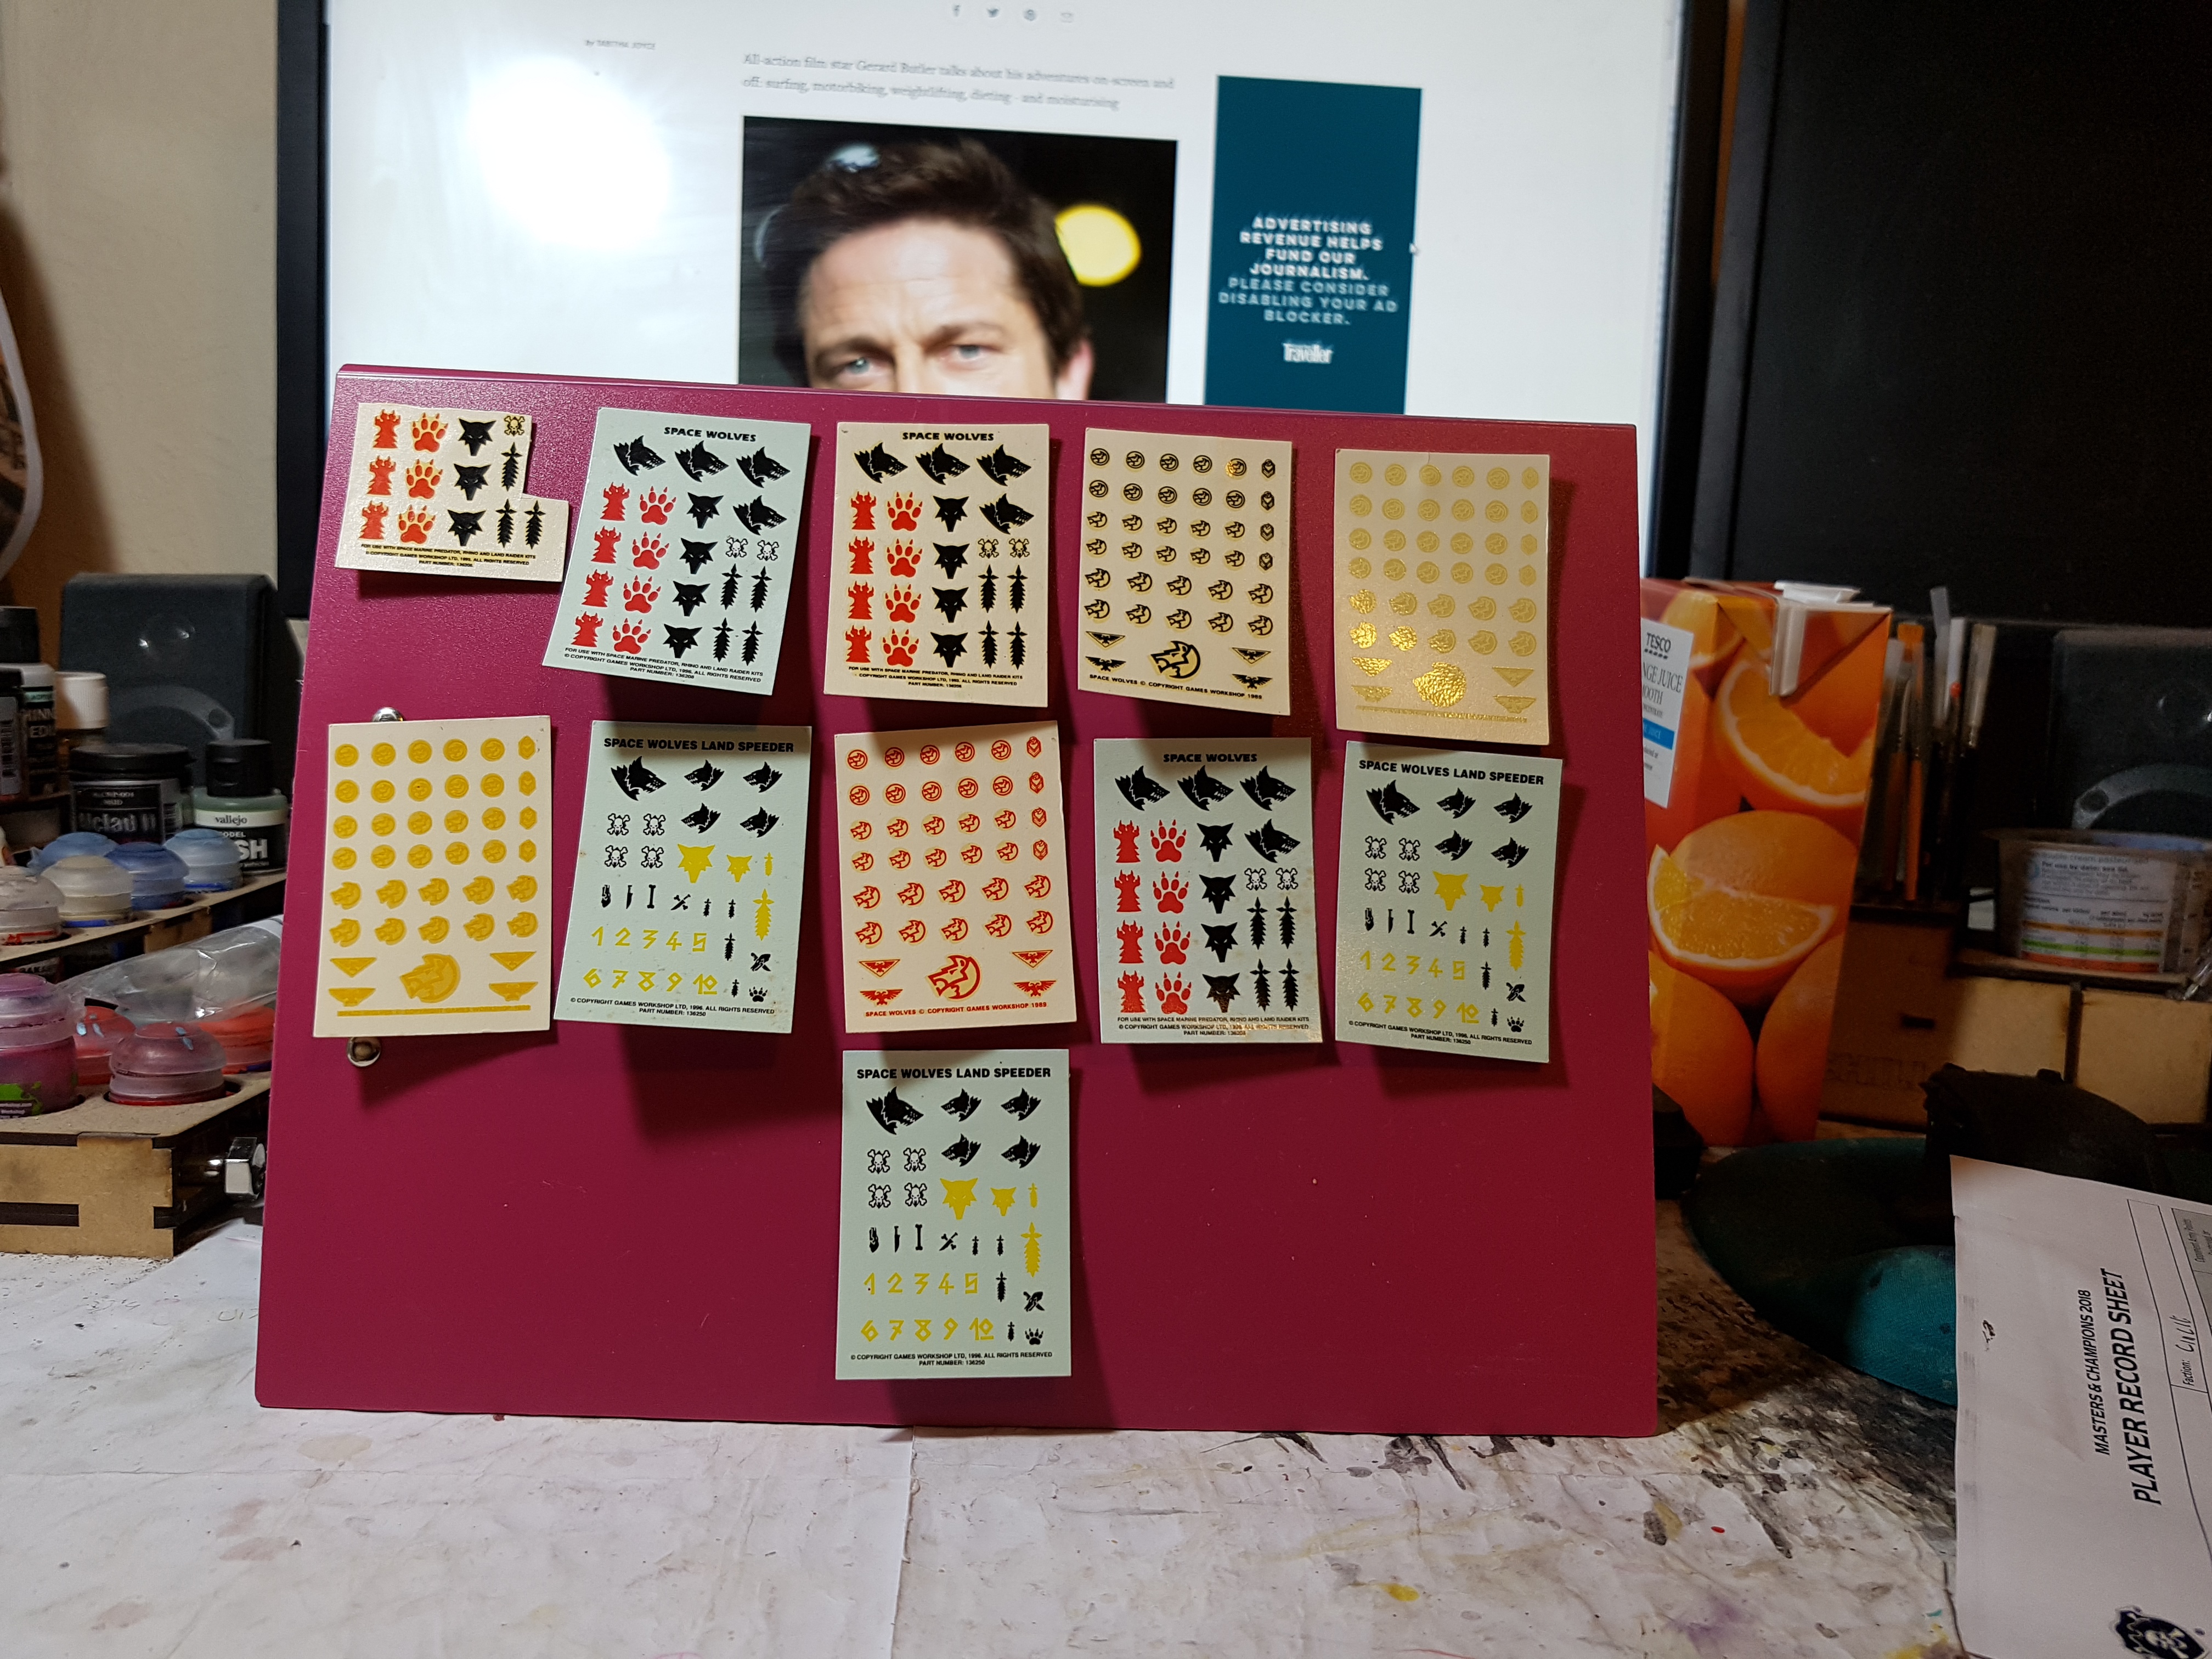
They were left in my window for 11 days at the tail end of birtish winter. There were maybe 2 good days of sun right at the end. However it appears to have done the job. See for yourselves.


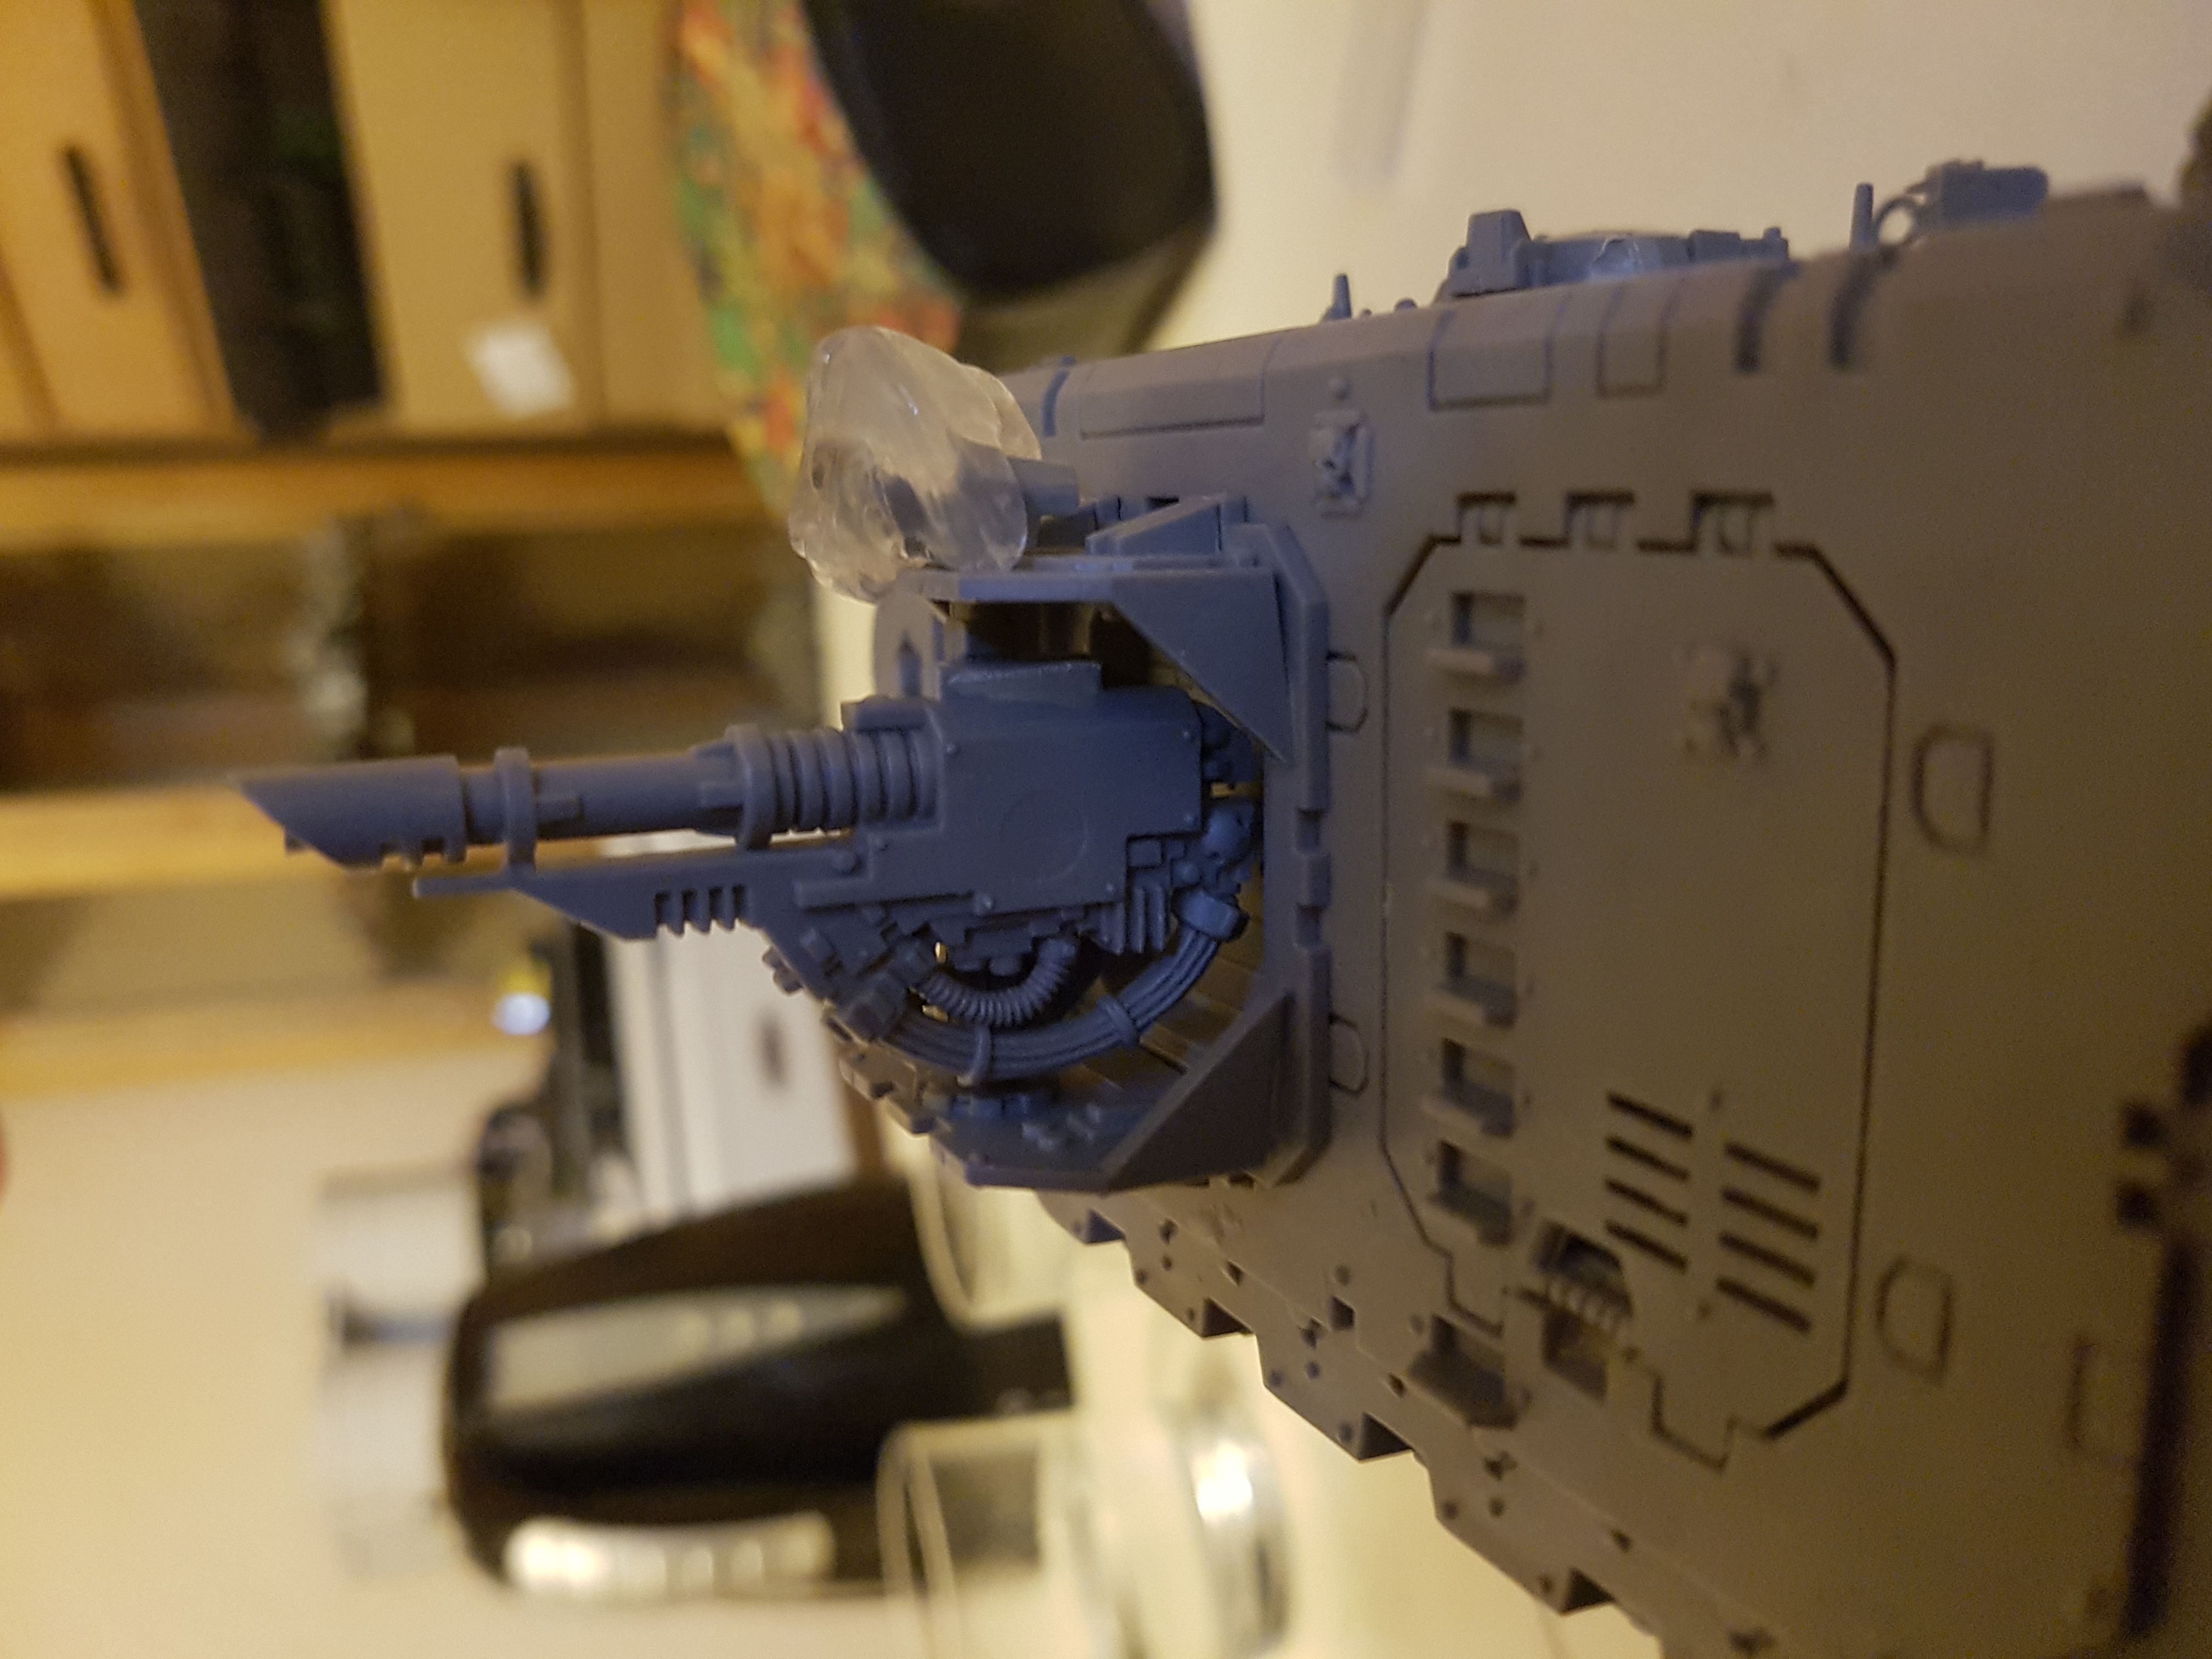
Tank Repairs
The predator and Land Raider were bot missing some parts. I was able to track down everything I needed except for one of the optics for the Land Raider. This gave the the opportunity to experiment with Oyumaro instant mould, using this link as my guide.
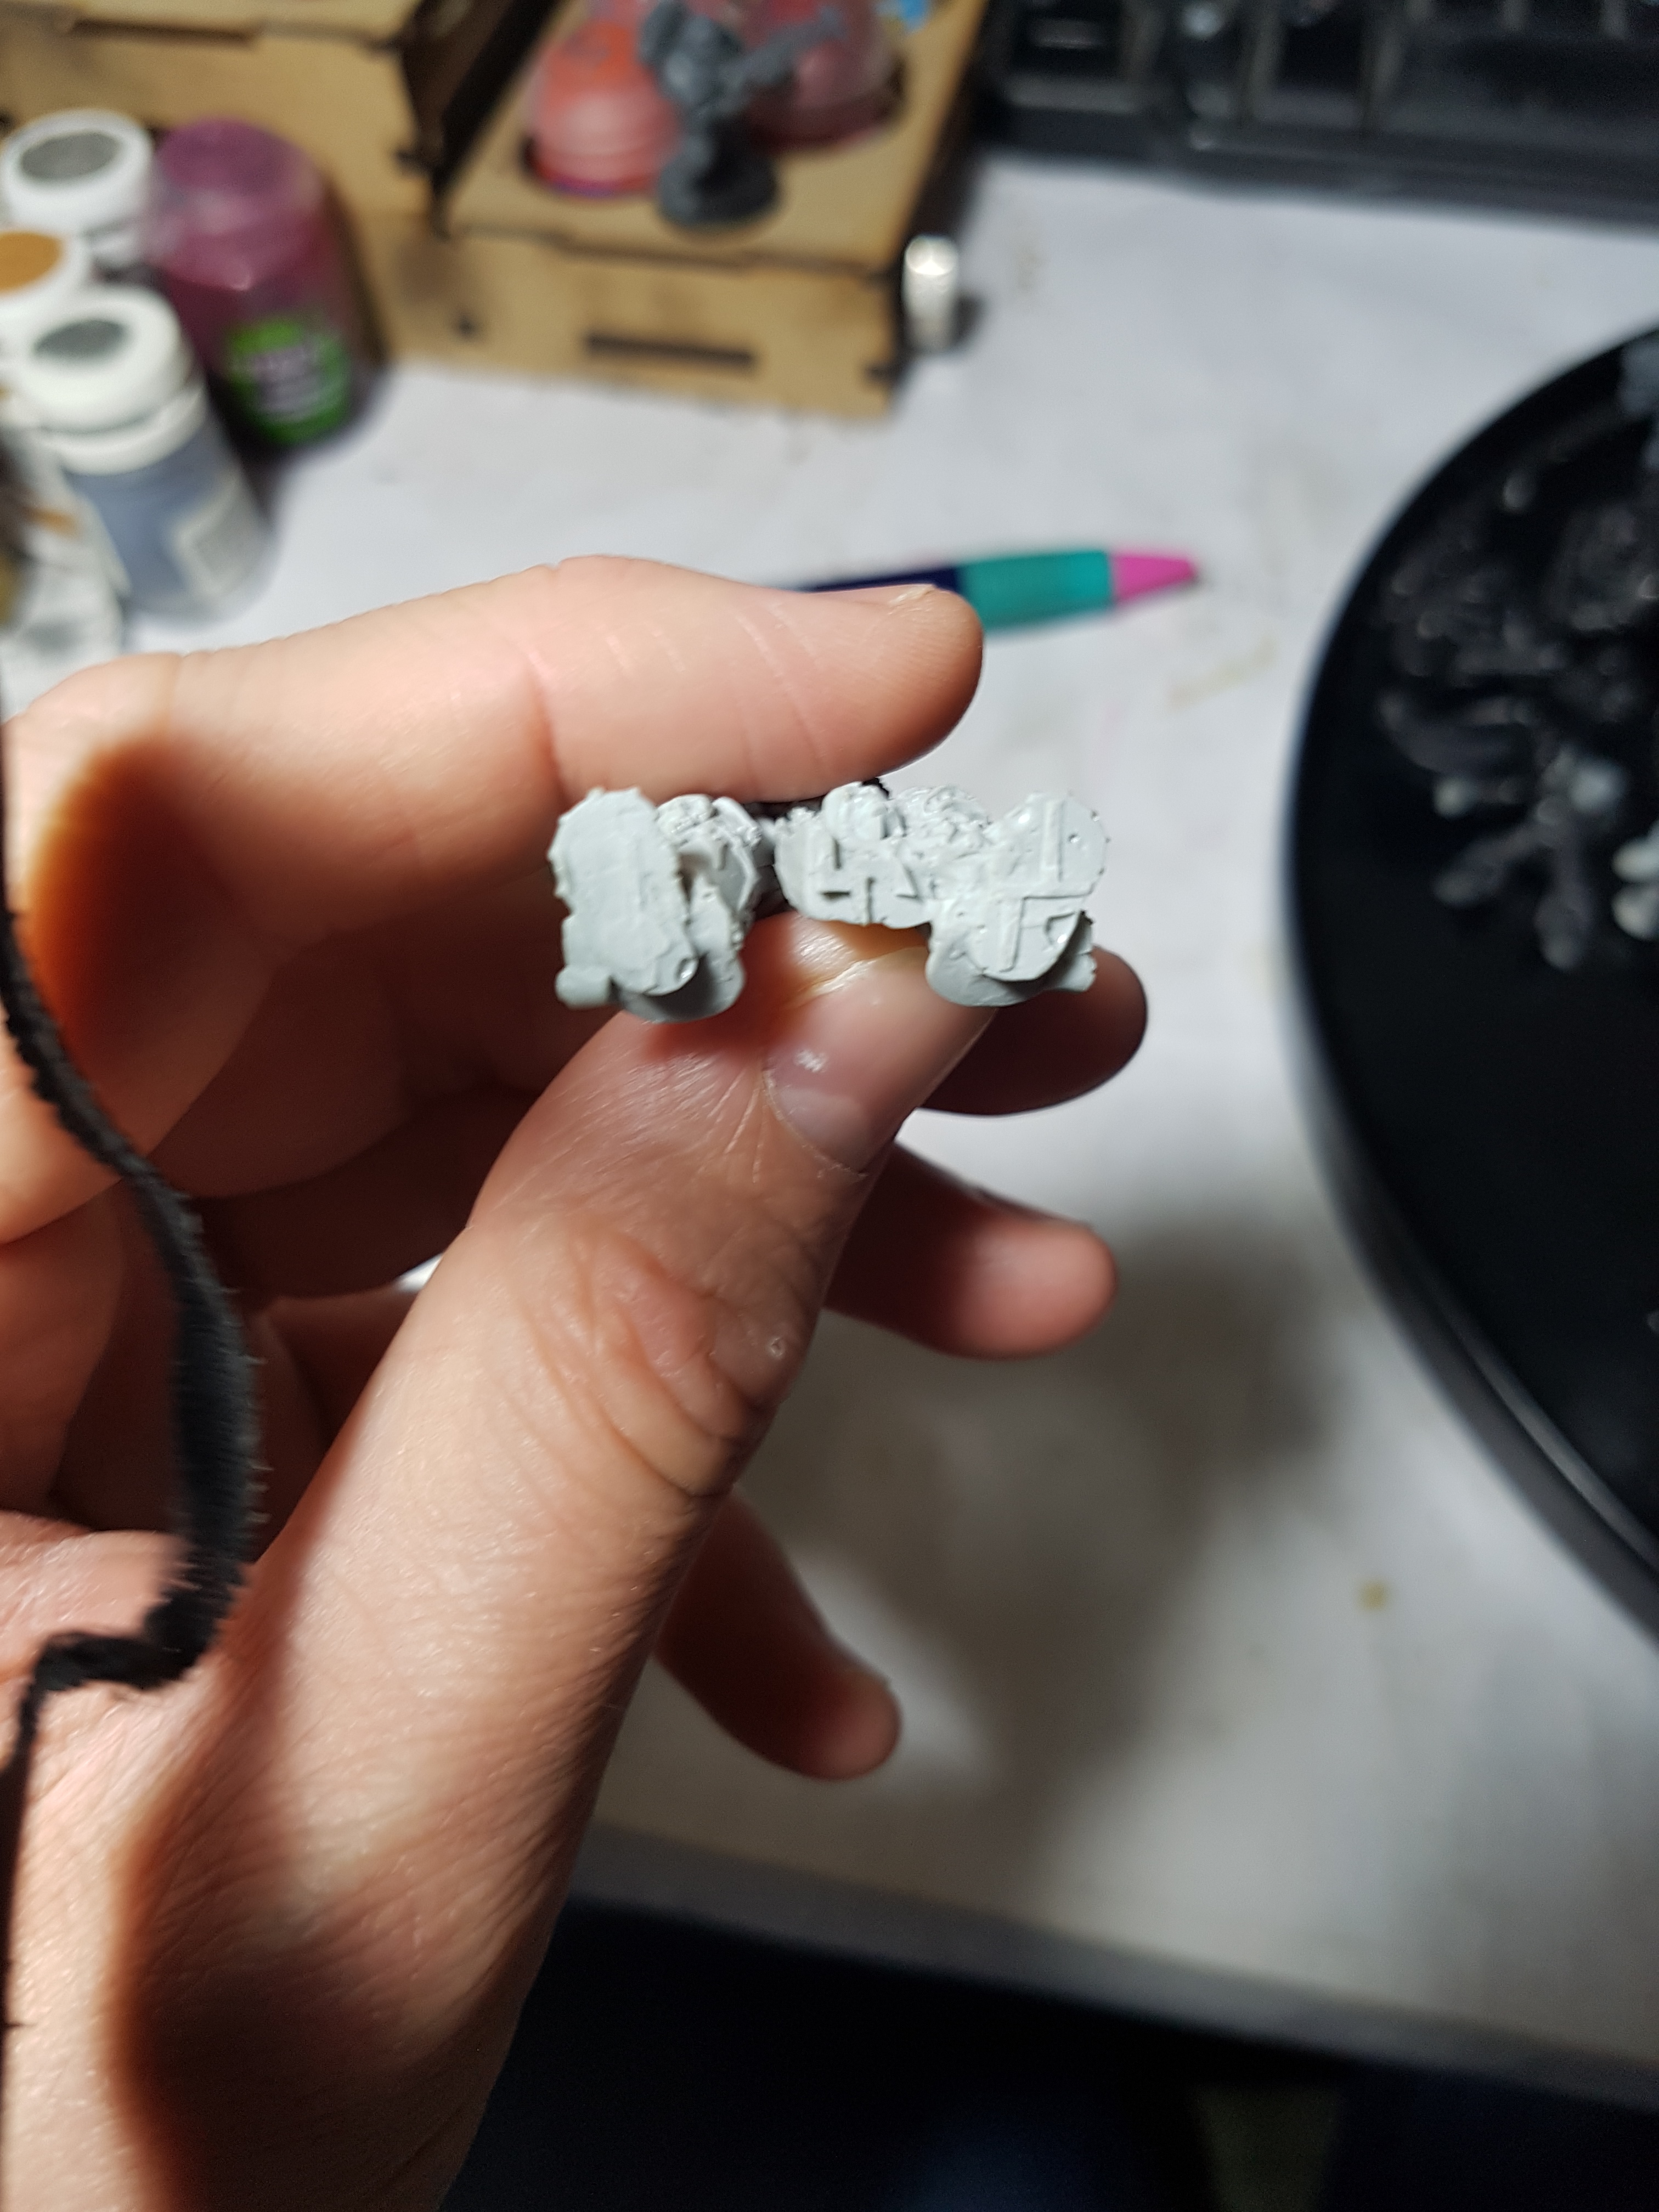
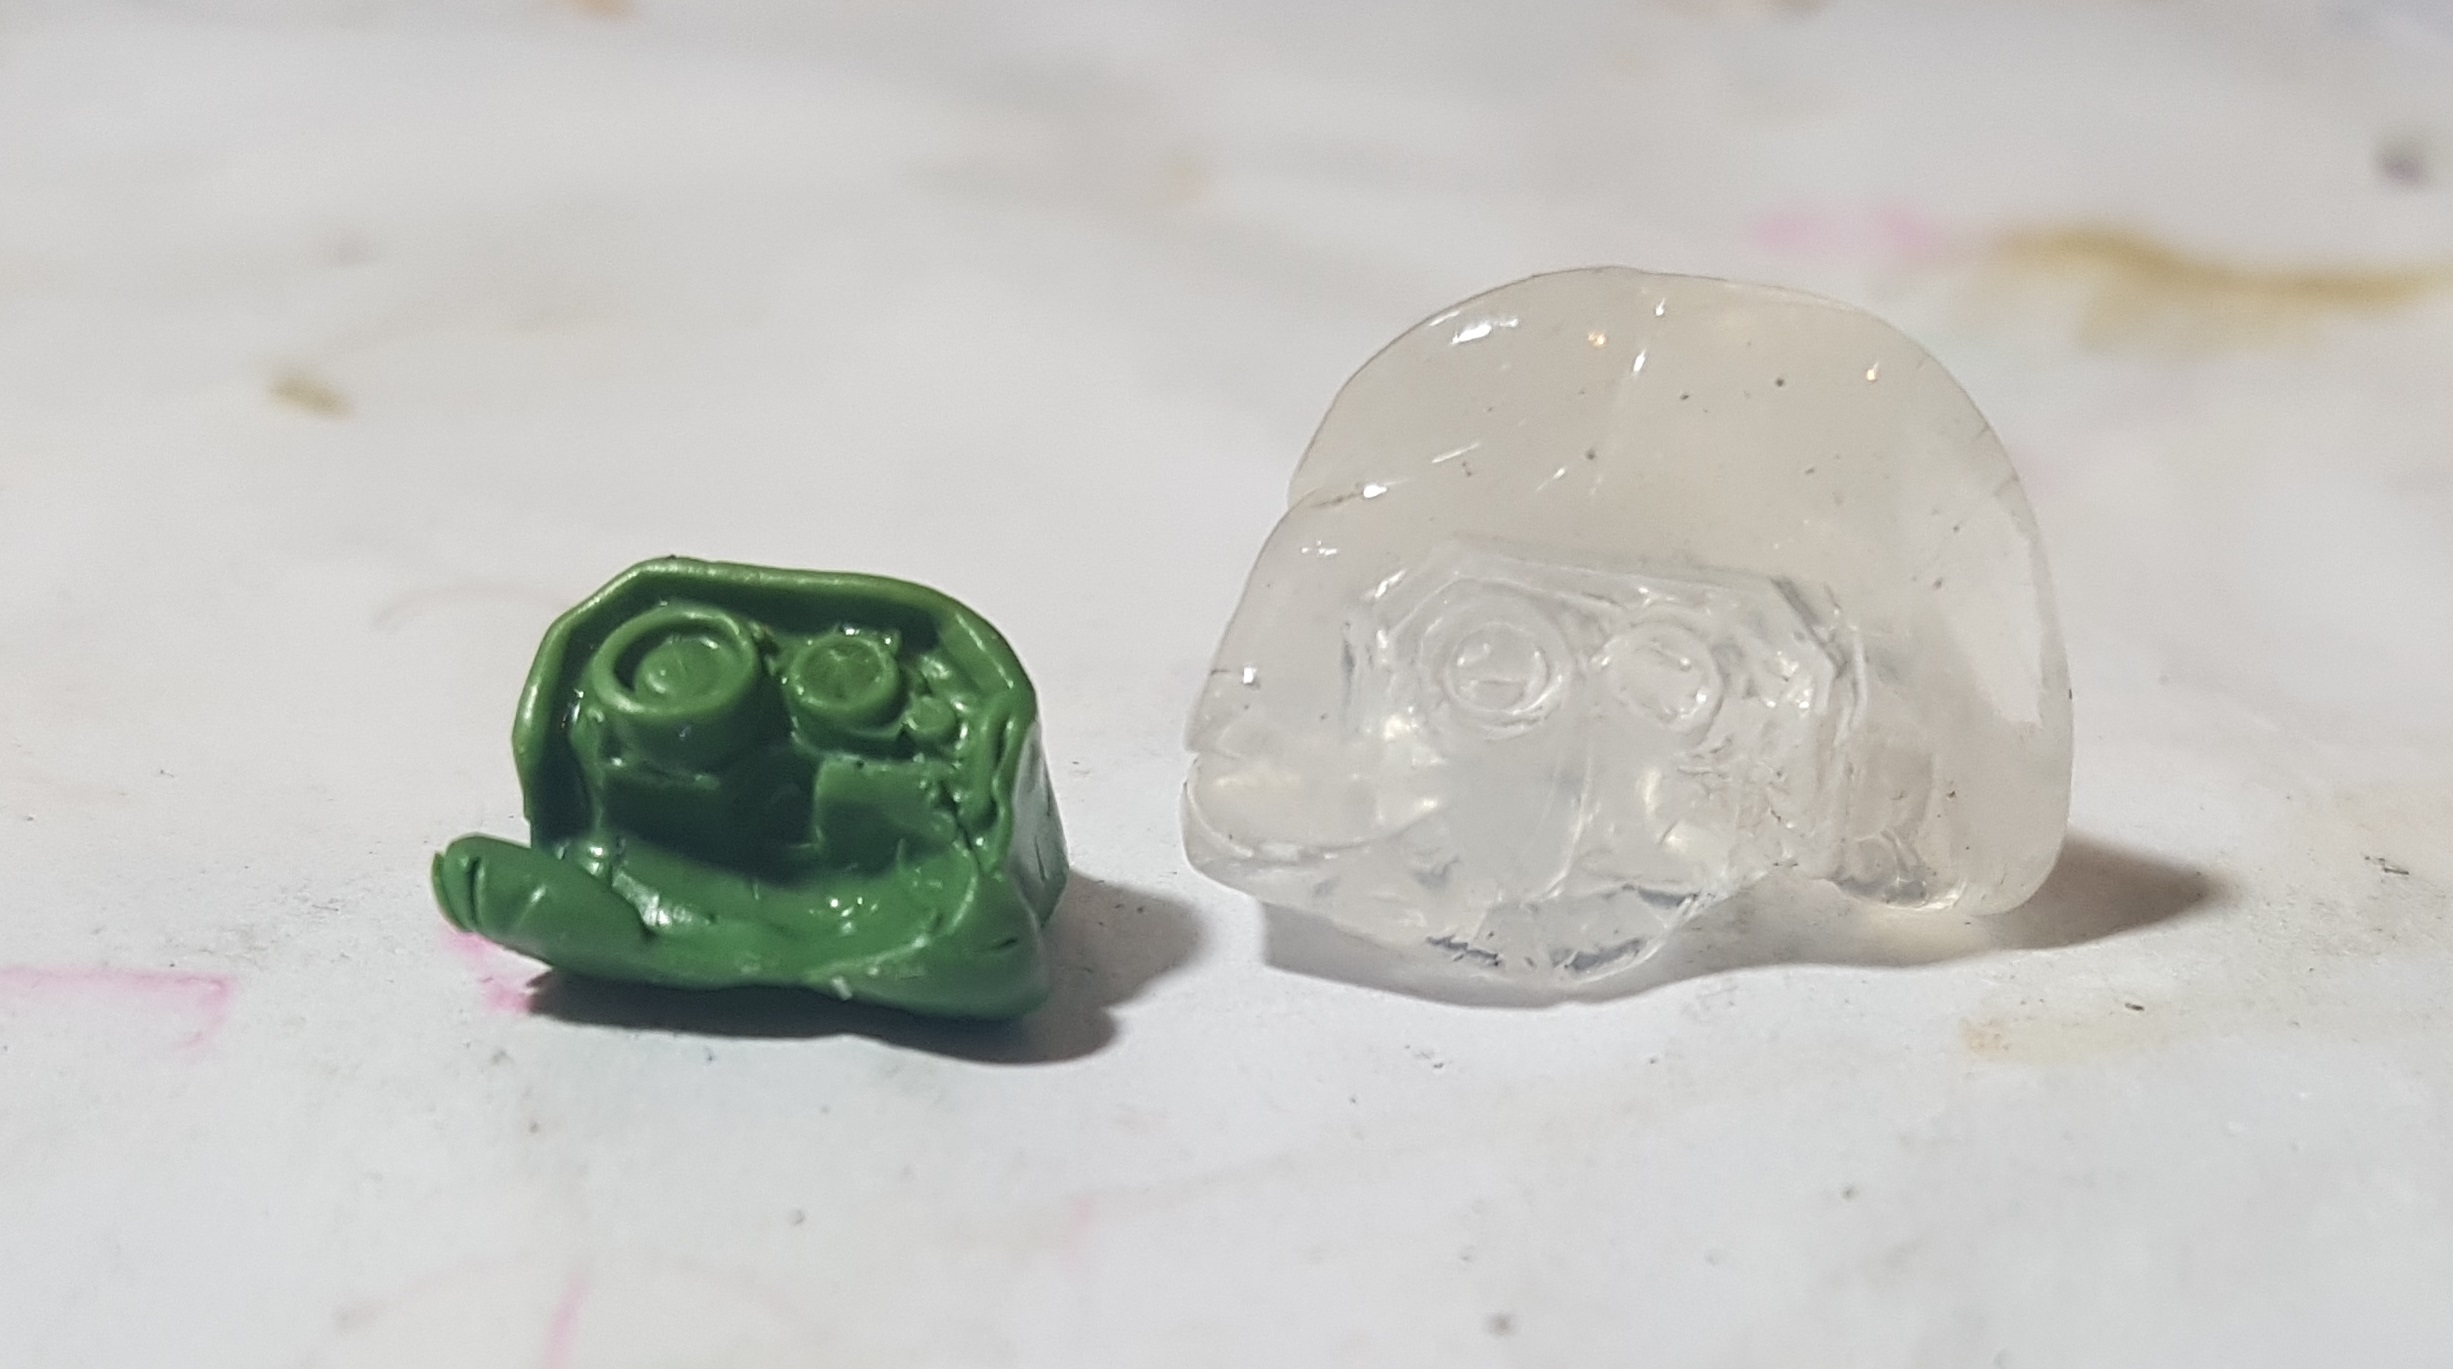
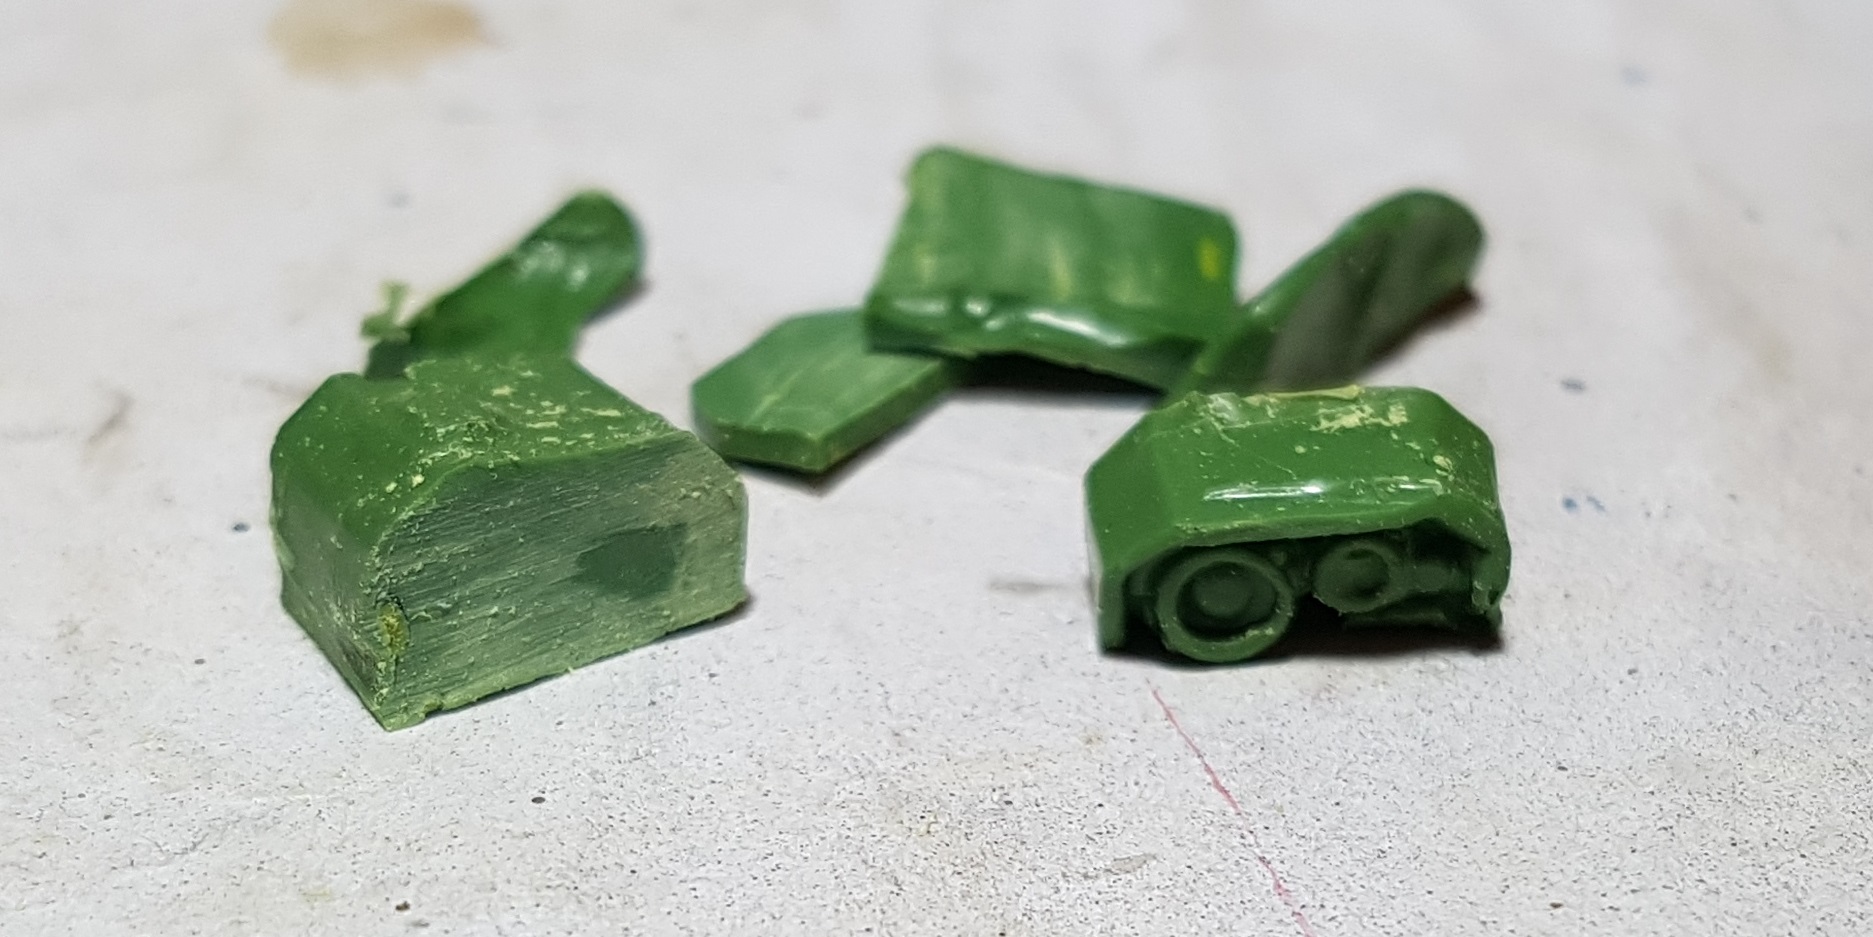
The basis for my mould couldn’t be safely removed from the tank so I had limited access to it (pic 1). I felt the best approach was then to take two moulds from it, one focusing on the front detail, and one focusing on the back detail, but with overlap between the two (pic 2). The Oyumaro really does set fast but I gave it extra time to be sure. Once my two moulds had set I stuffed them with green stuff (pics 3 & 4). The advantage of the clear Oyumaro over the coloured stuff is that you can already see the level of detail being maintained, along with spotting any voids before it’s too late to deal with them.
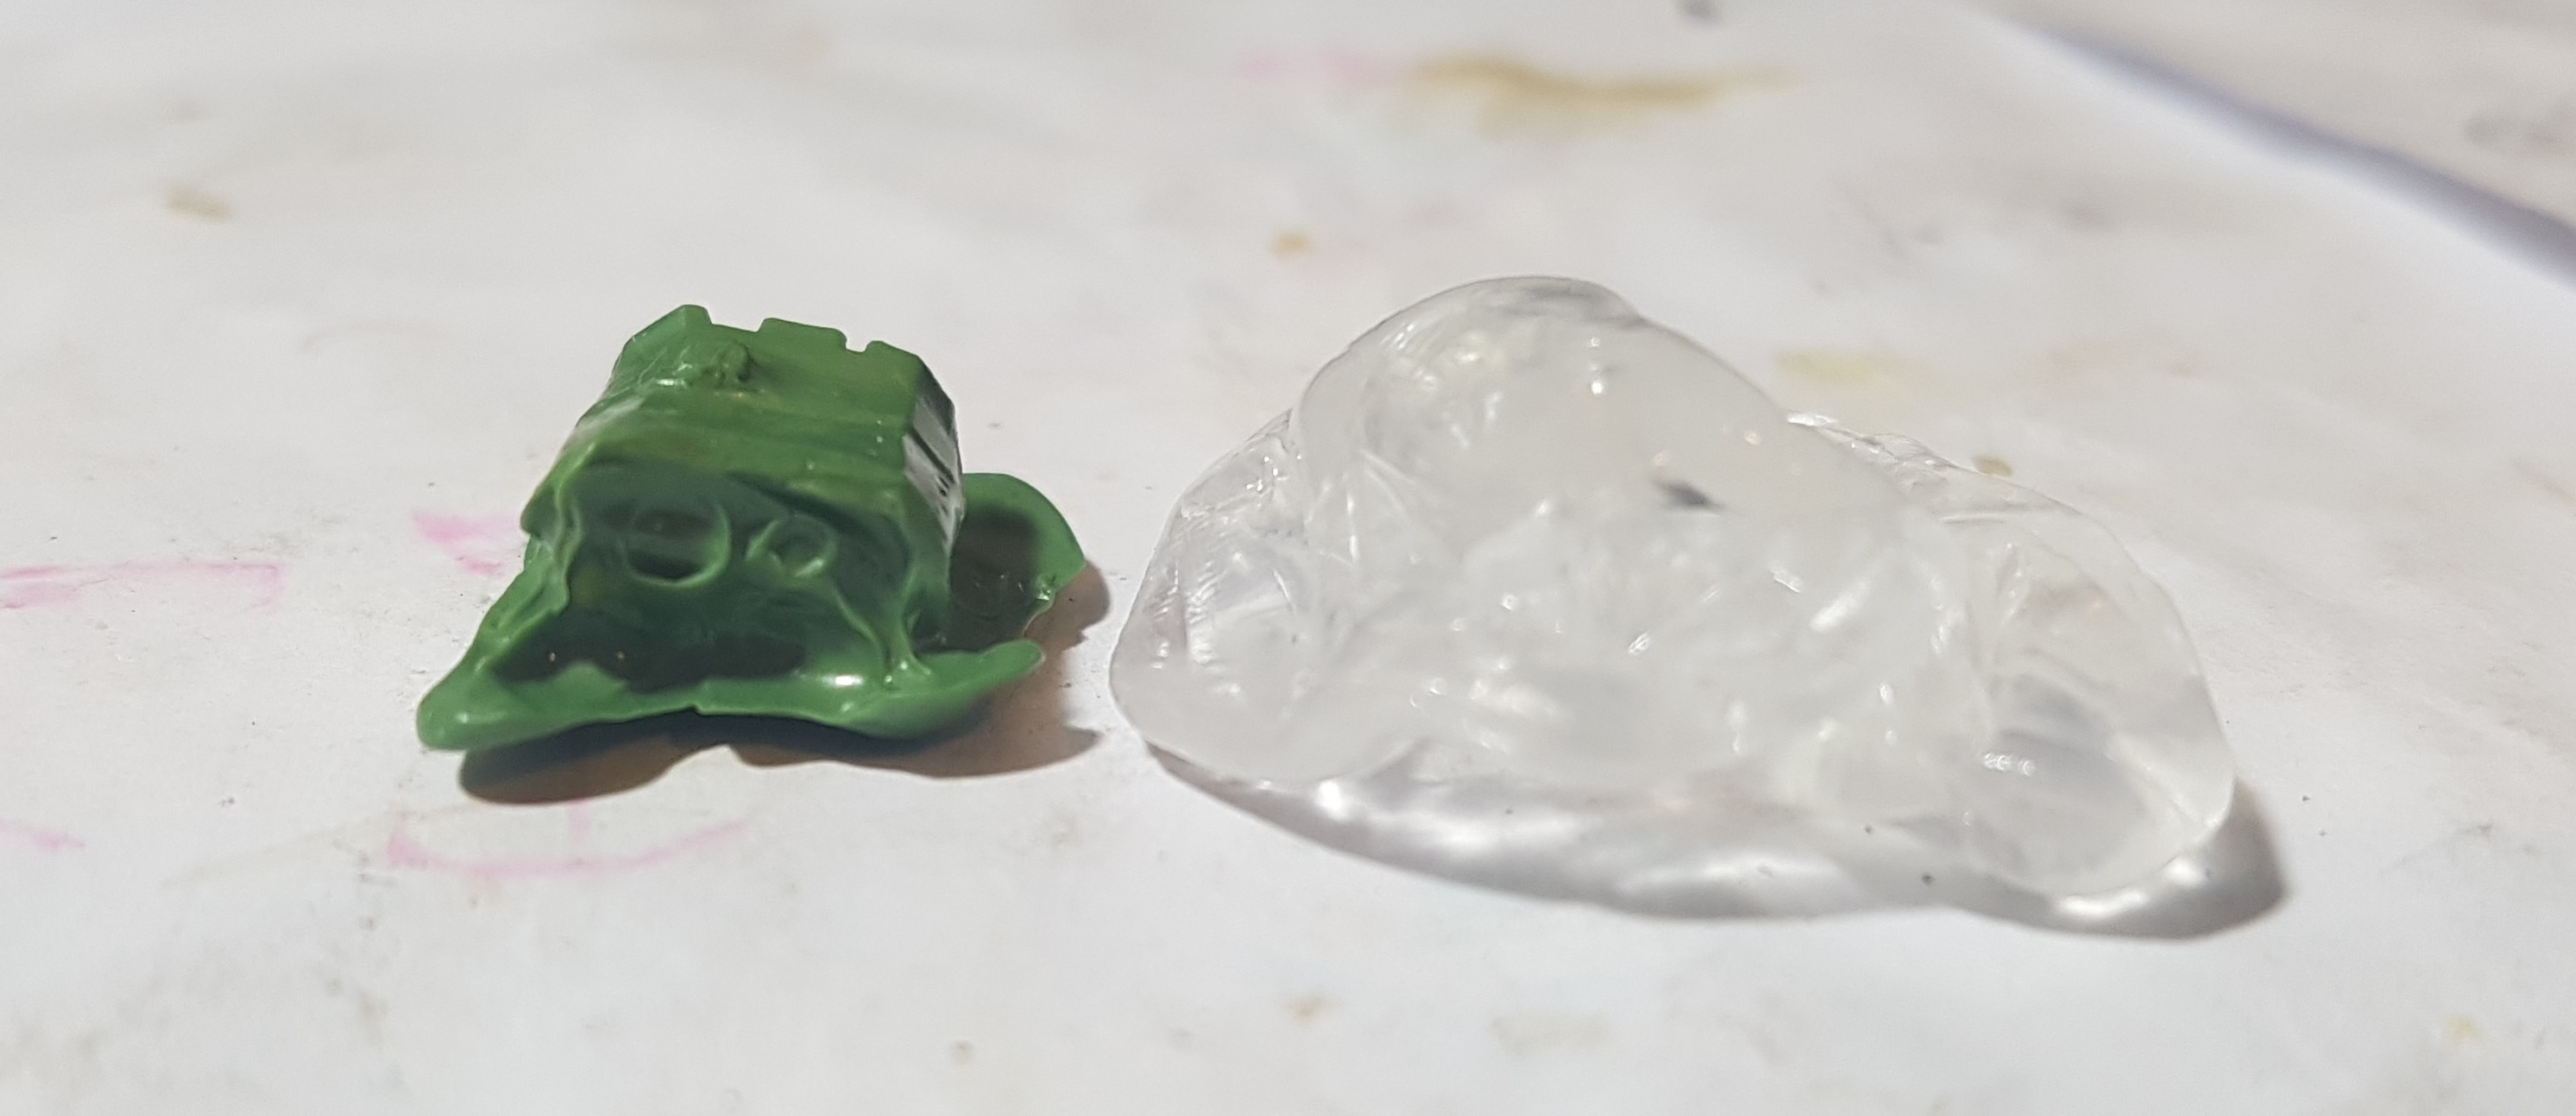
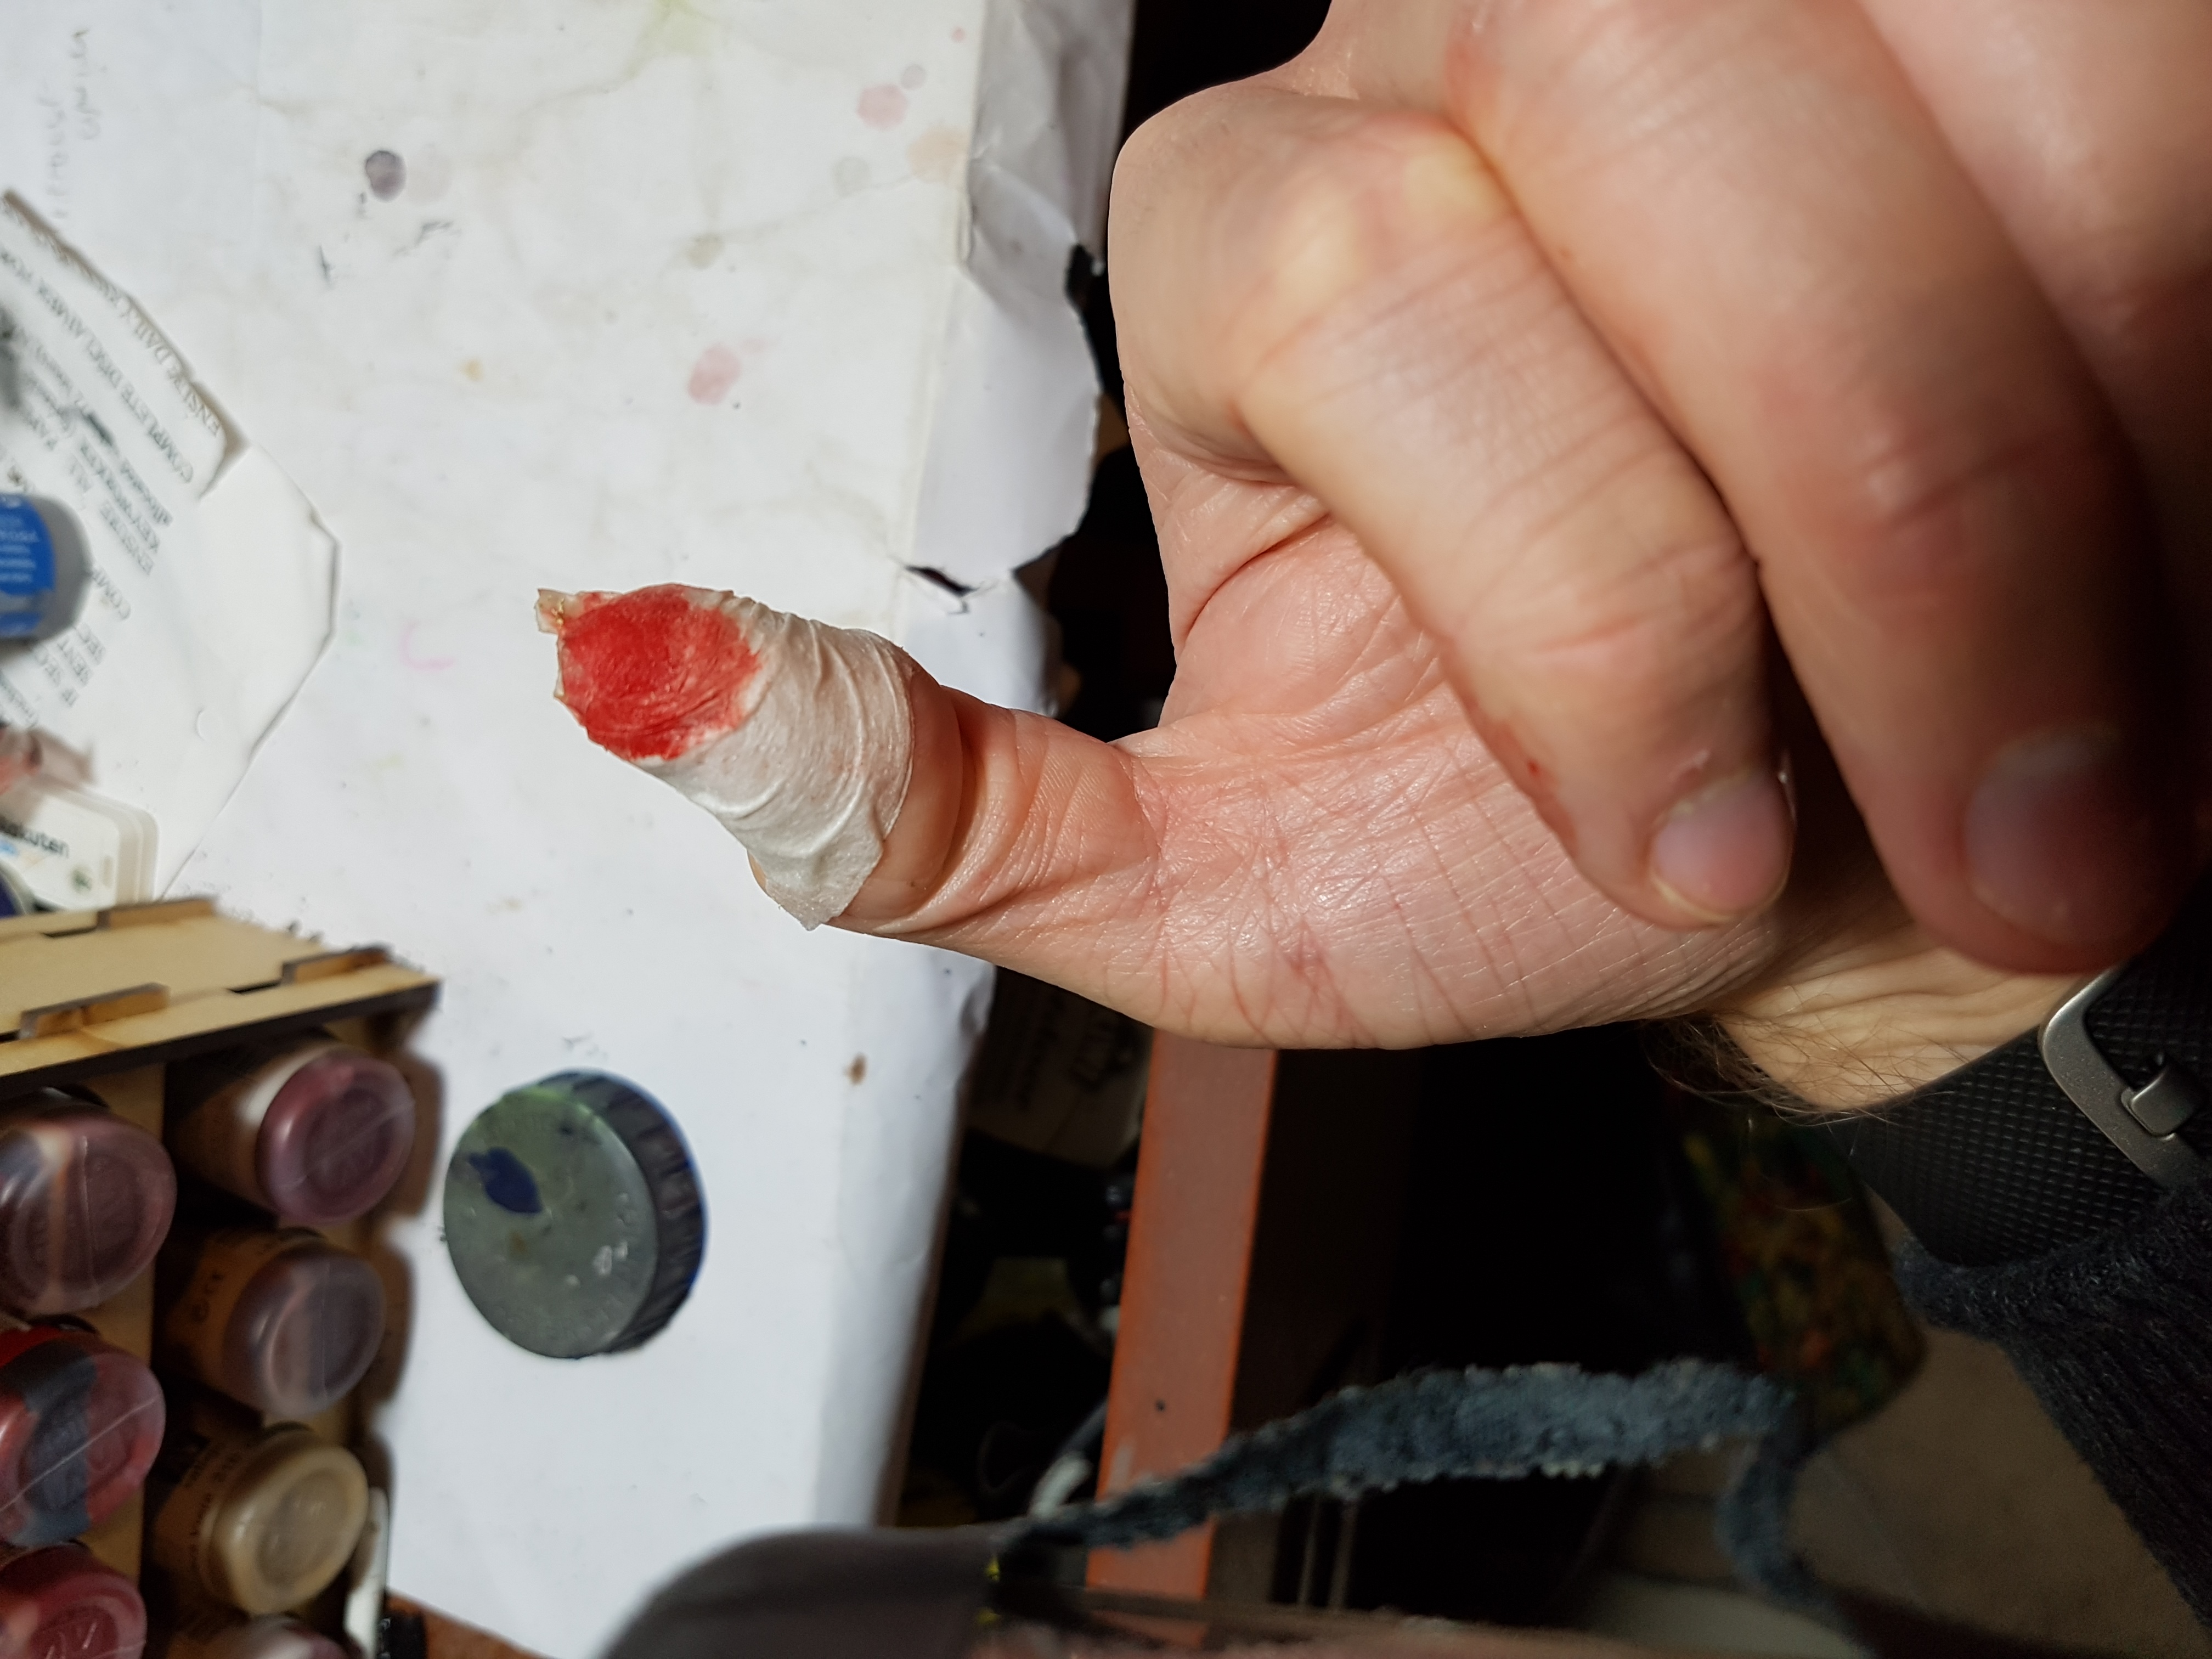
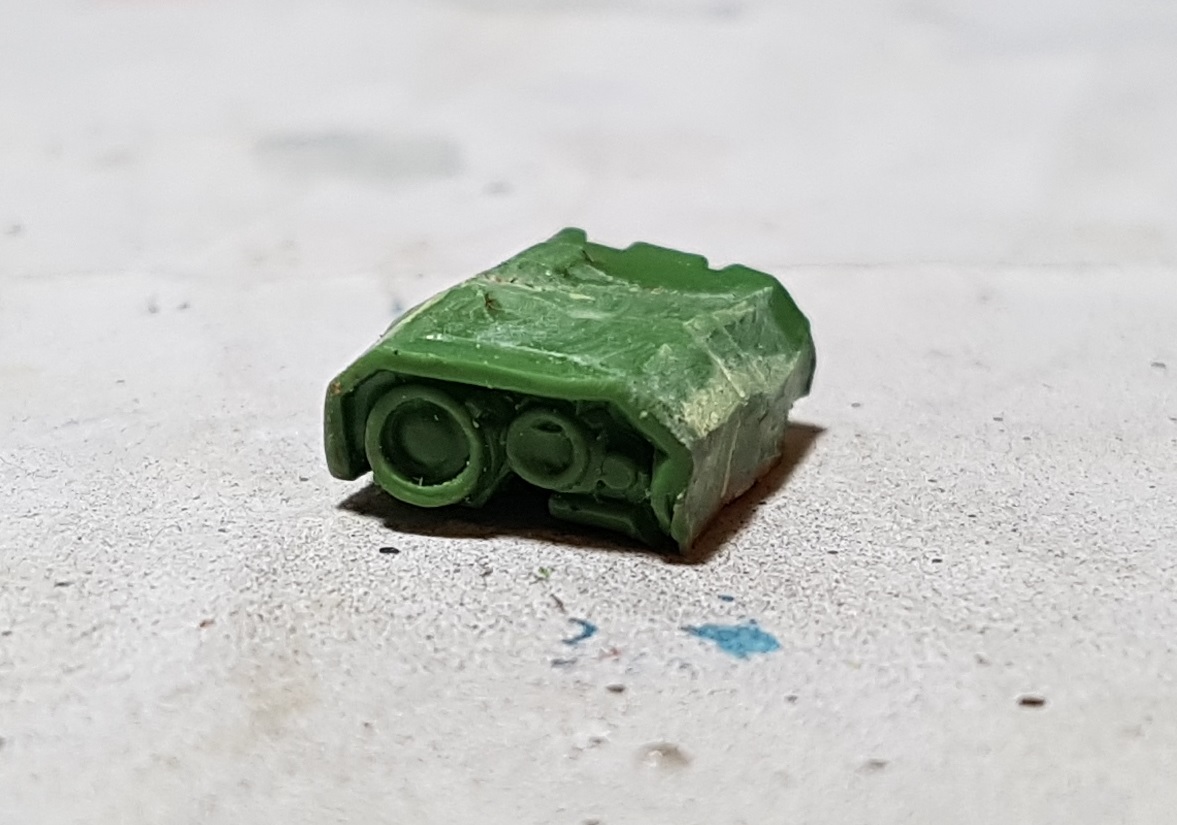
Green stuff takes around 24 hours to dry fully, but I left them a lot longer to be sure. Once set, I popped both parts out easily (pics 5 & 6). The moulds could be used again right away, or dropped in to boiling water and reused for another project. I trimmed off the excess material and eyeballed the parts against the original and cut away the unwanted overlap, leaving a little behind. The two parts were then dry fit and compared and the middle was filed down until what was left appeared to match (pic 7). because I am an idiot I chose to do the cutting and clean up using a brand new cheap box cutter that was to hand, rather than my slightly blunt hobby knife. As such I underestimated it’s sharpness and put it in to my thumb and it would not stop bleeding (pic 8). That knife is sharp! I can now tell you that superglue works a treat to seal wounds (pic 9). Learn from my mistakes.
With my hand glued back together I glued the sensors together. I sanded along the joins to clean them up and applied a little Vallejo Plastic Putty to smooth over any gaps. Once it was dry it was filed down once more and I have an acceptable replacement part (pic 10).


With the part made and the other parts acquired thanks to Ebay I could now rebuild everything.
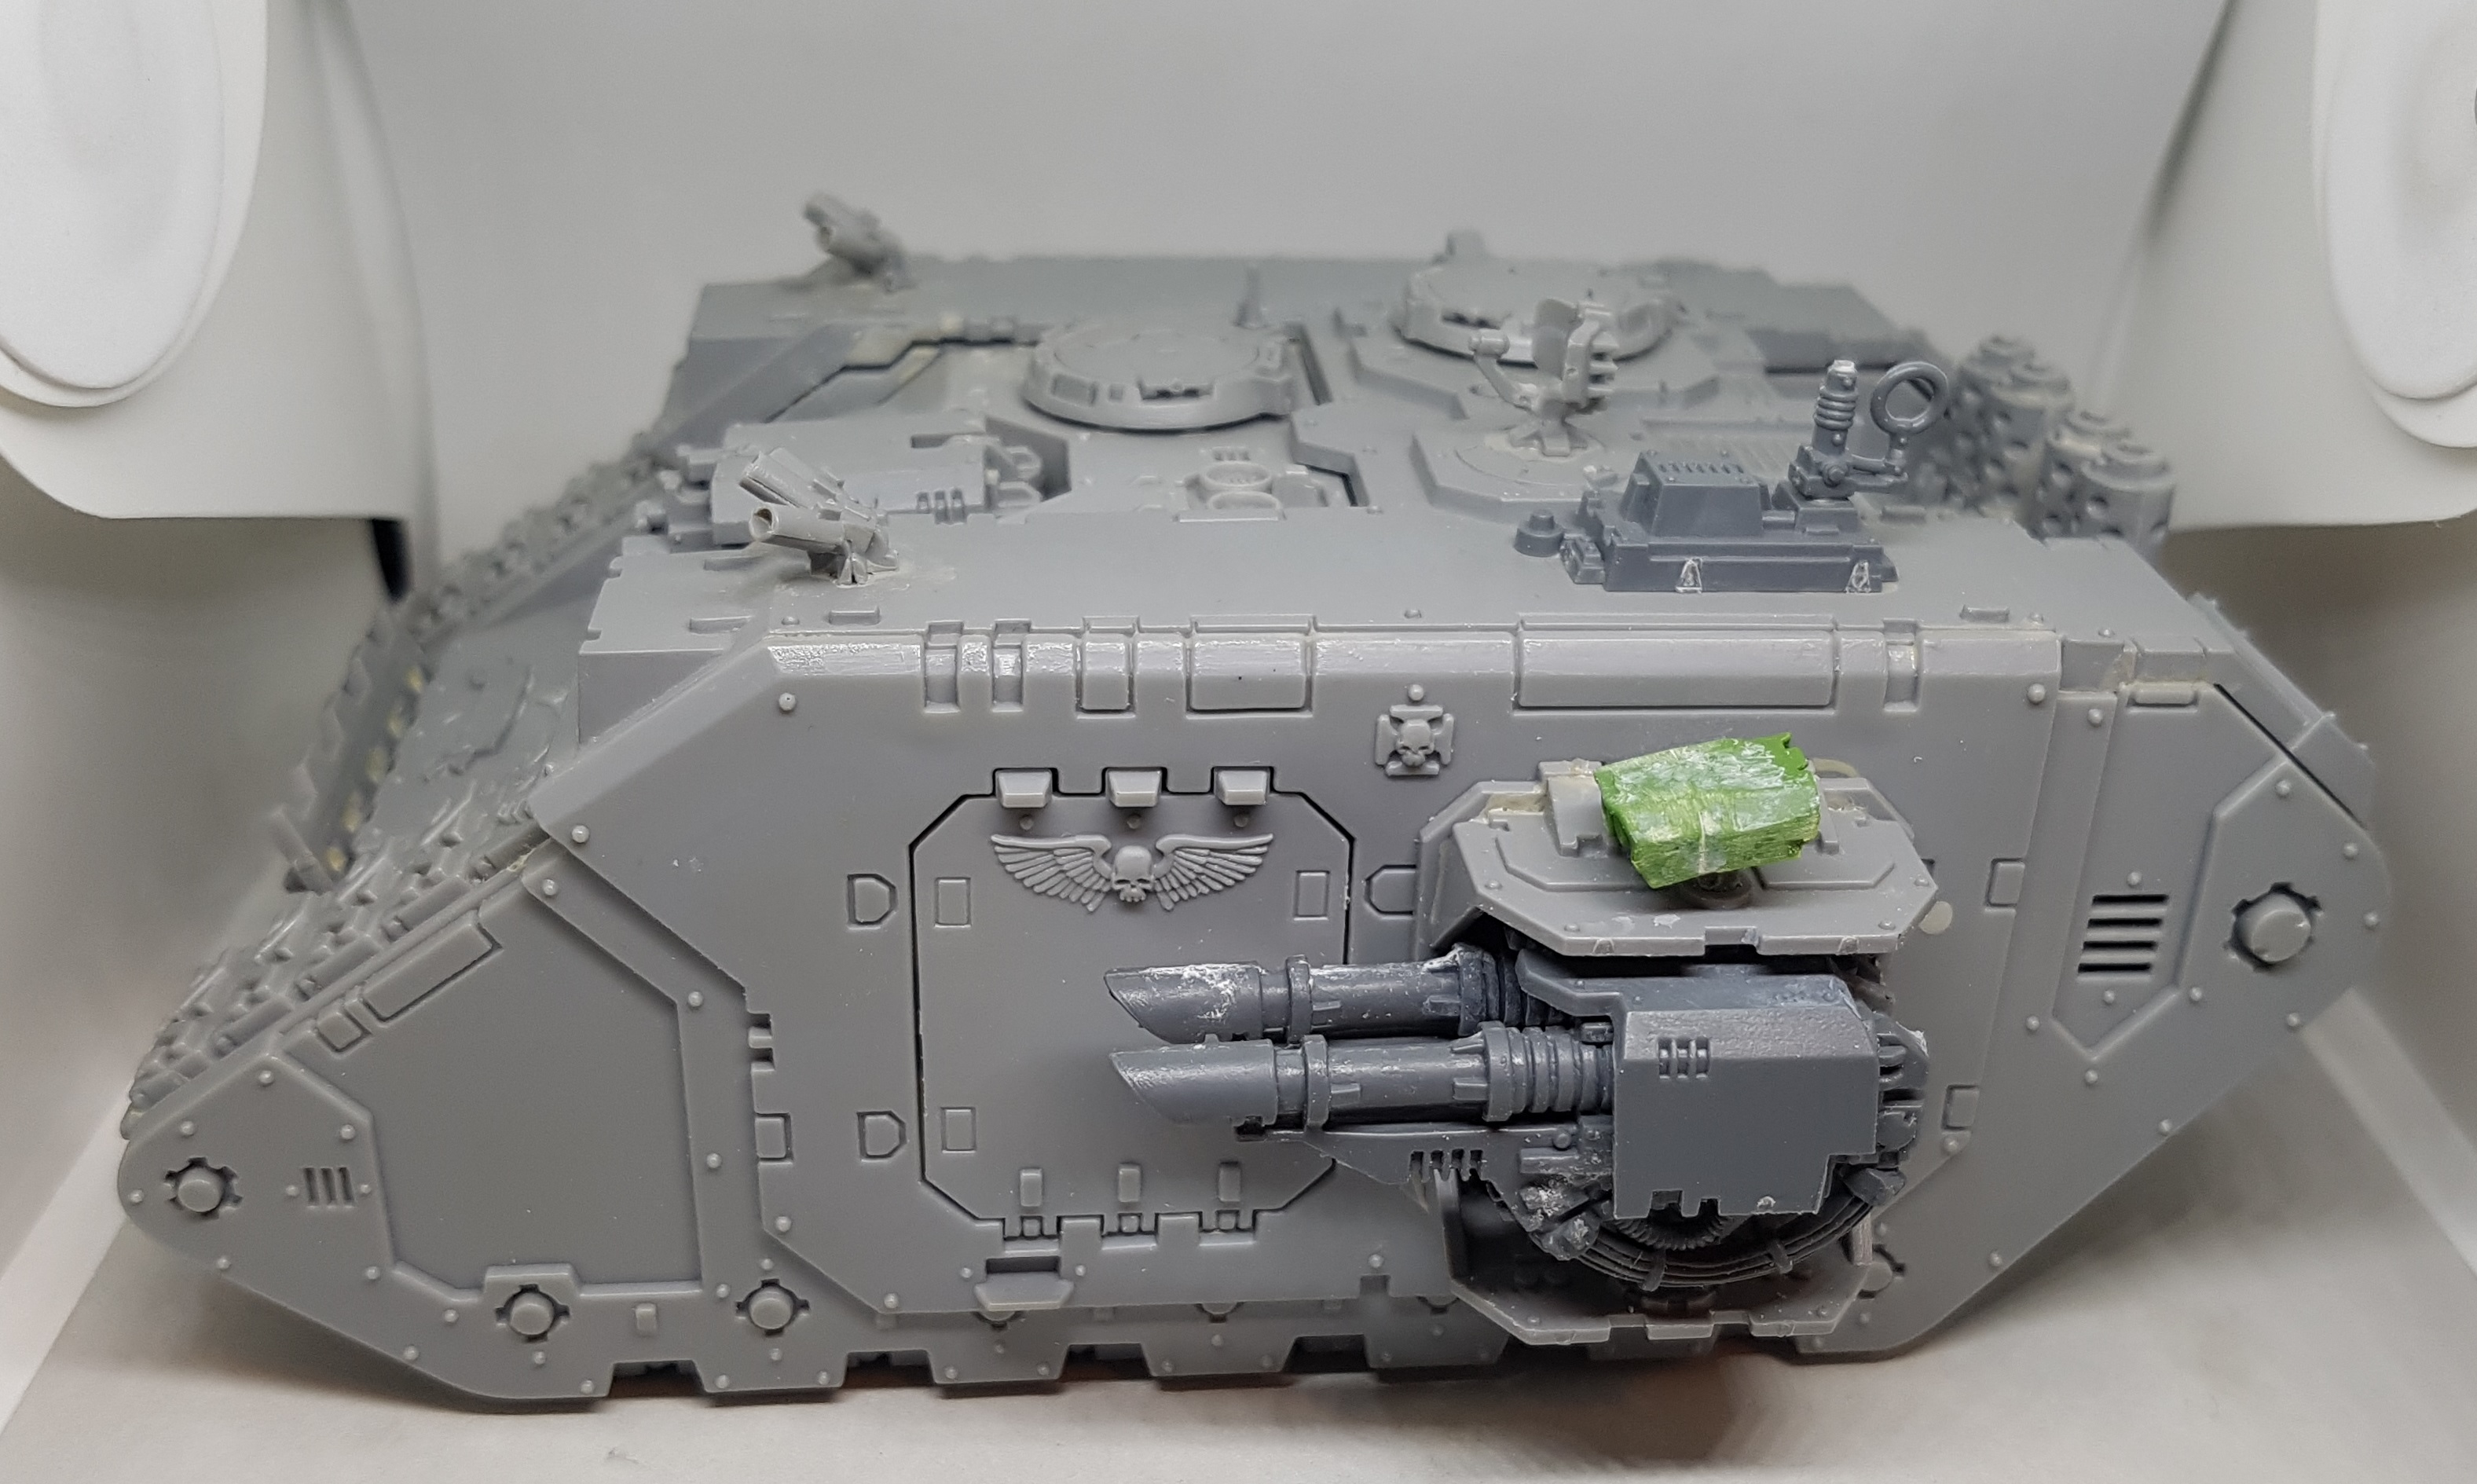
Starting with the Land Raider, the green part was pinned on to the turret to ensure strength, but it ended up pointing a little downwards by mistake. The radar dish arm was snapping off so I also pinned that. The pegs for the side lascannons were missing so I filled in the holes, and lined them up as best as I could. Not 100% sure they lined up enough for the shields to connect properly. I think they are supposed to be assembled before going in to their mounts, but that’s not an option here. I did a little clean up on these models too, but as they are already built I was limited in what I could comfortably achieve.

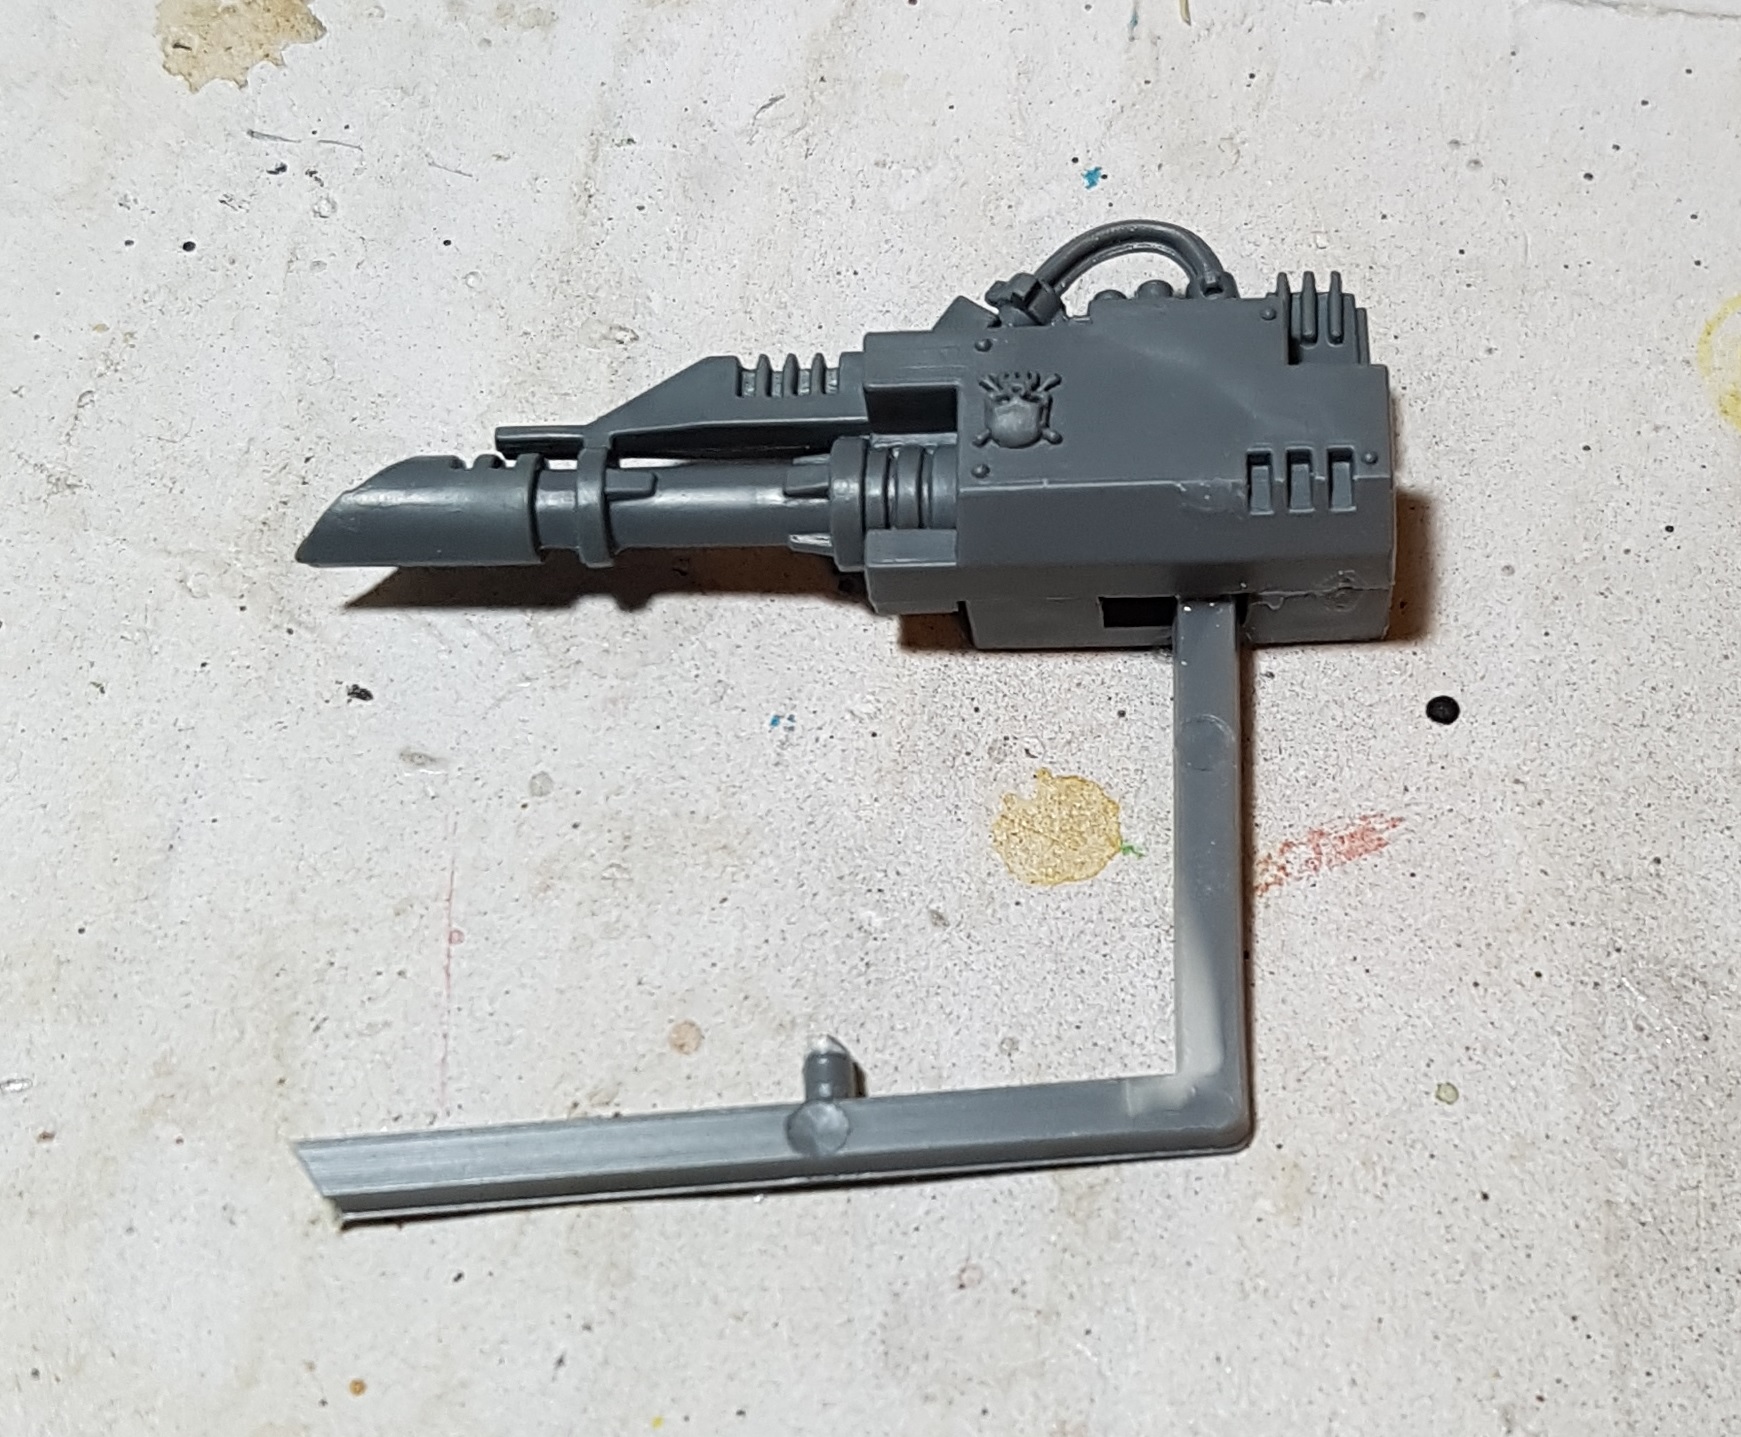
The Predator gun/turret was missing the piece that connected the two. I assume it was once part of the optic, but snapped of with the gun. I grabbed a piece of Mantic bases sprue which was square and seemed to be the right cross section to fit inside the gun. I glued it in place while assembling the gun and let it set (pic 1). Once dry, I cut it down to size and drilled pin holes in the sprue and the underside of the optic (pic 2). I can see why this gun snapped off. A single connection point on a moving part like this feels like it wants to snap off.
Again more clean up was performed on the model. The original glue job looks pretty thick and yellow. It seems to be holding strong though. We will see if it shows through the paint or becomes a problem.
I believe all I need to do for the 2 other tanks is pin their small guns back on to them. I should get that done tonight and then they are all repaired and ready to prime, unless anyone can see anything I’ve missed?
Bases
My infantry are now “finished”, but they aren’t finished-finished, as I’m giving the transfers lost of time in the sun to bleach away the yellow before I try them out. I’ll post a section on them once I’ve some finished shots to share, which will hopefully be this weekend. If I can’t call them done and cross them off my list soon I’ll get grumpy.
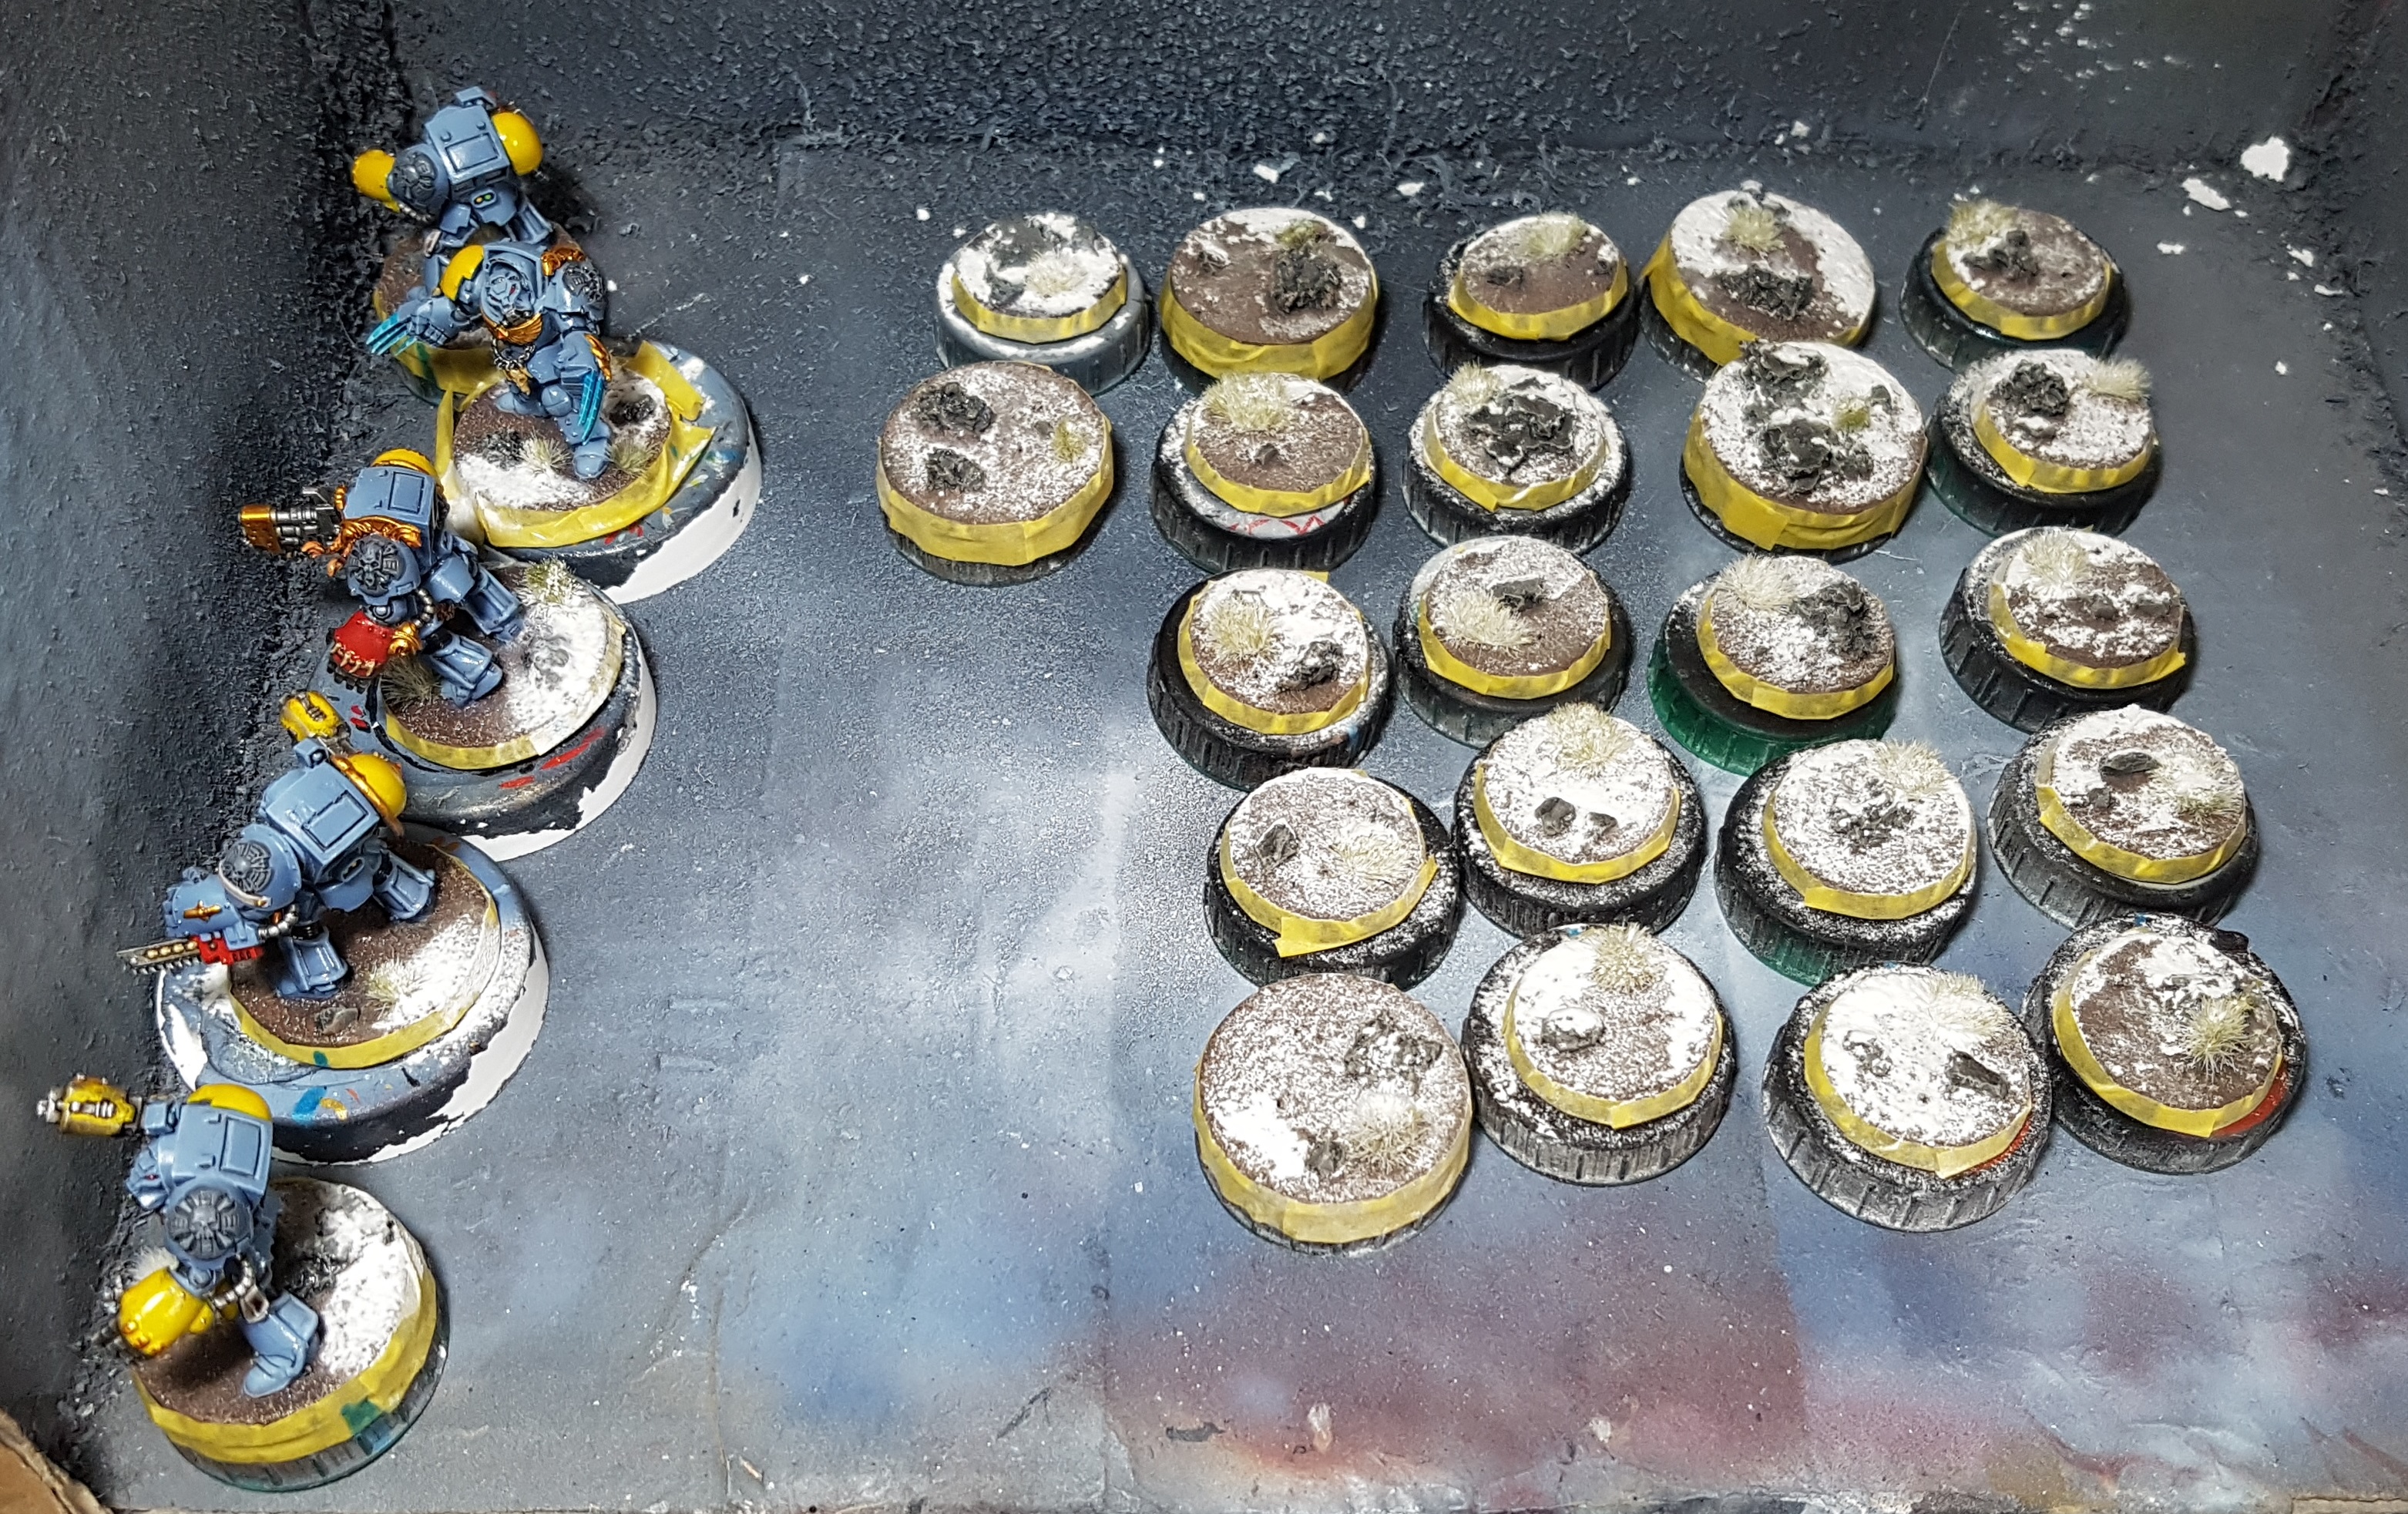
What I can share is the work I’ve done on their bases. Every base was undercoated a dark colour, either a black or the base colour grey of their rocks. The rocks were painted with VMC Neutral Grey, washed with Nuln oil and drybrushed up with P3 jack Bone. The mud was painted with P3 Battlefield Brown, then drybrushed with P3 Bootstrap Leather and then a little P3 Jack Bone. This is the same as before. Simples. I then reclaimed the pin holes I had made back at the start of the project so I can see where people will end up standing. Then I added some winter flock from Serious Play Scenics. Not much. I don’t want the flock dominating the bases, or getting in the way of attaching the models. I then masked off the rims of each of the bases as I don’t want to get any snow stuck there.

You see that blue line on each of the bases? That’s the direction the wind is going to be coming from. I’ll be applying the snow in multiple coats so being able to spray from the same point layer after layer is key. I didn’t think it through properly for the bases with guys already on so I largely ignored it for them and just did the best I could without ending up with snowmen.
With this done, it was time to prep my workspace. Two key things to remember going forwards
- Everything will be covered with hairspray. It will ruin everything. Do it inside a box. I used the box I use for airbrushing, and even then I lined it with newspaper as i wanted to keep using it
- Snow flock is a very fine powder. It will go everywhere and you will want to recover it. I wore a dust mask at a times and waited until I was home alone so no one could create air flow near it. I also prepared 2 clean trays lined with clean newspaper for working with the snow on.
I lined up all my bases in the box and drowned them in Tescos Everyday Value Hair Spray and then transferred then to a clean tray for flocking. I do not want the excess snow getting stuck to the excess spray and being wasted. I was very selective when spraying the bases with models on, and even then made mistakes.
The snow flock was then applied through a Wilco’s tea strainer reserved solely for this task using a small spoon over all the bases before being allowed a little time to dry. I’ve no idea how long it wants, but I gave it around 10 minutes. Hours might be better, but I wanted this done before anything happened to blow snow everywhere.
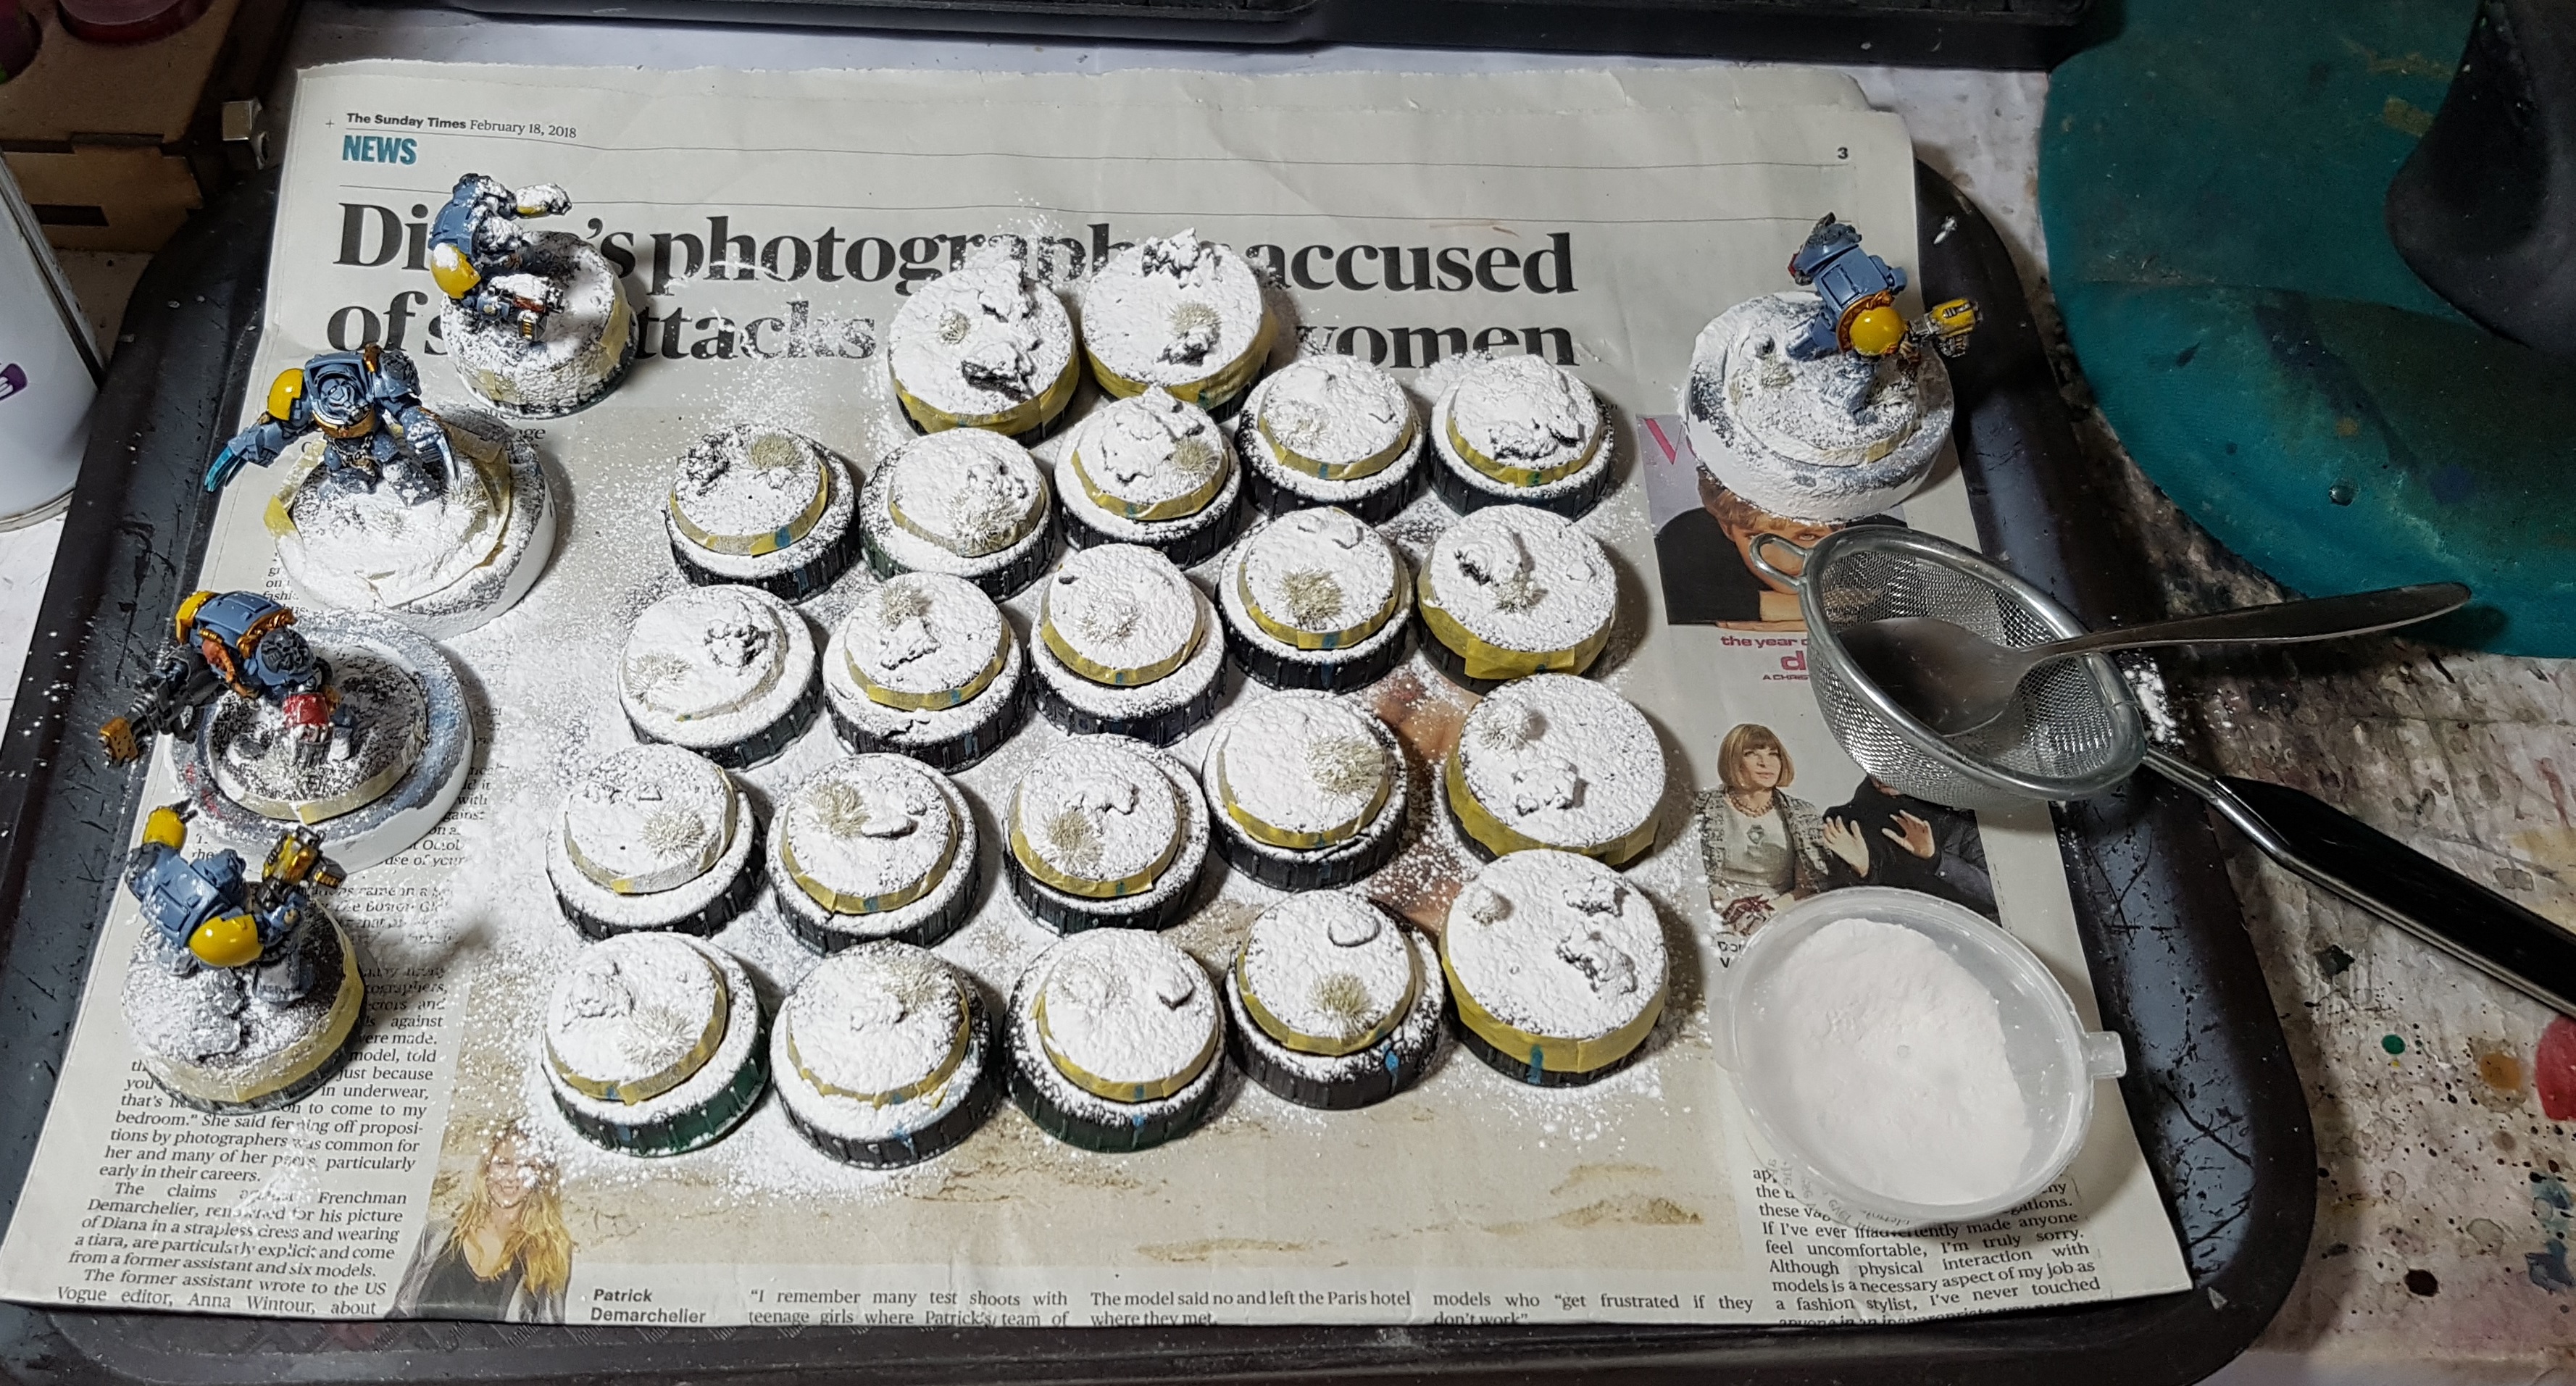
Once dried, the excess was gently shaken and tapped off. I had some snow stuck to the minis so I took a wet brush and cleaned them off as best I could. Everything was transferred back to the box, the excess snow as returned to its container and I repeated this process a few more times to build up the layer. Once I was happy with the results, I left it for a couple of hours to dry, cleaned off the models with a wet brush, and then gave everything 2 coats of gloss varnish with the airbrush to seal it in.
Next stage was to glue the minis in place, and peel off the masking agent. It became evident that I was transferring snow to the minis so they were cleaned up with a wet brush once more, and everything was sealed once more with gloss varnish. Previous coats had been more of a blanket coating without picking anything up. This was an individual target approach. Once dry I painted up the bases and gave just the bases a coat of gloss.
They are currently sat on a shelf waiting for the transfers and looking quite good. here are a few points of interest:
- The snow used is from precision ice And Snow. I received a sample set in an AssetDrop discovery box last year.
- Every time you apply the first coat of hair spray or varnish over the top of the snow it “melts” a little. You end up with a little less there than before. Plan for this.
- I suspect this stuff is designed for display pieces rather than models. I think it is at its best when it is allowed to pile up and then left loose, rather than sealed in so it can be handled or breathed near. If anyone knows a better way to seal it in when piled up please let me know.
- Wear a dust mask! No one wants to inhale hairspray. I’ve no idea if the snow is bad for you, but typically any fine powder you can inhale is usually bad for you. Plus you really don’t want to breathe or, god forbid, cough at the pot of snow!


